Learn WordPress with ProWebWriter - Part 5 - Themes, Menus, Widgets, and More!
Hello and welcome! You've stumbled upon an ongoing series of tutorials about WordPress that is currently exclusive to Steemit. Are you confuzzled by WordPress? Learn the basics here FREE.
Check out these links to the other parts of this series if you missed them:
- Part 1 - Introduction
- Part 2 - Setting Up Your WordPress Site
- Part 3 - Posts, Pages, and the WordPress Editor
- Part 4 - Categories, Tags, Media, and Comments
What You Will Need for Part 5
- Your WordPress site set up according to Part 2 linked above ^
What You Will Learn in Part 5
- How to choose and install a theme for your WordPress site
- How to customize your theme
- How to use widgets
- How to create your navigation menu
- About the WordPress code Editor
Here we go!
Choosing and Installing a WordPress Theme
From your Dashboard, click Appearance in the left navigation.
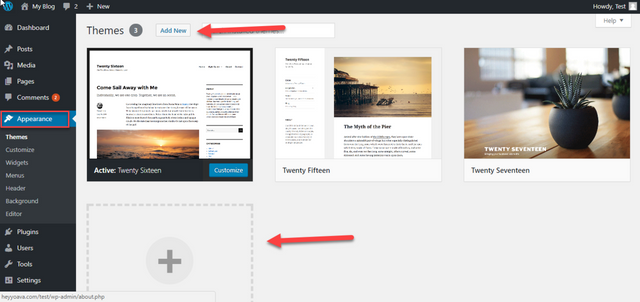
The Themes screen will open.
WordPress installs with a few default themes. My install shows the following default themes:
- Twenty Fifteen
- Twenty Sixteen
- Twenty Seventeen
These are good themes, and you'll never have to worry about WordPress not working properly due to an issue with the theme if you use one of them. However, I NEVER use the default themes because using one of them is a surefire way to make sure your website doesn't have a unique look.
That's just me.
There's absolutely nothing wrong with using them, and you can customize the look of your site with your images, content, and plugins.
It's just a matter of personal preference.
The best way to see what other kinds of themes are available is to click the Add New button.
The Add Themes screen will open.
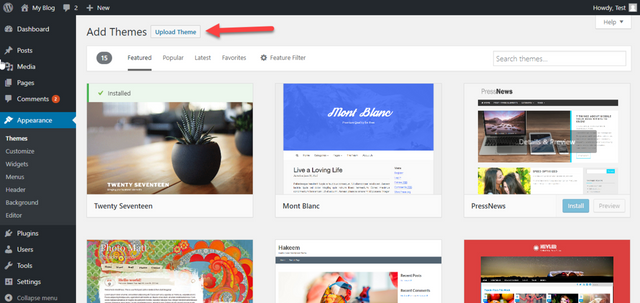
A quick sidenote: You can also search Google for themes which might be easier for you. I prefer using WordPress itself because themes in the catalog are compatible and frequently updated. To install a theme from a third party, download the zip file from the third party website, and upload it to your WordPress site using the Upload Theme button. Don't unzip the file.
A word on theme pricing: All of the themes available in the Add Themes screen are free to install and try out on your site. Most of them are free to use indefinitely. What you will find is that the developers will lock down certain features to make you want to buy the "premium" version. Again, this is a personal preference. There are workarounds for most of the premium features if you're savvy enough, and that's my goal for these tutorials.
Notice the tabs across the top where you can view themes based on if they are featured, their popularity, the newest ones, and your favorites.
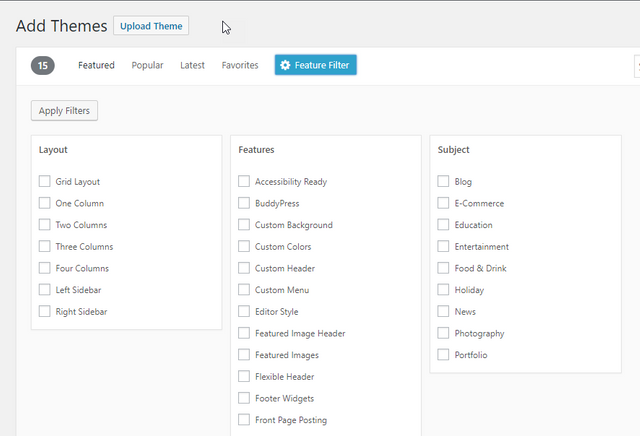
There is also a robust Feature Filter where you can search for themes based on the exact features you are looking for.
To install a new theme, hover your cursor over the theme you want, and click the blue Install button.
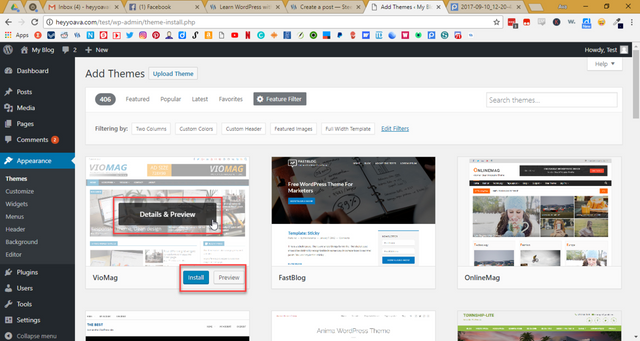
In my experience, the Preview button doesn't really do much to show you what your website will look like with that particular theme. I usually go through and install a few themes to try on, and use the Live Preview from the Themes screen instead to get an idea of how it will look.
Once you've installed a theme, it will be indicated in the Add Themes screen. You will notice you can now Activate the theme which makes it live on your website or you can use the Live Preview feature to "try it on" without fully activating it.
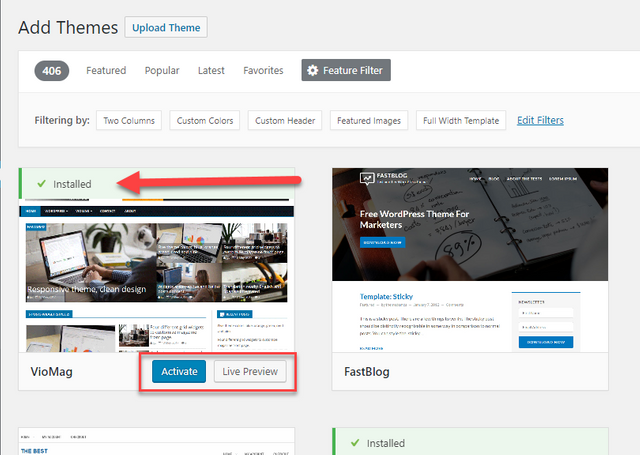
Keep in mind, the theme you choose is likely to look nothing like the screen shot that made you install it.
Images and plugins are missing.
You can get an idea if the colors, fonts, and other features look good on your website. If you're pleased, you can Save & Activate.
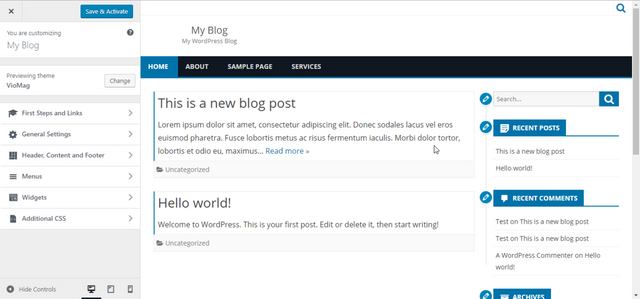
If not, keep looking and trying out different themes.
Customizing Your Theme
Once you've activated your chosen theme, you can customize it by either clicking the blue Customize button on the theme itself in the Themes screen, or by clicking Customize under Appearance in the left navigation.
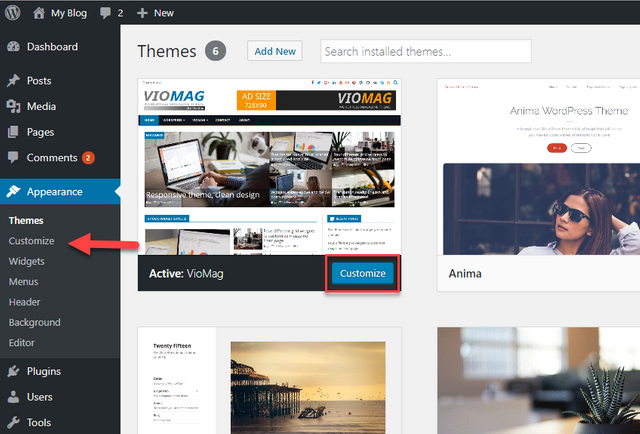
The Customize screen is almost identical to the Live Preview screen.
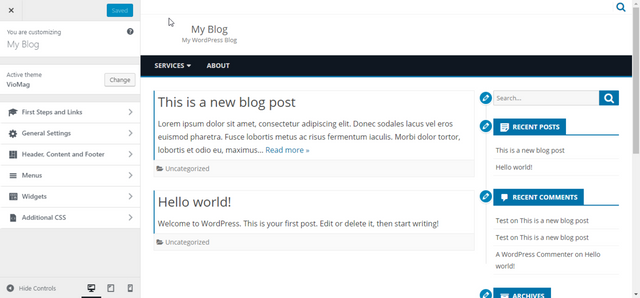
Use the left navigation to see what customizations are available for the theme you've chosen.
Certain themes will require that you download specific plugins to make them work properly. They indicate this in the Customization screen, and/or sometimes as a banner in the top of your Dashboard.
Go ahead and download any plugins needed if indicated. WordPress will usually install the plugins automatically. If not, don't worry about this right now. We'll cover it in the next part of the series when we go over Plugins.
I've activated one of the default themes so you can get the basics of how the Custmizer works.
We'll start at the top with Site Identity.
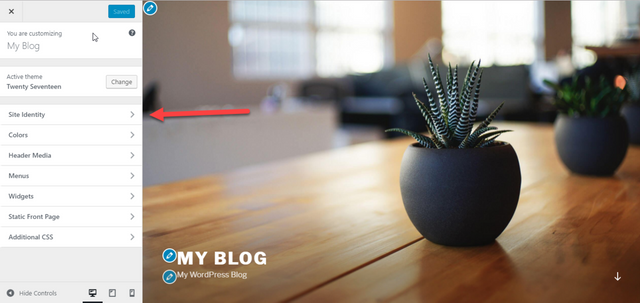
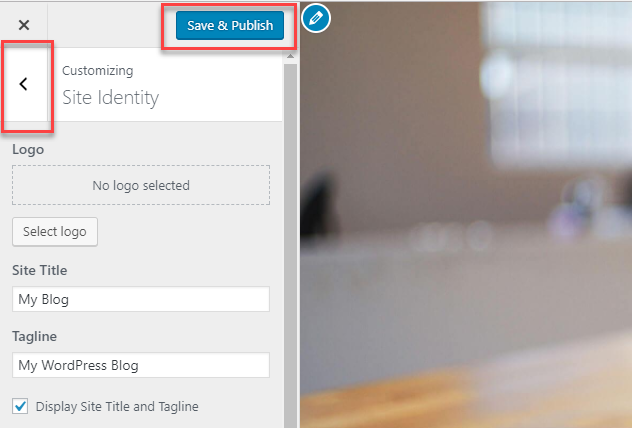
When you click Site Identity, the items available for customization will appear in the left navigation. You will be able to preview your changes on your site in the view to the right.
I will go over each item below the image.
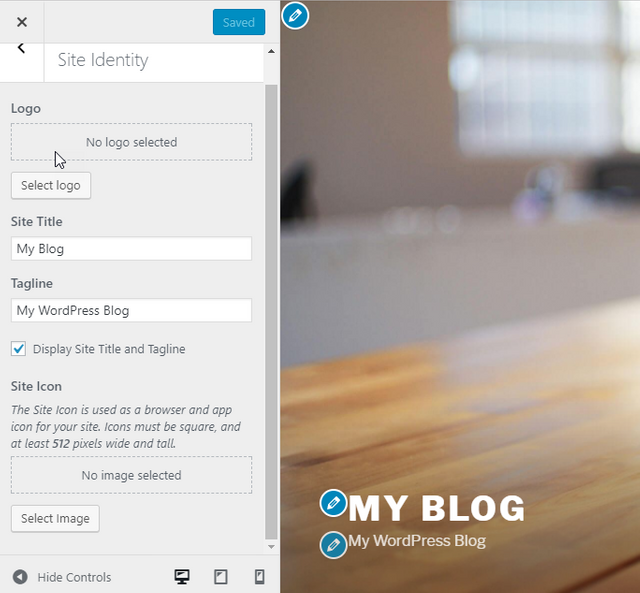
Logo - Click the Select Logo button to upload a logo for your website if you have one. If you don't, your Site Title and Tagline will appear in its place.
Site Title - The title of your website. This will be automatically filled with the title you specified in the Settings in Part 2 of this series.
Tagline - Your tagline goes here. If you don't have one, leave it blank. This will be automatically populated with the tagline you specified in the Settings in Part 2 of this series.
Display Site Title and Tagline - Check this box if you are using the Site Title and Tagline instead of a logo. If you have a logo, uncheck it.
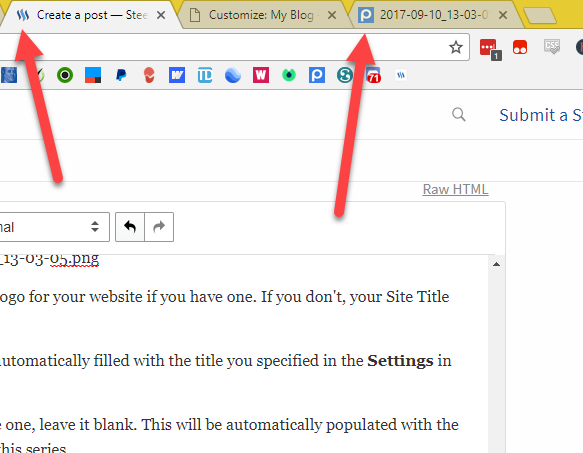
Site Icon - This is your favicon. A favicon is a small icon that represents your site on your browser tab as indicated in the image below.
Click the blue Save & Publish button to save your changes. Then click the back arrow to return to the main customization menu.
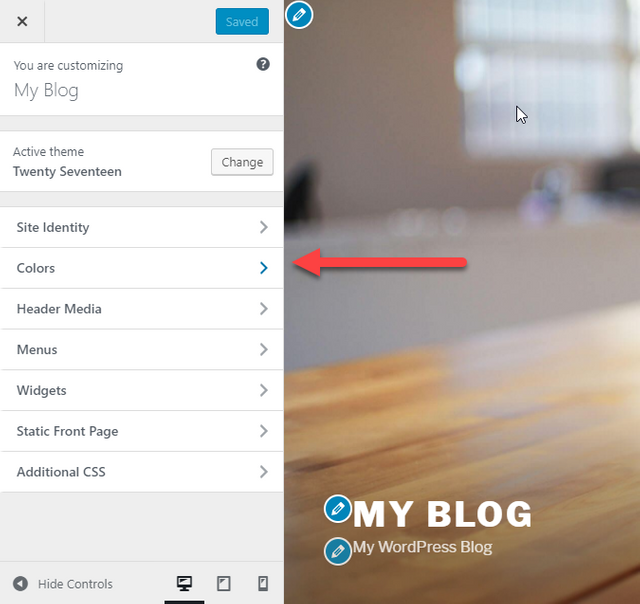
Click Colors in the left navigation.
Different themes will have varying amounts of control over theme colors. The Twenty Seventeen theme I'm using as an example has very few options. Some themes will only let you customize the colors if you purchase the premium version. It just depends on your chosen theme.
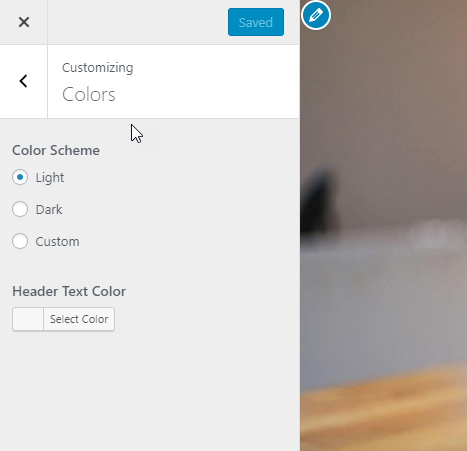
Click the blue Save & Publish button to save your changes, and click the back arrow to return to the main navigation.
Click Header, or Header Media in my case, in the left navigation.

Here you can add a custom header. You may be able to add a header video. The customization available to you will depend upon your theme.
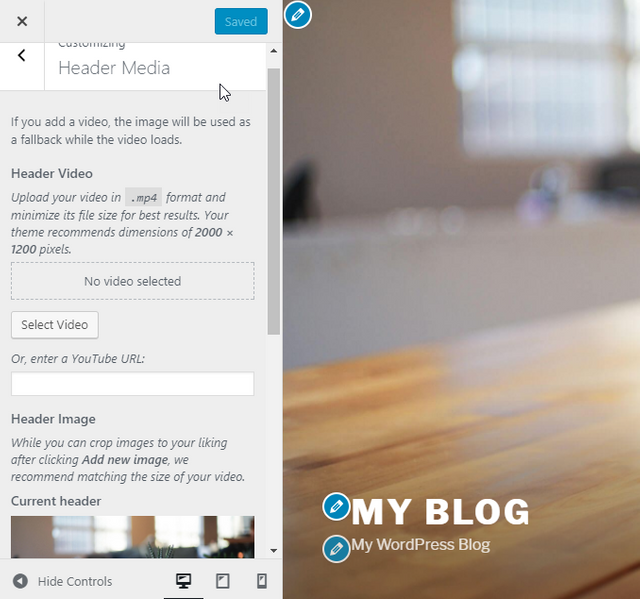
Keep an eye out here for the dimensions of you header to ensure you upload an image of appropriate size.
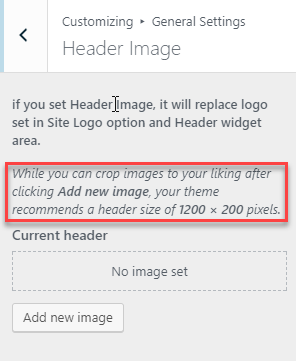
Click the blue Save & Publish button, and then click the back arrow to return to the main navigation.
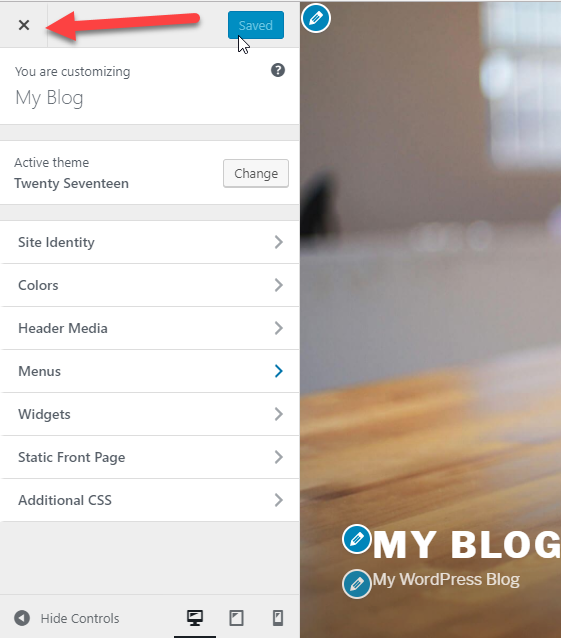
We're not done with the Customizer yet, but in order to customize the next setting, we need to create the menu or main navigation for your website.
Click the X in the top left of the Customize screen.
Creating Your Menu and Setting Up The Main Navigation of Your Website
You'll need Pages to create a Menu. If you won't have already have your Home, About, Contact, Services, or whatever Pages you need on your site created, quickly create blanks for the time being. Simply add a new page for each, type the title, and click Publish.
To create your menu, hover your cursor over Appearance and select Menus from the fly-out menu.
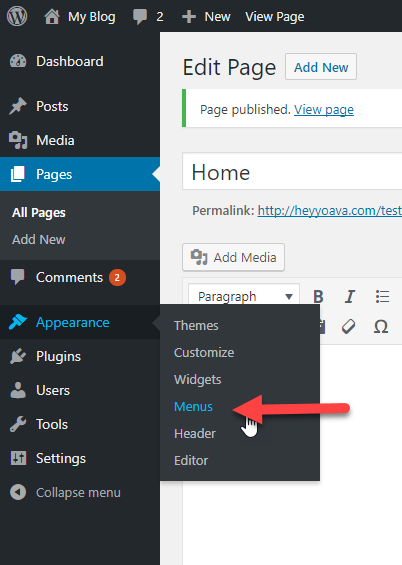
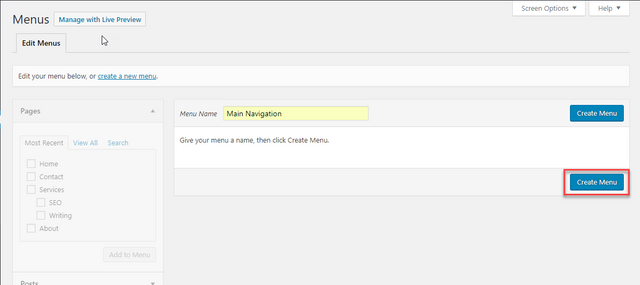
The Menus screen will open. Type the name of your menu. Click the blue Create Menu button.
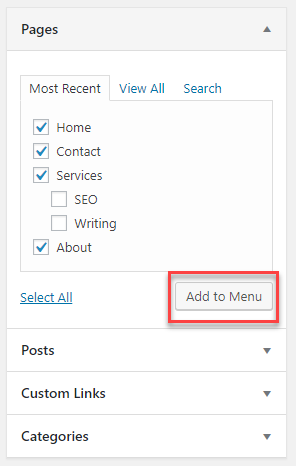
To just create a quick navigation menu for your pages, click the checkbox next to the Pages you want to add to your navigation. Click the Add to Menu button.
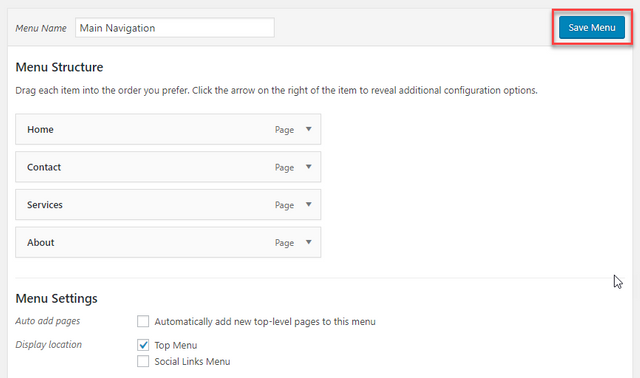
Your Pages will appear to the right. You can drag and drop the order. Notice how the cursor changes when you hover over each item. Once you are satisfied, click the blue Save Menu button.
Before We Return to the Customizer...
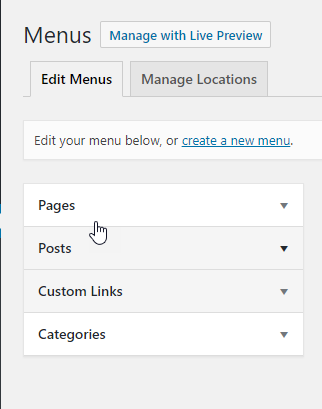
You can add important blog posts to your navigation. You can add custom links and categories as well using this interface. You can also create more than one menu and put it in a widget in other areas of your website. I like to create a separate menu for legal information and put it in the footer of my website. This type of menu would include items like:
- Privacy Policy
- Terms and Conditions
- Affiliate Disclaimer
Back to Customization
Click Menus in the left navigation of the customizer.
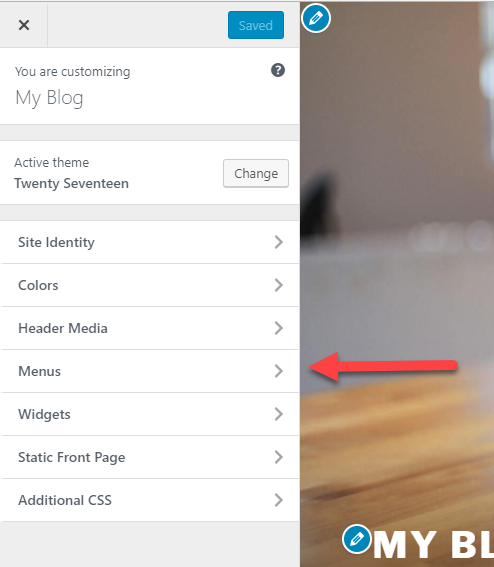
Click Menu Locations.
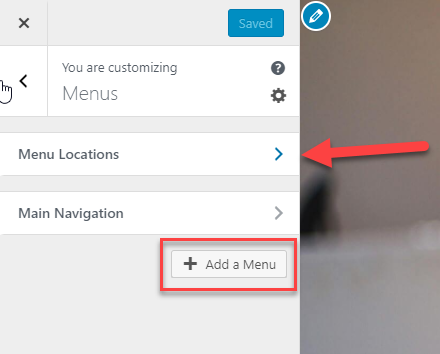
NOTE: You can also add menus from this interface for future reference. This may not be available in all themes.
Select your main navigation from the drop-down menu.
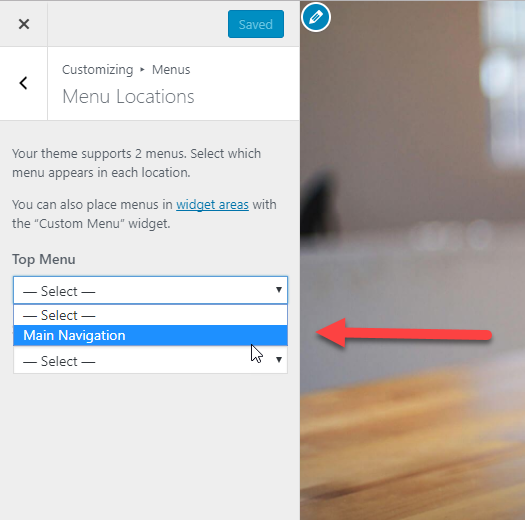
Click the blue Save & Publish button at the top and then click the back arrow to return to the main navigation.
About the Next Two Items in Customization
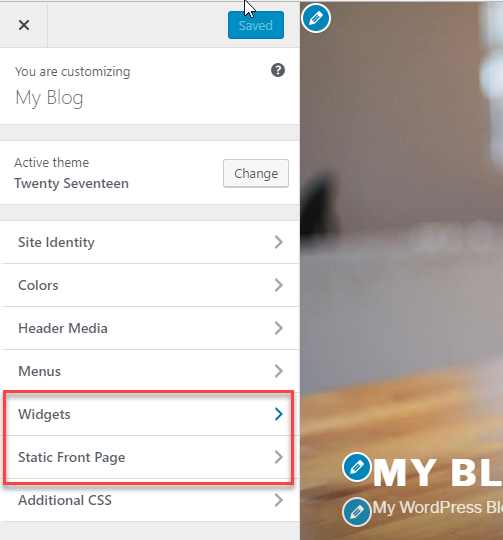
Widgets - We will over this a little later in this tutorial from the WordPress Dashboard since it's part of the Appearance menu. Keep in mind, you can add Widgets to different parts of your website from the Customizer as well depending upon your theme.
Static Front Page - This is the same Setting located in the Settings menu of your Dashboard under Reading. We covered this in Part 2 of this series.
The Final Customization Item
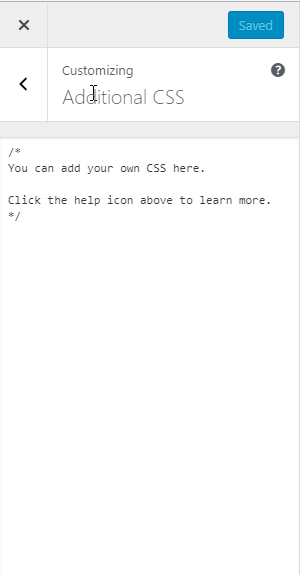
Additional CSS allows you to override the Stylesheet for your website. You can customize colors and all kinds of things if you're CSS savvy. You want to edit the Stylesheet here as opposed to in the WordPress Editor because when your theme updates, it will erase your changes.
Click the blue Save & Publish button when you're done. We are finished with the Customizer.
WordPress Widgets
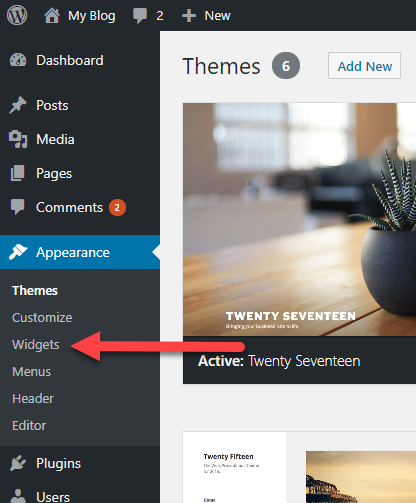
From your WordPress Dashboard, click Widgets under Appearance in the left navigation.
What is a Widget?
WordPress Widgets add content and features to your Sidebars.
Using Widgets you can add menus, tag clouds, recent comments, recent posts, and all kinds of other stuff to different areas of your website.
Depending upon your theme, you may be able to add Widgets to your header or footer as well.
If you use a Page Builder plugin, you can add Widgets to your Posts and Pages as well. Widgets are a really powerful WordPress tool that you can use to serve up all kinds of content to your readers.
Inside the Widgets screen...
Like the Categories and Tags screens I covered in Part 4 of this series, the Widgets screen is two-sided.
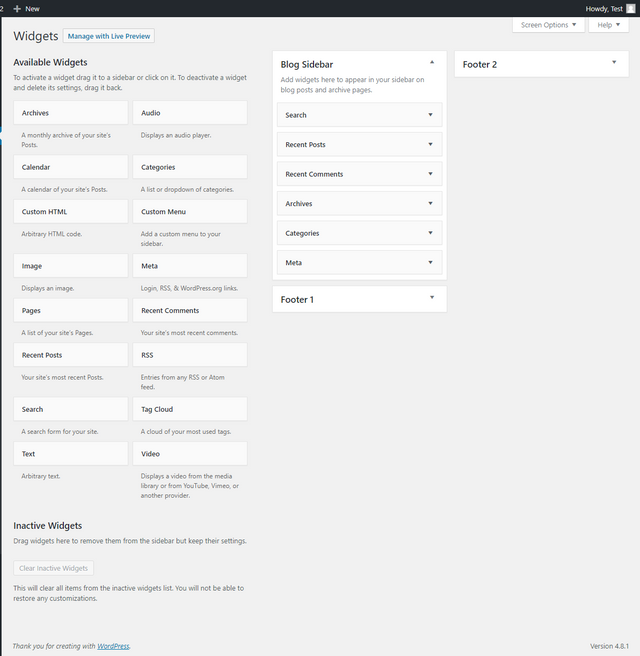
On the left side are the Available Widgets you can add to your Widget areas, and on the right are the Widget areas available in your theme.
You can add Widgets to your website by simply dragging and dropping the Widget you want to use from the left side of this screen to the corresponding Widget area on the right.
Some Widgets will have a small set-up area accessible by clicking the small arrows to the right.
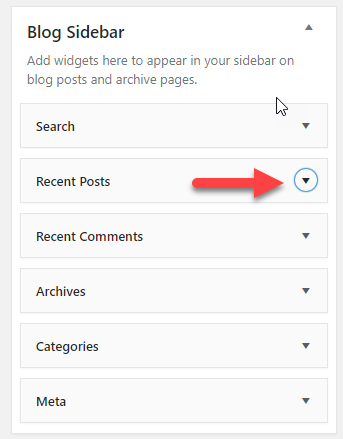
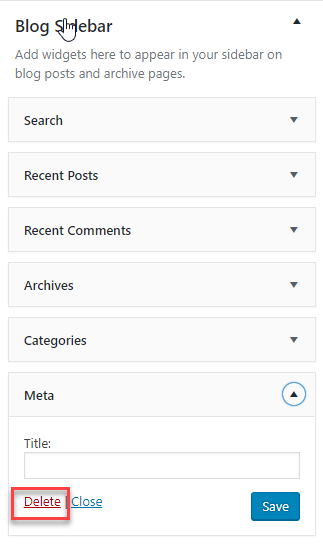
Also, your theme may have some default Widgets in the different widget areas that you don't want to use. You can remove a Widget from any widget area by clicking the arrow, and then click the red Delete link.
Each Widget has a brief description beneath it to help you understand what it does. When you install more Plugins to your website, more Widgets may become available to you.
NOTE: The next item in the appearance menu is Header which simply opens the Header settings in the Customize screen of your Theme, so we will skip it and talk about the Editor.
WordPress Code Editor
From your Dashboard, click Editor under Appearance in the left navigation.
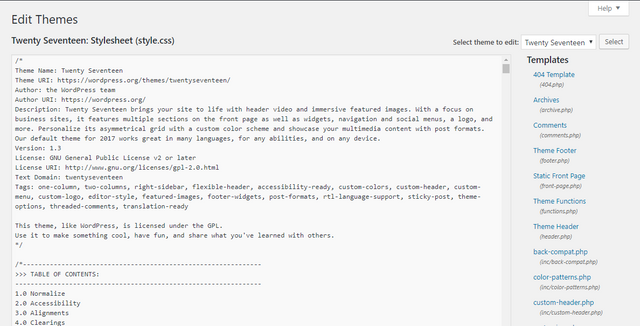
Now...GET OUT! Don't touch anything, don't click it, just get out!!!
This is the coding of your WordPress theme. Making changes in this screen should only be done if you know what you're doing. Even then, you should know that if you make changes here, they could be lost when your theme is updated.
Wrapping Up Part 5
So, how's your website coming along? Do you have it looking stunning? (Eat it, Wix!)
Are you beginning to see how versatile WordPress is as a platform?
Cool! I'd love to hear from you in the comments.
Coming Up in Part 6
In Part 6, we will finally be covering Plugins. Plugins often are the catalyst for making your WordPress site into an online store, membership site, forum, or pretty much whatever you can dream up.
While WordPress is a feature-rich platform in and of itself, Plugins expand that a thousand-fold.
If you found this post helpful and you'd like to check out the other parts of this series, here are the links:
- Part 1 - Introduction
- Part 2 - Setting Up Your WordPress Site
- Part 3 - Posts, Pages, and the WordPress Editor
- Part 4 - Categories, Tags, Media, and Comments
If you have any questions about WordPress, please post them in the comments below. You may help someone else who wanted to know the same thing!
Thanks for reading! ❤

Hello, thank you for this document, I think about starting a blog, I have allready a website, but not a hostingcompany and not decided if I will use Wordpress. This might help me..
Congratulations @prowebwriter! You have completed some achievement on Steemit and have been rewarded with new badge(s) :
Click on any badge to view your own Board of Honor on SteemitBoard.
For more information about SteemitBoard, click here
If you no longer want to receive notifications, reply to this comment with the word
STOP