How to Run Scalable Wordpress on AWS: Part 2
Step 3: Configure an Elastic Beanstalk Environment
There’s a few different (many in fact) ways of using Amazon Web Services to control some servers. You could go straight down the EC2 route, which would be comparable to running your own VPS, minus any control panels that came with yours, or you could use one of the other management options out there to configure instances and make them run the stuff you want them to (specifically your Wordpress site).
We’re going to use Elastic Beanstalk in this example because it’s simple and extensible enough to do what we’re wanting to achieve and takes care of most of the complicated stuff behind the scenes for us.
Install the Elastic Beanstalk command-line interface
The “eb” command-line interface lets you push code into Elastic Beanstalk.
Amazon have a good guide on installing it.
If you’re on a Mac, it should be enough to run:
pip install --upgrade --user awsebcli
Choose an AWS Region
You’ll need to choose an AWS Region to deploy to. There’s quite a few:
us-east-1 : US East (N. Virginia)
us-west-1 : US West (N. California)
us-west-2 : US West (Oregon)
eu-west-1 : EU (Ireland)
eu-central-1 : EU (Frankfurt)
ap-south-1 : Asia Pacific (Mumbai)
ap-southeast-1 : Asia Pacific (Singapore)
ap-southeast-2 : Asia Pacific (Sydney)
ap-northeast-1 : Asia Pacific (Tokyo)
ap-northeast-2 : Asia Pacific (Seoul)
sa-east-1 : South America (Sao Paulo)
cn-north-1 : China (Beijing)
us-east-2 : US East (Ohio)
ca-central-1 : Canada (Central)
eu-west-2 : EU (London)
Typically you’ll want to choose a region that’s close to where your website visitors are. There is a small caveat however and that is that not all AWS services are available in all regions yet.
As the last part of this tutorial relies on using Elastic File System, a relatively new component of AWS, only the following regions have support for all of the services used:
us-east-1 : US East (N. Virginia)
us-east-2 : US East (Ohio)
us-west-2 : US West (Oregon)
eu-west-1 : EU (Ireland)
We’ve used London in this example extensively but please note that at the time of writing, there is no support there for EFS so if you’re in Europe like we are then Ireland is probably the way to go.
You can pick a region from the drop-down in the top right of most AWS Console screens.
Set up a blank Elastic Beanstalk app
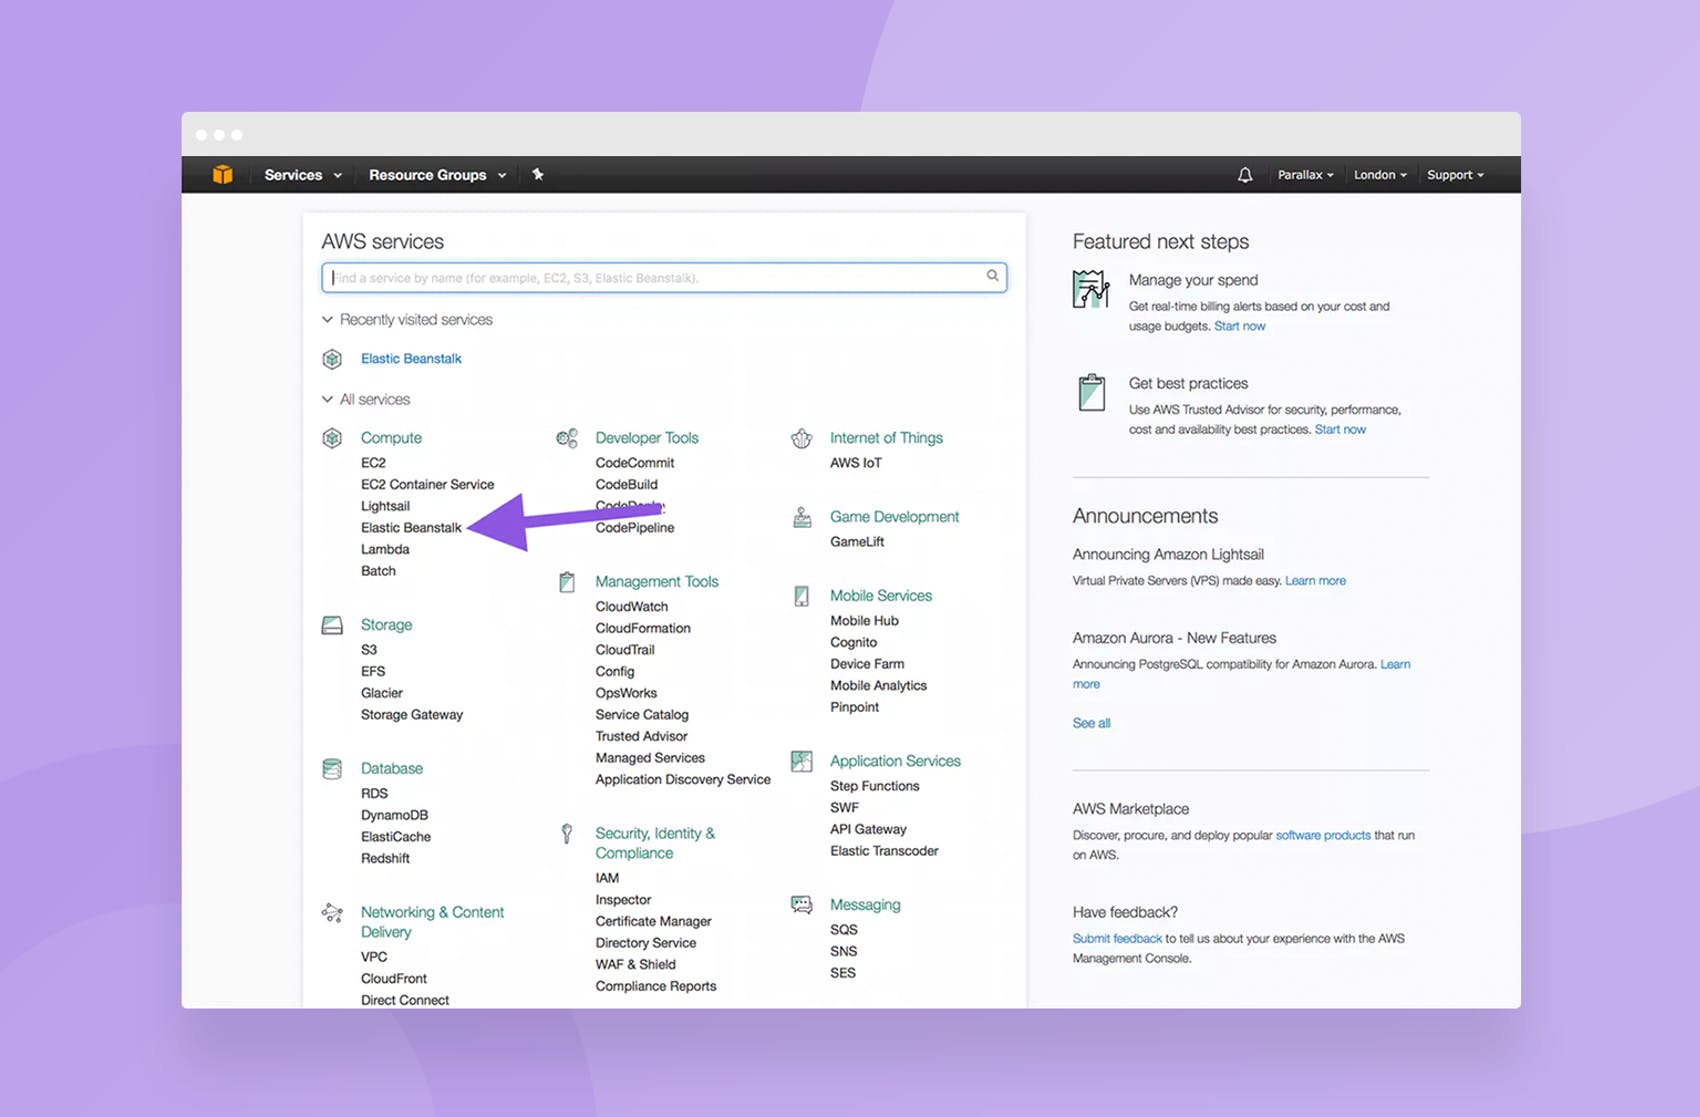
You’ll be at the Console home when you log into Amazon Web Services. It will look a bit like this:
The service you’re looking for is Elastic Beanstalk. It’s under Computer (follow the arrow on the above screenshot) or you can search for it.
Note: I’m using the new user interface that AWS have released for EB in these examples. You should receive a prompt to use the new UI. If you don’t, don’t panic – while everything may look slightly different it’s not miles away from what it used to be and it’s mostly in the same place, called the same things.
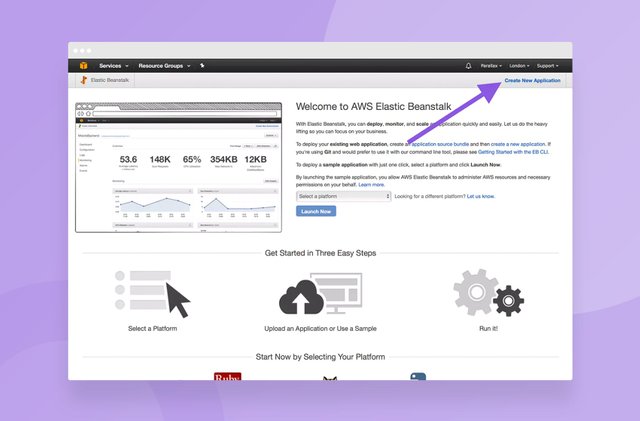
Once you open it up, you should see this:
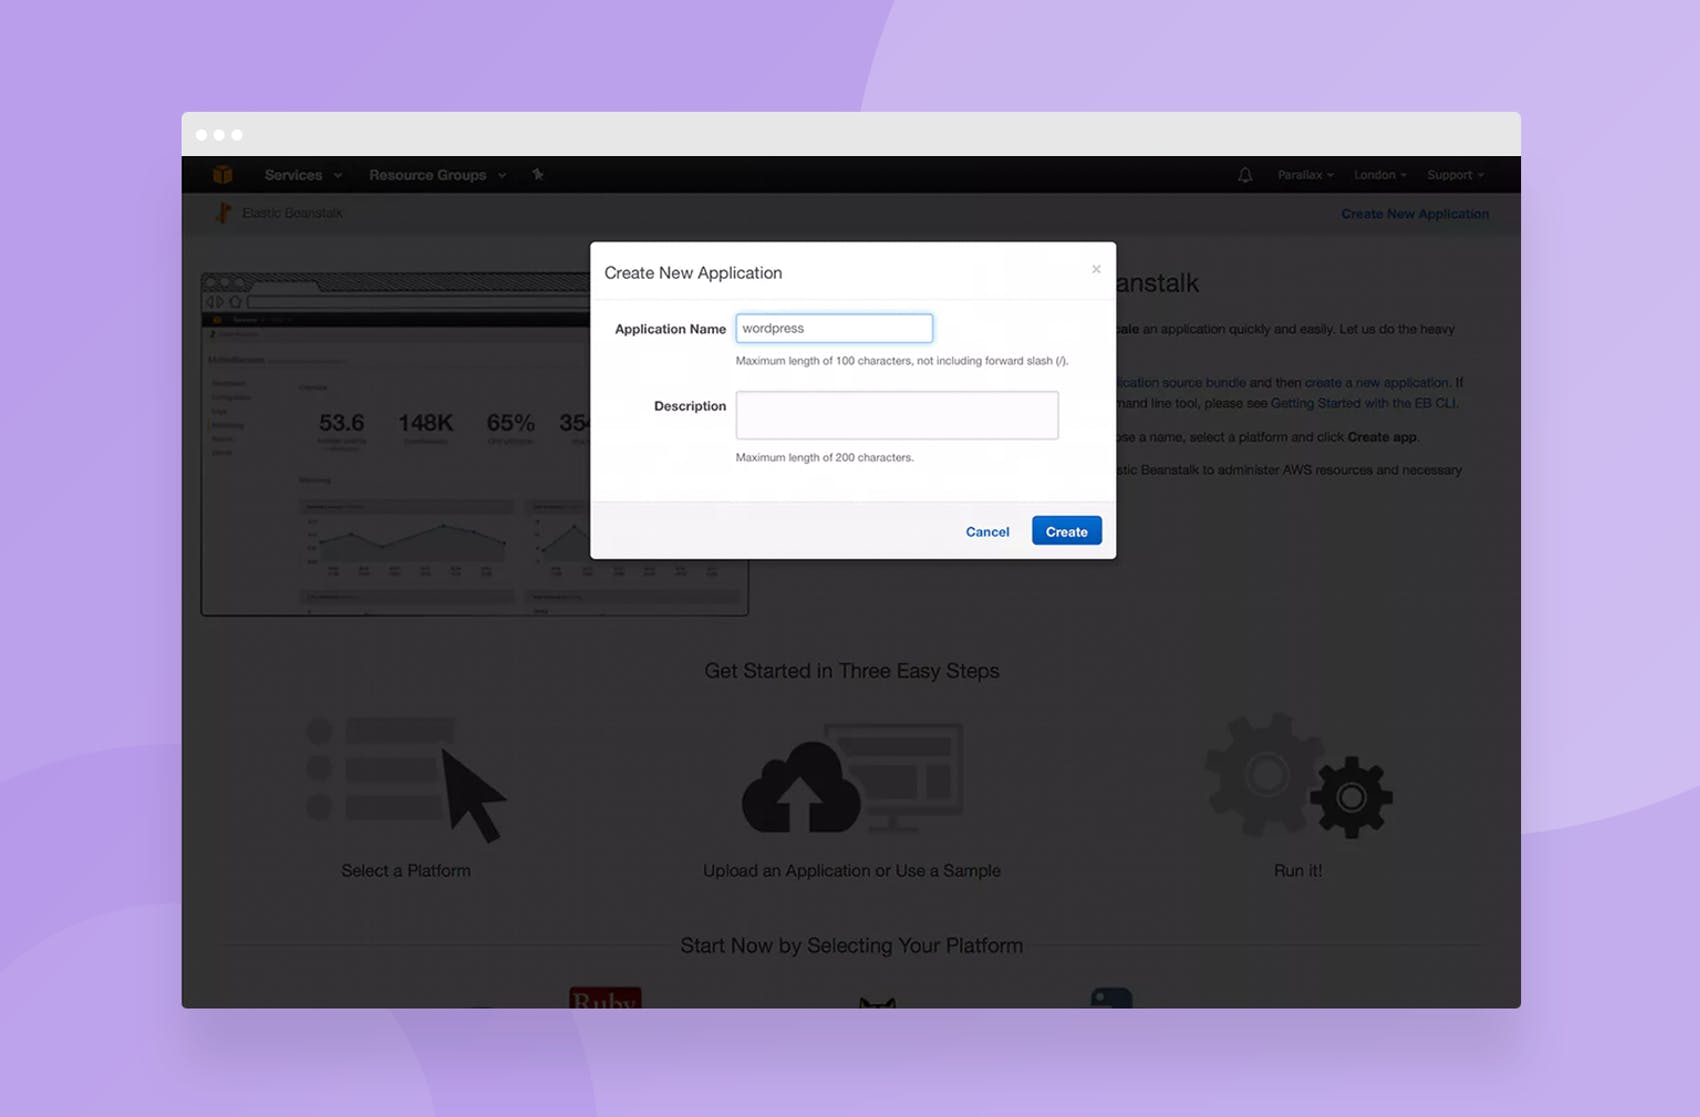
Try to contain your excitement somewhat and don’t go straight in and hit the “launch now” button. We want to go through the slightly less-exciting wizard that appears when you click “Create New Application” in the top right. Again, follow the arrows.
I’ve descriptively called our application “wordpress”. You can go with whatever you want here though.
If you think you’ll be running more than one Wordpress install, maybe go with sitename-wordpress or something.
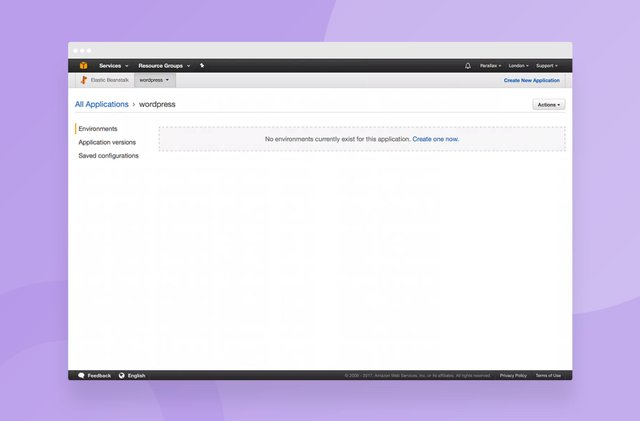
We have an application now, but no environments for it to run in. That’s OK, we can sort that now.
An application is more or less what it sounds like: It’s a set of code that will get deployed. An environment is a place (or server/set of servers) that this code will go onto to actually run.
Most advanced users will have a production and a qa environment. Some people will even have an environment for every different version of their application. We’re going to skip past some of the advanced stuff and just focus on getting things up and running.
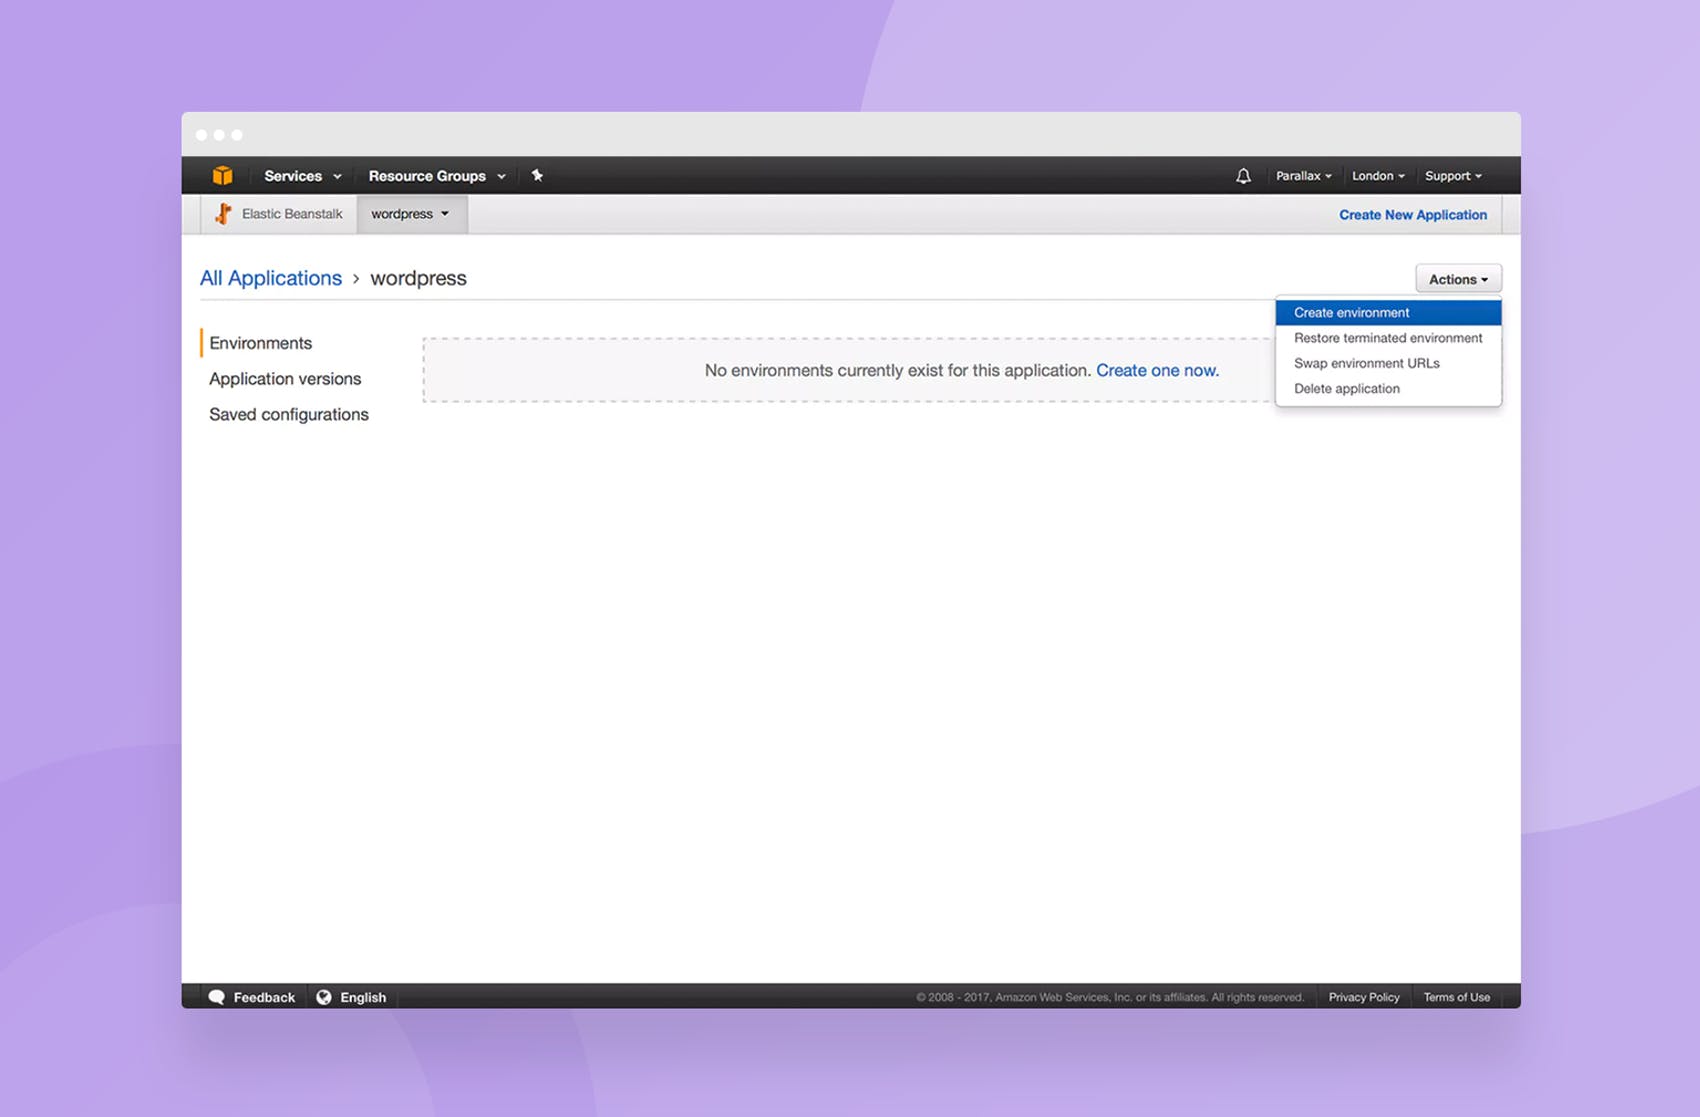
Under “Actions”, you will find “Create environment”. Click it.
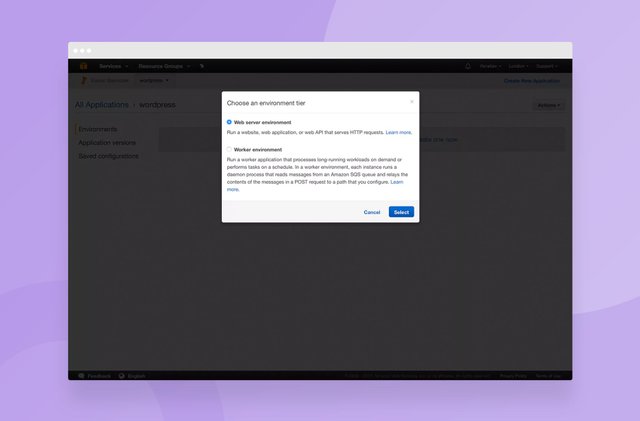
We’ll ignore worker environments for now – you want a web server environment:
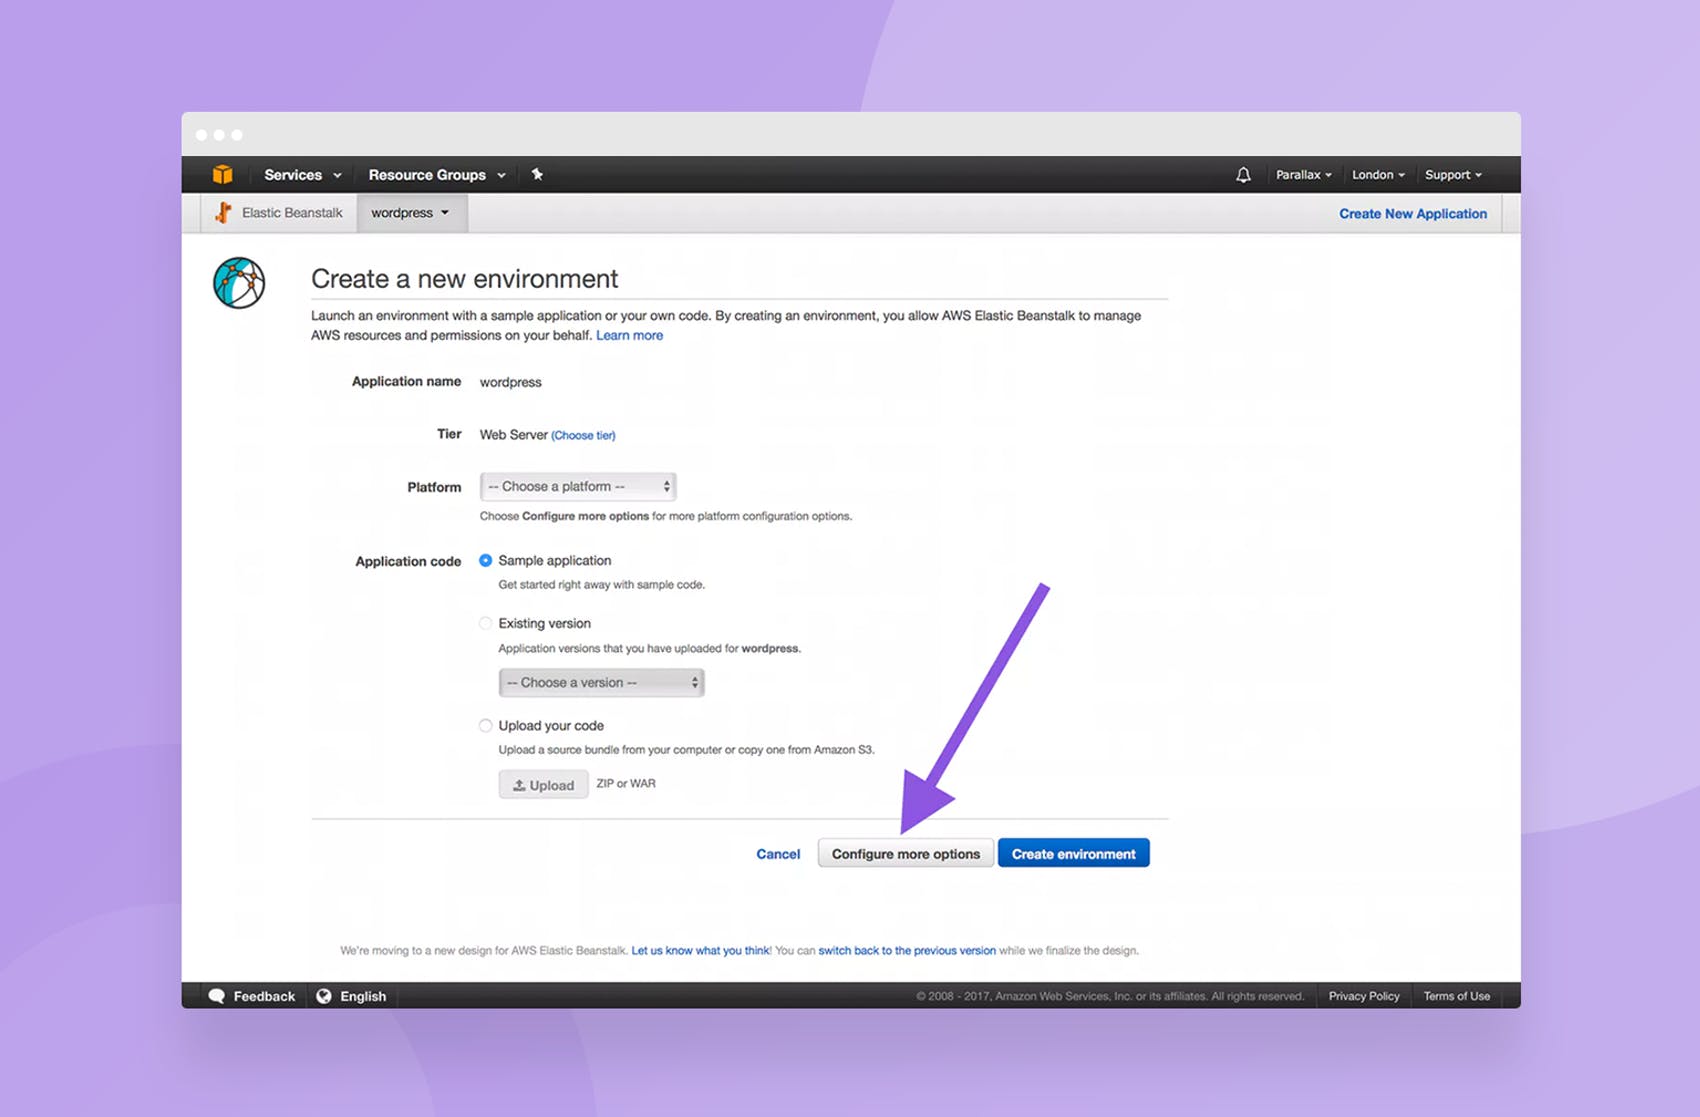
Logic would dictate that you select PHP from the dropdown on this next screen and go ahead and click “Create environment”. Logic is wrong. Select PHP from the dropdown but don’t click this button.
Why? Wordpress is still a PHP5.6 beast at the moment (although this is set to change in 2017 sometime) and going with the default version of PHP is likely to break many many things.
We’re going to click “Configure more options” instead:
It’s probably worth noting at this point that having the Application code as “Sample application” is fine right now too. We’ll worry about getting our actual code deployed into this environment after we’re done configuring everything.
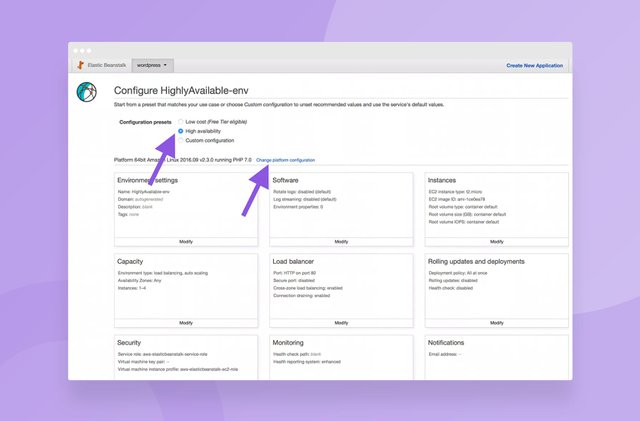
Note that we’ve selected “High availability” instead of “Low cost”. That means that our Wordpress install will be on multiple servers, not just one and allow us to autoscale it.
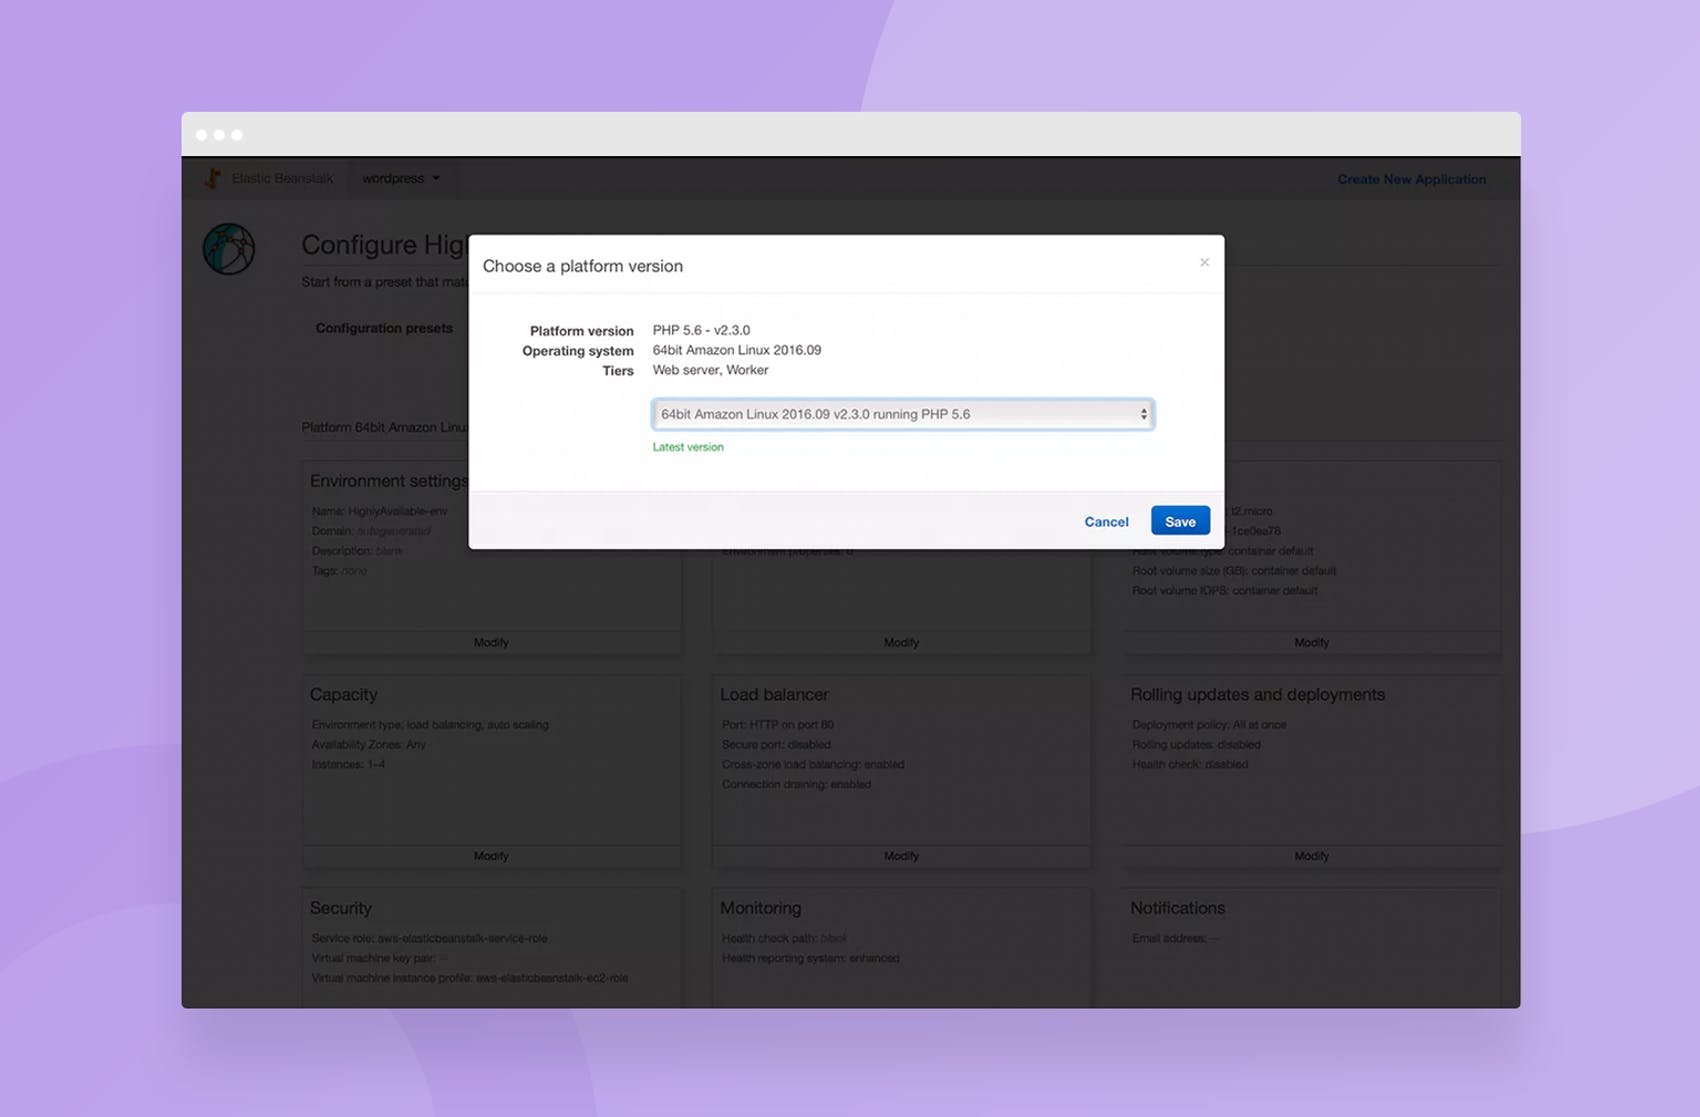
After selecting High availability, click “Change platform configuration”:
You want to choose PHP 5.6 in this dropdown. 7.0 won’t work currently but may well work in the future. As a bonus, you can actually change this around later without experiencing any downtime. That’s awesome.
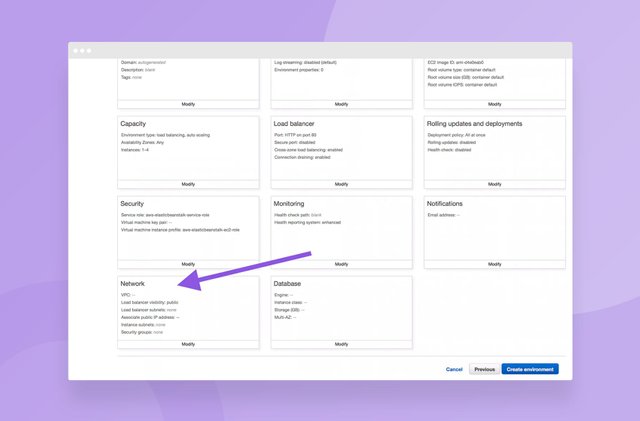
You’ll want to open Network, as shown below, by clicking “Modify” underneath it:
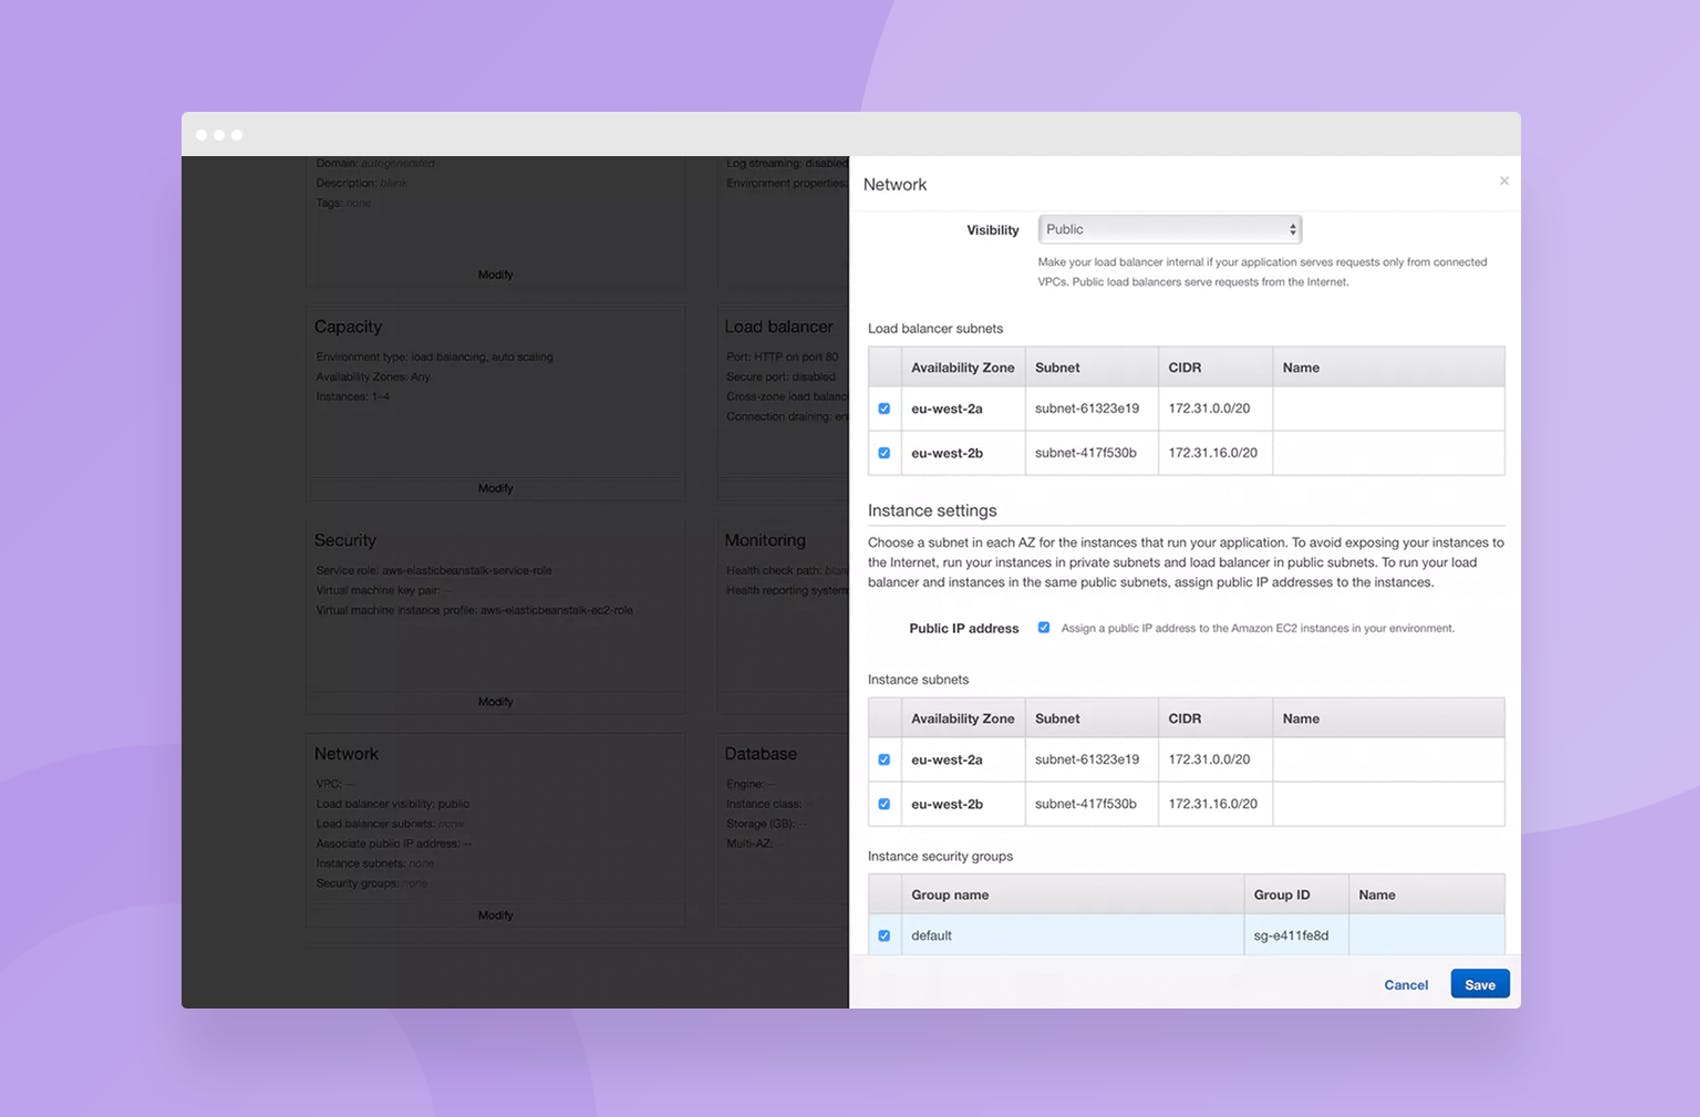
Under VPC, choose your default VPC (there should just be one in the dropdown if this is a new account).
Visibility should be “Public”.
Tick all Load balancer subnets.
Tick “Public IP Address”.
Tick all Instance subnets.
Tick default for instance security group.
If you’re a bit click-happy like me, you will have noticed that there’s a Database option in the configuration screens.
Don’t touch this – as tempting as it is, it doesn’t currently support something called AWS Aurora. Put simply, Aurora is basically MySQL but more awesome and significantly faster.
Because we like both awesomeness and speed, we’re going to configure some of those bits ourselves later on.
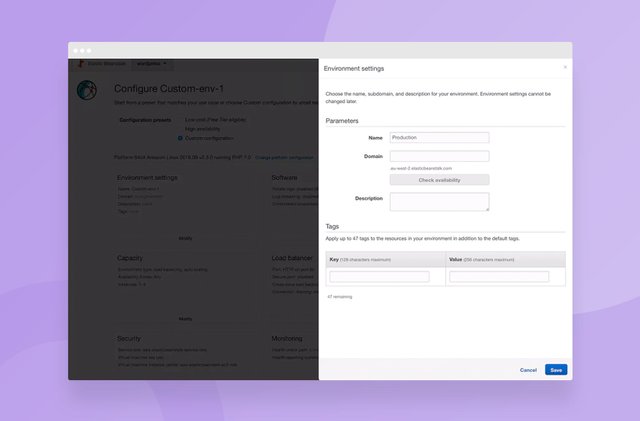
One last, optional, step, is to give your Environment a name. This is a good thing to do because if you don’t, it’ll be called “Custom-env” which isn’t particularly snappy. We’re going to call ours “Production”.
You’ll find this setting in the first configuration box, titled Environment settings:
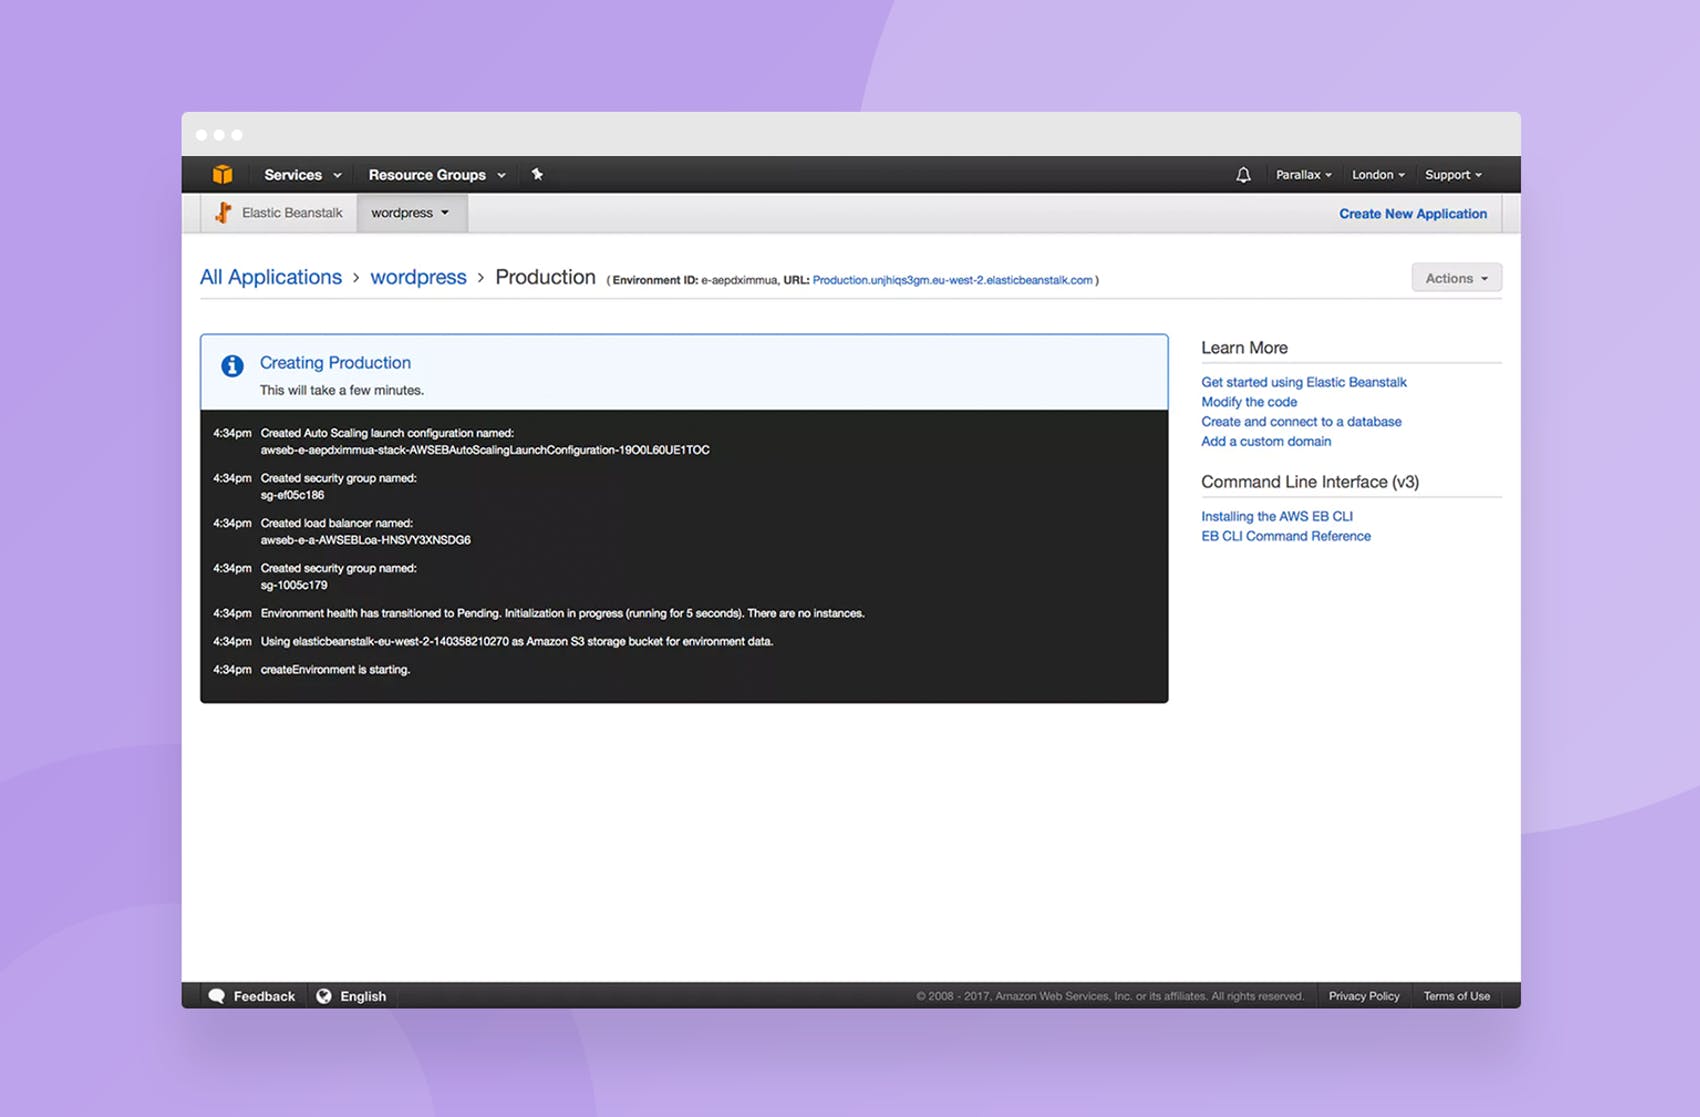
Once that’s saved, you can leave everything else as it is and go ahead and click the “Create environment” button down on the bottom-right.
AWS will go away and do your bidding for you now. It does take a while (maybe 5 minutes) to sort itself out so be patient. It might not look like it’s doing stuff but it is.
What have we just done?!
So, we clicked some buttons, AWS did some things. But what things?
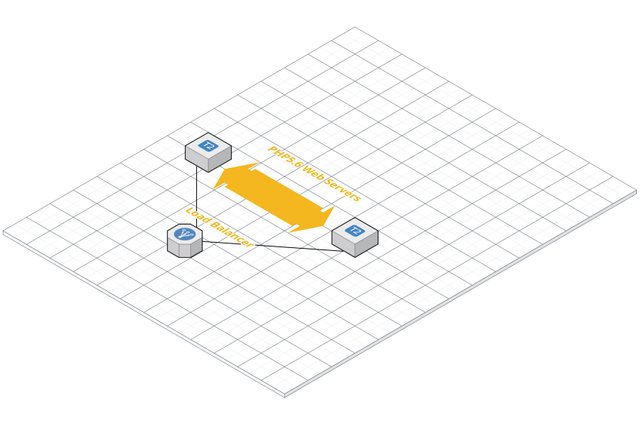
What we’ve just asked Elastic Beanstalk to do for us is to create the following Environment:
A picture tells a thousand… errr… nodes?!
What we’ve done is we’ve set up a load balanced, scalable web server tier. What does this mean?
There’s a load balancer at the “front”. That’s the bit that user’s browsers speak to when they want a web page. That load balancer then picks one of the PHP5.6 Web Servers sat behind it and asks one of them for the web page that the user requested. Once it’s got it, it then passes that back to the user’s browser.
Why is this good?
- The load balancer is redundant, i.e. it can have bits of it break and people will still be able to use it.
- The web servers behind it are also redundant. If one goes down, then the load balancer stops sending traffic to it.
- The web servers can be scaled transparently, i.e. you could have two web servers as in the diagram above, or you could have 50. Who knows, maybe Justin Bieber wrote a guest blog post for you and it went viral or something.
Less downtime, more speed.
Accessing the environment
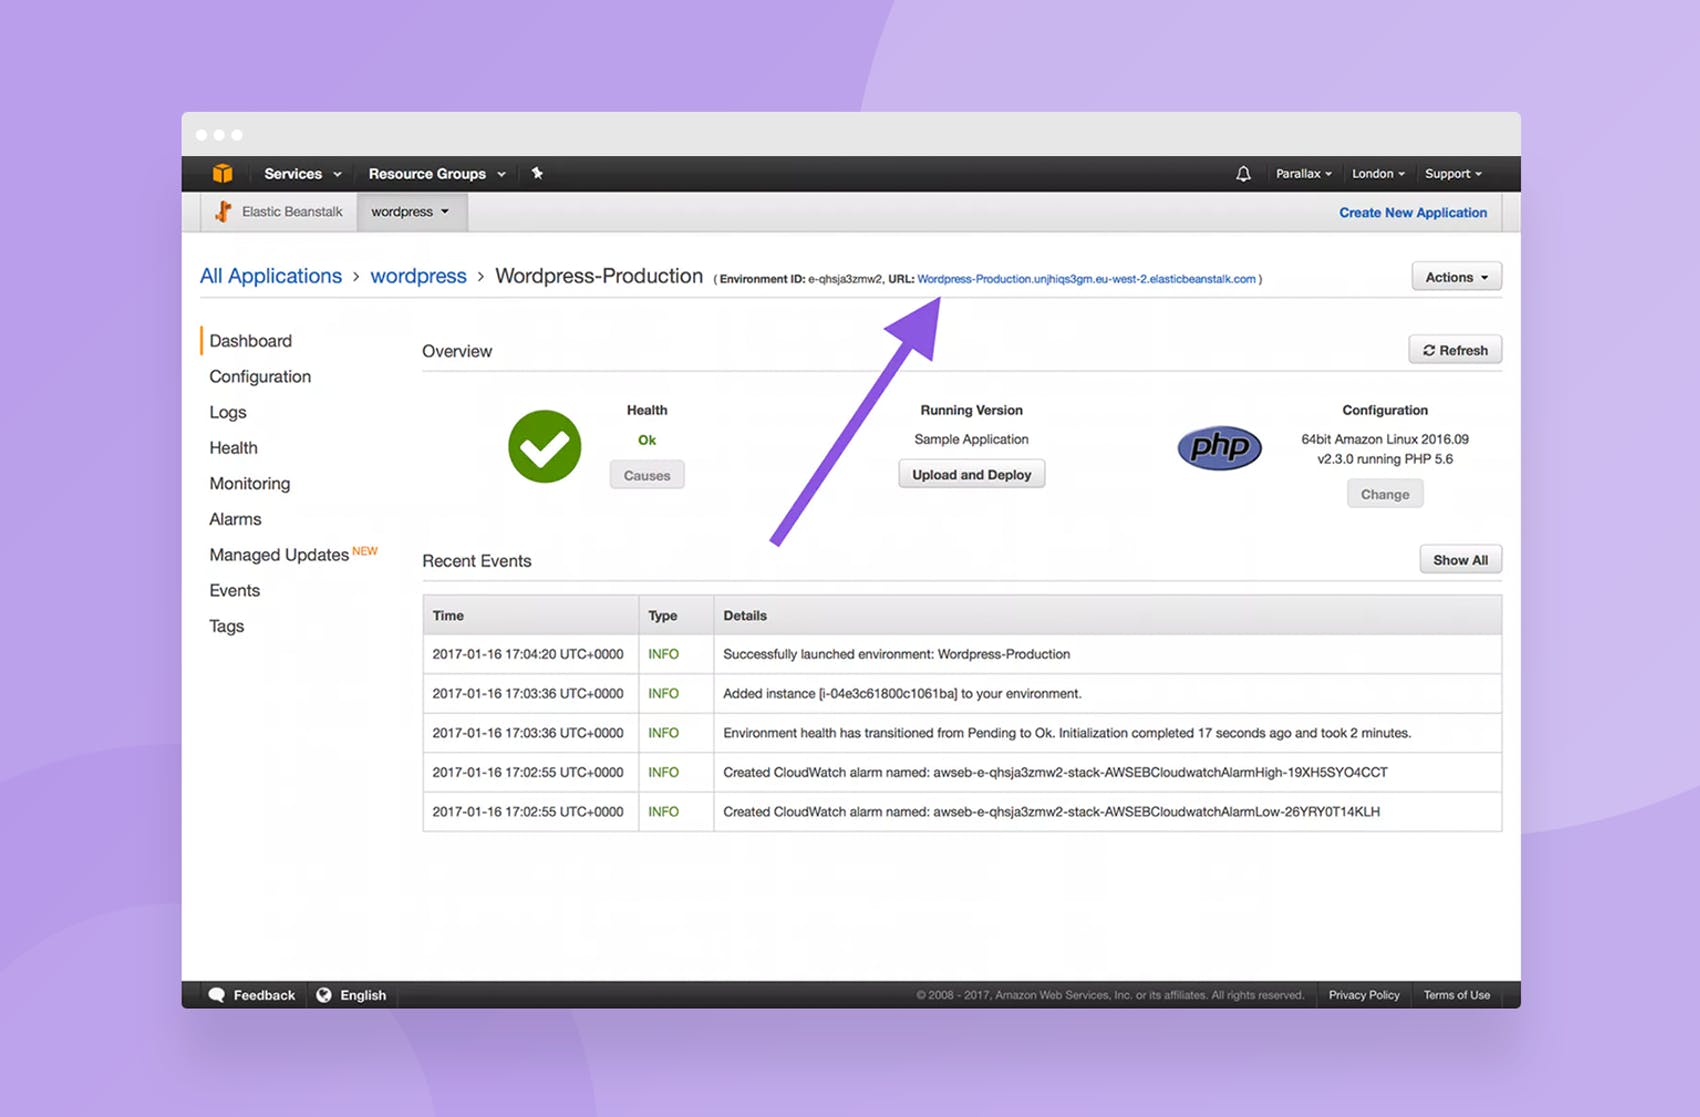
If you head back to your application (click “wordpress”) and then into your environment (once it turns green, meaning it’s all ready for you), you’ll notice that there’s a URL in Elastic Beanstalk:
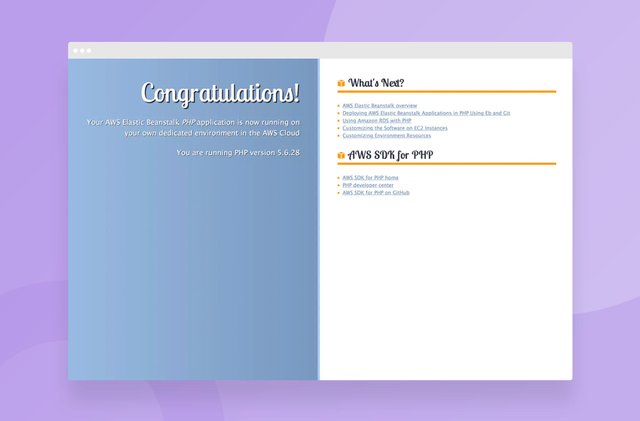
Clicking this link will show you the sample application we installed in this environment earlier (remember – our code isn’t in yet!):
The page will tell you which version of PHP your environment is running. If it says 7.0, terminate the environment and create a new one and make sure you choose 5.6. You can have as many environments per application as you like which is useful for testing things before going live with them.
