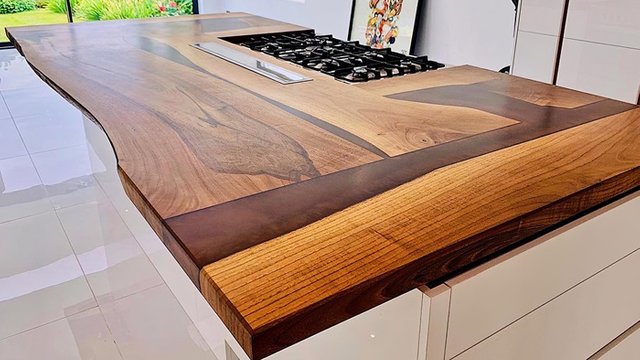
Specialist Gluing Techniques for Wooden Kitchen Worktops
The traditional way to create a glue edge has been to use a feed-through molder, where the left and right vertical spindles are set with straight knives to produce a flat edge. The problem with this is the way the knife comes into contact with the timber as it passes through.

Spinning around on the block, usually at 6000 rpm, the knife effectively hits the timber at about 26 degrees and scoops out a groove. It is this action which causes all the issues. These grooves can vary wildly depending on how fast the timber is run through the machine.
At high feed speeds, the scoops will be quite wide, and there is an obvious ripple, often clearly visible, along the entire length, particularly visible in oak and walnut. Lowering the feed speed helps to combat this, however this obviously takes longer and therefore becomes more expensive.
A standard 6000 rpm moulder will run between 6 and 30 metres per minute. Being able to run a machine at five times the output is pretty tempting in a world dominated by cost. However this is only the first issue. The second issue, lost on just about every other manufacturer, is compression.
As the knife comes in to contact with the timber for the first time, before it starts its cut, it compresses the timber. During the cutting stroke, as the angle changes from 26 degrees to zero, the compression factor increases through this rotation. This means that the top layers of cells just under the knife cut are compressed together.
This means the surface is made much less porous, and as a result the glue will not penetrate as well, and therefore the strength of the glue line will be compromised. This can be minimised with ultra sharp tooling, however to make this effective the tool would need to be sharpened every hour.
Even a moderately sharp knife will lead to unacceptable levels of compression, often called 'glassing' where it actually makes the top surface like a glaze, thus making it all but impossible for the glue to penetrate. Woods like oak and walnut are somewhat affected by this, but maple, iroko and other tropical timbers are significantly affected to the point where glue line failure in these worktops is a common occurrence.
The way to achieve the perfect glue edge is to use a special saw blade combined with pre-moulding. To do this, there are a number of requisites without which the search for the ultimate glue line will be fruitless.
Firstly, the moulder needs to have six heads - two top spindles, two bottom spindles and two sides. The last bottom head which accommodates the saw arbour must be big enough to accommodate the saw blades, and also have plenty of power; at least 20KW. Ideally the spindles should all run at 8000 rpm.
The next requisite is that the input material should be accurately finger jointed. Finally, we must assume that all tooling is of very high quality, sharp, and for hardwoods like oak and walnut, carbide tipped at the least, preferably solid carbide.
Set up the first bottom to take off enough material to ensure that after passing this first head it is perfectly flat to the bed, as this creates the first reference point, or datum. Next, the right vertical spindle should be set to remove enough material to provide the second reference edge, the right fence datum, with a good enough finish.
The left vertical spindle needs to take enough off the left edge to provide a clean and consistent edge, the same being true of both the top heads, which are there just to clean the timber up and calibrate it, so it requires the least amount of sanding once glued.
That takes us to the last bottom, where the real action takes place. The tool here is effectively a saw arbour with two blades, both hogging blades. A special side pressure fence needs to be set up exactly right to hold the timber perfectly still as it guides it in to the special tool.
The tool needs to be a very high quality tool, from a supplier like Leitz, to ensure that everything is set up correctly with an exact perpendicular set up from the bed to the blades. Without this setting at absolutely 90 degrees, then staves will not glue together in a flat panel.
The saw blades need to be carbide and very sharp, but since they will be set to only remove 0.5mm each side, and should have 24 teeth set with a reverse hook, they will only need sharpening every 4000 - 6000 linear meters.
When working with materials such as oak and walnut, not only must the tooling set up be spot on, but the machine itself should be in perfect condition. Weinig machines offer the precise tolerances required for this sort of work. Spindle bearings need to be super heavy duty in order to minimize or preferably eliminate vibration.
But even with all this, you still need the skill to set the machine up and operate it. With oak worktops making an increasingly large percentage of replacement and new kitchen worktops, getting it right has never been more important.
Atten: The World's Largest Collection of 16,000 Woodworking Plans: https://bit.ly/TwoodworkingPlans