HOWTO create a witness_node on a fresh (rented) Debian 8 linux box
Hi,
because my rented VPS are running Debian8 by default I tried to get this beast running on Debian8 which after 1-2 days finally succeed. I've written down some instructions and create this howto To help those out which seek the same goal to run a witness under Debian8

Starting
After connecting to your fresh box by ssh or even a virtual box on your local computer you should ensure the system is up to date.
apt-get updateapt-get upgradeIn the documentation for the node to compile steem you need the following packages:
gcc-4.9 g++-4.9 cmake make libbz2-dev libdb++-dev libdb-dev libssl-dev openssl libreadline-dev autoconf libtool git
Additional on Debian8 you need python3
Needed for building the right boost libraries:
autotools-dev build-essential g++ libbz2-dev libicu-dev python-dev
Needed in Debian8 to get cmake discover anything it needs.
pkg-config doxygen libncurses5-dev
Install everything by this command:
apt-get install gcc-4.9 g++-4.9 cmake make libbz2-dev libdb++-dev libdb-dev libssl-dev openssl libreadline-dev autoconf libtool git python3 autotools-dev build-essential g++ libbz2-dev libicu-dev python-dev doxygen libncurses5-devGetting and compiling boost
It is IMPORTANT to use the version 1.60.0 and not the latest (1.61.0 at the time I'm writing this) version of the boost libraries. I tried to compile against the latest boost lib and failed.
Get, decompress and build the boost libraries with these commands:
wget -c 'http://sourceforge.net/projects/boost/files/boost/1.60.0/boost_1_60_0.tar.bz2/download' -O boost_1_60_0.tar.bz2tar xjfv boost_1_60_0.tar.bz2cd boost_1_60_0./bootstrap.sh ./b2This compiles the boost libraries in the boost directory and we link the libraries with steemd, no need to install them on the system. This give you no headache if you need another boost version or the system comes with another preinstalled boost library.
If everything succeed you see this message:
The Boost C++ Libraries were successfully built!The following directory should be added to compiler include paths: /root/boost_1_60_0The following directory should be added to linker library paths: /root/boost_1_60_0/stage/libGetting and compiling steem
now leave the boost directory and get the steem source and the needed submodules:
cd ..git clone https://github.com/steemit/steem.gitcd steemgit submodule update --init --recursiveNow the interesting part starts and if all is done right it should work (cross your fingers)
cmake -DBOOST_ROOT="/root/boost_1_60_0" -DCMAKE_BUILD_TYPE=Release .make installby the miracle of time :-) steemd should be build without any critical errors (warnings can be ignored) and it is installed in /usr/local/bin ready to be invoked by any user on the system.
Create a non privileged user and run steemd
Well this is the way I'm do it. I know there are many ways of handling users, root and hardening systems. This is one of many ways and because my vps are connected to my homenetwork by a vpn connection I normally use root ans standard user and switch for the different jobs from there to the unprivileged user.
The (dis-)advantages of the different ways to accomplish this and how you secure a system is not the scope of this howto.
Create a user with the name steem (not able to login)
adduser steem --disabled-loginanswer all questions and create the user. Now switch to your fresh created user and start steemd for the first time:
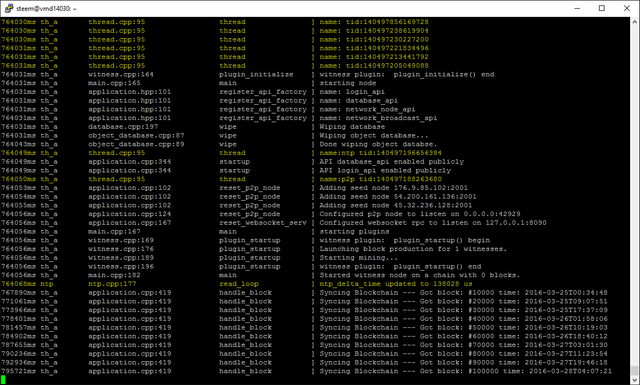
su - steemsteem@vmd14030:~$ steemdIf everything is working as expected you should see a console like this:

than you made it - steemd is compiled and able to run.
Congratulation !
Configuration of the Node
It's time to give the Node your face - we need to configure it to run properly
There are several options how a node can be configured:
- as witness
- as witness + miner
- as miner
- as seednode
A seednode can be compared to a fullnode in the "old cryptoworld" a node which offers blockchain data to clients and is accessible by p2p from outside. This configuration is out of scope of this how-to.
A witness can be compared to a mining pool which can have an inbuilt miner. It is possible to connect other miners to a single witness to add mining power to a singel witness.
Important to know never have two nodes run as withness under the same account. This could lead to geting the complete reward removed !
Ok we configure this node as witness with one miner from the same account. We need to add seednodes to tell your node where to get blockchain data from, we configure your account, your private key for the witness and the mining task. Additional we open the rpc endpoint to give you the posibility to connect with the cli_wallet to your node and act an your account.
Please get running seednodes from http://status.steemnodes.com/
Do the following changes to your
open your config.ini (usually /home/steem/witness_node_data_dir/config.ini) with your favorite text editor and change the following settings :
seed-node = steemd.pharesim.me:2001
seed-node = seed.steemed.net:2001
seed-node = seed.steemnodes.com:2001
rpc-endpoint = 127.0.0.1:8090
witness = "hagie"
miner = ["hagie", "VERY LONG PRIVATE KEY"]
mining-threads = 6
private-key = VERY LONG PRIVATE KEY"
after closing your favorite editor you may execute steemd again and it should start syncing the blockchain.
That's it - you have a running witness_node and your node is ready to mine.
Honestly I wasn't choose to do some work - I must be elected first. To help me reach the goal I ask you kindly to vote for me as witness.
Find me in the list of witnesses or use the cli_wallet by issuing the command
vote_for_witness [own account] hagie true trueOf course give me an upvote if you need this howto helpful.
If there are any Errors in the document please let me know ! If something critical changes I will post this as comment.
If anyone got an Idea how to properly configure logging please let me know. At the moment I use bash tools to get a logfile while running steemd in background. To do this start steemd with the following command:
steemd > /home/steem/witness_node_data_dir/logs/log_file 2>&1 &
you can now check the log with
tail witness_node_data_dir/logs/log_file -fand also use the cli_wallet from the same session.
About me
Father of 4 children, crypto victim , well more a crypto fan but burned so often it really hurts ...
Working with Computers since 30 years now - started with C64, Amiga and PC (386 DX 25 was the first)
At my Job as IT Specialist / Network architect I'm responsible for network infrastructure and user support.
Addicted to good food (I try to compensate the overweight with jogging in the summer months and going on the treadmill winters)
Loving Heavy Metal Music and Flower Power :-)

And a little proof:

Regards
Nice tutorial here @hagie. My only suggest for something you might want to add is how to start the cli-wallet as well as how to generate WIF key.
This can be done in the cli-wallet by using the command
suggest_brain_keyafter your wallet is created and unlocked.Fuuuuck yes .. I just forgott to tell how to get the WIF key.
It's also possible to use the available account and read the WIF Action key from the website. Of course it's better to use another account for security reasons.
I am new to Steem but will try it out, looks like a great guide. Thanks for all the hard work in getting that together.
\ (•◡•) /
It is very, very difficult for me but thanks anyway ! we will investigate further! And good luck to you man!
Try it - it works - I reinstalled the box and have done the written steps one by one and it works out of the box.
regards
Honestly I didn't understand any thing, programming is a mysterious world, I like it but I did not learn it, I start teach my self simple languages like HTML and CSS may be one day I will go to some school to study programming, great post bro , Be well
Great guide Hagie :D
I like those manowar tickets! Hope i'll catch one of the shows as well
"By the miracle of time" - Whoa! You rock.
How big is the blockchain currently and how fast is it growing? (Is there a page with these stats for those planning nodes?)
at step ./b2
I get the message {..failed updating 22 targets...
...skipped 18 targets...}
tell me what is wrong
Hi,
I need to see the error which happen, could you check the lines bevor for #ERROR Tags and Post these ?
I reset all over again
I have a question "miner = ["hagie", "VERY LONG PRIVATE KEY" immediately login and password ?]
mining-threads = 6
private-key = VERY LONG PRIVATE KEY here privat key ? any posting or memo"
"
652409ms th_a witness.cpp:101 plugin_initialize ] _witnesses: ["jhonione"]
highlighted in red it is okay ?
the private key in WIF format - you can see it in your wallet section if you click "view private key" and enter password. No login / password needed.
Yes red is ok es long it's not an error.
generally understood, but in addition to your commands are added
update your system and install ntp
sudo apt-get update && sudo apt-get -y upgrade
sudo apt-get install ntp
sudo dpkg-reconfigure tzdata # to set your time zone
Install the build tools
sudo apt-get install gcc g++ cmake make libbz2-dev libdb++-dev libdb-dev libssl-dev openssl libreadline-dev autoconf libtool git libncurses-dev build-essential kernel-package libncurses-dev doxygen libboost-all-dev autotools-dev automake
you may have to run this on a fresh install and reboot
sudo dpkg --configure -a
sudo fallocate -l 4G /swapfile
sudo chmod 600 /swapfile
sudo mkswap /swapfile
sudo swapon /swapfile
sudo reboot
but still from time to get the message
Floating point exception (core dumped)
and the synchronization process stops