Warhammer: GW Painting Contest - unit #1 finished
GW Painting Contest - unit #1
Hello everyone!
I finished the unit of the first two weeks: A Tomb Banshee and here she is:
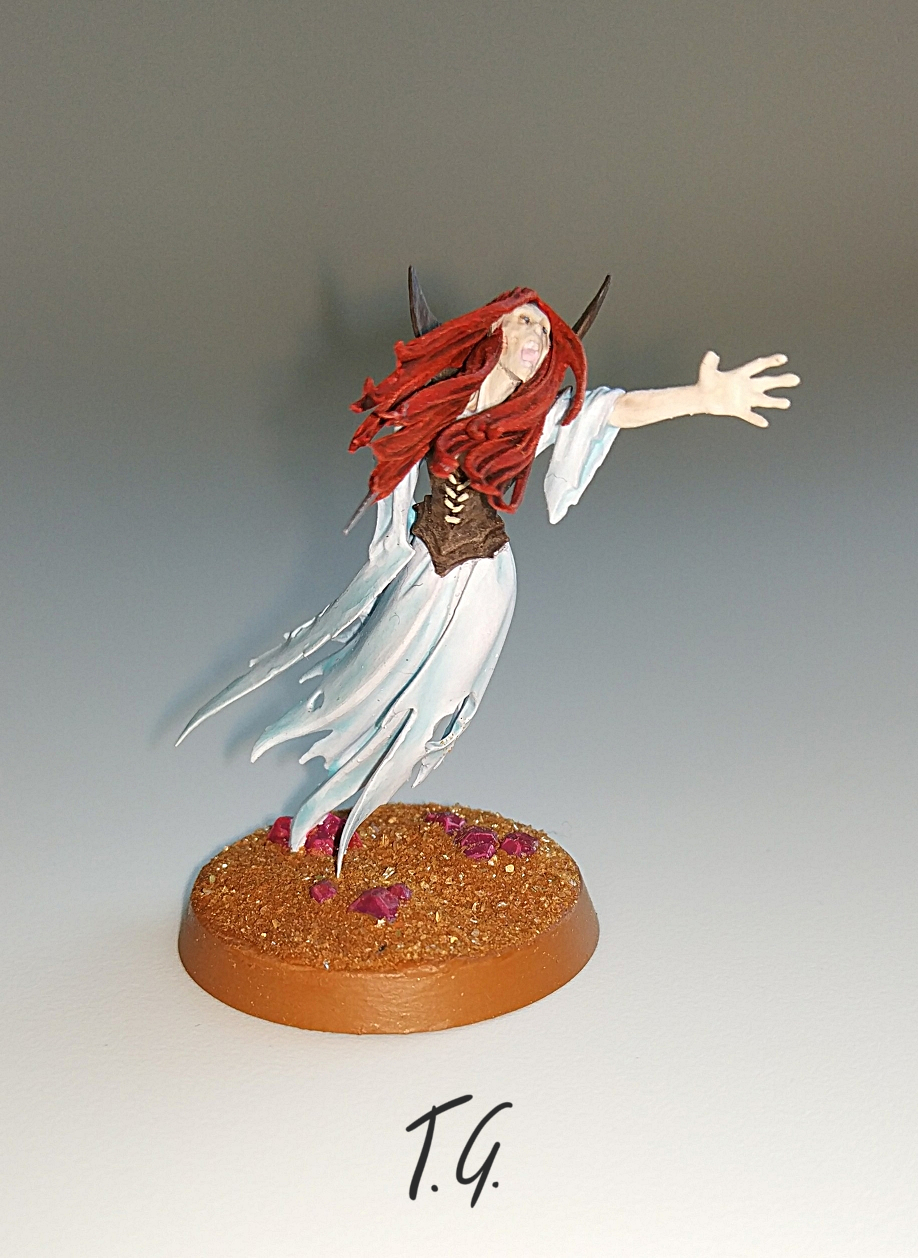
Sadly her hair just does not want to look good on any photo I made, but I think it looks close enough on that one.
So for the ones curious how I made her:
First of all I thought about what colors I want to have. I know that I want to keep the red hair and white/blueish cape seen on the GW homepage. For the corsage (?) I wanted to use some dark metallic with blue to make it look like an armor. But then I decided to make it leathern instead. I just felt like this would be more fitting. Biggest part was the skin. I clearly did not want to have it nearly the same color as the cape. But I did not want it to be completely pale white like I did on another miniature. I ended up with a pale color, but more of a skin tone then pure white.

I started with various white base layers (that's why I primed her gray instead of black) on the cape and painting the leather. I used a dark brown and dry brushed / stippled lighter brown tones over it. To make it look more uniform a applied a dark brown shade over it.
For the hair I used a red base coat, then washed it with a dark color and dry brushed it with lighter colors (If you are interested in the exact colors feel free to ask.)
Then I applied various thin coats of a mixture of water/Lahmium Medium and Baharroth Blue over the white cape and painted details of the gems. I used the purple/pink/violet tone because I already have gems on similar bases in that color.
For the skin I mixed a skintone with white, a tiny little bit of Baharroth Blue and Ushabti Bone. I tried detailing it with the same color mixed with even more white and a light shade.
For the base (deco):
I wanted to change the small square base to a bigger round base, but keep some of the original deco.
I painted the deco beforehand, because it is easier to paint holding a whole base than small pieces.
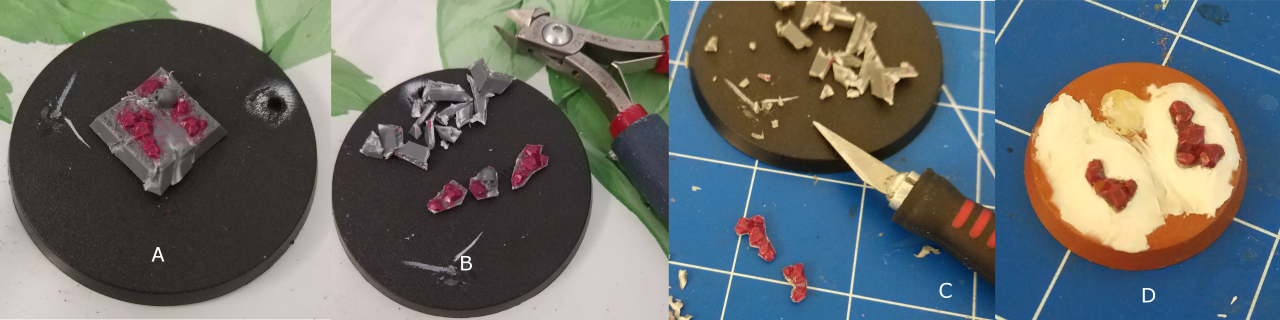
First I set some cuts around the old base with a pliers (A). Be careful not to accidently destroy the pieces you want to keep. The cuts will help to cut chunks of the base, which is the next step. Try to cut out your desired deco pieces roughly as seen in B.
For the next step a used a hobby knife to clean up the pieces(C). I did not want to use the skull piece, so I put it aside for a possible later use. No need to throw that away. I suggest using a cutting mat when working with a hobby knifes. Anyway be really careful with sharp knifes! I do not want to be responsible for bleeding fingers or scratches in your parents/partners favorite desk :)
After cleaning the pieces I fit them on my new base (D). I turned out that I need some modeling putty. Hint: Paint the base coat of your base afterwards. Otherwise you may have to paint it twice - just like me :) For the finish I glued some sand on top.
Greetings,
~ Tami
Looks pretty good!