Manage your Zilliqa Securely with Ledger and Zillet (Tutorial)
Zilliqa is poised to shakeup the market with its extreme scalability. Here’s how to keep your ZIL secure in the meantime.
As many cryptocurrency holders are well aware, most blockchains are painfully slow. As it stands, both Bitcoin (BTC) and Ethereum (ETH) have a maximum throughput of under 20 transactions per second — which frankly isn’t enough to support a huge number of users.
In light of this, several blockchains began to emerge to tackle the so-called scaling issue, providing the technology that would allow hundreds of potentially thousands of cryptocurrency transactions per second, thereby allowing cryptocurrencies to truly rival the likes of Visa and Mastercard.
Among these, Zilliqa (ZIL) is one of the most popular thanks to its innovative sharding solution, which sees blockchain load split across multiple parallel ‘shards’, each of which allows transactions to reach finality without needing to broadcast it to the entire network like Bitcoin and Ethereum, among other coins.
As perhaps the most complete and well-developed solution to achieve extreme scaling, Zilliqa is widely considered to be among the handful of cryptocurrencies due to see huge explosion both in terms of asset value, but also in terms of users.
With that in mind, it’s a good idea to secure your ZIL now, so that you’re ready to transact with the new Zilliqa-based economy once it’s ready.
***Before you begin: **You will need to have an initialized Ledger Nano S hardware wallet, plus the **Zilliqa *app already installed on your Ledger device. To learn how to install apps to your device, click here.
Update your Ledger Live application:
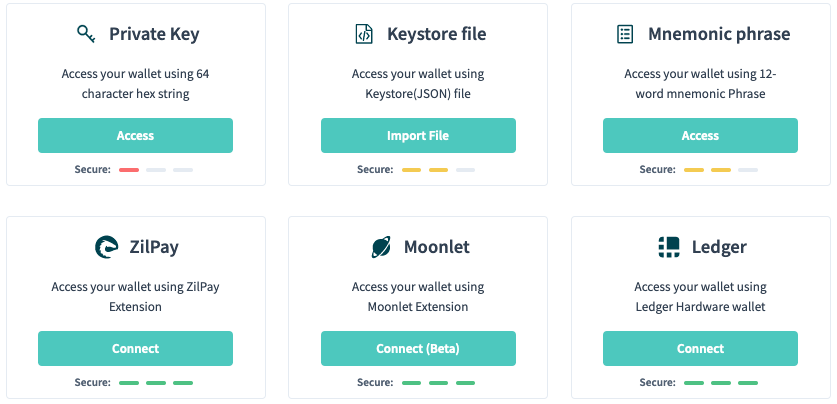
Open Your Ledger ZIL Wallet with Zillet
(1) Before you begin, you will need to connect your Ledger Nano S to your computer using a USB cable. Then, unlock the device and open the Zilliqa app before continuing.
**(2) **Head over to the Zillet web app, and select the Ledger login option on the bottom right.
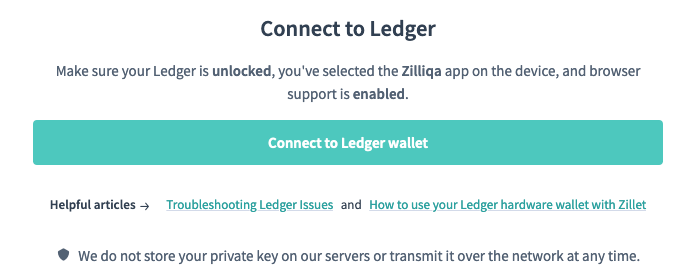
(3) Click the ‘Connect to Ledger wallet’ button when available.
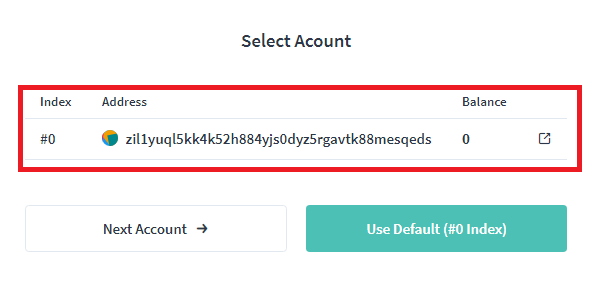
(4) Zillet will then load up your device and ask you to select an index key. Select whichever index you want by scrolling through the list of options with the ‘Next Account’ button, and then click the green button to select the address you wish to use with Zillet.
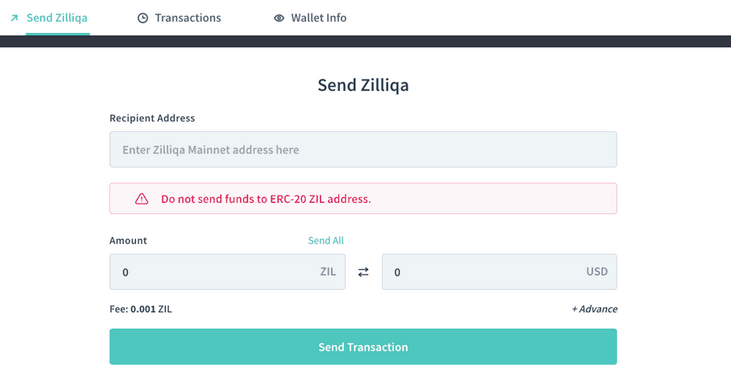
**(5) **Zillet will then load your wallet from your device. You will then be able to send payments and check your recent transaction history. Note that you will need your Ledger device on-hand to authorize payments.
For more information about using the Ledger Nano hardware wallet with third-party wallets for each unique cryptocurrency, click here.