Setting up your own OpenVPN server and portable router.
Hi, Steemers!
I’d like to present you this little tutorial on how to setup your own VPN-server and a portable Wi-Fi router so that you can access the Internet without being spied on by your government. This will also allow you to to access resources on the net which might be otherwise blocked in your country.
This tutorial is aimed for people with basic/intermediate knowledge on computers/networking, since all you seasoned hackers out there are probably already using your own VPNs ;-)
So, what we’re gonna do is this:
- Setup a virtual machine in the cloud. We’ll use this virtual machine to run a special piece of software (so called VPN-server) which we’re gonna be connecting our portable Wi-Fi router to.
- Setup our Wi-Fi router to connect to our VPN-server which will provide us with an encrypted access to the Internet.
Those of you who are familiar with VPNs might ask why would we want to setup a Wi-Fi router instead of connecting your desktop computer directly to the VPN-server. There are several reasons why we want to do this:
- Once you have your router set up and running you can have every other computer, notebook/laptop, tablet pc, smartphone in your house use this encrypted channel without any doing any additional settings and tweaking.
- You can take your router with you as you travel and have an encrypted access to the Internet which you can share with others.
- Connect to a public Wi-Fi network through your router will give you a secure access to the Internet.
This is what you’re gonna need for this tutorial:
- VISA/MasterCard/PayPal/Other payment method. Since we’re going to run our own VPN-server we gonna need to «rent» a virtual machine from some cloud-provider. There are many providers out there, for example Amazon/AWS, Microsoft/Azure, etc. Every one has it’s own pros and cons. In this tutorial I’m gonna be using Digital Ocean since I’ve found it to be the most user-friendly and with a pretty low fees. The virtual machine for this tutorial comes with a price tag of $5/month which I think should be acceptable for the most of the readers.
- GL-AR150 mini Wi-Fi router. Most of you are already using a Wi-Fi router, so why bother with another one you may ask? There are several reasons:
- We need a router which runs a special version of firmware, namely OpenWRT.
- We want a small portable router which we can take with us everywhere we go.
Basic knowledge on how to work with a command line.
Let’s move on. First we need to create an account with some cloud service provider. In this tutorial I’m gonna be using DigitalOcean as an example. You may wish to choose another provider and the details on how to setup a basic virtual machine may vary the main principles stay the same:
- You register an account.
- You’re given a web interface to manage your virtual machines.
- Once your virtual machine is up and running you can access it via SSH-connection or using a special web-based console.
So, let’s create an account.
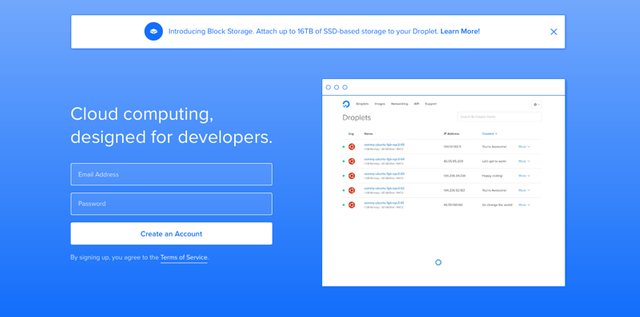
- Go to https://www.digitalocean.com. On the main page you’ll see see a registration form.
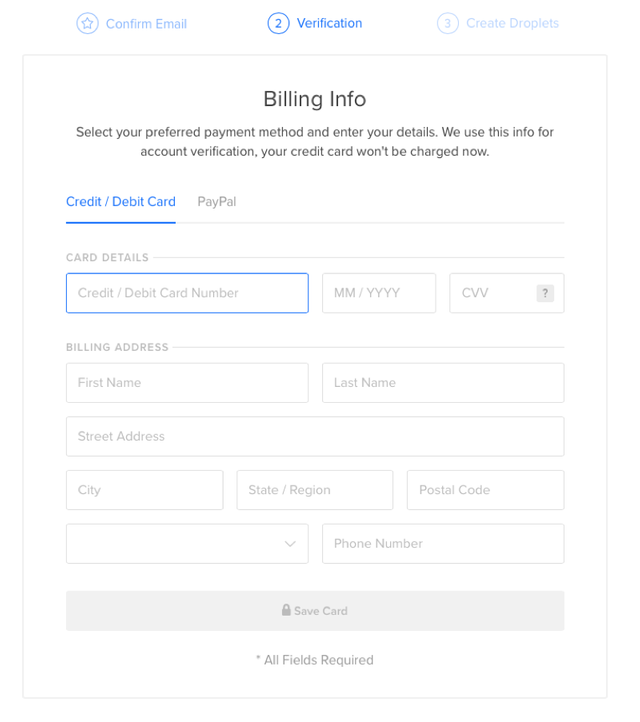
Enter your e-mail address. Choose some strong password, then press «Create an Account» button. A standard e-mail with a verification link is gonna be sent to your mailbox. You should click the link to confirm your registration. After that you’re gonna be presented with a billing info form.
You may choose to fill in your credit/debet card information or use an existing PayPal account.
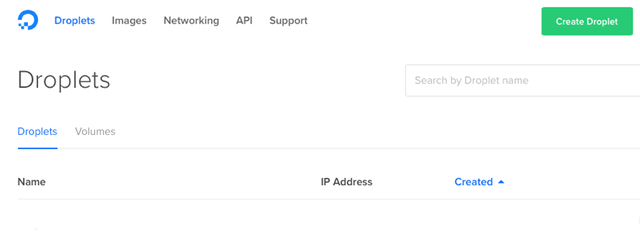
Once you’ve done with that I recommend you to log out and login in again to make sure that your account has been created without errors. The main menu contains several sections: Droplets, Images, Networking, API and Support. We are interested in so called Droplets. This is the term DigitalOcean uses to refer to a virtual machine instance. On the top right corner there’s a convinient «Create Droplet» button which lets us create a virtual machine, click it. On the next page we are gonna proceed with the setup:
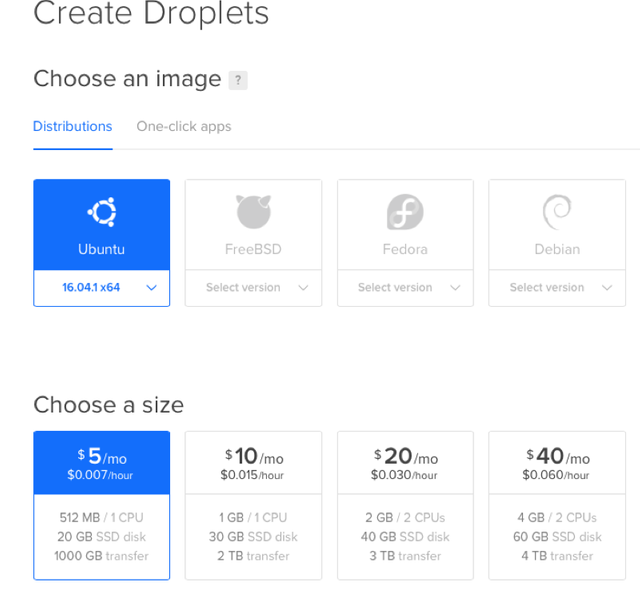
- First step is to choose which operating system to run inside the droplet. Choose «Ubuntu 16.04.1 x64». Other Linux distributions may work as well, but this tutorial is based on Ubuntu.
- Second step is to choose your virtual machine hardware configuration. Since we are going to use our droplet only for VPN-server the bare minimum configuration of 512 Mb / 1 CPU / 20Gb should be enough. This configuration comes with a $5/month fee.
- Next step is «Add block storage», which we don’t need and and can be skipped.
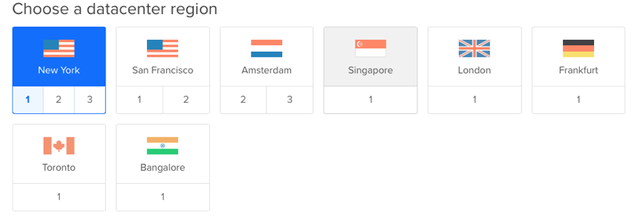
- Next we choose a datacenter region. You should probably select the one which is closest to your geographical location. Choosing a particular region may be useful if you want to access some services which are restricted to some given region. For example if you wish to watch some video-service which is not available in your country.
You may skip the next section: «Select additional options».
- Next step is «Add your SSH keys». There’re two ways which you can access your virtual machine:
a) You can you a web-based console provided by DigitalOcean.
b) By using SSH-connection.
Those of you who know what an ssh-connection is may add your public key here.
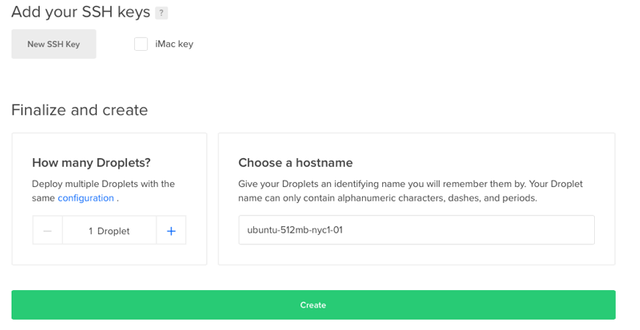
- Final step is to specify how many droplets we want to create, which is «1 Droplet» and give it a hostname, for example «test».
Now once we’ve configured our virtual machine let’s create it by pressing «Create» button.
It will take 10 to 15 seconds to create your first droplet and you should receive an e-mail with IP-address, login and password information for virtual machine.
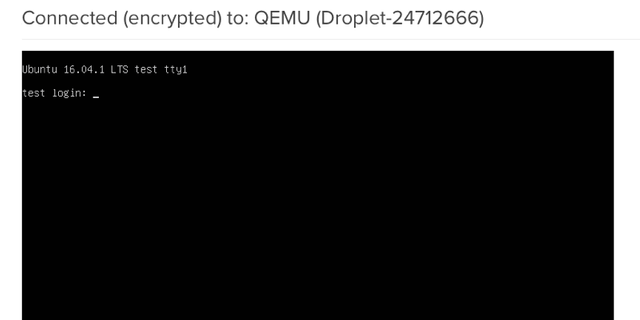
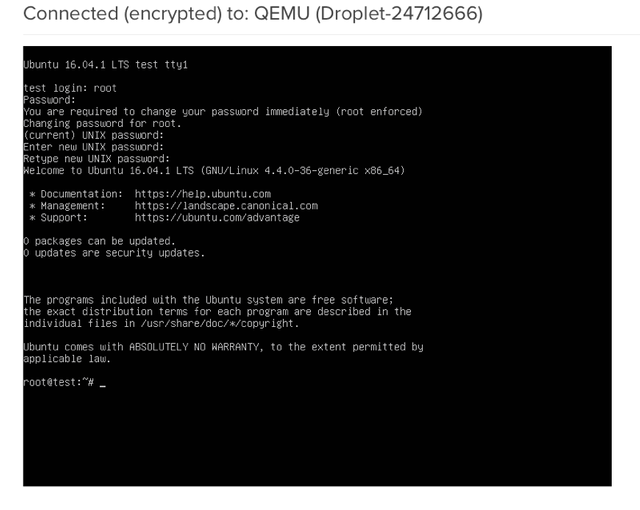
We’re gonna connect to our droplet via web-console. Enter login/password information which was sent to you in the e-mail. After that the system will ask you to change your password. One more time enter your current password and then provide the system with your own new password. Write this password down and don’t loose it. Note that the system will refuse to accept a weak password.
Once you’ve changed your password you should be logged in to your virtual machine. Congratulations, you have a running Linux server under your control. Our next step is to install and configure OpenVPN-server software.
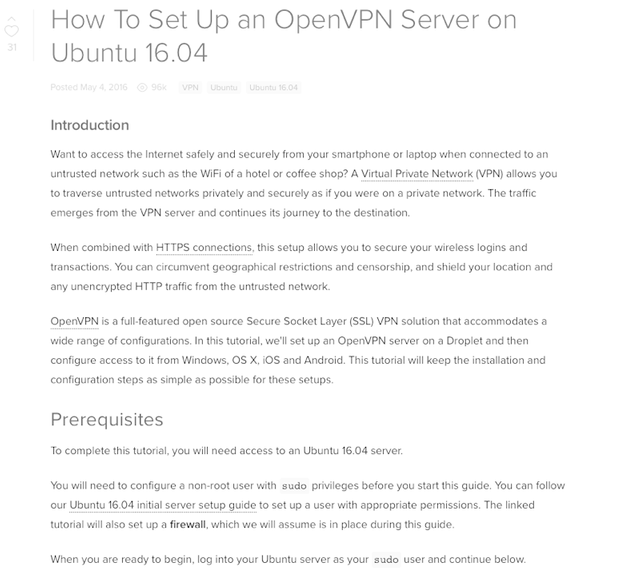
2. Setting up OpenVPN server software is the most difficult step. If you’re not familiar with command line you should probably ask someone more experienced to help you. On the other hand, keep in mind that you’re working with a virtual machine which can be safely destroyed and recreated again as many times as you wish, so there should be no worries if you «break» something. The process of configuring OpenVPN server is described in a very well written and detailed HOWTO by DigitalOcean. Here’s the link: https://www.digitalocean.com/community/tutorials/how-to-set-up-an-openvpn-server-on-ubuntu-16-04
Carefully follow the instructions given in the HOWTO and you should be able to setup everything needed to run OpenVPN-server. I’ve had my own server configured according to that HOWTO and found everything to working.
3. If you have successfully completed OpenVPN installation step it’s time to setup your router.
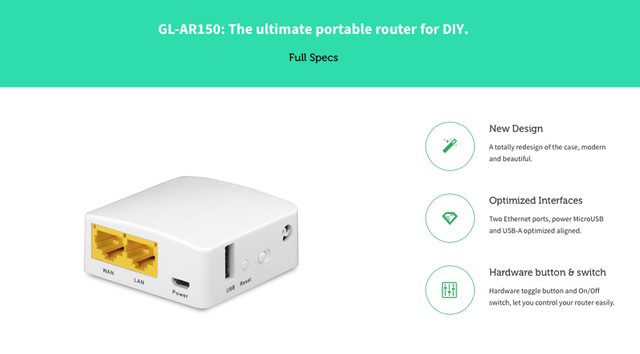
The router I’m referring here is GL-AR150 (http://www.gl-inet.com/ar150/). Why exactly this router?
As I mentioned before, this model is running an open-source firmware called OpenWRT which lets us install additional software on the router and it’s got tremendous numbers of settings which we can tweak via built-in web interface. The full specs of this router:
- CPU: Atheros 9331 Soc 400M
- ROM: 16Mb
- RAM: 64Mb
- Interface: 1Wan, 1LAN, 1USB2.0, 1 MicroUSB
- WAN/LAN: 10/100Mbps
- Wireless: 802.11b/g/n 150Mbps
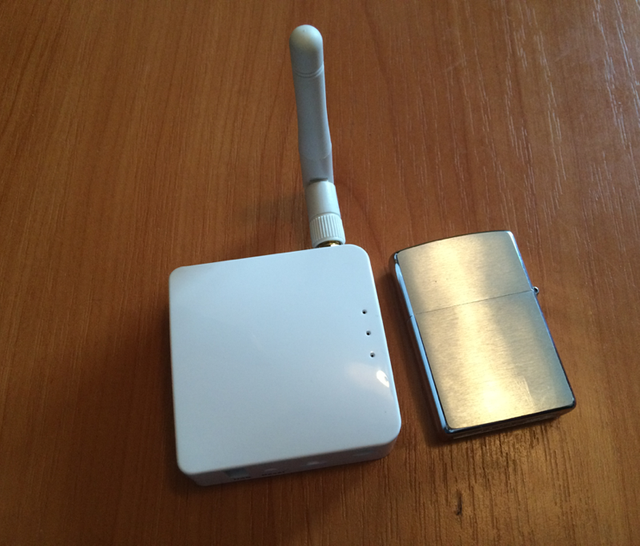
The router is very compact, roughly the size of a Zippo lighter:
- Size: 58x58x25mm
- Weight: 40g
More details can be found here: http://www.gl-inet.com/ar-specifications/
It comes with a very cheap price tag of: $25 (internal antenna) or $27 (external antenna).
There’re several places where you can by this little devices:
- http://www.gl-inet.com/shop/
- http://stores.ebay.com/1-GL-iNet
- https://www.amazon.com/s?marketplaceID=ATVPDKIKX0DER&me=A364119SDJA4QG&merchant=A364119SDJA4QG&redirect=true
- http://www.aliexpress.com/wholesale?catId=0&initiative_id=SB_20160905000717&SearchText=gl-ar150
4. Configuring router to work with our OpenVPN server.
Connect your router with Ethernet cable (using WAN port) and power it up with an USB cable. The router comes with default wireless settings which are listed at the bottom of the router itself, mine came with these settings:
- IP: 192.168.8.1
- SSID: GL-AR150-48c
- Key: goodlife
Key is actually your wireless password.
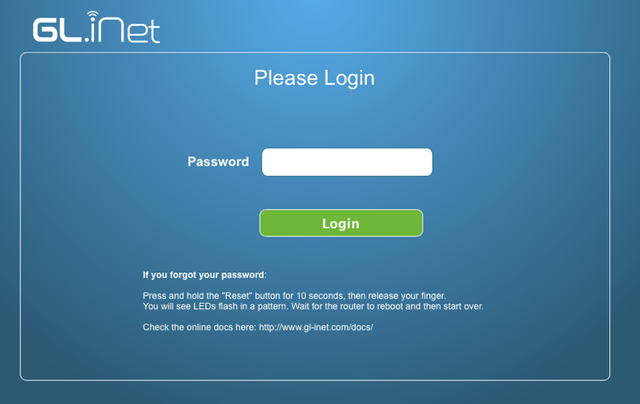
Using your desktop computer connect to your router’s Wi-Fi network using provided SSID and Key. Once connected go to your web browser enter this url: http://192.168.8.1/
This should present you with a login form which gives access to different router settings.
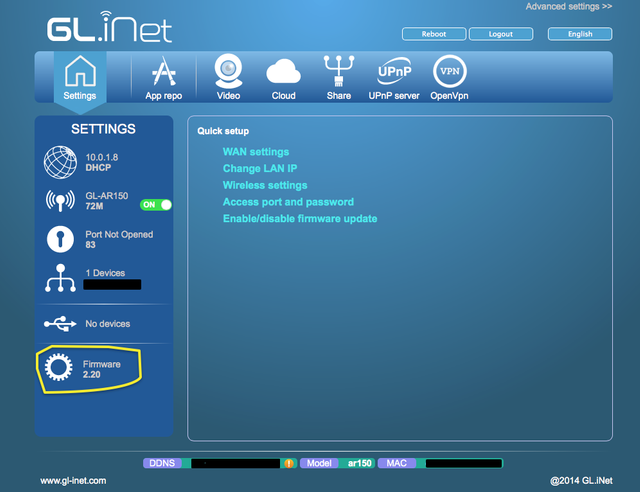
The first thing you want to do once logged to your router is update it’s firmware. At the bottom left of the main menu click «Firmware» option. The update process should be pretty is straightforward - the router downloads new firmware, installs it reboots.
Next things you need to change is:
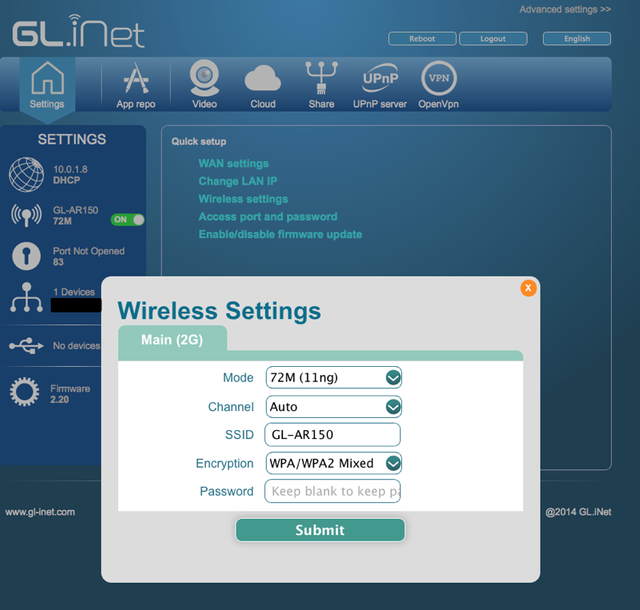
Wi-Fi settings: the name of your wireless network and the password
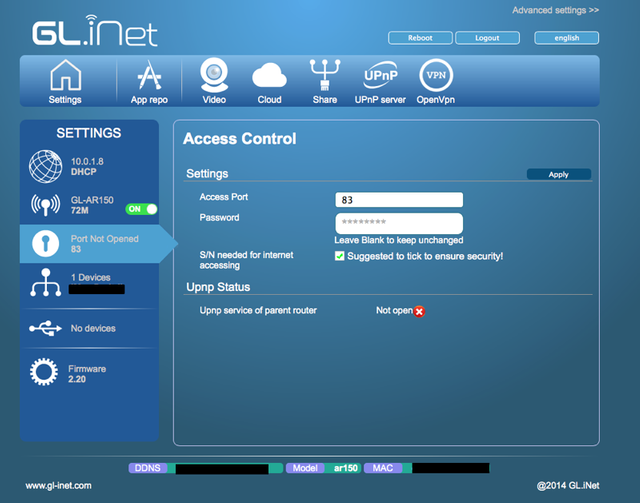
Your router’s password, which is quite important.
Next step is to configure our router to work with OpenVPN server. If you have successfully configured your virtual machine you should have a OpenVPN client configuration file handy. Just to make sure: go to this link: https://www.digitalocean.com/community/tutorials/how-to-set-up-an-openvpn-server-on-ubuntu-16-04 and revisit section «Transferring Configuration to Client Devices»
You should have file client1.ovpn downloaded to your desktop computer by now.
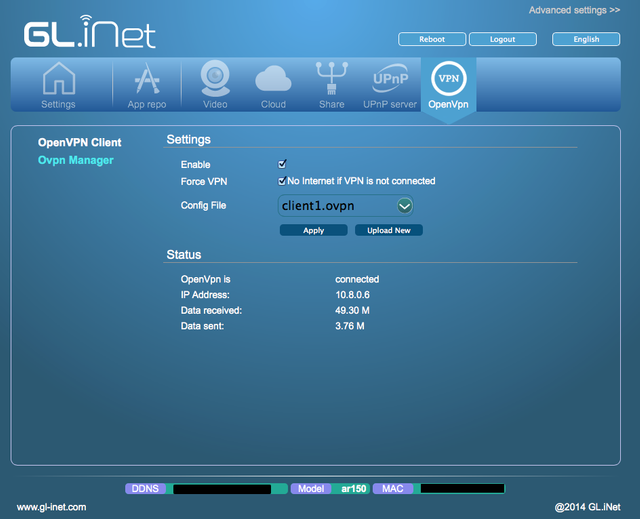
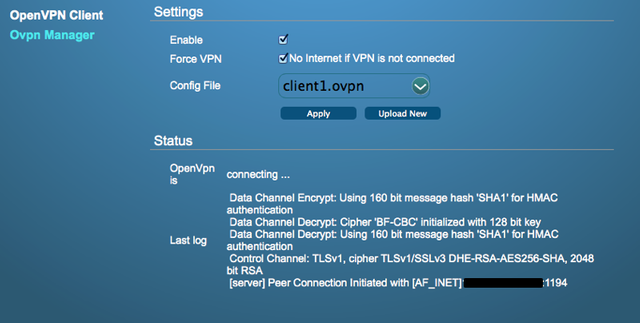
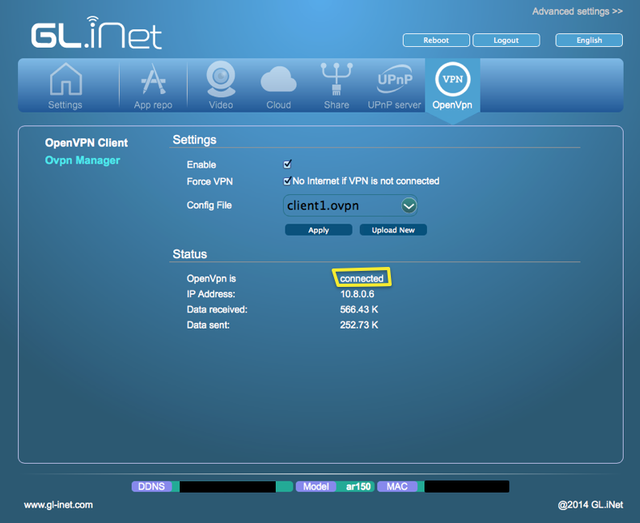
On your router’s configuration screen select «OpenVPN» tab and drag-n-drop client1.ovpn file there. To enable VPN connection select «Enable» checkbox. Another useful setting is «Force VPN» which will make your router always use VPN. Press «Apply» button this should initiate connection to your server.
Some debug messages should start appearing under «Status» section. The connection itself should take 5-10 seconds and if everything is ok you should see «OpenVPN is connected» status message.
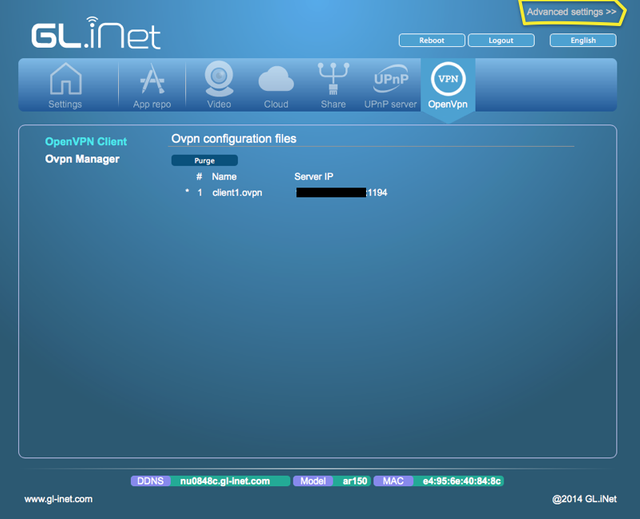
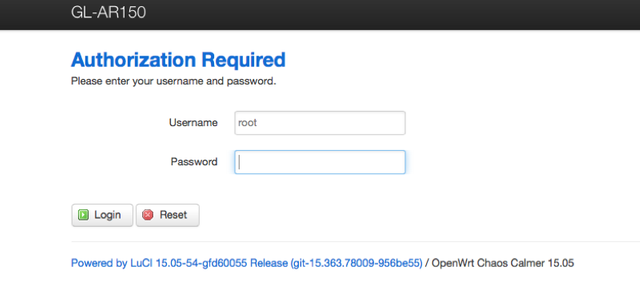
We are almost done. The last step is to configure our router to use external DNS servers. To do so locate «Advanced settings >> » menu item at the top right corner of your screen and click it. This should redirect you to a login form where you should enter your router password once again.
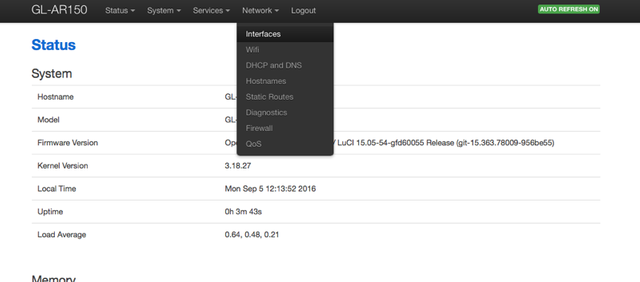
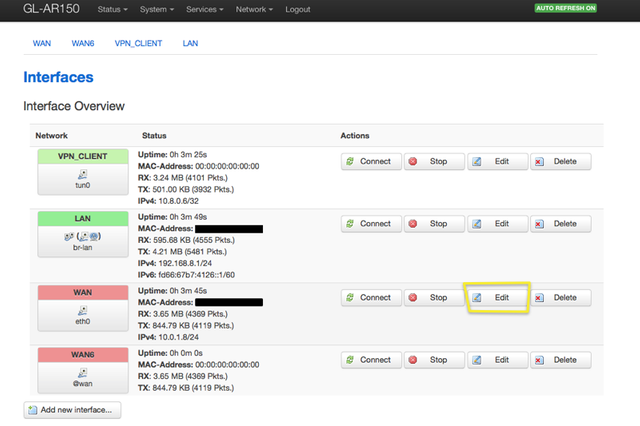
Once logged in, locate «Network» item at the top menu and select «Interfaces» submenu which should present you with an overview of all active network interfaces on your router.
Select the one with the name «WAN» and press «Edit» button.
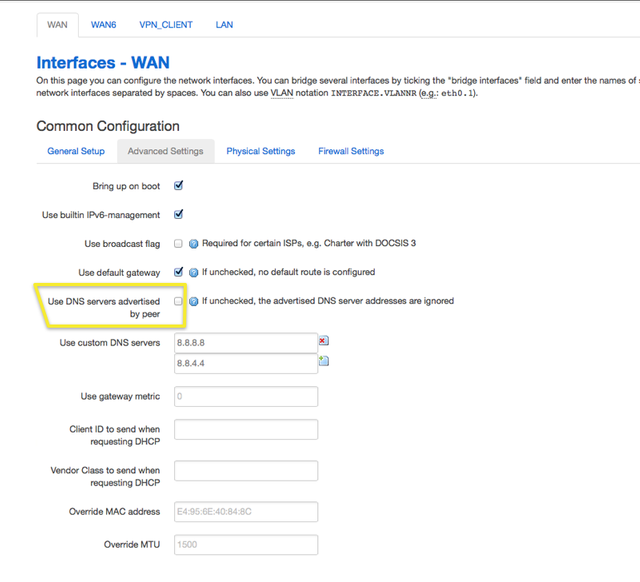
Navigate to «Advanced settings» tab and uncheck «Use DNS servers advertised by peer» checkbox. This should enable textfield named «Use custom DNS servers». Enter «8.8.8.8» in the textfield and add another textfield by pressing «+» icon. Enter «8.8.4.4» in the textfield. These are the IP addresses of Google’s DNS servers, but you may use any DNS server. The best option would be to your your own DNS server, but that is a topic on itself. For now we’ll just stick with those DNS servers. Press «Save and Apply» button and reboot your router. This should complete the configuration precess.
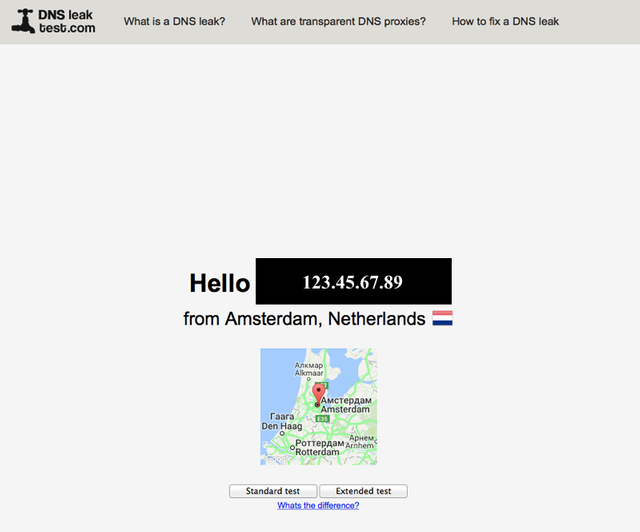
Once your router reboots, login to it and make sure OpenVPN status is connected. Now it’s time to test our connection. Using your web browser navigate to https://www.dnsleaktest.com. This is a very useful site which shows information about your IP address and DNS servers which are being used by your OS. On the main page you should see the IP address of your OpenVPN server and the country where that server is located, which should, obviously be different from your real IP address and your country.
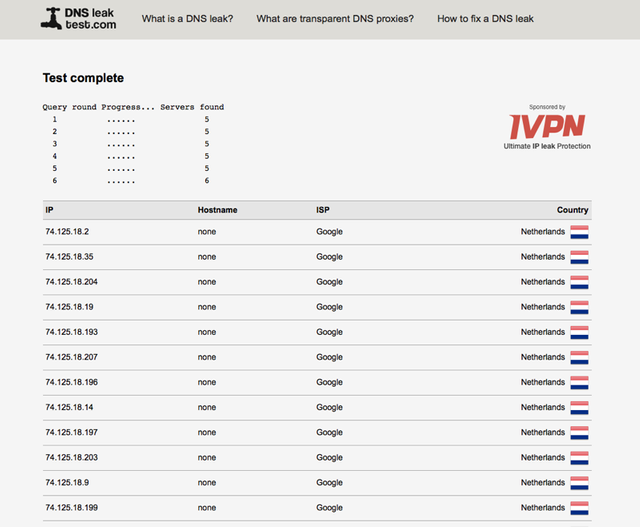
The very last step is to test our DNS servers. Press «Extended test» button and you should be redirected to the next page which should show you a bunch of IP adresses. The «ISP» column of the table should read «Google», which means everything is ok.
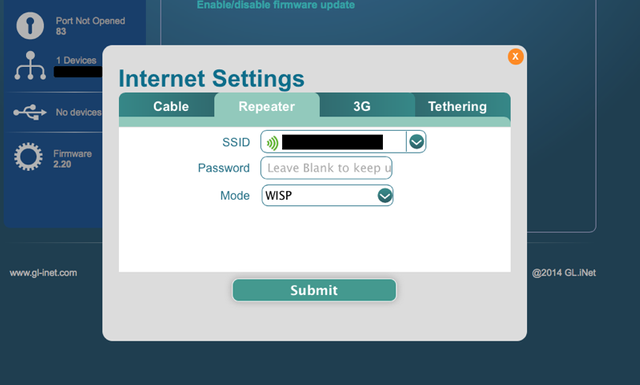
From now on you should be able to use your VPN connection on other devices, share it with your friends, and take your router with you as you travel. Your router can be connected to another Wi-Fi network (for example a public Wi-Fi network in some internet cafe) and provide you with a secure encrypted VPN channel. This mode is called «Repeater» or bridged mode. If you wish to use it login to your browser and on the main screen click «Quick settings» -> «WAN settings» menu item.
A dialog box should pop up. Under «Repeater» tab select a public Wi-Fi network you wish to connect to and enter it’s password.
WARNING: according to router’s documentation if you enter a wrong password you may end up being unable to login to your router and would be forced to reset the router to default settings. So be careful. Your router has lots of other interesting features, for example, you can connect to Internet using an USB LTE modem plugged into the router. You may find a lot of additional information on official forums at this link: http://www.gl-inet.com/forums/.
I hope you’ve found this little HOWTO useful. See you next time :)

Congratulations @dizzus! You received a personal award!
You can view your badges on your Steem Board and compare to others on the Steem Ranking
Vote for @Steemitboard as a witness to get one more award and increased upvotes!