Tutorial: How to create a Linux GeeXbox USB bootable thumbdrive in Windows

Hi Anidel here for another useful and simple tutorial. Today I am going to show you how to create a bootable GeeXbox thumbdrive. I will try to keep the tutorial as simple as possible so that even newbies can easily follow the instructions.
Introduction
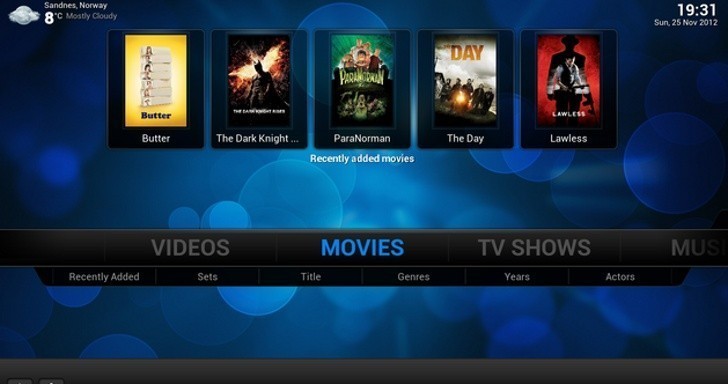
GeeXboX is a free and open source Live USB/Live CD based Linux distribution providing an HTPC software suite for personal computers and ARM-devices that since version 2.0 comes with a pre-configured version of Kodi media center as its media player and GUI.
Requirement
- GeeXbox ISO image
- Rufus USB utility program
- Empty USB drive atleast 2GB
- Web browser with internet connection
- Computer with Dual Core processor with at least 2GB of RAM
- Windows OS
Procedure
The first thing we should do is download all necessary files that we need to complete the procedure. We need to files here. First is the ISO image of GeeXbox and the RUFUS USB utility. we can download the ISO image here and we can download rufus here.

Once we are done downloading we then locate the files to start working with them. The file names we are looking for are the following: "geexbox-3.1-x86_64.iso" and "rufus-2.18p.exe". We can easily find the downloads by using this keyboard shortcut keys in when using the chrome browser "CTRL+J" this wll bring us to the download page of chrome where we can see the recently downloaded files.

Now that we have the files we can start making the USB bootable drive. Please insert a blank USB drive to the computer. If the USB drive you are using is with files please make sure that it is backed up. When we start copying the ISO image to the USB drive all of its contents will be destroyed.

Now we will open the RUFUS USB utility program. The link that I shared is the portable version which does not require any installation. Just double click on it and run it. Once you open it setup it up as shown in the screenshot below. Make sure that you select the ISO image "geexbox-3.1-x86_64.iso". Click the "open" button to proceed to the next step.

After clicking "open" button it will set the image source to "geexbox-3.1-x86_64.iso" make sure that all the ticker box and the other settings are the same as shown below. Once you are sure that that settings are okay click on "Start" button to start the image copying process to the USB.

Once clicked the next page will appear. Just follow the instructions I have written in the Screenshot below.

After clicking on the "ok" button the program is now primed to copy the imaged to the USB. As a last reminder a pop up window will appear reminding you that the USB will be totally be erased. Just click "ok" button to continue.

Wait until you see a totally filled up green progress bar. Once this is filled up the process is done. You may close RUFUS by clicking on the "close" button.

We check in windows explorer if indeed the image was copied.

To test your USB bootable drive just plug it in a computer and have the computer boot from USB.


Success we have created a Bootable GeeXbox USB thumbdrive!

Posted on Utopian.io - Rewarding Open Source Contributors
Great work @ankarlie, how you upgraded me on my IT knowledge this morning thanks a lot
Thank for your appreciation of my work. Although this tutorial was not approve by uptopian due to requirements comments like this gives me a lot off boost to keep on creating it.
Very detailed
Thanks for visiting my blog sis :)
Your contribution cannot be approved because it does not follow the Utopian Rules.
You can contact us on Discord.
[utopian-moderator]
Oh well it is okay you win some and you lose some anyway i will just post it as a regular tutorial. Thanks for the explanation. @manishmike10 clarification are all installation process considered easy? because it they are there is no point spending hours makng tutorials maybe spotting bugs and making suggestions is much better as it does not take as much effort and technical know how.
Congratulations! This post has been upvoted from the communal account, @minnowsupport, by ankarlie from the Minnow Support Project. It's a witness project run by aggroed, ausbitbank, teamsteem, theprophet0, someguy123, neoxian, followbtcnews/crimsonclad, and netuoso. The goal is to help Steemit grow by supporting Minnows and creating a social network. Please find us in the Peace, Abundance, and Liberty Network (PALnet) Discord Channel. It's a completely public and open space to all members of the Steemit community who voluntarily choose to be there.
If you would like to delegate to the Minnow Support Project you can do so by clicking on the following links: 50SP, 100SP, 250SP, 500SP, 1000SP, 5000SP. Be sure to leave at least 50SP undelegated on your account.
This post has received a 0.03 % upvote from @drotto thanks to: @banjo.