Tutorial Instalasi Jaringan Nirkabel Menggunakan Cisco Packet Tracer -- Wireless Network Installation Tutorial Using Cisco Packet Tracer
[IND]
**A. Langkah –Langkah Melakukan Simulasi Instalasi Jaringan Nirkabel Di PT.ABC Menggunakan Aplikasi Cisco Packet Tracer **
1.) ALAT DAN BAHAN
PC SERVER 1
ROUTER 1
HUB 3
ACSES POINT 9
PC CLIENT 10
KABE STRAIGHT & CROSS
2.) Memasukkan alat dan bahan ke dalam frame yang berrwarna putih
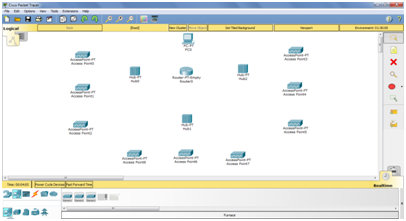
3.) Menghubungkan pc server dengan router menggunakan kabel cross >> menghubungkan router dengan hub menggunakan kabel straight >> menghubungkan hub dengan acses point menggunakan kabel straight.
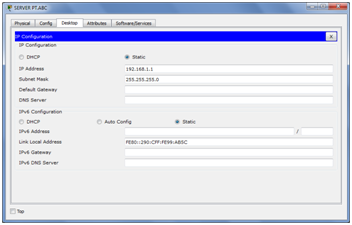
4.) Mengkonfigurasi IP address dan subnetmask PC server
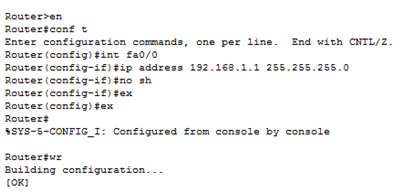
5.) Membuka router >> menambahkan 2 ethernet lagi pada router hingga menjadi 4 ethernet >>Mengkonfigurasi router Ethernet 0/0,1/0,2/0 dan 3/0 menggunakan CLI dengan perintah seperti di bawah ini:
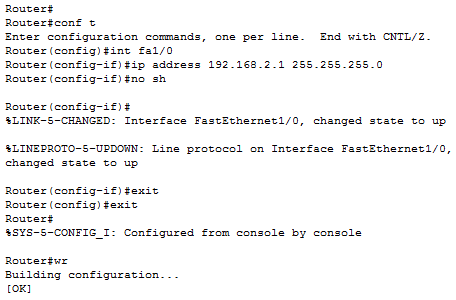
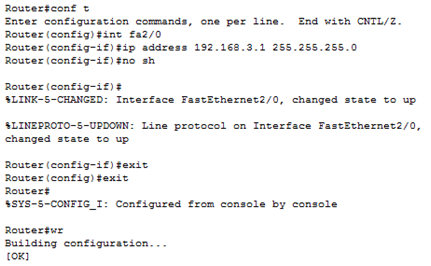
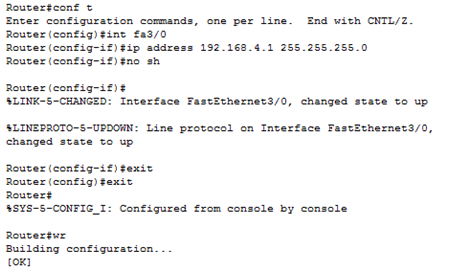
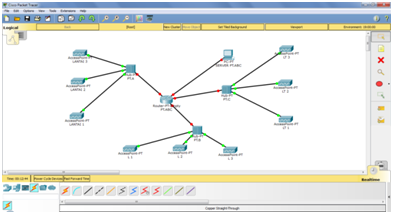
6.) Hasil setelah mengkonfigurasi router ,PC server,hub dan acses point saling terhubung
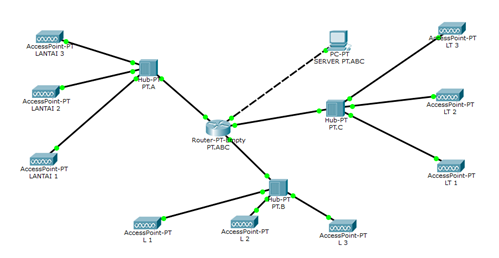
7.) Menambahkan pc client dan mengkoneksikan ke setiap acses point
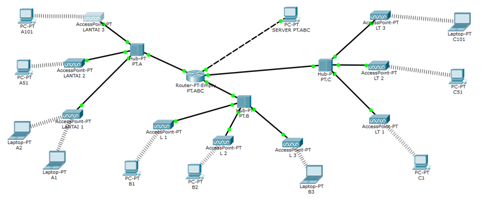
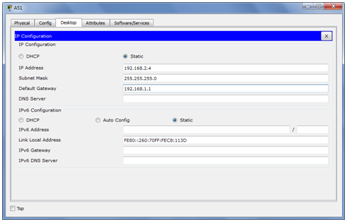
8.) Mengkonfigurasi semua pc client dengan ip static (Static adalah memberikan ip addres secara manual pada client )
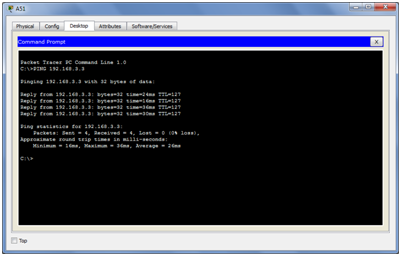
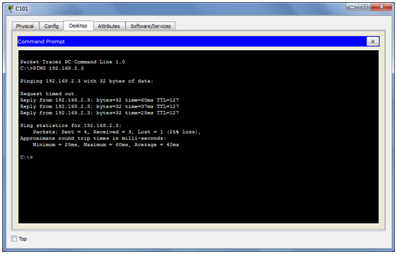
9.) Test ping antara pc client sesama pc client dan pc client dengan server dan reply
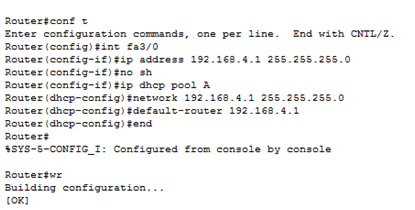
10.) Mengkonfigurasi router secara DHCP dengan perintah seperti di bawah ini (DHCP adalah memberikan ip address secara otomatis oleh server pada seluruh client yang terhubung kedalam server tersebut)
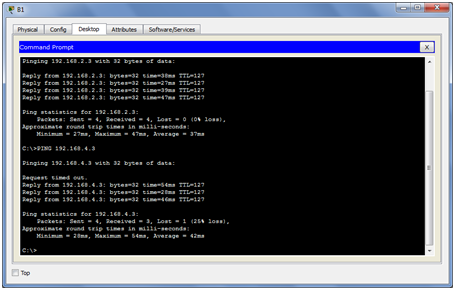
11.) Test ping
[ENG]
A. Step -Step Performing Wireless Network Installation Simulation at PT.ABC Using Cisco Packet Tracer Application
1.) TOOLS AND MATERIALS
PC SERVER 1
ROUTER 1
HUB 3
ACSES POINT 9
PC CLIENT 10
CABLE STRAIGHT & CROSS
2.) Inserting tools and materials into a white frame

3.) Connecting pc server with router using cross cable >> connect router with hub using straight cable >> connect hub with acses point using straight cable.

4.) Configure the IP address and subnetmask of the server PC

5.) Opening router >> adding 2 more ethernet on router until become 4 ethernet >> Configuring Ethernet router 0 / 0,1 / 0,2 / 0 and 3/0 using CLI with command like below:


6.) Results after configuring router, PC server, hub and acses point are connected

7.) Adding the pc client and connecting to each acses point

8.) Configure all pc clients with static ip (Static is giving ip address manually to the client)

9.) Test ping between pc client fellow client pc and pc client with server and reply


10.) Configure the router in DHCP with the command as below (DHCP is to give ip address automatically by server on all clients connected to the server)

11.) Test ping

Sumber : Muhammad Zulkhairi
Posted on Utopian.io - Rewarding Open Source Contributors
Your contribution cannot be approved because it does not follow the Utopian Rules, and is considered as spam.
You can contact us on Discord.
[utopian-moderator]