[Tutorial]Ionic App Development : Root components and navigation.

Repository: Ionic App Repository Github
Software Requirements:
Visual Studio Code(Or any preferred code editor)
Chrome(Or any preferred browser)
What you will learn:
In this tutorial you would learn how to live code a real ionic application with practical examples including these major concepts
- Understanding and setting ionic root components
- Navigating through pages while modifying the root components.
- Exploiting unique events available with the ionic platform.
Difficulty: Intermediate
Tutorial
In this tutorial we'll be dealing with a major and essential part of ionic which would help create better ionic applications with a better UI. Hence, we would be covering root components and how to use them.
First things first,
What are root components: To understand what root components are, you would need to understand how navigating between pages works. Pages in ionic are opened on a stack. Meaning that when you navigate to a new page from the root it is presented to overlay the root component. In simpler terms, it is like putting pieces of paper on each other and forming a heap of papers. When we navigate backwards however, it's like removing a piece of paper from the heap and moving to the page that comes before the present page.
Let's move to setting the root component. If not stated earlier, whenever an ionic App is loaded, it is loaded from the index.html file which is the entry point for our app.
index.html

<!DOCTYPE html>
<html lang="en" dir="ltr">
<head>
  <meta charset="UTF-8">
  <title>Ionic App</title>
  <meta name="viewport" content="viewport-fit=cover, width=device-width, initial-scale=1.0, minimum-scale=1.0, maximum-scale=1.0, user-scalable=no">
  <meta name="format-detection" content="telephone=no">
  <meta name="msapplication-tap-highlight" content="no">

  <link rel="icon" type="image/x-icon" href="assets/icon/favicon.ico">
  <link rel="manifest" href="manifest.json">
  <meta name="theme-color" content="#4e8ef7">
  <style rel="stylesheet" href="app/app.scss"></style>

  (html comment removed:  add to homescreen for ios )
  <meta name="apple-mobile-web-app-capable" content="yes">
  <meta name="apple-mobile-web-app-status-bar-style" content="black">

  (html comment removed:  cordova.js required for cordova apps (remove if not needed) )
  <script src="cordova.js"></script>

  (html comment removed:  un-comment this code to enable service worker
  <script>
    if ('serviceWorker' in navigator) {
      navigator.serviceWorker.register('service-worker.js')
        .then(() => console.log('service worker installed'))
        .catch(err => console.error('Error', err));
    }
  </script>)

  <link href="build/main.css" rel="stylesheet">

</head>
<body>

  (html comment removed:  Ionic's root component and where the app will load )
  <ion-app></ion-app>

  (html comment removed:  The polyfills js is generated during the build process )
  <script src="build/polyfills.js"></script>

  (html comment removed:  The vendor js is generated during the build process
       It contains all of the dependencies in node_modules )
  <script src="build/vendor.js"></script>

  (html comment removed:  The main bundle js is generated during the build process )
  <script src="build/main.js"></script>

</body>
</html>
This is a typical index.html file in any ionic project. From this file, all scripts needed to run are loaded and within the ion-app tag our app runs.
When a new app is run, the application which is basically a native application running in web view comes to the index.html file and from there loads the app within the ion-app tag. This tag leads the app to whatever root component has been set up. For our application the root component which is set by default is our tabs page.
Hence, this is what loads.
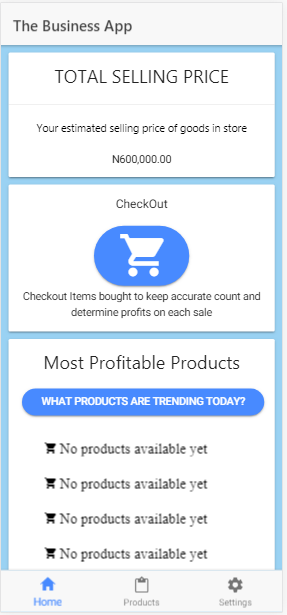.png)
The tabs page is a component which shows a simple view of many pages in a tabs format. Whenever you start up a new application using the tabs command which should look like this:
ionic start anapplication tabs
It would set the root component of the app to be the tabs page.
So the common question involving this is how to change the root component of an ionic application. To do this, head to the
src/app/app.component.ts
The file should look like this
import { Component } from '@angular/core';
import { Platform } from 'ionic-angular';
import { StatusBar } from '@ionic-native/status-bar';
import { SplashScreen } from '@ionic-native/splash-screen';

import { TabsPage } from '../pages/tabs/tabs';

@Component({
  templateUrl: 'app.html'
})
export class MyApp {
  rootPage:any = TabsPage;

  constructor(platform: Platform, statusBar: StatusBar, splashScreen: SplashScreen) {
    platform.ready().then(() => {
      // Okay, so the platform is ready and our plugins are available.
      // Here you can do any higher level native things you might need.
      statusBar.styleDefault();
      splashScreen.hide();
    });
  }
}
The point of interest is this line
rootPage:any = TabsPage;
This piece of code found within this file determines where ionic would choose to load the application as the root component within start up.
They are other ways to set the root component when the app has already loaded using preset functions.
With the navCtrl which is already loaded in each generated page. You could use that function as a triggered event for a click or any other in-page interaction.
To do this you could write:
this.navCtrl.setRoot(Homepage)
//This page has to be imported to the ts file that's it's being used in
this.navCtrl.popToRoot()
//Use this to go to the root page of your stack which should be the home page set above
The last thing we would be covering today is the set of unique functions triggered on special occasions. They are very similar if not exact to Angular commands such as ngOnInit. Which is called by angular whenever a component loads.
Examples of this unique functions in ionic are
-IonViewDidLoad
-IonViewWillLoad
-IonViewWillDismiss
-IonViewWillEnter
This functions are triggered during this lifestyle continuously for whatever page they are in and can be very useful if exploited properly.
For example if you would want a pages data to be called from a server everytime a page is loaded ionViewDidLoadwill be the most appropriate option. Using life cycle events are essential for better ionic programming an as we go along you'll see why more clearly.
Hope this tutorial helps
You can find my code in Github
Thank you for your contribution @yalzeee.
After analyzing your contribution we suggest the following points below:
Put more images of the application or even a small video with the interaction with the application.
Your tutorial is well explained and simple to understand.
Good job, we are waiting for your new tutorials.
Your contribution has been evaluated according to Utopian policies and guidelines, as well as a predefined set of questions pertaining to the category.
To view those questions and the relevant answers related to your post, click here.
Need help? Write a ticket on https://support.utopian.io/.
Chat with us on Discord.
[utopian-moderator]
Thank you for your review, @portugalcoin!
So far this week you've reviewed 7 contributions. Keep up the good work!
Hello! I find your post valuable for the wafrica community! Thanks for the great post! We encourage and support quality contents and projects from the West African region.
Do you have a suggestion, concern or want to appear as a guest author on WAfrica, join our discord server and discuss with a member of our curation team.
Don't forget to join us every Sunday by 20:30GMT for our Sunday WAFRO party on our discord channel. Thank you.
Hi @yalzeee!
Your post was upvoted by @steem-ua, new Steem dApp, using UserAuthority for algorithmic post curation!
Your post is eligible for our upvote, thanks to our collaboration with @utopian-io!
Feel free to join our @steem-ua Discord server
Hey, @yalzeee!
Thanks for contributing on Utopian.
We’re already looking forward to your next contribution!
Get higher incentives and support Utopian.io!
Simply set @utopian.pay as a 5% (or higher) payout beneficiary on your contribution post (via SteemPlus or Steeditor).
Want to chat? Join us on Discord https://discord.gg/h52nFrV.
Vote for Utopian Witness!