Effects | Smoke Effect | GIMP #2
Effects | Smoke Effect | GIMP #2
(Image Source)
In this part, I will be telling how you can create smoke effect to make your image look cool. One of the things you'll be needing is a basic understanding of GIMP for which I am working on introduction series. I just wanted to show what you can do with GIMP, you can also follow me and implant this effect in your own image.
To follow along with this tutorial you will be needing set of smoke brushes. To install downloaded brush you can follow these steps.
- Go to the place where you have installed the GIMP. Go to the directories mentioned below.
GIMP 2 > share > gimp > 2.0 > brushes - Paste the Brushes(.abr) file and restart the GIMP. You're now ready to proceed.
Smoke Effect
Step 1
First of all create new document. You can do this by going to drop down menu file then click "create". You can use the settings I am using, if you are experienced with this then choose whatever you like. These are the settings I am using.
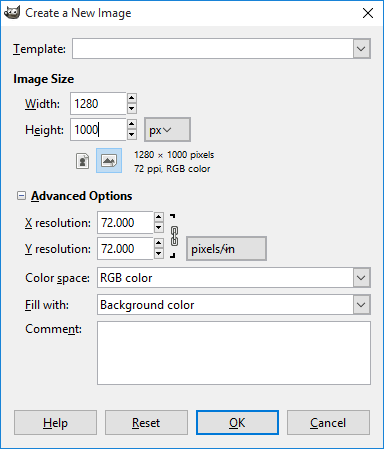
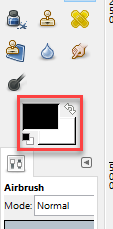
After changing the settings click "OK" and by doing this new document will be opened. Make sure your background color is white and foreground color is white like this.
Step 2
Fill the white document with black color. You can do this by using Bucket Fill tool, like this
Step 3
Now what we need to do is import image. You can do this by going into file's drop down menu and clicking open. Then select the image you want then click open.
Step 4
After opening the image, add it to the document we created. You can do this by dragging the image tab to the previous document we created, like this.
Step 5
Resize the image you are using. This can be done using Resize Tool.
Step 6
Now we need to desaturate the image. We can do this by going into drop down menu of colors and then clicking desaturating. We are gonna be using Luminosity as it gives us great effect which we'll be needing.
Step 7
Now we need to create a new layer and add gradient with gradient tool. This new layer with gradient is gonna act like background for the effect.
Step 8
Turn the opacity of the the layer to down to the 80%, enough to see the face of the girl.
Step 9
Now we are entering the main parts. First of all select the layer and add layer mask. Layer mask will help you show image at that parts where brush is added, you'll be using layer mask a lot so it's better to understanding of it. After making layer mask select a brush which you think is most suitable for that image and use it. Right now when you use brush it will be unclear, it is because of opacity we set down earlier in the post.
Step 10
Once you have done the using of brush select the opacity and set it back to 100% and boom! there you have it. The smoke effect will be done and you'll have awesome smoke could, ready to impress friends with your editing skills!

Hope you have learned something new in this part, stay tuned for the next one. Remember if you have any confusion state them in comments. I'll be more than happy to help.
Cya! Next Time
Posted on Utopian.io - Rewarding Open Source Contributors
Thank you for describing the post with the video, to explain them
Thank you for the contribution. It has been approved.
You can contact us on Discord.
[utopian-moderator]
Hey @umais I am @utopian-io. I have just upvoted you!
Achievements
Suggestions
Get Noticed!
Community-Driven Witness!
I am the first and only Steem Community-Driven Witness. Participate on Discord. Lets GROW TOGETHER!
Up-vote this comment to grow my power and help Open Source contributions like this one. Want to chat? Join me on Discord https://discord.gg/Pc8HG9x