Introduction Video And Animated GIF Light Trails For Utopian.io
Hello friends! this is my 5th contribution on utopian.io I in my past contribution I already made an GIF logo of utopian, this time i made an awesome and interested video full hd 1080p introduction light trails for utopian.io and GIF Animated introduction.

We take a look at how we can create some nice energy trails without any additional third-party plug-ins. We start off pretty simple, just one composition. One circle path, animate the path animation using Vegas, then we duplicate the layers and add turbulent displace and glow. With this comp we can now duplicate it LIKE 50 TIMES (at least) and then using the HUD TOOLKIT script we can easily randomly offset the layers and their transform properties.
Hopefully this will give you an idea of how create this effect
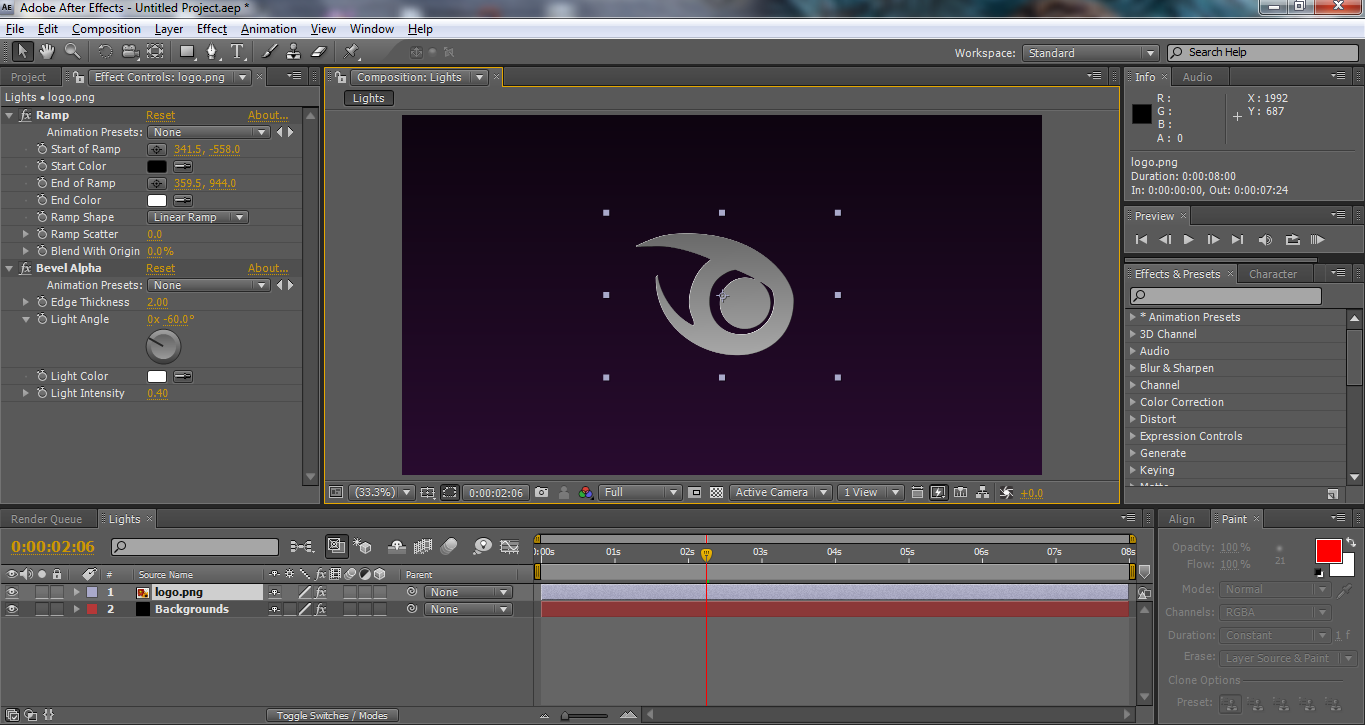
This is my workplace how i made this Introduction:
• I will make a new composition.

• Create a new background go to to (Layer > New) then click Solid put the name of your new backgrounds and click the Make Comp Size then click OK.

• Go to effects, choose Generate and click Ramp.

• Drop your logo into composition timeline go to effects, choose generate and click ramp. We can also add perspective and add bevel alpha.
Let see how can create sore of light trails.
• Let's make a new composition I set the value of withd to 1000px, height si 1000px and the duration is 02:00 seconds the compisition name is trails single and click Ok.

• Click a new Solid Layer double click the elipse to make a circle mask go to effect, choose generate and click vegas.

• If the fx vegas settings is open change the Blend Mode to stencil, change value of Segments to 1, make sure your Stroke is set on mask paths. Change the value of width to 3, make the Length to 0.500.

• Now we can animate that appearing to make a rotation and the disappear. Make the key frame of the rotation click the stop watch of the rotation and move the time indicator to the end of composition timeline and i set the key frame from -1.

• Move the time indicator in the beginning of timeline set the length to 0, move again the time indicator to the end of composition and set the value of length to 0. Highlights all key frame and press the F9 on your keyboard to eases all key frames.

• Select the rotation on your composition timeline, click the graph editor i will select my end point to be smoother and the beginning point. Select length click again the graph editor i move the smoother of the beginning and the end point.

• Click the white background on composition and hold CTRT+SHIFT and press C to pre-compose the layer. Go to effect, choose distort click the turbulent replace change the value of size to 12 and the value of amount is 25, click CTRL D to duplicate the layer. Set the value of a duplicate layer change the value of size to 6.0 and the amount is 265.0 and i can actually add matte the click simple choker and set the value of choke matte to -4.20 to increase the thicker. Go to effects, choose blur and sharpen and add the fast blur.

• Duplicate the original layer increase the value of amounth and the value of size. Click the original layer double click the stop watch of evolution.

• Go to effect, choose color correction and click curve change the channel to Alpha add stylize and click glow change the value of glow radius to 29.0.

• Duplicate the original layer click CTRL + D on your keyboard turn off the duplicate layer click the eye symbol in the left corner. Go back to the original layer go to effect, choose color correction and click curves i want to change the color of the lights to blue, change the channel to blue all the curve is drop to down. Go to effect, choose style and click glow. Click the duplicate layer and take to turn in on click the square box in the left corner go to effect again and repeat the procedure you make to original layer and now we can see it's look like better.

• Going back to the tutorial composition now we can add the trails single into our composition timeline i will make the trails single 3D and add my camera. Create the clone layer of the original trails layer make sure of trails single layer are selected.

Now for the actual transition of the logo.
• Let's go to our logo holder composition double the logo holder let's made to a pre-compose by holding CTRL + SHIFT and press letter C on your keyboard. Create new white solid layer double click the elipse tool to create a circle.. Go to the mask feather and set the value to 41.0 go to mask expansion and create a key frame click the stop watch of the mask expansion let set the value until the circle is complete disappear. Move the time indicator to 4 seconds.

• We can use this layer to create a transition pre-compose the white solid layer double click the pre-compose layer. Add a new solid layer for the new solid go to effect, choose Noise & Grain and click Fractal Noise. Change the fractal type to Dynamic Progressive and check the Invert. Click the Transform and change the value of the scale to 50.0.

• Pre-compose the white solid 3 layer turn off the pre-compose layer click the eye symbols on the left corner. Select the original layer go to effect, choose distort and click turbulent displace so we have now small turbulent variation in our transition.

• Go to effect, choose distort and click displacement map for displacement map choose transition texture set the value of Max Horizontal and Max Vertical Displacement to 50.0.

• Back to logo holder click the logo pre-comp then press F4 choose the luma matte transition base.

• This is for the final step is add noise fractal click the original logo holder and duplicate the layer go to effect, choose noise grain and click fractal noise, change the fractal type to Dynamic Progressive. Go to effect again, choose color correction and click tritone click the Tritone and glow effects copy and paste to logo holder.


You can checkout this project on my youtube channel you can actually download it the link discreption below.
Download the video here: Link
You can also download the Aep file here: Link
--- TOOLS ---
Software : After Effects CS4
Plug-ins : None
Level : Beginner
Open Source Contribution posted via Utopian.io
Vote on this contribution has been fixed since the bot voted unfair in comparison to other similar contributions.
[utopian-moderator]
Thank you so much @elear i really appreciate this :) More blessings comes to you
This looks great! Is it easy to edit the colors here?
Maraming step sir @deveerei b4 naging ganyan ang color nya hehe.. :)
I see- oks sya, astig! Di pa din ako marunong AE hahaha.
Di ko na lang na ilagay yung ibang Screen shot sobrang dame e haha.
Hey @toffer I am @utopian-io. I have just super-voted you at 15% Power!
Achievements
Up-vote this comment to grow my power and help Open Source contributions like this one. Want to chat? Join me on Discord https://discord.gg/Pc8HG9x
Thank you @utopian-io
Great work.. thanks @toffer
You are almost welcome @amrumk.. :)
Thank you for the contribution. It has been approved.
[utopian-moderator]
Thanks you @jefpatat for approval..
you just work nicely bro in here,as a graphics designer.
Thank you @imon for your wonderful feedback..
Excellent work! Thank you for showing how to do this simply and accurately!
You are always welcome @jhonamono..