Arduino 101: Using 2 ultrasonic sensors and servo motor
What Will I Learn?
- You will learn the working principle of the ultrasonic sensor.
- You will learn how to program the arduino board by using the Arduino software.
- You will learn how to use 2 ultrasonic sensors and a servo motor to create your very own motion follower circuit.
Requirements
Hardware
- Arduino Uno
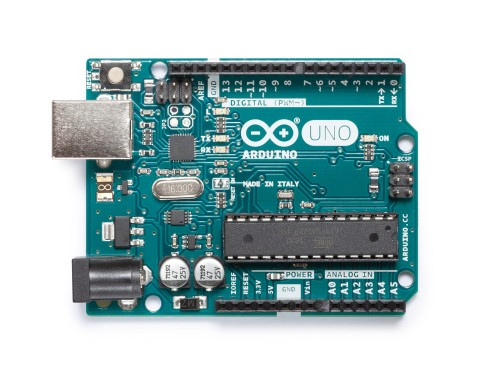
Image source - Ultrasonic sensors(2 pcs.)
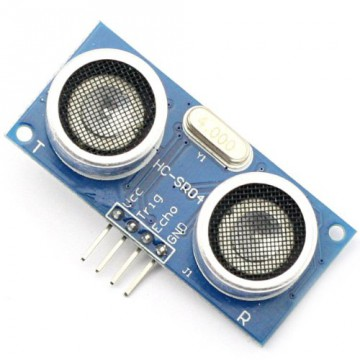
Image source - Servo motor

Image source - Jumper wires
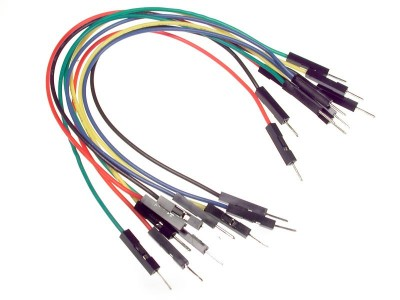
Image source - Breadboard
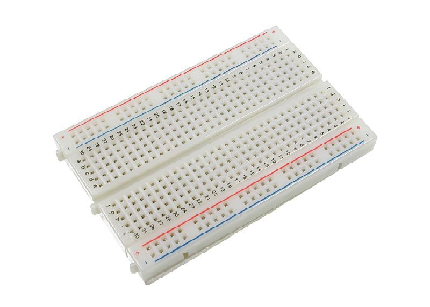
Image source - Computer

Image source - USB type A to B cable
Image source
Software - Arduino software/ Arduino IDE


Knowledge
- Basic electronics and programming knowledge
Difficulty
- Intermediate
Project description
This project uses the Arduino Uno board as the main controller for the whole circuitry. There will be 2 ultrasonic sensors that will serve as the input and triggering device for the servo motor. Once something is in front of the sensors, (assuming that there is a person or a moving object in front) the sensors will send the data to the arduino board stating that there is something near it, thus activating the servo motor to start moving and face the source of the movement.
Component description
Arduino Uno - is a type of arduino board that is used regularly by specialist and hobbyist because it is the most robust of the bunch. It is stuffed with a microcontroller board that is based on ATMega328P with 14 advanced I/O pins (6 are PWM outputs), 6 analog inputs, 16 Mhz quartz crystal, a power jack, a USB port, an ICSP header and a reset button.
Ultrasonic sensor - is a type of device that can measure the distance to an object by the use of sound waves. It measures the distance by sending sound waves at a specific frequency and listening for that sound wave to bounce back. By recording the elapsed time between the sound wave being produced and the sound wave bouncing back, it is able to compute the distance between the sonar sensor and the object.
Servo Motor - is a type of motor that is built for precise control of the angular or linear position, velocity and acceleration. It consists of a suitable motor that is coupled to a sensor for position feedback.
Tutorial Contents
Step 1: Gather the parts
- You can buy the following components in your nearby electronics shop or order them online.

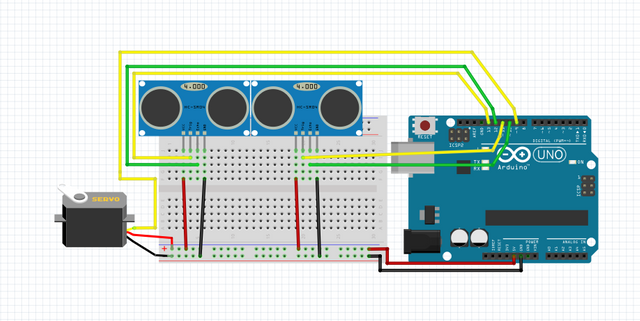
Step 2: Construct the circuit
Connect the Sources
- Connect the 5V pin of the arduino board to the top/bottom row of the breadboard(the connections here are horizontally connected).
- Connect the GND pin of the arduino board to the top/bottom row of the breadboard but make sure not to place the sources together as this will short the arduino board and may cause damage.

Connect the sensors
1st sensor
- Connect the VCC pin of the ultrasonic sensor to the positive terminal in the breadboard.
- Connect the GND pin of the ultrasonic sensor to the negative terminal in the breadboard.
- Connect the TRIG pin of the ultrasonic sensor to pin number 11 of the arduino board.
- Connect the ECHO pin of the ultrasonic sensor to pin number 10 of the arduino board.

2nd sensor
- Connect the VCC pin of the ultrasonic sensor to the positive terminal in the breadboard.
- Connect the GND pin of the ultrasonic sensor to the negative terminal in the breadboard.
- Connect the TRIG pin of the ultrasonic sensor to pin number 13 of the arduino board.
- Connect the ECHO pin of the ultrasonic sensor to pin number 12 of the arduino board.

Connecting the Servo motor
- Connect the positive terminal of the servo motor(red wire) to the voltage source grid in the breadboard.
- Connect the ground terminal of the servo motor (black wire) to the negative terminal in the breadboard.
- Connect the data wire(yellow wire) of the servo motor to pin number 9 of the arduino board.
- Note: Use color coded wires so that you will not get confuse with the wirings.

Step 3: Programming
- Connect the arduino board to the computer by using the usb cable type a to b.
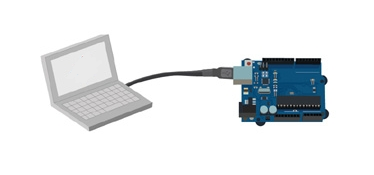
Image source - Once connection has been established, open the Arduino IDE and go to Tools > Board: > then select the Arduino/Genuino Uno.


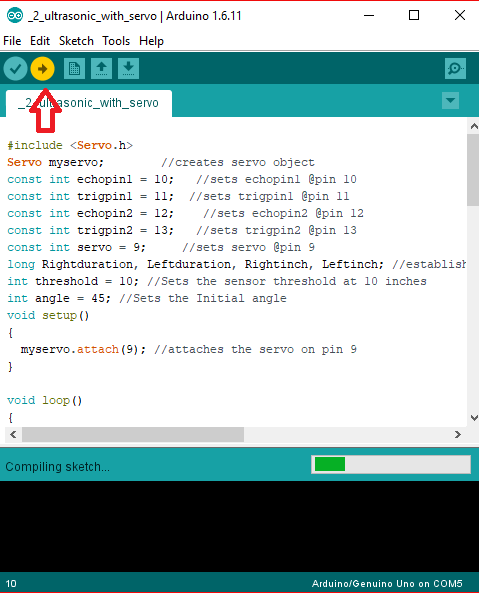
- Copy the codes below and paste it into your sketch in the Arduino IDE.
#include <Servo.h>
Servo myservo;        //creates servo object
const int echopin1 = 10;   //sets echopin1 @pin 10
const int trigpin1 = 11;  //sets trigpin1 @pin 11
const int echopin2 = 12;    //sets echopin2 @pin 12
const int trigpin2 = 13;   //sets trigpin2 @pin 13
const int servo = 9;     //sets servo @pin 9
long Rightduration, Leftduration, Rightinch, Leftinch; //establishes the variables of the duration and sets distance in inches
int threshold = 10; //Sets the sensor threshold at 10 inches
int angle = 80; //Sets the Initial angle
void setup()
{
  myservo.attach(9); //attaches the servo on pin 9
}
void loop()
{
  pinMode(trigpin1, OUTPUT);   //trigpin1 is set as output
  digitalWrite(trigpin1, LOW);  //sets the trigpin1 to give low pulse
  delayMicroseconds(3);      //duration is 3 microseconds
  digitalWrite(trigpin1, HIGH);   //sets the trigpin1 to give high pulse
  delayMicroseconds(5);     //duration is 5 microseconds
  digitalWrite(trigpin1, LOW);
  Rightduration = pulseIn(echopin1, HIGH); //reads high pulse
  pinMode(trigpin2, OUTPUT);  //trigpin2 is set as output
  digitalWrite(trigpin2, LOW);  //sets the trigpin2 to give low pulse
  delayMicroseconds(3);       //duration is 3 microseconds
  digitalWrite(trigpin2, HIGH);   //sets the trigpin2 to give high pulse
  delayMicroseconds(5);       //duration is 5 microseconds
  digitalWrite(trigpin2, LOW);
  Leftduration = pulseIn(echopin2, HIGH); //reads high pulse
  //this will convert the elapsed time into the distance
  Rightinch = microsecondsToInches(Rightduration);
  Leftinch = microsecondsToInches(Leftduration);
  follow();   //follows the movement
}
long microsecondsToInches(long microseconds)
{
// The speed of sound is 340 m/s or 73.746 microseconds per inch.
// The ping travels out and back, so to find the distance of the
// object we take half of the distance traveled.
  return microseconds / 74 / 2;
}
void follow() //conditions for the follow command
{
  if (Leftinch <= threshold || Rightinch <= threshold)
  {
    if (Leftinch + 2 < Rightinch)
    {
      angle = angle - 2;
    }
    if (Rightinch + 2 < Leftinch)
    {
      angle = angle + 2;
    }
  }
  if (angle > 160)
  {
    angle = 160;
  }
  if (angle < 0)
  {
    angle = 0;
  }
  myservo.write(angle);
}
What this code does is this, first it declares the pins of the ultrasonic sensors and servo as
cons intmeaning it will be a read-only variable and cannot be changed. Then it declares the duration and sets the distance as inches. The distance threshold is set to 10 inches with an initial angle of 80 degrees of the servo motor. Now, once the ultrasonic sensors detect something within the 10 inches threshold, it will send that data to the arduino uno which will then activate the servo motor to face the source of the movement. This will follow that object if its within 10 inches with 2 degrees per step, the range of angle that it can follow is from 0 - 160 degrees. Once the source of movement is gone, it will stop the servo from moving and will keep waiting until a new movement has been detected.
After typing the code into your arduino IDE, click Verify to compile and save your sketch and this will also check for any errors in the program.

If there is no error found in the program, click the Upload button to install the program into the arduino board.


Step 4: Testing
- Once the installation is complete, remove the arduino uno from the computer and plug in your battery pack to start the arduino board. Once it has started, the circuit should already be functioning. Hover you hand withing the 10 inches range from the sensor, this should detect your hand and will move to face in the direction of your hand. Slowly move your hand sideways and this should follow it by 2 degrees per step until it reaches its 160 degrees or 0 degrees.
- Now, remove your hand away from the sensor, this should stop the servo motor from moving from its place.
- If none is working, redo the previous steps and make sure that you have followed each step carefully.
- Also check your connections as the wire from the breadboard will easily get loosen especially if the wire is not properly fitted into the slot of the breadboard.
Curriculum
Check out my other arduino tutorials below:
- Arduino 101: Automated parking gate circuit using ultrasonic and servo motor
- Arduino 101: Motion activated Servo motor with Arduino
- Arduino 101: PIR based burglar alarm with Piezoelectric buzzer and Arduino
- Arduino 101:Pir based burglar alarm with piezoelectric buzzer and arduino
- Arduino for beginners
Posted on Utopian.io - Rewarding Open Source Contributors
I have always felt anything that has to do with microcontrollers and hardware in general, was hard to deal with. This kinda simplifies the process for me.
One thing though, what other areas can I apply this adruino programming to. I mean, ultrasonic sensors don't look too personal for personal consumption. What are some other areas I could look into
It is always hard at first my friend, I also had a hard time figuring out how this microcontrollers work the first time but after tons of research and desperation, I was finally able to understand it . I'm sure you can also figure it out in no time! The hardware are much simpler than the software you just need to understand their functionality/mechanism.
As for the the areas that you can apply this arduino, you can use every sensors available to make anything you want. you can make your home smart just by using the arduino and some relays and sensors, you can create a robot arm by using some servos and controller. you can even create make an automatic coffee maker that will activate after it senses that you have already woken up and pour it into a cup. The possibilities are endless with using arduino and other microcontrollers especially this is the time of IoT where you can do anything wirelessly!Technology is just super exciting, dont you agree? 😁👌
Thank you for the contribution. It has been approved.
You can contact us on Discord.
[utopian-moderator]
Thanks a lot @deathwing :D
I will be featuring it in my weekly #technology curation post for the @minnowsupport project and the Tech Bloggers' Guild! TBG is a new group of Steem tech bloggers and content creators looking to improve the overall quality of the niche.
If you wish to not be featured in the curation post this Saturday please let me know. Keep up the hard work and I hope to see you at the Tech Bloggers' Guild!
whoa! that's great. i'd love my post to be featured. thanks a lot😀
Dugo akong ilong pero interesting kaayo! Grabe lodi! :D
Nice one this could help me a lot of project.
Hey @ted7 I am @utopian-io. I have just upvoted you!
Achievements
Suggestions
Get Noticed!
Community-Driven Witness!
I am the first and only Steem Community-Driven Witness. Participate on Discord. Lets GROW TOGETHER!
Up-vote this comment to grow my power and help Open Source contributions like this one. Want to chat? Join me on Discord https://discord.gg/Pc8HG9x