Arduino 101: Automated parking gate circuit using ultrasonic and servo motor
What Will I Learn?
- You will learn the basic working principle of how an ultrasonic sensor works.
- You will learn how to use the ultrasonic sensor with a servo motor.
- You will learn how digital input and output works by using the Ultrasonic sensor as the input and the servo motor as the output.
Requirements
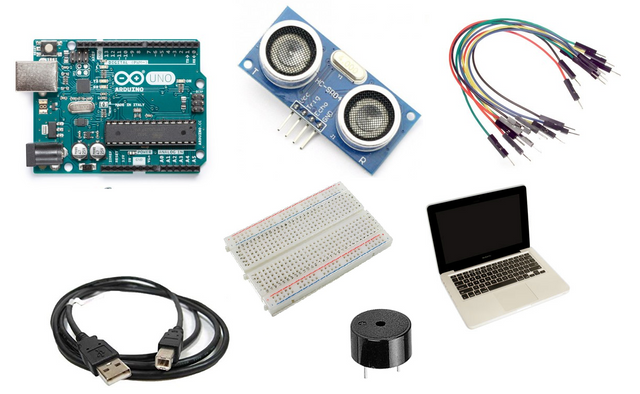
Hardware
Arduino Uno
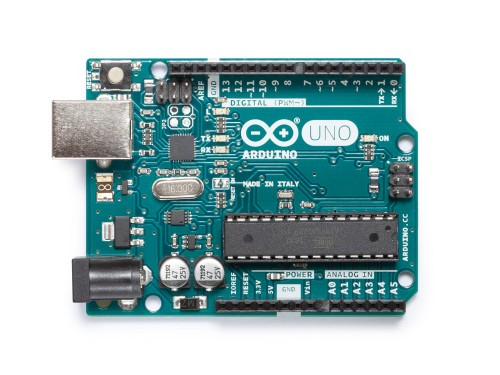
Image sourceUltrasonic sensor (HC-SR04)

Image sourceServo motor
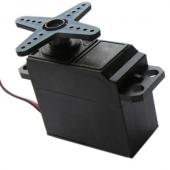
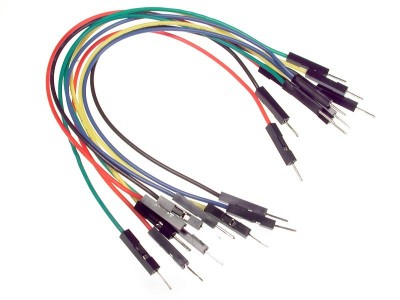
Image sourceJumper wires

Image sourceBreadboard
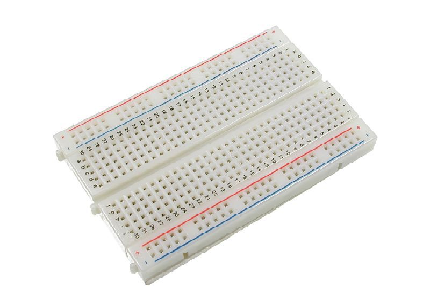
Image sourceComputer

Image sourceUSB type A to B cable

Image source
SoftwareArduino Software/ Arduino IDE


Knowledge
- Basic electronics and programming knowledge
Difficulty
- Basic
Project description
This project uses the Arduino Uno board as the main controller for the whole circuitry. The ultrasonic will be the input and triggering device for the servo motor. Once something is in front of the sensor, (assuming it would be a car because this is for an automated parking gate) the ultrasonic will send the data to the arduino board stating that something is near it, thus enabling the servo motor to start and letting the car pass.
Component description
Arduino Uno - is a type of arduino board that is regularly utilized by specialist/hobbyist due to its robust and strong outline. It is stuffed with a microcontroller board that depends on ATMega328P with 14 advanced I/O pins (6 are PWM outputs), 6 analog inputs, 16 Mhz quartz crystal, a power jack, a USB port, an ICSP header and a reset button.
Ultrasonic sensor - is a device that can gauge the distance to an object by the use of sound waves. It measures the distance by sending a sound wave at a particular frequency and tuning in for that sound wave to bounce back. By recording the elapsed time between the sound wave being produced and the sound wave bouncing back, it can compute the distance between the sonar sensor and the object.
Servo Motor - This device is a rotary actuator/ linear actuator that is built for precise control of the angular or linear position, velocity and acceleration. It consists of a suitable motor that is coupled to a sensor for position feedback.
Tutorial Contents
Step 1: Gather your parts
- The components used in this project are easily obtainable in your local electronic shop.

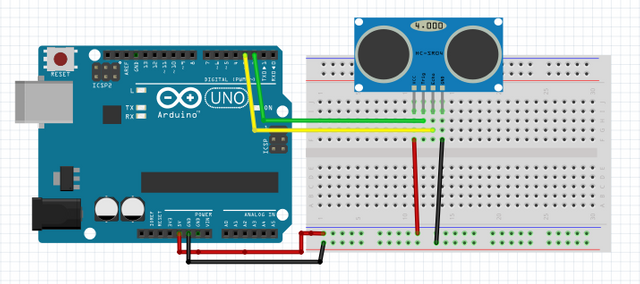
Step 2: Constructing the circuit
Connect the Sources
- Connect the 5V pin of the arduino to your assigned positive terminal of the breadboard (+).
- Connect the GND pin of the arduino to your assigned negative terminal of the breadboard (-).
- Note: Do not ever connect the sources together as this will short circuit your device.

Connect the Sensor
- Connect the VCC pin of the ultrasonic sensor to the positive terminal(+) of the breadboard.
- Connect the GND pin of the ultrasonic sensor to the negative terminal(-) of the breadboard,
- Connect the ECHO pin of the ultrasonic sensor to pin number 4 of the arduino uno board.
- Connect the TRIG pin of the ultrasonic sensor to pin number 2 of the arduino uno board.
- Note: Use color coding to your wiring in order to avoid confusion.

Connect the Servo motor
- Connect the positive terminal(red wire) of the servo motor to the voltage source terminal in the breadboard(+).
- Connect the negative terminal(black wire) of the servo motor to the ground in the breadboard(-).
- Connect the data pin(yellow wire) of the servo motor to pin number 9 of the arduino board.

Step 3: Programming
- Connect the arduino board into the computer using the USB type A to B cable.

Image source
-Once connected, open the Arduino IDE and go to Tools > Board: > then select the Arduino/Genuino Uno.

- Copy the code below and paste it to your own sketch in the arduino IDE.
#include <Servo.h>
Servo myservo; // create servo object
const int trigPin = 2;  //defines trigpin @pin 2
const int echoPin = 4;  //defines echopin @pin 4
void setup() {
myservo.attach(9); // attaches the servo on pin 9 to the servo object
}
void loop() {
// the distance result is in centimeters:
long duration, cm;    // The Duration will be the input pulse width and distance will be in centimeters.
pinMode(trigPin, OUTPUT);
digitalWrite(trigPin, LOW); //sends low pulse for 2 microseconds
delayMicroseconds(2);
digitalWrite(trigPin, HIGH);  //sends high pulse for 20 microseconds
delayMicroseconds(20);
digitalWrite(trigPin, LOW);
pinMode(echoPin, INPUT);
duration = pulseIn(echoPin, HIGH);
// convert the time into a distance
cm = microsecondsToCentimeters(duration); //formula
// the condition for the distance
if ( cm > 7 && cm < 14)
{
myservo.write(90); // sets the servo position according to the scaled value
delay(4000);
}
else if ( cm < 7)   //sets the condition
{
myservo.write(0); // sets the servo position according to the scaled value
delay(100);
}
}
long microsecondsToCentimeters(long microseconds) {
// The speed of sound is 340 m/s or 29 microseconds per centimeter.
// The ping travels out and back, so to find the distance of the
// object we take half of the distance traveled.
return microseconds / 29 / 2;
}
What this code does is simple, first it defines the pins of the ultrasonic and servo motor. Then it sets the trigger pin to give out the pulses and the echo pin to listen for the echo waves, this will determine the distance of the object from the sensor. Once something is close to the sensor (more than 7 cm and less than14 cm) it will activate the servo motor to move up to 90 degrees for about 4 seconds. This will let the car pass through and once 4 seconds is up, and there is no object in the area it will retract the servo motor back to 0 degrees to block the area. If the object is too close to the sensor <7 cm it will not let the object pass through it.
- After you type in the codes, click the Verify button to save and compile the sketch. This will also check if there is any errors in your program.

- Click the Upload button to install the program into the arduino uno board.

Step 4: Testing
- After the installation has completed, test your arduino uno by hovering your hand for about 8-13 cm away from the ultrasonic sensor. This should trigger it and let the servo motor move up to 90 degrees.
- Now, remove your hand away from the sensor, this should retract the servo motor back to its original angle.
- Then, move your hand close to the sensor (less than 7 cm), your servo motor should retain its position at 0 degrees.
- If all is working as expected, good job! And if all is not working, redo the previous steps and make sure you have followed all my instructions.
Curriculum
You can also follow my other arduino tutorials down below.
- Arduino 101: Motion activated Servo motor with Arduino
- Arduino 101: PIR based burglar alarm with Piezoelectric buzzer and Arduino
- Arduino 101: Tilt Sensor with Arduino
- Arduino for beginners
Posted on Utopian.io - Rewarding Open Source Contributors
Thank you for the contribution. It has been approved.
You can contact us on Discord.
[utopian-moderator]
Thanks you very much sir :)
Hi @ted7, this is @upvotedonator and your tutorial deserves an upvote.
Im here to upvote, follow, and resteem your post.
Hoping for your support by following and upvote this comment.
Thank You!
nice project. can you please share arduino project with php script for database. Waiting for that post. thank you.
Thanks @bgie8311. I would love to share it to you if only I could, but I still haven't grasp the php script just yet but I can refer you to a good friend of mine who's very good with it. Visit @japh blog, there you can find a lot of IOT projects.
Hey @ted7 I am @utopian-io. I have just upvoted you!
Achievements
Suggestions
Get Noticed!
Community-Driven Witness!
I am the first and only Steem Community-Driven Witness. Participate on Discord. Lets GROW TOGETHER!
Up-vote this comment to grow my power and help Open Source contributions like this one. Want to chat? Join me on Discord https://discord.gg/Pc8HG9x