How to print a specifiec area of the page using printThis jQuery Plugin
What Will I Learn?
- You will learn how to download and use printThis jQuery Plugin
- You will learn about printThis() method
- You will learn some parameter in printThis() method
Requirements
- Basic Knowledges about HTML
- Basic Knowledges about JavaScript
- Basic Knowledes about CSS
- Need to host jQuery and printThis jQuery Plugin file
Difficulty
- Basic
Tutorial Contents
Many way we can do to create a print button. One of them is using printThis jQuery Plugin. It is a plugin to create simplely the print button. With this plugin we can also modify the print page like import the parent css, adding title and more other. For more detail, Let's Follow tutorial bellow :
Downloading printThis jQuery Plugin
Download it in https://github.com/jasonday/printThis
Extract
printThis.jsto a new folder
Creating HTML element
Open your text editor
Create new file save as
index.htmland save it in previous folder that you have extracted
printThis.jsfileAdd HTML element as usual
- <html>
<head>
<title>Print Page</title>
</head>
<body>
</body>
</html>
- Create some HTML element as sample
            <form>
            Nama : <input type="text" id="nama">
            Kelas : <input type="text" id="kelas">
            </form>
- Then create a button to add Print fucntion
<button>PRINT</button>
Including JQuery and printThis jQuery Plugin
- Because printThis jQuery Plugin is some part of jQuery so we need to host jQuery file. Here I use CDN
<script src="https://ajax.googleapis.com/ajax/libs/jquery/3.2.1/jquery.min.js"></script>
- Include printThis jQuery Plugin
<script src="printThis.js"></script>
Coding the jQuery Script
- To write the jQuery Script we should open
<script>tag. You can put it in<head>element or in<body>element.
<script></script>
- Before add more event in jQuery. There is an event that we should add for the first. It is ready() event. this event to make sure that all html elements are loaded. if it is, then it will load jQuery script. So, all jQuery Script must write in this function event.
$(document).ready(function(){
});
- Select the button and add the click event Fucnction
$("button").click(function(){
});
- Select the element that you will print then add printThis method
$("#nama").printThis();
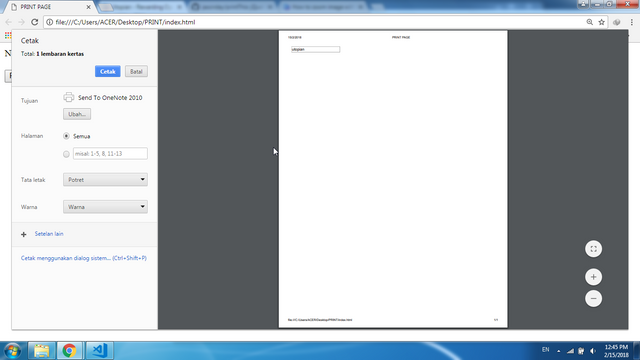
- Run the file for testing

To add more options on print page, printThis jQuery Plugin has provide some parameter like :
pageTitle: ""for adding the title
debug: falseto show the iframe for debugging
importCSS: trueto import css tags
importStyle: false,to import style tag
printContainer: trueto grab outer container
loadCSS: "path/to/my.css"to load more css file
removeInline: falseto remove all inline styles from print elements
printDelay: 333to set time for printing delay
header: <h2>PAGE</h2>to add the header
footer: nullto add footer
base: falseto accept a string for the URL
formValues: trueto preserve form values
canvas: falseto copy canvas elements
doctypeString: "..."to enter a different doctype
removeScripts: falseto remove script tags
copyTagClasses: falseto copy classes from the html & body tagYou can use the mentioned parameter as you need. How to use it. Look the example bellow :
 $("#nama").printThis({
                        debug: false,
                        importCSS: true,
                        importStyle: false,
                        printContainer: true,
                        loadCSS: "path/to/my.css",
                        pageTitle: "",
                        removeInline: false,
                        printDelay: 333,
                        header: null,
                        footer: null,
                        base: false ,
                        formValues: true,
                        canvas: false,
                        doctypeString: "...",
                        removeScripts: false,
                        copyTagClasses: false
                });
- For the full code you can get bellow :
<html>
<head>
<title>PRINT PAGE</title>
<script src="https://ajax.googleapis.com/ajax/libs/jquery/3.2.1/jquery.min.js"></script>
<script src="printThis.js"></script>
</head>
<body>
<form>
Nama : <input type="text" id="nama">
Kelas : <input type="text">
</form>
<button>PRINT</button>
<script>
$(document).ready(function(){
$("button").click(function(){
$("#nama").printThis({
debug: false,
importCSS: true,
importStyle: false,
printContainer: true,
loadCSS: "",
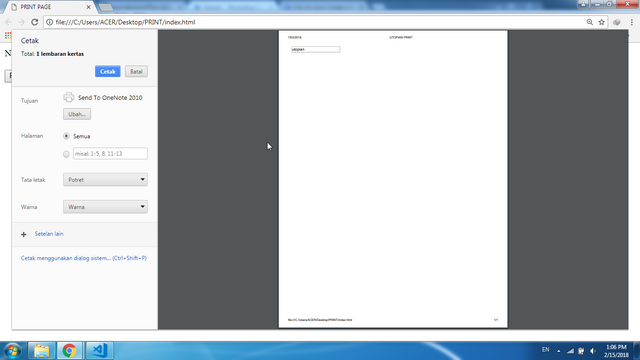
pageTitle: "UTOPIAN PRINT",
removeInline: false,
printDelay: 1,
header: null,
footer: null,
base: false ,
formValues: true,
canvas: false,
doctypeString: "",
removeScripts: false,
copyTagClasses: false
});
});
});
</script>
</body>
</html>
Curriculum
- How to change validation style of input element when user input using jQuery
- How to create International Phone Input using intl-tel-input jQuery Plugin
- How to pop-up image galery on modal using bootstrap and jQuery
- How to check already exist username when user input on Sig Up Form
- How to add Rows in Table element using jQuery
- How to insert data to MySql from PHP using jQuery AJAX
- Auto-Refresh Specific HTML element Without Reloading page Using jQuery
- How to create a toggle button to show and hide an element
- How to Create Filter Lists using jQuery
- How to Create Filter Tables using jQuery
Posted on Utopian.io - Rewarding Open Source Contributors
Thank you for the contribution. It has been approved.
You can contact us on Discord.
[utopian-moderator]
Hey @creon, I just gave you a tip for your hard work on moderation. Upvote this comment to support the utopian moderators and increase your future rewards!
I would resteem
thank you
Yes, thank
i follow you and upvote to your post ,, now kindly upvote me and follow me back then i will give upvote to your five more posts
https://steemit.com/dmania/@awais55/twitter-user-works-out-how-to-get-rid-of-the-new-snapchat-update
Hey @sogata I am @utopian-io. I have just upvoted you!
Achievements
Suggestions
Get Noticed!
Community-Driven Witness!
I am the first and only Steem Community-Driven Witness. Participate on Discord. Lets GROW TOGETHER!
Up-vote this comment to grow my power and help Open Source contributions like this one. Want to chat? Join me on Discord https://discord.gg/Pc8HG9x