Materialize Education Series Part #2: How to Create a Full Screen Image Slider Using Carousel with XAMPP Localhost Server From Scratch
Welcome to the second Video Tutorial of the Materialize! This tutorial about "Creating Full Screen Image Slider" I hope you enjoy this tutorial video!

What Will I Learn?
- You will learn how to create image slider with Materialize CSS codes.
- You will learn how to create full image slider with Carousel slider from scratch.
- You will learn how to use Materialize CSS with jQuery library and how to create image slider with using jQuery library.
- You will learn how to write codes for full image carousel slider styles with using Materialize CSS.
- You will learn how to use Materialize CSS with jQuery script methods.
- You will learn how to make Localhost Connection to Materialize Library with using XAMPP Control Panel Server.
Requirements
- Materialize Full Package 1.0.0-beta version (CSS and JS [minified and unminified])
- jQuery 3.3.1 Compressed (minified version).
- Microsoft Visual Studio Code. (or another text editor).
- A Standard Computer.
- A Standard Browser.
- XAMPP Control Panel Server.
- A few images.
Difficulty
- Intermediate
Description
Hello everyone, welcome to the second episode of the Materialize CSS Education Series. In this tutorial video I showed you how to create a Image Slider with using jQuery and Carousel also I used XAMPP Control Panel Server in this video. I teached you how to use Materialize library with jQuery library in the same time. I showed and I explained you how to use a lot of division codes with classes for "Materialize CSS" for example; "full-slider", "carousel-item", special Materialize CSS Divison Classes, defining location of next and previous buttons with division command and other division classes etc. I taught you how to make Localhost connection to Materialize Library with XAMPP Control Panel.
Also I explained in detail all the commands used when creating Image Slider. In this tutorial video,we used Materialize package instead of CDN Bootstrap, I explained the reason for this in detailed on the video.
Also I gave technical information about codes, classes, about materialize, libraries and all operations. Our Materialize education series will progress from basic - intermediate to advanced. All the programs described in the video (Materialize CSS, Visual Studio Code, XAMPP Server Control Panel Server) are open source and are all included in the links section of the GitHub repositories (Except XAMPP Control Panel Server). If you wish, you can access the web pages of these programs and download links for Windows from the links section.
Some Additional Steps About Materialize Image Slider Tutorial
STEP 1:

We entered the addresses of the libraries we need between the headcommands.
(Materialize CSS, jQuery, Materialize JS, Material Icons Family (via Google Fonts),libraries used this video.
STEP 2:
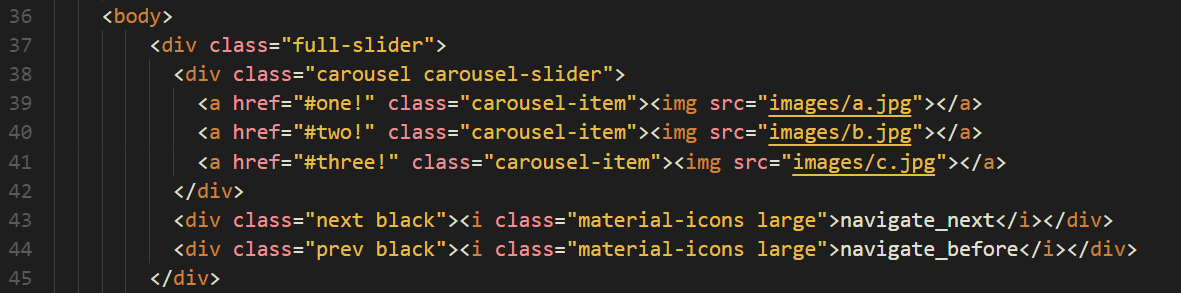
This section div commands were written with Materialize CSS specific classes.
This section about specifying Image Slider action with Carousel Slider, specified image location with a hrefcommands. We used two classes with the divcommand, one of which we used Materialize CSS Icons Family instead of Bootstrap CDN, we used the another class for encode nextand previousbuttons.
STEP 3:

In this section, we have defined the visual and functional settings for the image slider with the help of the stylecommand.
STEP 4:

In order for the buttons to function correctly, the necessary code was written in the scriptcommand area. Script areas codes was written to to provide these properties;
We wrote codes about the scrolland drag events, in this way we can slide the pictures by clicking on the button and we can also drag the picture with the mouse for move on to the next image.
.prevand .next functions were written for the buttons to work properly.
Also this command was used to fit (100%) the image to the full screen:
$('.carousel').carousel({fullWidth:true}).css("height", $(window).height());
Codes Used in This Video
  <html>
          <head>
          <link type="text/css" rel="stylesheet" href="css/materialize.min.css"  media="screen,projection"/>
          <link href="https://fonts.googleapis.com/icon?family=Material+Icons" rel="stylesheet">
          <script type="text/javascript" src="https://code.jquery.com/jquery-3.3.1.min.js"></script>
          <script type="text/javascript" src="js/materialize.min.js"></script>
          <meta name="viewport" content="width=device-width, initial-scale=1.0"/>
          </head>
      <style>

      .next, .prev{
        top:40%;
        color:red;
        cursor:pointer;
        position: absolute;
      }

      .prev{
        left:0px;

      }

      .next{
        right:0px;

      }

      .carousel .carousel-item>img{
        height: 100%;
        width: 100%;

      }

      </style>
    <body>
        <div class="full-slider">
          <div class="carousel carousel-slider">
            <a href="#one!" class="carousel-item"><img src="images/a.jpg"></a>
            <a href="#two!" class="carousel-item"><img src="images/b.jpg"></a>
            <a href="#three!" class="carousel-item"><img src="images/c.jpg"></a>
          </div>
          <div class="next black"><i class="material-icons large">navigate_next</i></div>
          <div class="prev black"><i class="material-icons large">navigate_before</i></div>
        </div>
        <script>
        $(document).ready(function(){
          $('.carousel').carousel({fullWidth:true}).css("height", $(window).height());
          $('.next').click(function(){
            $('.carousel').carousel('next');
          });
          $('.prev').click(function(){
            $('.carousel').carousel('prev');
          });
        });


        </script>


 </body>
  </html>
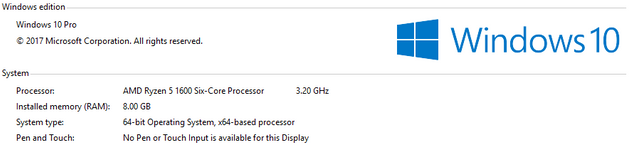
My Operating System
Video Tutorial
Links
- Materialize Github Repo
- Materialize Web Site
- Materialize Package Download for Windows
- Visual Studio Code (VSCode) GitHub Repo
- Visual Studio Code Web Site
- Visual Studio Code Download Link for Win x64
- XAMPP Server Web Site
- XAMPP Server(For Windows) Download Link
- jQuery GitHub Repo
- jQuery Web Site
- jQuery Download Link
Curriculum
You can follow the other parts of the materialize education series here! :)
Posted on Utopian.io - Rewarding Open Source Contributors
Thank you for your contribution. It has been reviewed and scored.
I see a great improvement @sargoon in your outline and using graphical images to enhance your video tutorial. It is worth spending the time to work out these steps for learners so that they know where to focused in the teaching.
I have a few suggestions for you with regard to the video tutorial:
for people whose English is their second language, you need to work on the pronunciation and diction when you speak.
Learn to be more deliberate when you speak and 'not slurr' so that your words are distinct.
As a teacher myself, I always speak more deliberately when I am teaching. I cannot teach with the same kind of voice that I use when I 'chat' and talk with people. Especially when you video is quite lengthy (almost 20 minutes long), it is very difficult for users to follow along when they cannot hear clear diction. Also if your voice is monotone, all the more you need to vary your voice tone. So what you can do is: Imagine you are speaking at the front of the hall and you have only one audience and he is seated at the back row, right at the end. Now with that in mind, you need to project your voice so that he can hear your words clearly. You also need to find ways to vary your teaching because you don't want him to fall asleep. So with that picture in your mind, you will be able to do a better presentation. The last person in the last row needs to capture all your teaching and you are going to help him through to stay engaged throughout the process.
If you have further questions, contact us at Discord.
Need help? Write a ticket on https://support.utopian.io.
Chat with us on Discord.
[utopian-moderator]
Thank you for moderating my contribution, I will consider your suggestions to make better contributions for open source community and thank you very much for your suggestions, your suggestions will very helpful for me.
Hey @sargoon! Thank you for the great work you've done!
We're already looking forward to your next contribution!
Fully Decentralized Rewards
We hope you will take the time to share your expertise and knowledge by rating contributions made by others on Utopian.io to help us reward the best contributions together.
Utopian Witness!
Vote for Utopian Witness! We are made of developers, system administrators, entrepreneurs, artists, content creators, thinkers. We embrace every nationality, mindset and belief.
Want to chat? Join us on Discord https://discord.me/utopian-io