Tutorial : Creating Pop-Up Effects in Images Using Inkscape Software
Good morning everyone, hope you are always healthy, happy and can do your daily activities and routines as usual, and hopefully today is better than yesterday. On this occasion, I want to share a tutorial on how to create images with pop-up effects using Inkscape software.
To create images with pop-up effects is not difficult, even including the easiest trick in the world of graphic design, but before we go into the tutorial session, then we must first know what is inkscape? Therefore, I will try to explain in general about this inkscape, for a more detailed explanation of this inkscape software, you can searching on the internet or you can read also on wikipedia.
Inkscape
Inkscape is an open source software that is almost equivalent to corel draw, although not as famous as the corel draw itself. But this software already meets the standard XML, SVG and inkscape CSS can also run on windows operating system, so this graphic device is really friendly with you who have talent graphic designer.
The main goal of inkscape is presented is to be one of the current cutting-edge graphics tools. Okay friends, that's a glimpse of information about this inkscape, now we go into the tutorial season.
That's a glimpse of information about inkscape, hope you guys novice designers like me can understand and are interested to follow this tutorial from me.
Tutorial
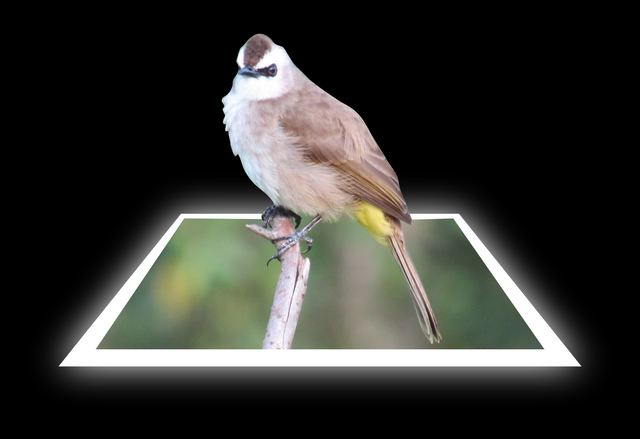
Creating Pop-Up Effects in Images Using Inkscape Software
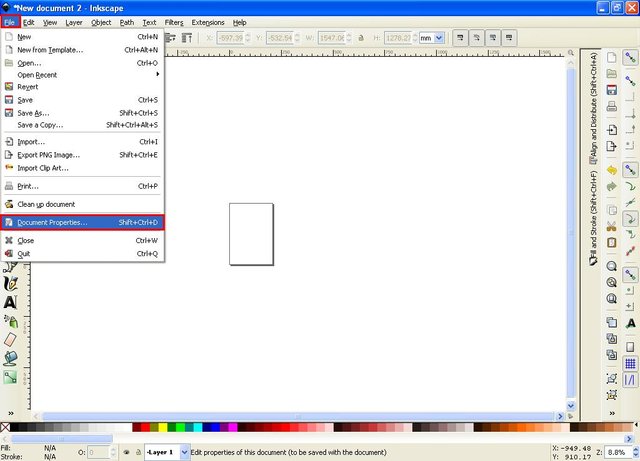
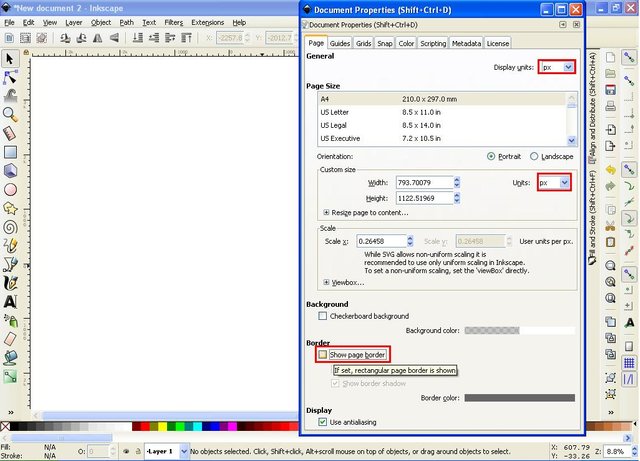
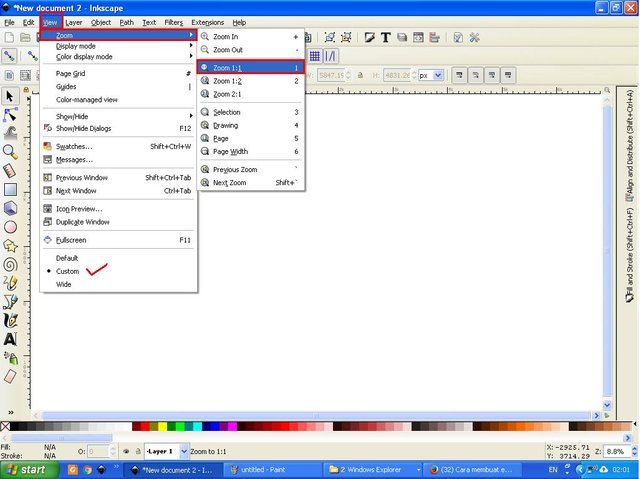
The first step, open Inkscape then click the file on the menu bar, then select document prperties, then un-check the show page border on the document properties command screen. Then click view on the menu bar and select the zoom 1: 1
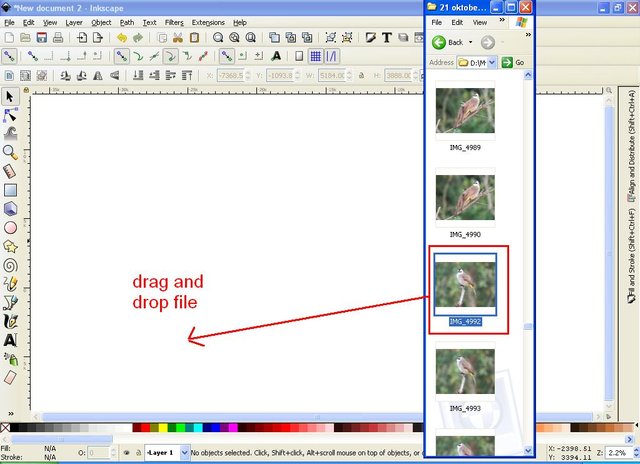
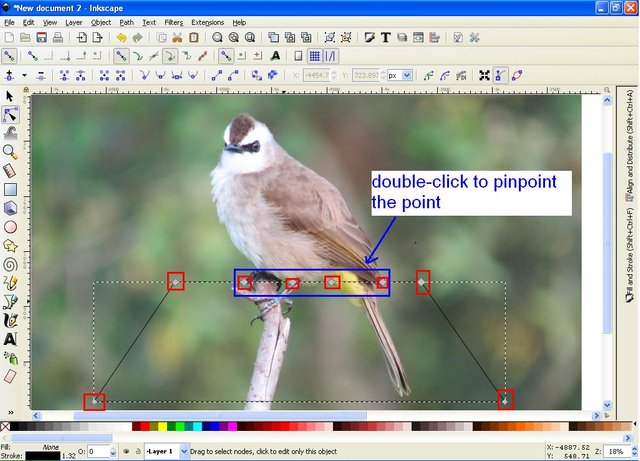
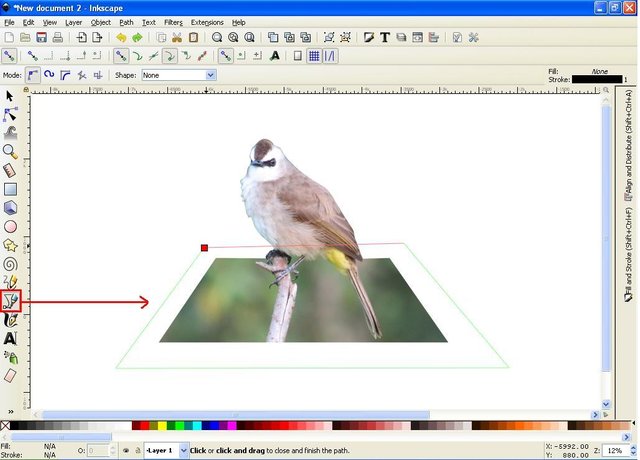
The second step, open the image folder which will be the object for giving pop-up effect then drag and drop the image to the inkscape workspace. Then click drwa bezier curves on the side bar and create a vector to cut some objects. After that set the vector line by dragging and dotting the points on the four vector corners, then double click on the part that will be used to cut the object, then drag and play mouse at the dots to form the image pieces like the instructions on the pictures below.

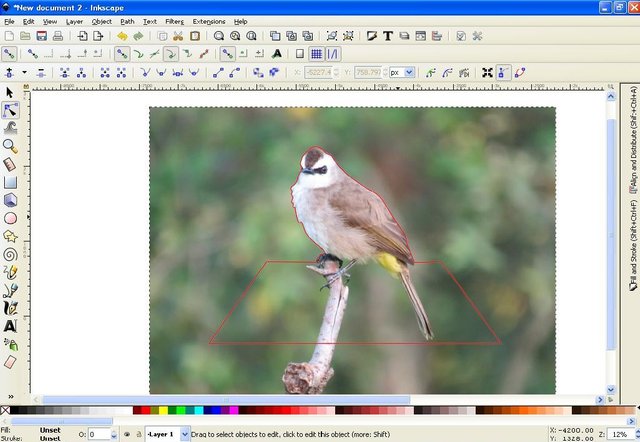
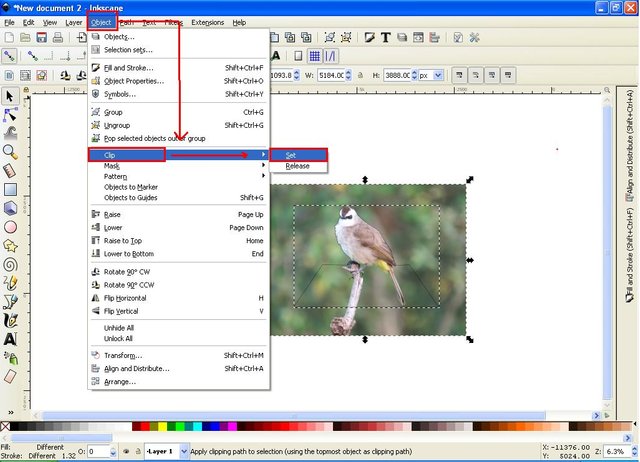
The third step is, click the select and transform object icon on the side bar, then block the object thoroughly, then click the object in the menu bar, then select the clip and select the set

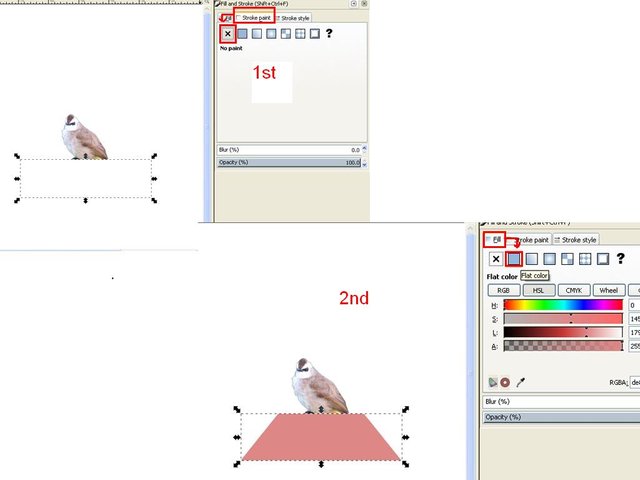
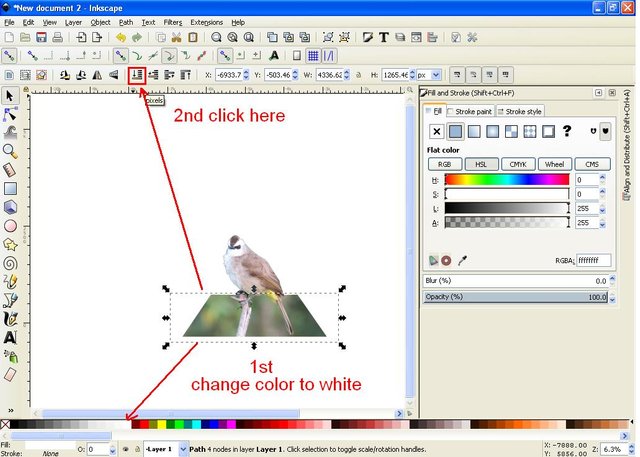
The fourth step, click the draw icon bezier curves again, and create a square vector by following the piece of the object, then click the stroke paint button on the fill and stroke command screen and click the no paint button, then click the fill button on the same command screen, then click the flat color, change its color to white color, then click icon lower selection to bottom on menu bar.
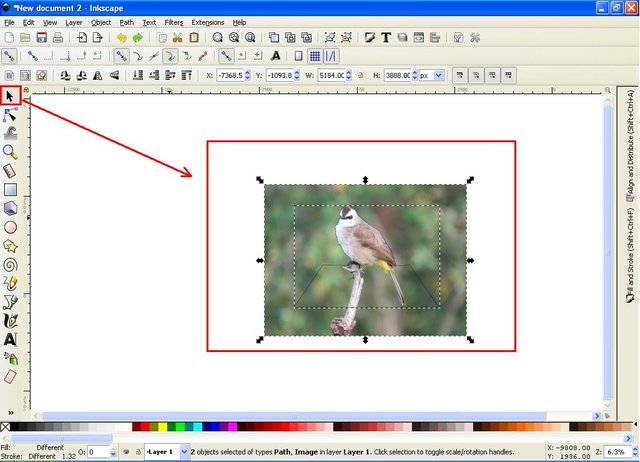
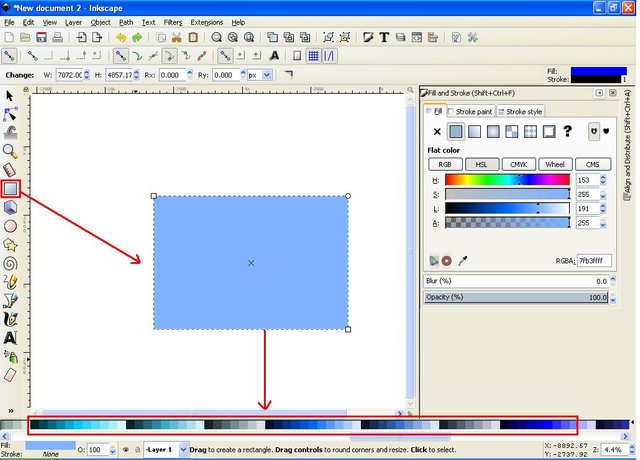
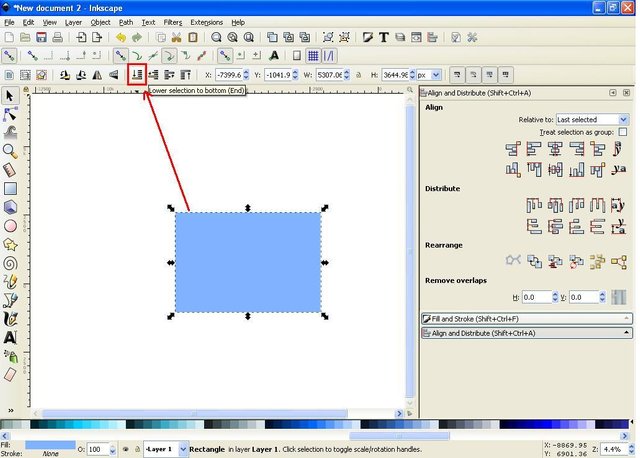
The fifth step, click the rectangles icon on the side bar, then create a rectangular object, and give whatever color there is in the task bar option, then click the lower selection to bottom icon on the menu bar. Then click the select and transform object icon on the side bar and then block the object thoroughly, then click the center icon on vertical axis on the command screen align and distribute object.
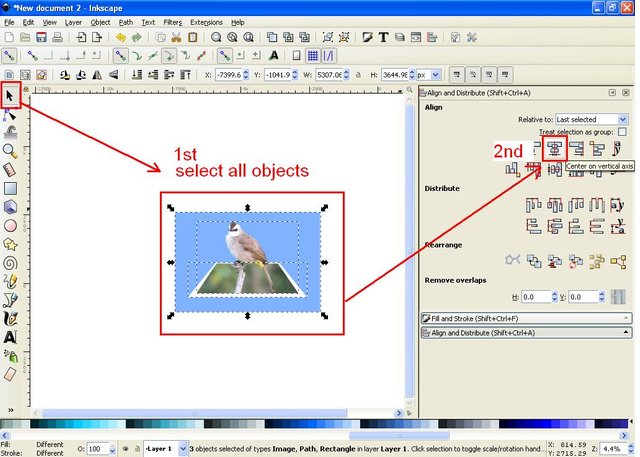
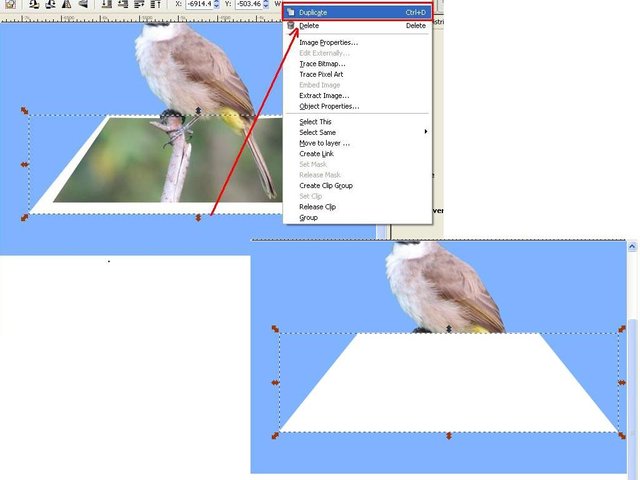
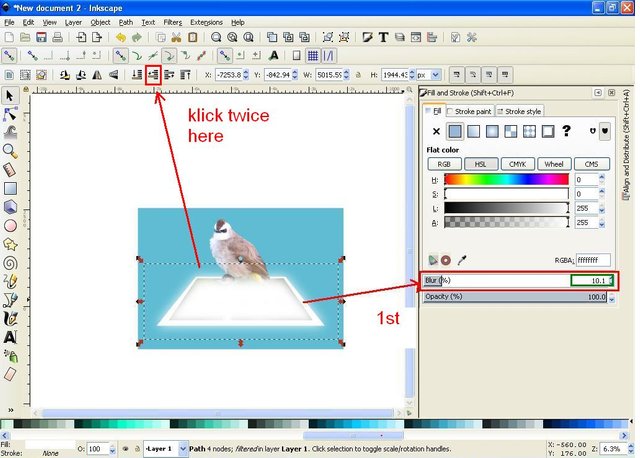
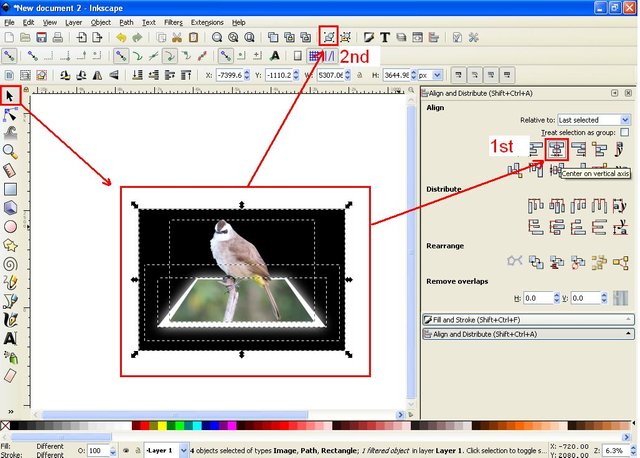
In the sixth step, click the white object and make a duplicate, or right click and select duplicate, for the duplicate object set the blur capacity to 10% on the fill and stroke command screen, click twice on the lower selection one step icon on the menu bar. Then click the background or object that we created with the rectangles before, and change the color to black. Then click the select and transform object icon again, then block all objects then click center on vertical axis on align and distribute object's command screen, click icon group on menu bar.

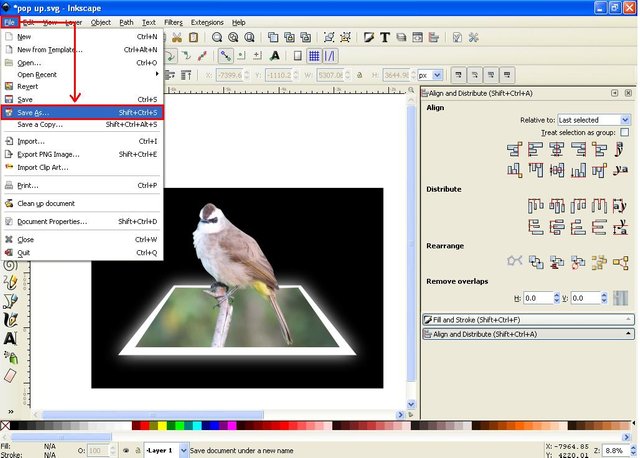
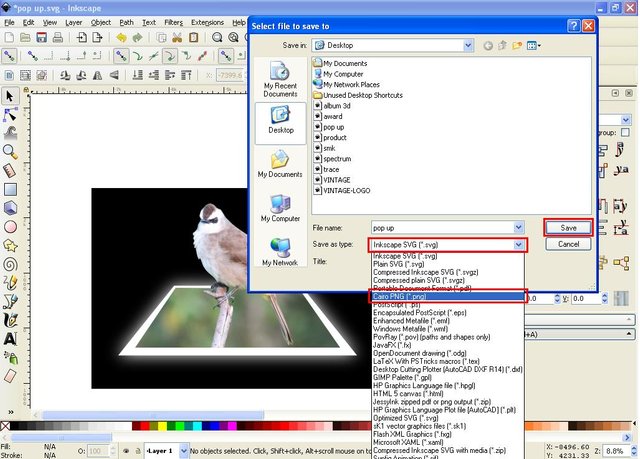
For the seventh step or the last step, is the file storage. Then click the file on the menu bar, then select Save As, and save the file in two formats, namely SVG format and PNG format. The function of SVG format is to make it easier for us to re-edit the object what if needed later. While the function of PNG format is to facilitate us to upload the file to various media.
Well, that's all I can share in this tutorial, hopefully useful for all of us. best regards @ saini88
Posted on Utopian.io - Rewarding Open Source Contributors
This post has received gratitude of 1.00 % from @jout
Big Thanks @jout!
GOOD SH-T! I'll check out the software editor app, thanks :D
you are welcome @jaye-irons!
Thank you for the contribution. It has been approved.
You can contact us on Discord.
[utopian-moderator]
Thank you very much @slempase #utopian-moderator
Hello @saini88. Thank you for your incredible post for Inkscape. For many years I have been amazed at the Vector graphic quality that Inkscape can provide. Looking forward to more of your content in the near future.
Hey @saini88 I am @utopian-io. I have just upvoted you!
Achievements
Suggestions
Get Noticed!
Community-Driven Witness!
I am the first and only Steem Community-Driven Witness. Participate on Discord. Lets GROW TOGETHER!
Up-vote this comment to grow my power and help Open Source contributions like this one. Want to chat? Join me on Discord https://discord.gg/Pc8HG9x
Get your post resteemed over 90000+ followers and get upto $19+ value Upvote. Your post will skyrocket and give you maximum exposer.
See our all pakages at: