TUTORIAL : Create a 3D Cube Logo Using Inkscape Software
Good morning friends, May you always be in good health and can do activities and routines of each, and hopefully today is much better than yesterday.
There is a saying that with the science of life becomes easy, with the faith of life become directed and with the art of living be beautiful. Speaking of art problems, it will never run out of material, because the notion of art is very broad and very varied form. I am sure my friends also have an art in making a post or tutorial or art in running your own life.
On this morning's occasion I want to give a post that is definitely related to art, which I summarize in a tutorial, the art I mean is the art of logo designing. To design a logo many ways can be done, and many software or applications that can be used.
In my tutorial this morning, I want to share how to create a three-dimensional logo or that we know as 3D using Inkscape software. As usual before I discuss the tutorial, first I will introduce what is Inkscape. But the explanation inkscape tutortial is only in outline only, because the explanation in detail I have described in my first, or it could be searching in goolge.
INKSCAPE
Inkscape is an open source software that is almost equivalent to corel draw, although not as famous as the corel draw itself. But this software already meets the standard XML, SVG and inkscape CSS can also run on windows operating system, so this graphic device is really friendly with you who have talent graphic designer.
The main goal of inkscape is presented is to be one of the current cutting-edge graphics tools. Okay friends, that's a glimpse of information about this inkscape, now we go into the tutorial season.
TUTORIAL
Create a 3D cube logo using Inkscape Software
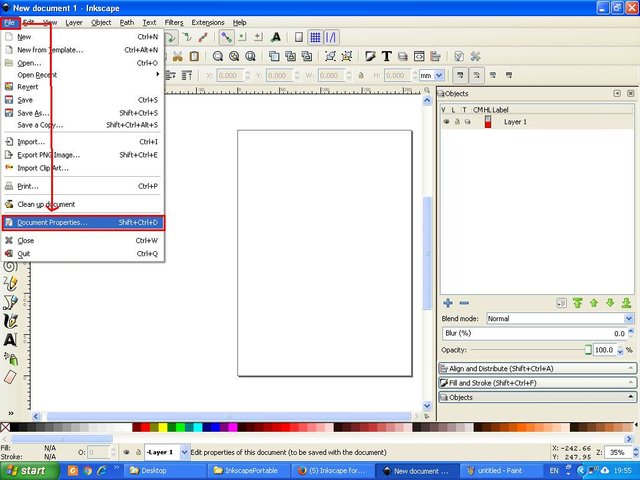
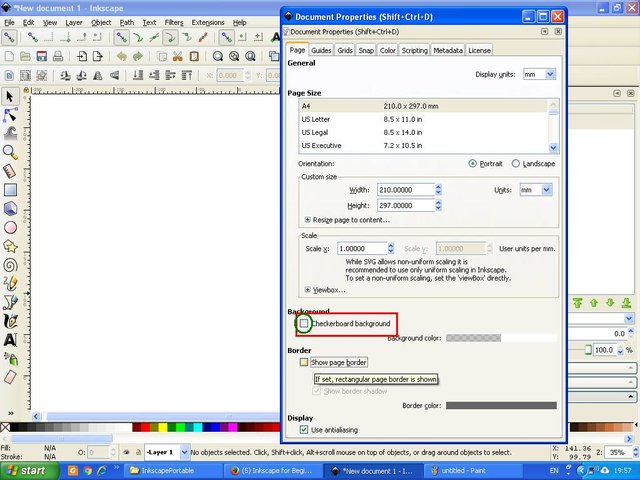
As a first step, friends of course know that friends already have this software, or just download it on google.com, then open Inkscape then click the file on the menu bar, then select document properties, on the command page document properties check the checkerboard backghround, then close the command page.
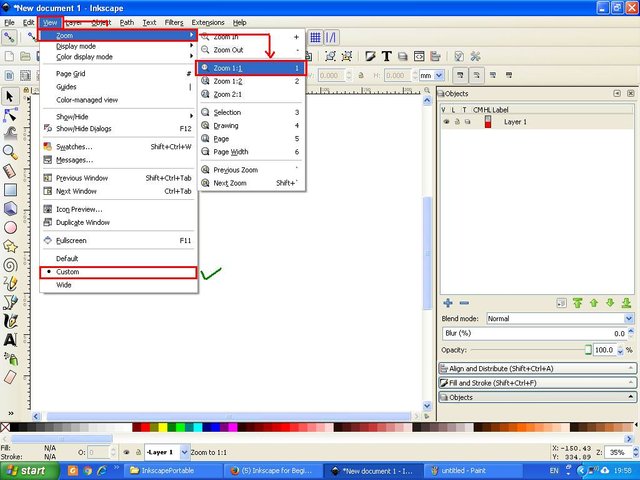
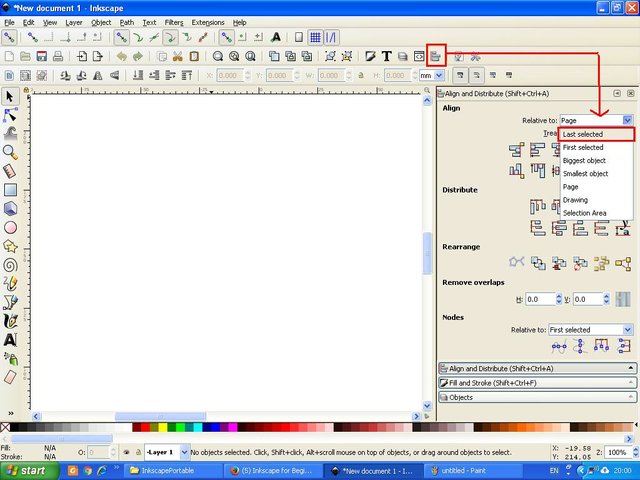
The second step click view on the menu bar, then make sure it is custom, then select zoom and select zoom 1: 1, then click the icon align and distribute object in the menu bar and select last selected on the arrow beside the text relative to
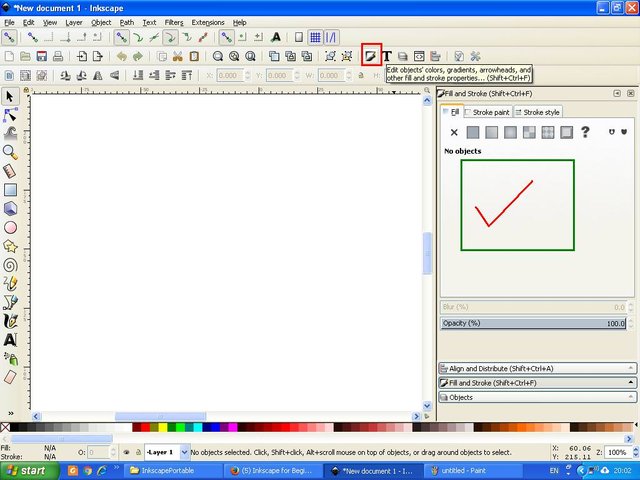
The third step click on the color edit icon, gradient etc .. on the menu bar for setting the opacity object later.
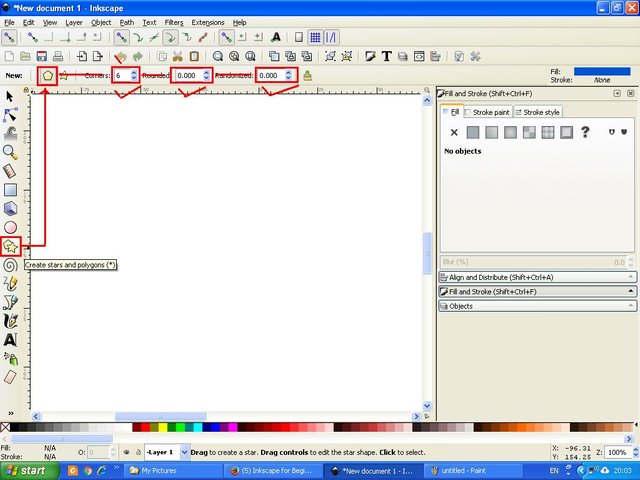
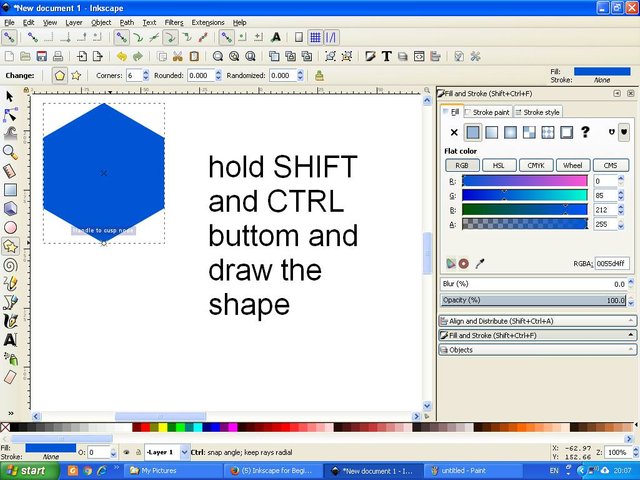
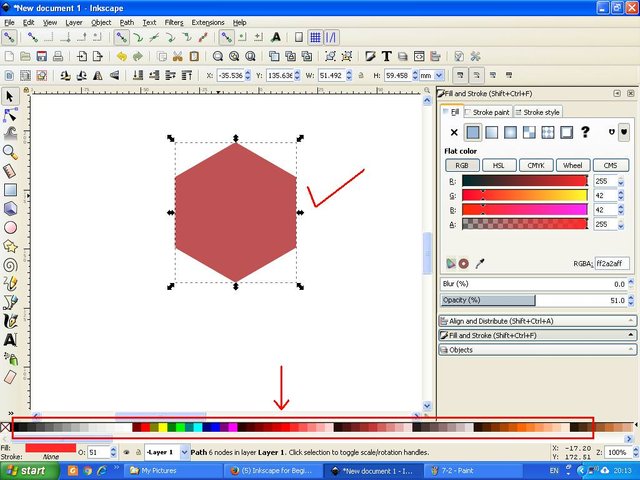
The fourth step starts creating an object, by clicking on the stars and polygons icon on the side bar then clicking regular polygons and making sure the corneer is nominally 6 and rounded and randomized with a 0.000 nominal. then hold down the CTRL and SHIFT keys on the keyboard and create the object using the mouse, if it is then release the CTRL and SHIFT keys and mouse simultaneously. Then change the color to black and lower the color opacity by clicking on the sidebar fill and stroke on the right of the screen.
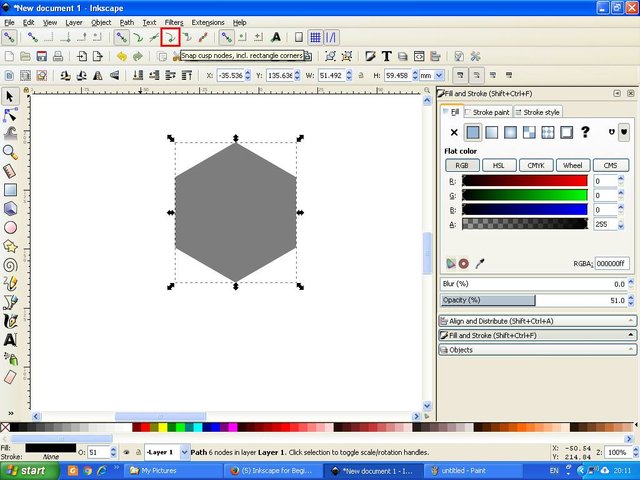
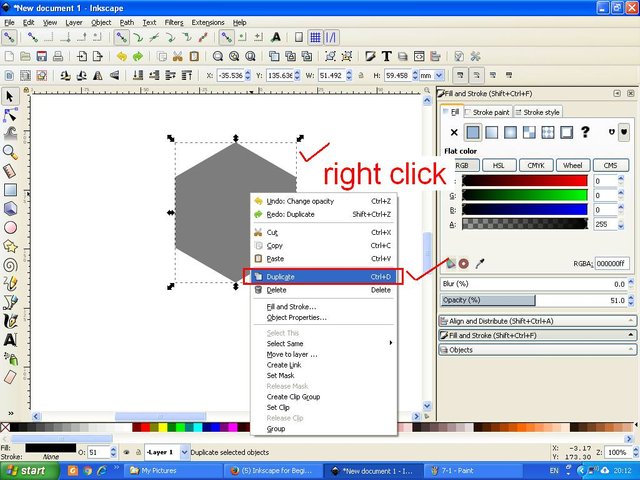
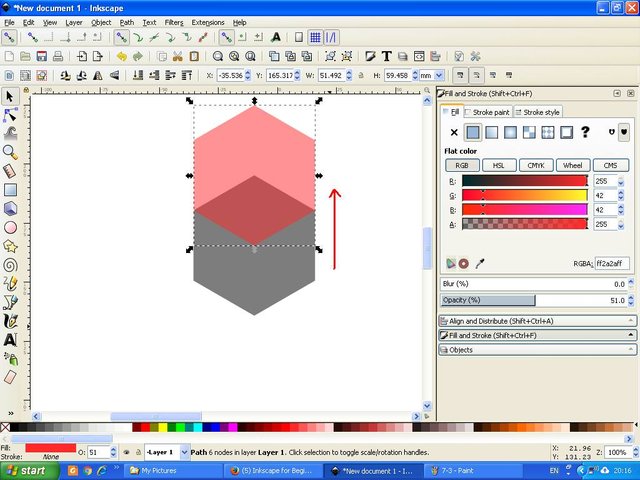
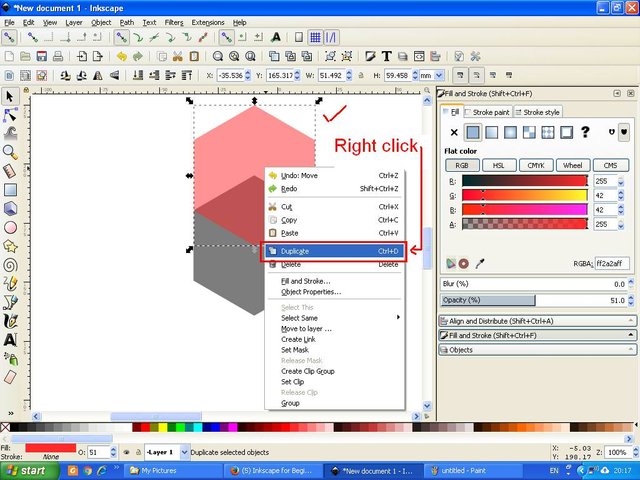
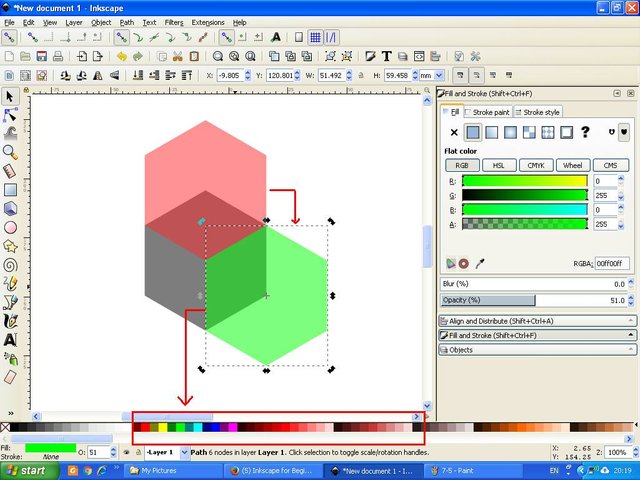
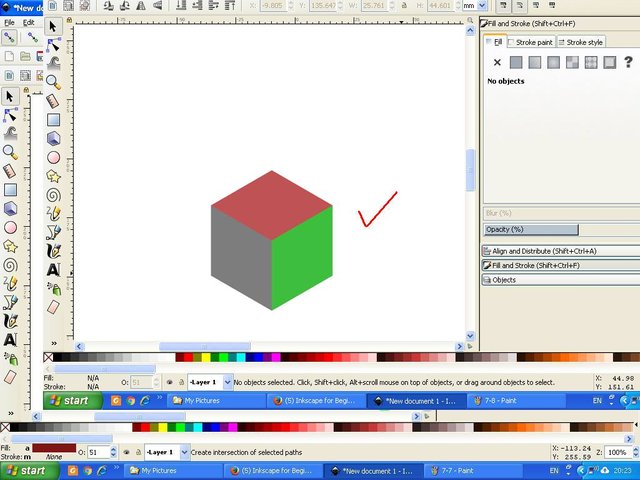
The fifth step right click on the object and then select duplicate then change its color so that it is different from the main object, here I use red color, then move up to form a rectangular shape, then right click on the red object and select duplicate, then replace the different colors and put on the right side, here I use green color. Then click the black object hold down the SHIFT on the keyboard click the red object, then select the path on the menu bar and select intersection, and the shape will soon change, as in the example image below.
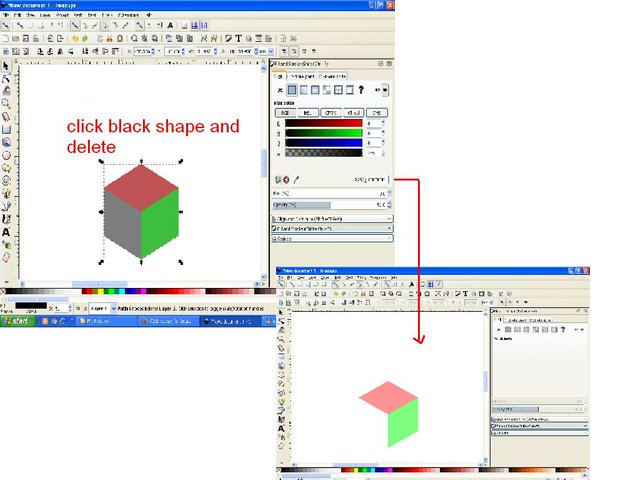
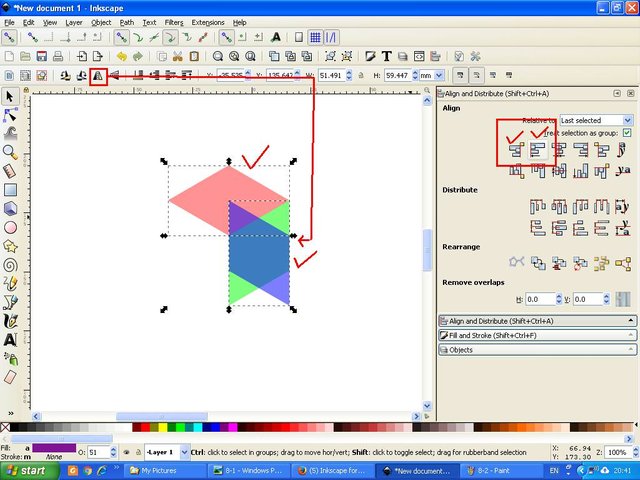
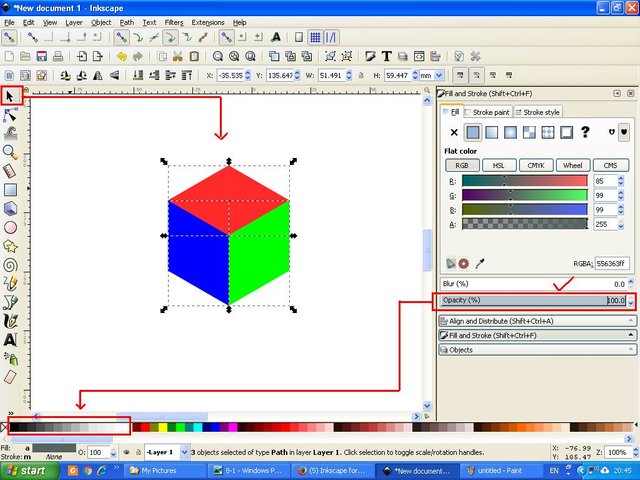
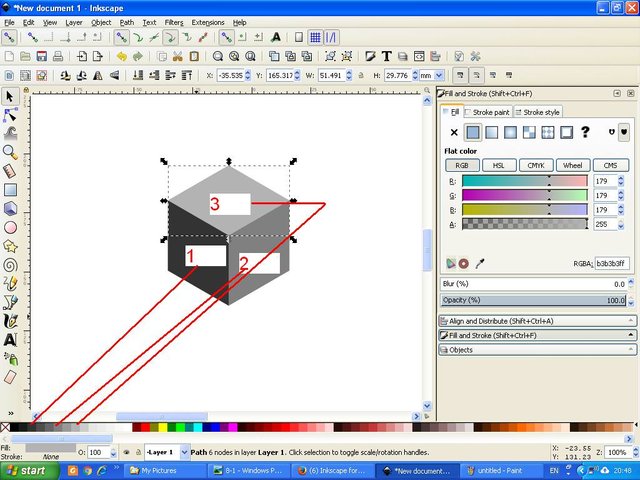
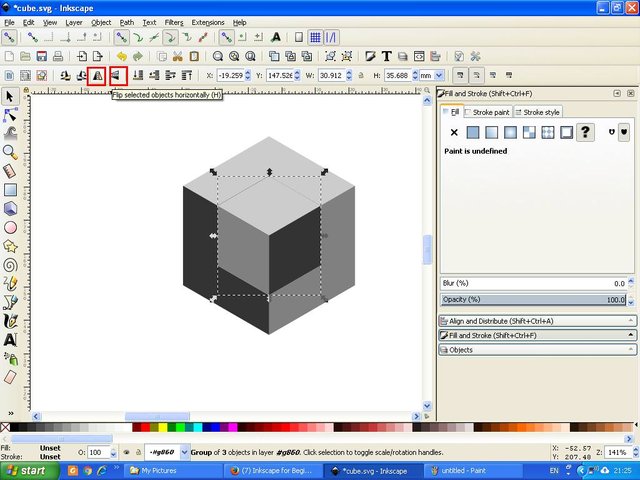
The next step, click the black and delete objects, then right click on the green object and select duplicate, then change to another color, of course must be different from the other two objects, here I use blue, then select the flip selected object icon on the menu bar then click Align left edges and click align right edges on the align and distribute object screen screen to the right of the screen. Next click on select and transform object then block the whole object and add opacity to 100%, then click one by one side of the object and substitute the color to gray with percent adjustment, here i use gray color with 80% capacity for left side 50% for right side and 20% for the top.
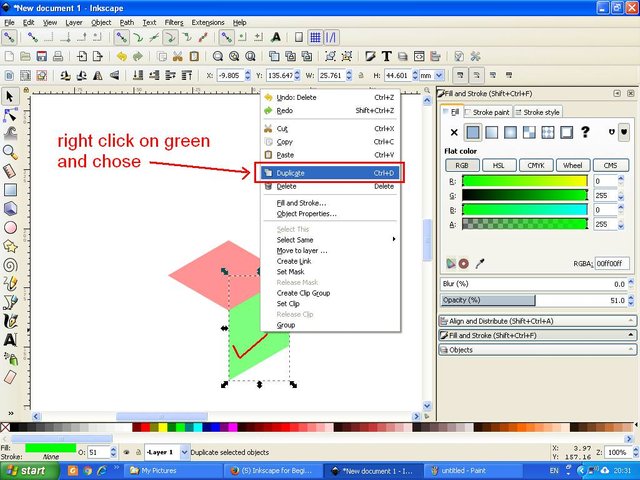
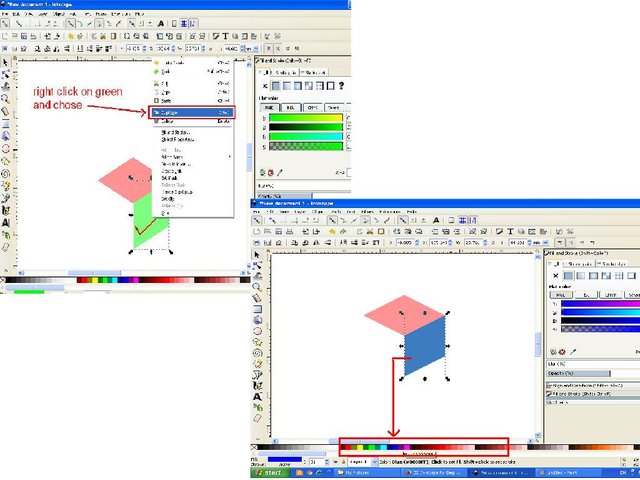
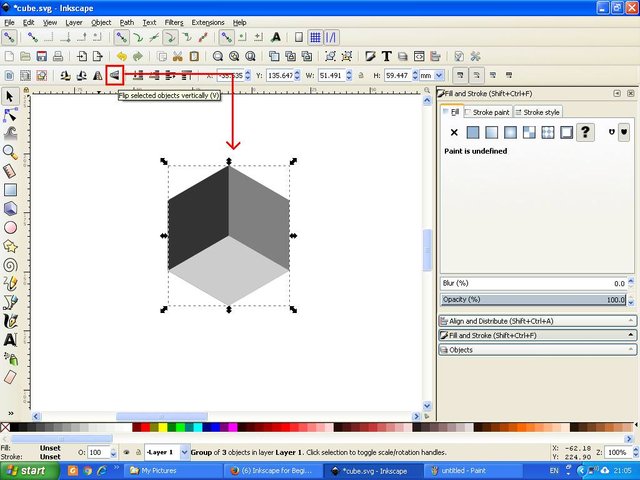
The next step click on the icon selected and transform on the side bar, as before then block the whole object and then click the icon group on the menu bar. Then right-click and select duplicate, then click the flip icon selected vertically on the menu bar, then minimize by clicking the arrow on one side of the object and hold down the SHIFT and CTRL keys on the keyboard, so the size of the duplicate object looks different from the original object.
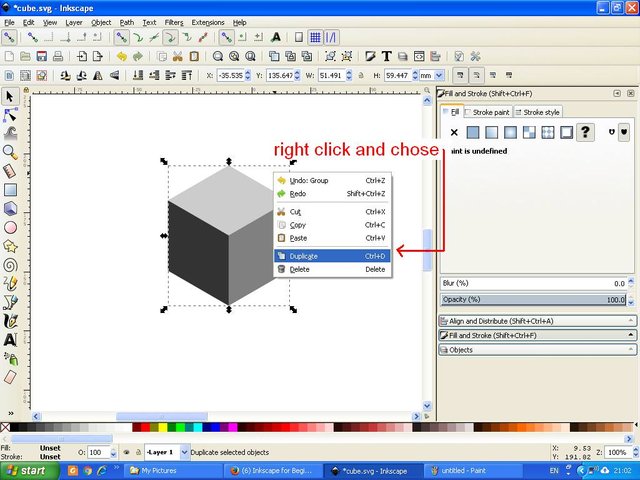
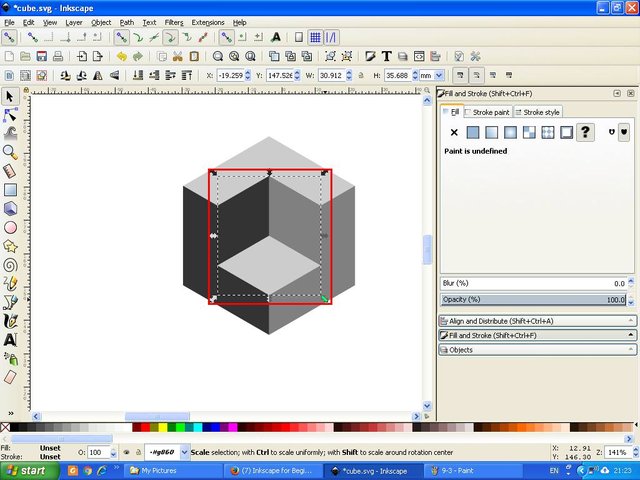
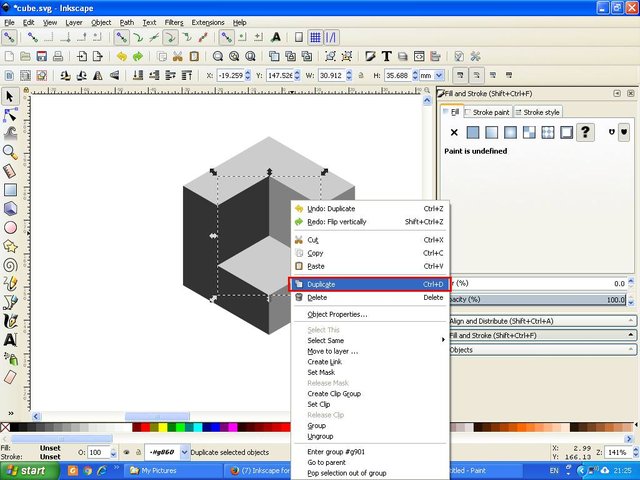
The next step right click on the duplicate object and select duplicate again and then click the flip icon selected vertically and horizontally, then hold down the Shift and CTRL buttons as it was smaller again so it looks different from the previous two objects, and now the cube has 3 Dimensions.
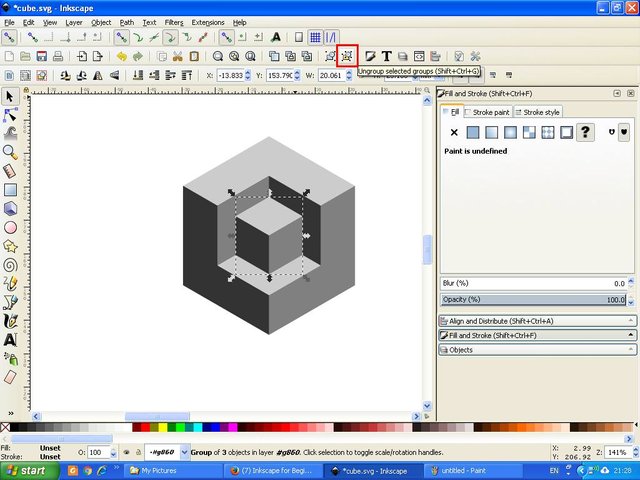
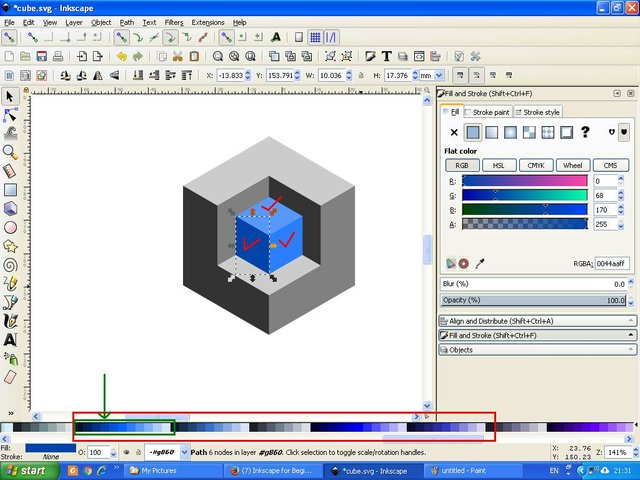
In order to more clearly visible the nature of three dimensions, continue the next step, at this stage click the smallest object of the three objects, then click ungroup icon on the menu bar, then click one by one side of the object dang anti color so it looks different, here I use # 0044AA for the left side, then # 0066FF for the right side and # 5599FF for the top side.
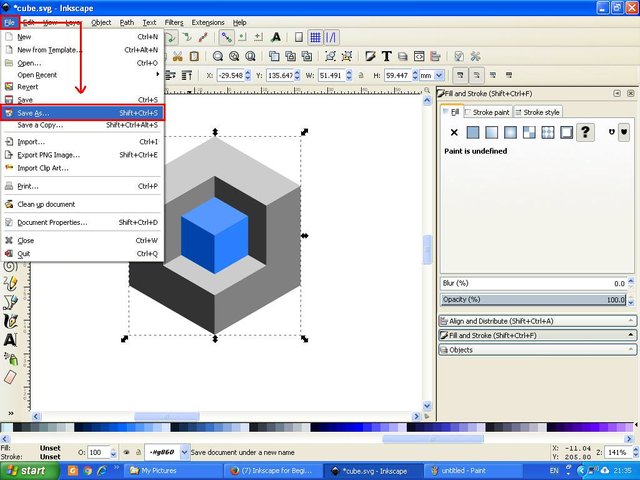
And now we come to the final stage of the whole process of making this 3D cube, before saving the file do step berikkut, click selected and transform obejk on the side bar then click the icon group object on the menu bar, then click as usual on the file on the menu bar select Save As then select one format to save the file, keep in mind that it is important to save the file into SVG format so that it can be re-edited later, if needed, and save it in PNG or other format to save the file intact.
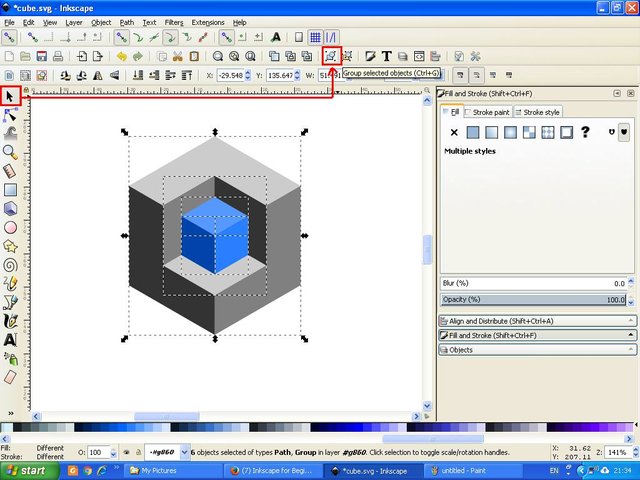
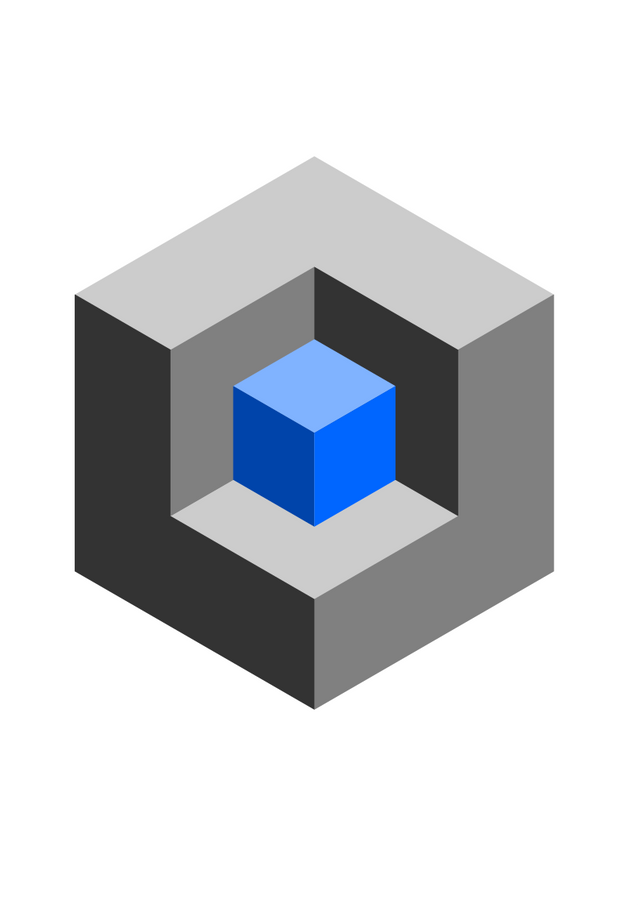
And this is the result of my tutorial this morning.
Well all my friends, so is my tutorial on this occasion, hopefully there are benefits and for those of you who want to try it I wish you good luck and good luck. Please give your upvote, leave your comments and follow my account if you wish to follow the next tutorial from me. Thanks and Best regards @saini88
Posted on Utopian.io - Rewarding Open Source Contributors

Thank you for the contribution. It has been approved.
You can contact us on Discord.
[utopian-moderator]
Thank you so much @shreyasgune #utopian-moderator
Hey @saini88 I am @utopian-io. I have just upvoted you!
Achievements
Suggestions
Get Noticed!
Community-Driven Witness!
I am the first and only Steem Community-Driven Witness. Participate on Discord. Lets GROW TOGETHER!
Up-vote this comment to grow my power and help Open Source contributions like this one. Want to chat? Join me on Discord https://discord.gg/Pc8HG9x