Godot Game Engine Tutorial: Creating a Function for a Button with Basic Programming
This is a link for my last tutorial.
https://steemit.com/utopian-io/@rye05/godot-game-engine-tutorial-how-to-create-a-press-start-button
It was about creating a button.
For today's tutorial, it's going to be with creating a button again but we'll be adding an extra functionality using basic programming.
So, let's start.
- Launch Godot
- If you followed my previous tutorial, you would have a sample project for the button we created. Double click it to open the editor.

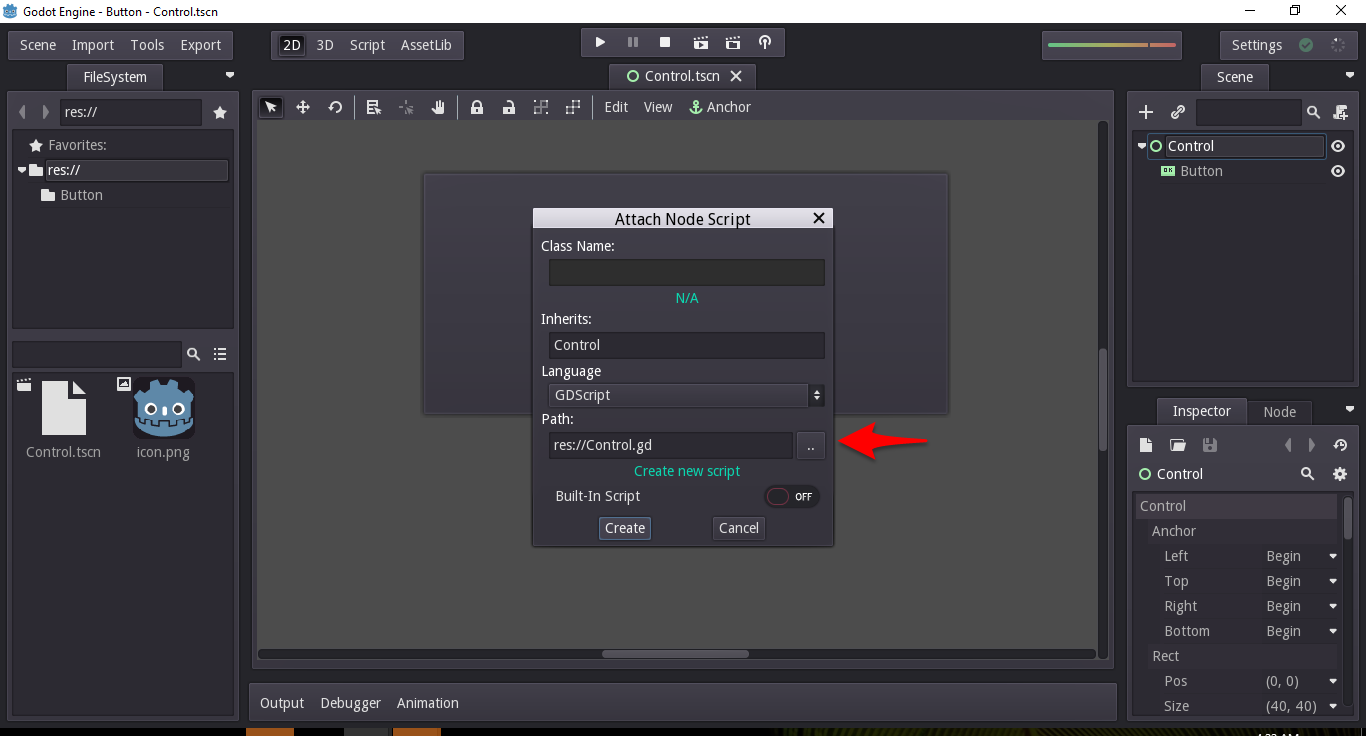
- On the control asset, right click and then choose attach script.

- A new window will pop up, no need to change anything, just leave it as it is.

- You can also save this script by clicking the button.
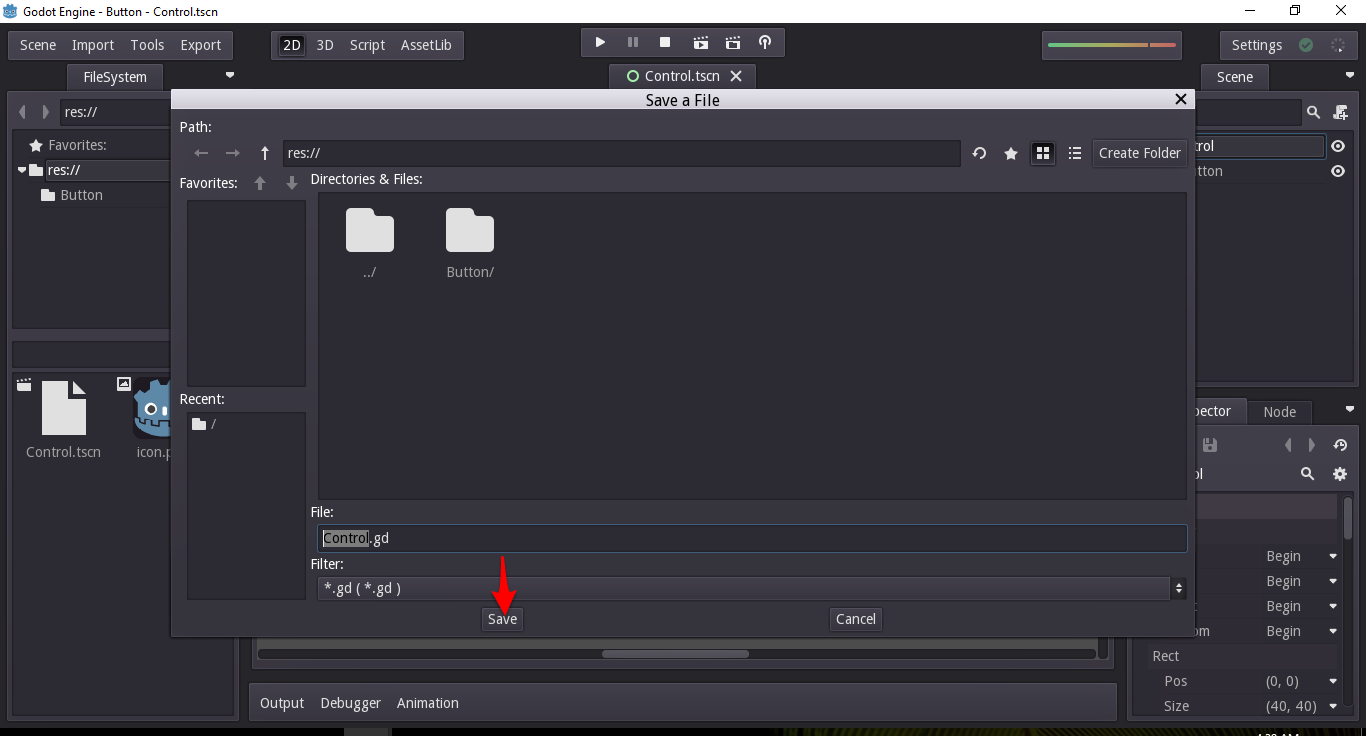
- You can name it and then click on save.
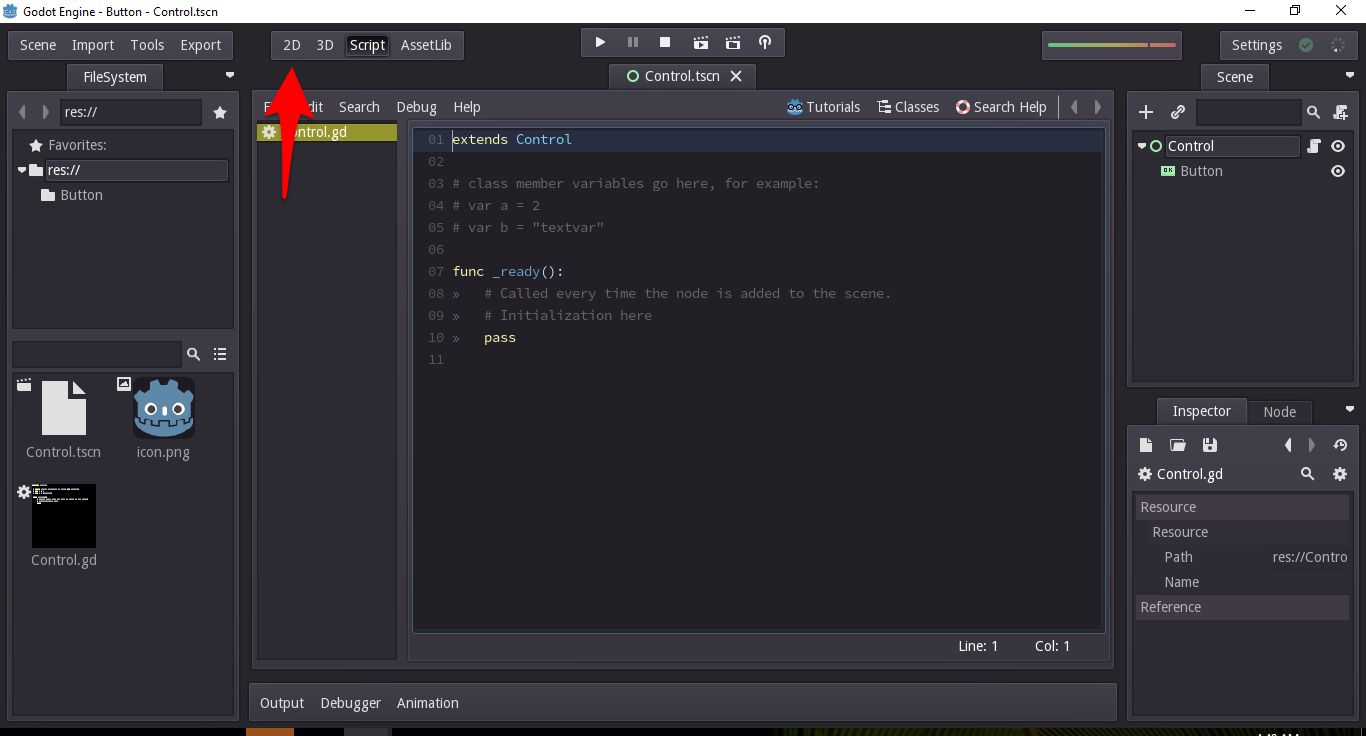
- This will be the script window for the Control asset. Don't worry, even if you don't have any programming background, you can still do it.

- Now, hit on 2D as we're gonna add something new.
- Click on the plus button at the right hand side.

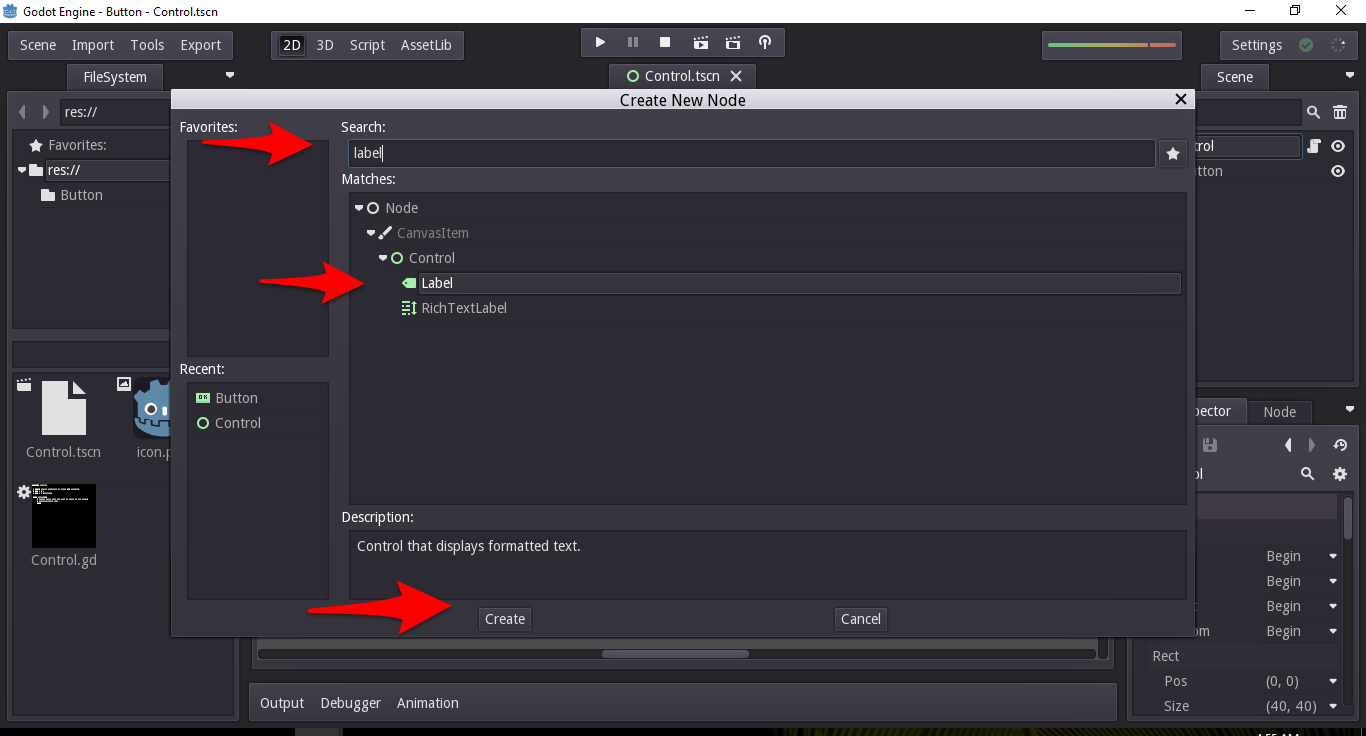
- We're gonna make a label asset, search for it then create.
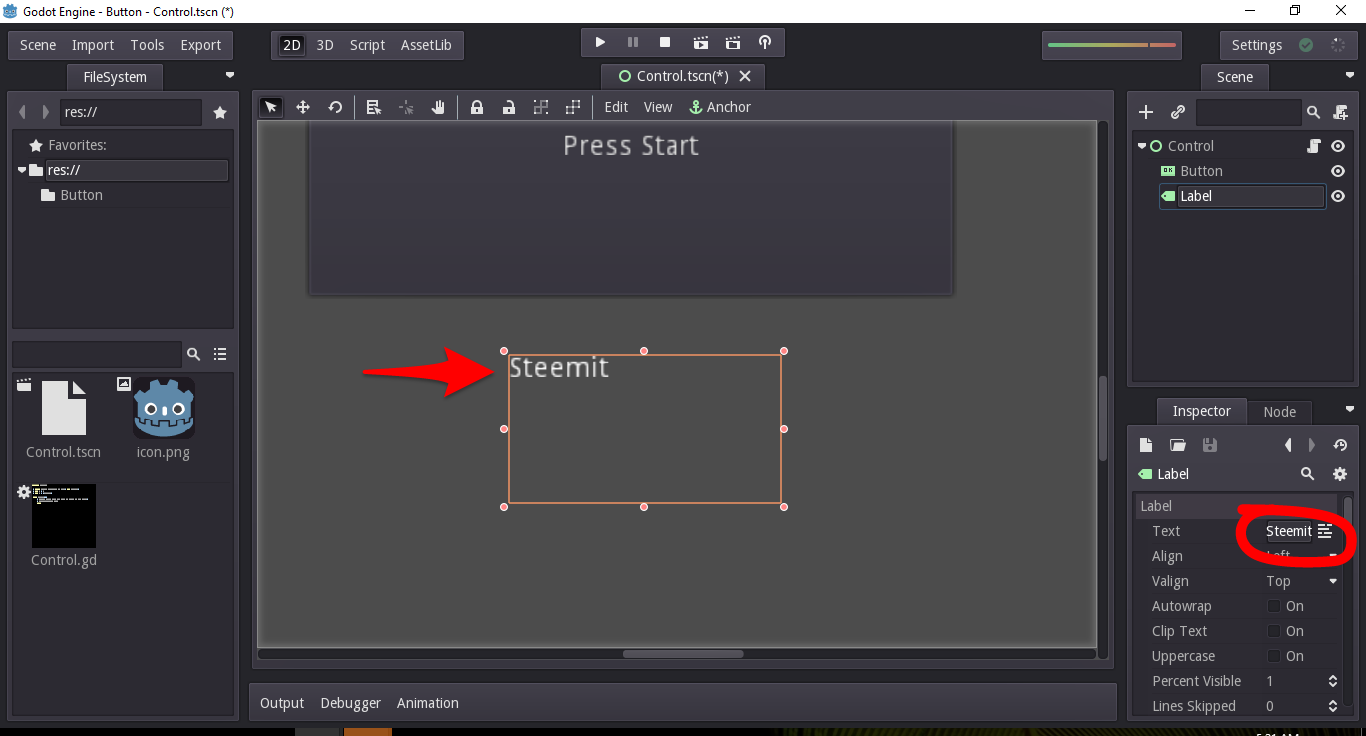
- The asset will appear but it will be blank. You can put a text using the same process as putting a text to the button. It's on the lower right hand side, I put Steemit.
- You can also center the text to make it look better.

- And if you scroll down a bit, change the color and background color as well.

- Go back to the Button asset and click on the node tab.

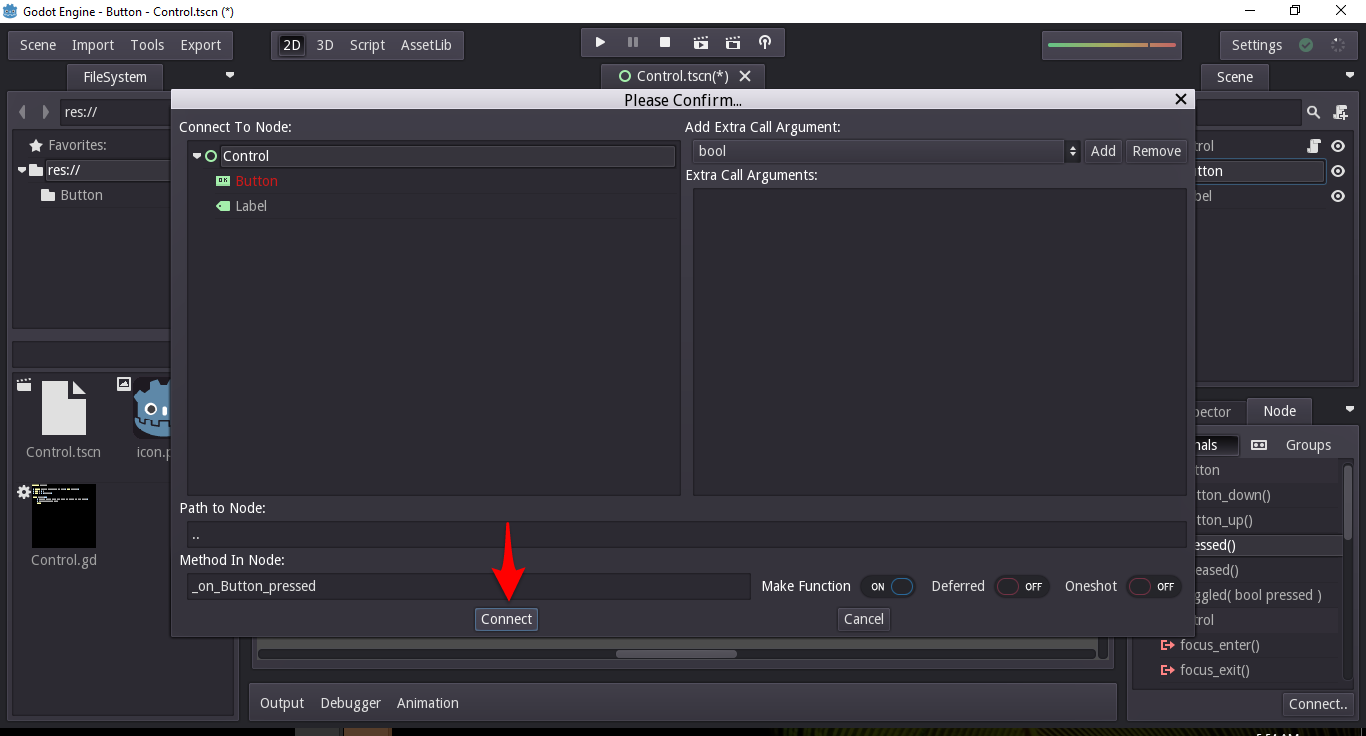
- You will see different options here for what the buttons can do, locate the pressed option and double click on it.

- A new window will pop up and by clicking connect, you will connect the pressed functionality from the Button asset to the Control Asset.
- Look at the script page of the Control asset, the pressed functionality has been successfully added and it has its own syntax.

- You can delete the syntax that starts with "pass" as it is not needed.

- Add a new syntax on the following line, it should be get_nodes() and the system will automatically give you the options available, choose Label.

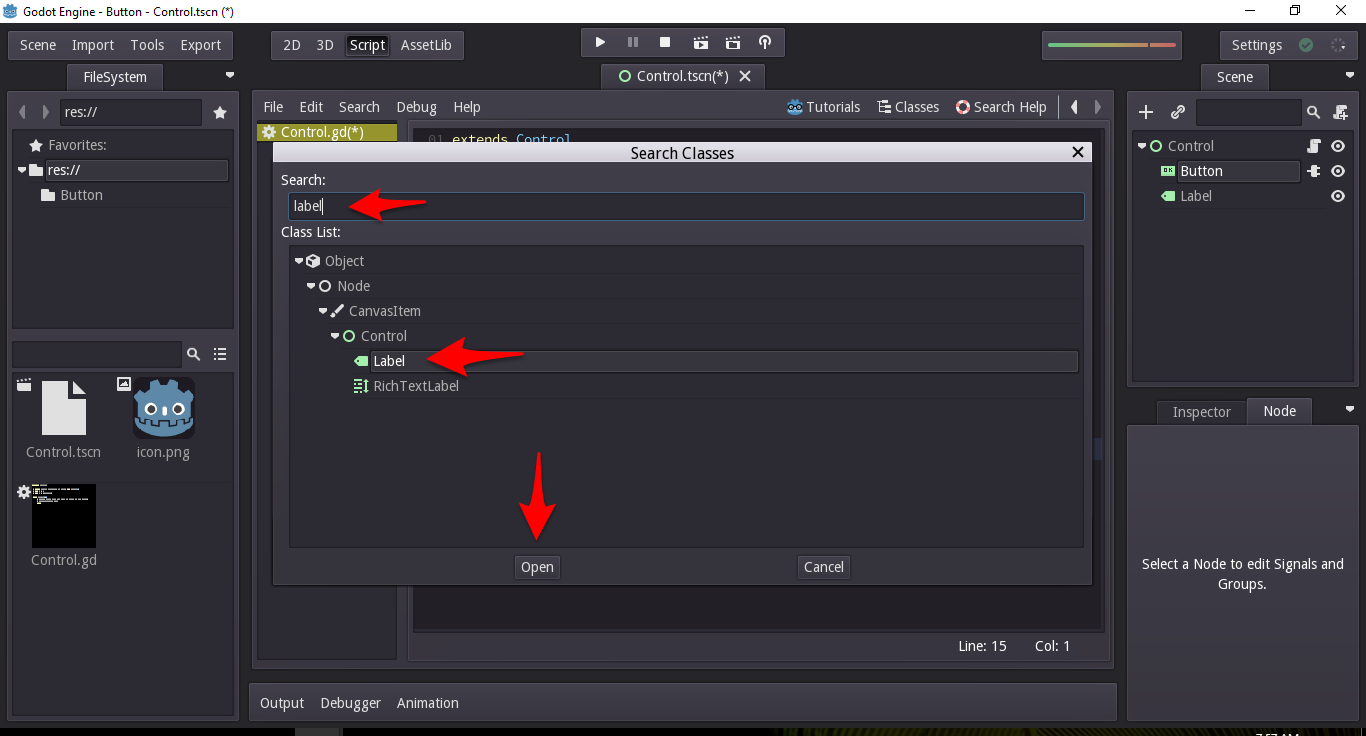
- The syntax should be get_nodes("Label") and hit classes at the top.

- Then put Label again and click open.
- After that, the script for the Label would also appear but you don't have to change anything here.

- Locate for the syntax that stars with void set_text and this is what we will put in the Control script.

- Let's go back to the Control script page by clicking Control at the top left, then on the syntax we created, add the syntax we got from the Control Script. So the whole syntax should read get_node("Label").set_text("Steemit is the Best"). I put Steemit is the best but you can put anything then hit on play.

- And here's what will happen when you click the button, the Label Steemit below the button will change when you click the button.

That's the wrap for this tutorial, thank you for reading.
Posted on Utopian.io - Rewarding Open Source Contributors
Very nice tutorial that anyone should be able to understand.
Thank you!
Thank you very much, glad you like it
Congratulations! This post has been upvoted from the communal account, @minnowsupport, by Rye05 (SteemPH Customer Service) from the Minnow Support Project. It's a witness project run by aggroed, ausbitbank, teamsteem, theprophet0, someguy123, neoxian, followbtcnews/crimsonclad, and netuoso. The goal is to help Steemit grow by supporting Minnows and creating a social network. Please find us in the Peace, Abundance, and Liberty Network (PALnet) Discord Channel. It's a completely public and open space to all members of the Steemit community who voluntarily choose to be there.
If you would like to delegate to the Minnow Support Project you can do so by clicking on the following links: 50SP, 100SP, 250SP, 500SP, 1000SP, 5000SP. Be sure to leave at least 50SP undelegated on your account.
you should be able to do this in your previous post. here
so for this post not enough can be received in utopian and get vote, you can return with something more different in the next opportunity.
[utopian-supervisor]
Thank you, I understand it got rejected, no problem with me. It's just that since I have no programming background, I got really confused with the whole tutorial when combining it in one. I just don't want to confuse my readers too. Thank you for the review.
Your contribution cannot be approved because it does not follow the Utopian Rules.
You can contact us on Discord.
[utopian-moderator]