How to change the shape of border with jquery
What Will I Learn?
- You will learn about handleShape
- You will learn about checkboxradio
- You will learn about setting shape with css
Requirements
- You have basic about jquery
- You have basic about css
- You have basic about html
Difficulty
- Basic
Tutorial Contents
In this post I will create a tutorial to change the shape of a border, as for border is a line that is on the outside of an object, be it in picture, table, and others. The steps that must be done is as follows.
- The first stage you have to prepare a text editor as a container of the program and browser to accommodate its output. I use notepad ++ and google chrome.
- The next stage is to create an html file with the name
bordershape.html, as usual to create a web page, we have to add an html element, like this:
<!doctype html>
<html lang="en">
   <head>
       <title>bentuk border</title>
    </head>
       <body>
        </body>
</html>
- Then we have to add a file and host from jquery, for those of you who do not have the jquery file you can download ithere, or you can copy the file below.
<link rel="stylesheet" href="//code.jquery.com/ui/1.12.1/themes/base/jquery-ui.css">
  <link rel="stylesheet" href="/resources/demos/style.css">
  <script src="https://code.jquery.com/jquery-1.12.4.js"></script>
  <script src="https://code.jquery.com/ui/1.12.1/jquery-ui.js"></script>
- Add a handleshape function that works to set the shape of the border, like this:
$( function() {
...
} );
- As we know that the code above serves to open and accommodate the class of shapes. Then add function with method
handleshape, like this:
function handleShape( e ) {
...
};
Function: open the function,handleShape: method,e: parameter, then add a variable to hold the form of the border, and add a command to remove the class, the class is circle, pill, square, rectangle, then add the class to hold the value of the target that is called when the program is run, the code is as follows.
$( ".shape" )
.removeClass( "circle pill square rectangle" )
 .addClass( $( e.target ).val() );
- Out of the
handleShapefunction, we have to add a variable that will be used as achekboxradiobutton, where the button will be used as input to hold commands from the checkbox. Then add a command to run the program when the button changes, like this:
$( "input" ).checkboxradio();
 $( "[name='shape']").on( "change", handleShape );
- Next we will enter in the creation of buttons by using html as a view of the program. In the first stage we have to declare a class
shape-wrapto hold the title tag and then create a class with theshape-barname to create a checkboxradio. Next create alabelwithfor shape-circle. And add the input button with the radio type and shape-circle id to accommodate the function already created in the script above, and also create a checkbox radio for other border shapes, Like this:
<div class="shape-wrap">
    <h3>pilih bentuk border yang tersedia</h3>
    <div class="shape-bar">
      <label for="shape-circle">bulat</label>
      <input type="radio" name="shape" id="shape-circle" value="circle" checked>
      <label for="shape-square">kubus</label>
      <input type="radio" name="shape" id="shape-square" value="square">
      <label for="shape-pill">Pil</label>
      <input type="radio" name="shape" id="shape-pill" value="pill">
      <label for="shape-rectangle">persegi</label>
      <input type="radio" name="shape" id="shape-rectangle" value="rectangle">
    </div>
  </div>
- After the command to make the above button is complete, then we will menbuat a command to display the border,
<div class="shape circle background jquery-ui"></div>
- After the html file is finished then we will enter the css file, this file serves to create border, border and border color. the first step is to create a file with the name
style.css, then we will enter at the setting stage of the border later.
.shape {
      margin-left: 4em;
      margin-top: 2.5em;
      height: 8em;
      width: 8em;
      border: 2px solid #333333;
    }
- In the code above can be seen that on the margin, height and width of the border will be arranged based on what we want. As for the form there is some code to set the radius of the border with the circle and pill form, and set the width of the border with the shape of pill and rectangle, and margin-left for square and circle. For the code you can see below.
}
    .circle, .pill {
      border-radius: 8em;
    }
    .pill, .rectangle {
      width: 16em;
    }
    .square, .circle {
      margin-left: 9em;
    }
- Here full code :
<!doctype html>
<html lang="en">
<head>
<link rel="stylesheet" href="style.css">
  <meta charset="utf-8">
  <title>bentuk border</title>
  <link rel="stylesheet" href="//code.jquery.com/ui/1.12.1/themes/base/jquery-ui.css">
  <link rel="stylesheet" href="/resources/demos/style.css">
  <script src="https://code.jquery.com/jquery-1.12.4.js"></script>
  <script src="https://code.jquery.com/ui/1.12.1/jquery-ui.js"></script>
  <script>
  $( function() {
    function handleShape( e ) {
      $( ".shape" )
        .removeClass( "circle pill square rectangle" )
        .addClass( $( e.target ).val() );
    };
    $( "input" ).checkboxradio();
    $( "[name='shape']").on( "change", handleShape );
  } );
  </script>
</head>
<body>
  <div class="shape-wrap">
    <h3>pilih bentuk border yang tersedia</h3>
    <div class="shape-bar">
      <label for="shape-circle">bulat</label>
      <input type="radio" name="shape" id="shape-circle" value="circle" checked>
      <label for="shape-square">kubus</label>
      <input type="radio" name="shape" id="shape-square" value="square">
      <label for="shape-pill">Pil</label>
      <input type="radio" name="shape" id="shape-pill" value="pill">
      <label for="shape-rectangle">persegi</label>
      <input type="radio" name="shape" id="shape-rectangle" value="rectangle">
    </div>
  </div>
  <div class="shape circle background jquery-ui"></div>
</body>
</html>
- Jalankan program
Demo live
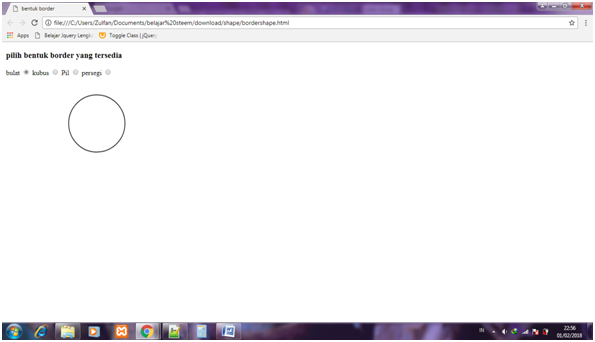
Here output :
- After click kubus checkboxradio.

- After click pill checkboxradio.

- After click persegi checkboxradio.

Posted on Utopian.io - Rewarding Open Source Contributors
Your contribution cannot be approved because it does not follow the Utopian Rules, and is considered as plagiarism. Plagiarism is not allowed on Utopian, and posts that engage in plagiarism will be flagged and hidden forever.
Plagiarised from here or somewhere else.
You can contact us on Discord.
[utopian-moderator]