Hidden-Video-Player-Application-with-Electron-Part-4

Repository
Electron GitHub Address
https://github.com/electron/electron
My GitHub Address
This Project GitHub Address
https://github.com/pckurdu/hidden-video-player-application-with-electron-part-4
What Will I Learn?
- You will learn to use child window in electron.
- You will learn to use the parent property in the BrowserWindow.
- You will learn how to adjust the visibility of electron windows with show property.
- You will learn how to change the properties of a window frame in electron.
- You will learn how to communicate between the main and renderer processes.
- You will learn how to read files in electron.
Requirements
- basic electronjs knowledge
- Atom Editor
Difficulty
- Intermediate
Tutorial Contents
Video player application is working, we can now load the videos into the application and hide it.
We can hide the video we want with the application, but if we leave the application like this, everyone can access the video.
If we want to hide the videos, we should only be able to log in with the username and password.
I will create a separate window to perform the login process. The first time the application opens, this new window will appear and the application will be hidden. When the user name and password are entered correctly this window will close and the application will be visible.
I will store the username and password information in a separate file, which I will create in the confidential file where confidential information is kept on this file.
I will use the ipc to send the information to the host application when it is logged in the login window.
With this tutorial:
- how to create an electron child window.
- how to read electron files.
- how to use ipc with electron
You will learn about topics.
Let's start coding.
First we create the page where we will perform the login process. I'm creating the login.html page.
I will use bootstrap on this page. I'll use the container class to center the page relative to the window.
I will place two inputs for the username and password, and two buttons for input and output operations.
Also I will place one label to inform the user when an incorrect entry is made.
In login.html
<!DOCTYPE html>
<html>
<head>
    <meta charset="utf-8" />
    <meta http-equiv="X-UA-Compatible" content="IE=edge">
    <title>Login Page</title>
    <meta name="viewport" content="width=device-width, initial-scale=1">
    <link href="https://stackpath.bootstrapcdn.com/bootstrap/4.1.1/css/bootstrap.min.css" rel="stylesheet"
    integrity="sha384-WskhaSGFgHYWDcbwN70/dfYBj47jz9qbsMId/iRN3ewGhXQFZCSftd1LZCfmhktB" crossorigin="anonymous">


</head>
<body>
    <div class="container">
        <br/>
        <div class="form-group">
            <label for="usr">User Name:</label>
            <input type="text" class="form-control" id="txtUsr">
        </div>
        <div class="form-group">
            <label for="pwd">Password:</label>
            <input type="password" class="form-control" id="txtPwd">
        </div>
        <button class="btn btn-success" id="btn-login">Login</button>
        <button class="btn btn-danger" id="btn-exit">Exit</button>
        <label  id="lbl"></label>
    </div>
    <script src="login.js"></script>
</body>
</html>
This page will be the child application of the main application so that the two windows will interact with each other.
In the createWindow() function, create a window using the BrowserWindow module for the login.html page.
Here we can set the child window of the win window using the parent property.
In main.js
let child
function createWindow() {
…

    child = new BrowserWindow({parent:win,width:400,height:300})

    child.loadURL(url.format({
        pathname:path.join(__dirname,'login.html'),
        protocol:'file',
        slashes:true
    }))

}
When we run the application when we do such an coding, two windows will open.
We have to hide the main window because there is nothing we want to open two windows. we can provide this hiding with the show property in BrowserWindow.
win =new BrowserWindow({width:1000,height:800,show:false})
child = new BrowserWindow({parent:win,width:400,height:300,show:true})
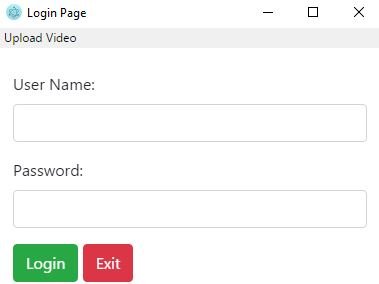
The following image occurs when the application is run.
If we leave the application like this, the user can upload a video to the app, and that's something we do not want.
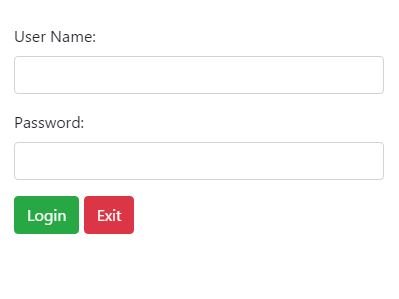
We need to lift the frame in the child window to solve this problem. We can remove the frame by adding frame: false in the child window's BrowserWindow.
child = new BrowserWindow({parent:win,width:400,height:300,show:true,frame:false})
Now we can start coding this page in login.js.
I have used angular for the main application and I want to use Jquery for this child window.
To download using jQuery npm, we only need to write npm i jquery so we can use our page by loading jQuery.
Where the username and password must be in a specific file. Let's read this file using the file system and compare it with the values entered.
Let's create a file named authorities under bats folder.
After installing jquery and file system, let's define a path to this file.
let $ = require('jquery')//load jquery
let fs = require('fs')//load file system
let filename = 'D:\\electron\\hiddenVideoPlayer-part3\\bats\\authorities'// file name path
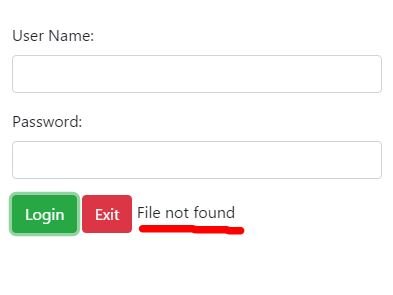
When we click on the login button, we first check this file. If the file is found, we will read the data in it and if it is not found, give an error message.
$('#btn-login').on('click', () => {//when btn-login click

                if(fs.existsSync(filename)) {//check file

                let data = fs.readFileSync(filename, 'utf8').split('\n')//read file
                // reading operation
                }else{
                    $('#lbl').text('File not found')//messagge
                }
            })
I will add the file and insert the data into it.
I have set the username and password according to a certain standard. According to these standards I will read the data and compare it with the necessary entries.
data.forEach((authorities, index) => {
     let [ user, password ] = authorities.split(',') //seperation by comma
Since we read the data according to the row, each row is available as an array in the array.
I will split the data according to the comma character.
let [name1,usr]=user.split(':')//seperation by colon
let [name2,pass]=password.split(':')//seperation by colon
let txtUser=$('#txtUsr').val();
let txtPwd=$('#txtPwd').val();
   if(txtUser==usr && txtPwd==pass){//input equation control
         // Login successful
     }
      else{
           $('#lbl').text('Username or Password is Incorrect')//
      }
I am accessing the username and password according to the colon.
If the login is successful I need to send the message is successful to the main process.
I will use the ipc renderer to send messages. I need to define it before I can use it.
const ipc = require('electron').ipcRenderer;//load ipc renderer
I should send the message when the data in the file is equal to the entries.
ipc.sendSync('entry-accepted', 'ping')//login success
Let's catch the events that will occur when we click on the exit button before capturing the message we sent with main process.
$('#btn-exit').on('click', () => {//when btn-exit click

        ipc.sendSync('exit', 'ping')
   })
We must define the ipcMain module to catch these messages in the main process.
In main.js
const {app,BrowserWindow,Menu,dialog,ipcMain}=require('electron')//ipcMain upload
We can catch messages with the names of the messages sent.
ipcMain.on('entry-accepted', (event, arg) => {
    if(arg=='ping'){
        const bat=exec('cmd /c electron.bat 123456',{cwd:"D:\\electron\\hiddenVideoPlayer-part3\\bats"},function(){

        });//open hidden file
        win.show()
        child.hide()
    }
})

ipcMain.on('exit', (event, arg) => {
    if(arg=='ping'){
        app.quit()//close app
    }
})
We can understand that the correct entry is made with the entry-accepted message, then we must make the hidden file we uploaded the videos visible, close the login page, and make the main application visible as well.
With the message exit we can understand that you want to exit the application and close the application.
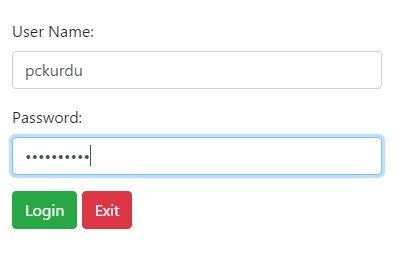
If we log in correctly to the application.
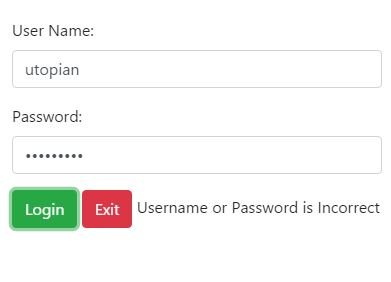
When an incorrect entry is made.
Curriculum
Hidden Video Player Application with Electron (Part 1)
Hidden Video Player Application with Electron (Part 2)
Hidden Video Player Application with Electron (Part 3)
Proof of Work Done
https://github.com/pckurdu/Hidden-Video-Player-Application-with-Electron-Part-4
Thank you for your contribution.
While I liked the content of your contribution, I would still like to extend few advices for your upcoming contributions:
Looking forward to your upcoming tutorials.
Your contribution has been evaluated according to Utopian policies and guidelines, as well as a predefined set of questions pertaining to the category.
To view those questions and the relevant answers related to your post, click here.
Need help? Write a ticket on https://support.utopian.io/.
Chat with us on Discord.
[utopian-moderator]
Thank you for your review, @portugalcoin!
So far this week you've reviewed 12 contributions. Keep up the good work!
Hey @pckurdu
Thanks for contributing on Utopian.
We’re already looking forward to your next contribution!
Want to chat? Join us on Discord https://discord.gg/h52nFrV.
Vote for Utopian Witness!