Android Tutorial | Firebase User Login| Part 4
Android is a mobile operating system developed by Google, based on a modified version of the Linux kernel and other open source software and designed primarily for touchscreen mobile devices such as smartphones and tablets. In addition, Google has further developed Android TV for televisions, Android Auto for cars, and Android Wear for wrist watches, each with a specialized user interface. Variants of Android are also used on game consoles, digital cameras, PCs and other electronics. Android provides a rich application framework that allows you to build innovative apps and games for mobile devices in a Java language environment.
Source
Source 2
Useful Links
What Will I Learn?
Android Add New Activity
Android Layout Design
Android Click Listeners and methods
Requirements
Android Studio (Download)
Basic knowledge of Java
Android Device (For run and test our app)
Difficulty
- Intermediate
Curriculum
Android Tutorial | Google Text Recognition API | Part 1
Android Tutorial | Firebase User Registration | Part 2
Android Tutorial | Firebase User Registration | Part 3
Tutorial Contents
In this tutorial I will prepare a login page in our app and use firebase to do login control. First we will create login activity and java class for our login feature.
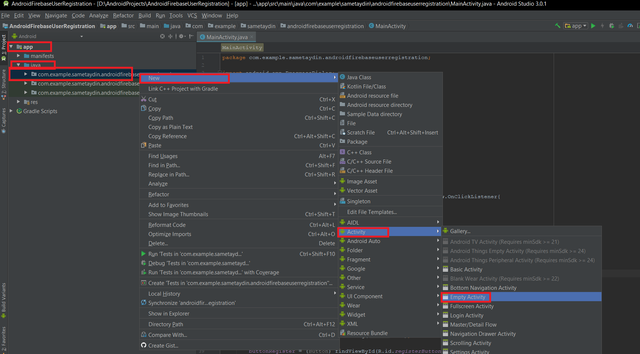
Now, open the "app/java/" folder, and right click the project folder. Select New -> Activity -> Empty Activity.
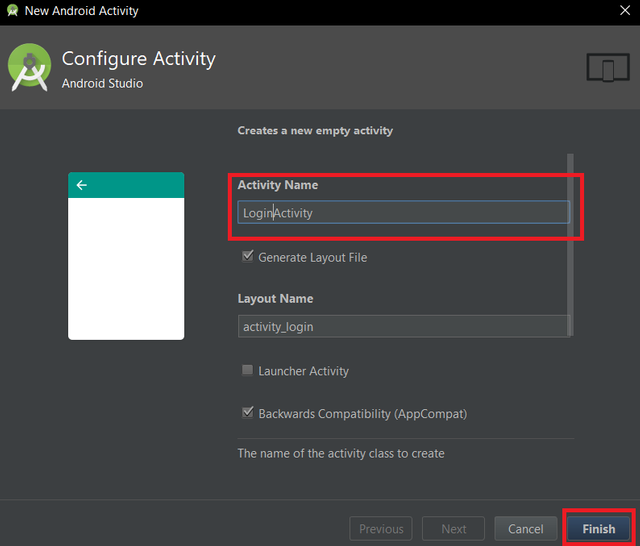
Now we will enter the activity name and click on the finish button.
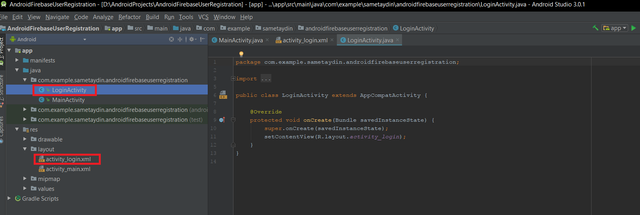
For our login feature we have successfully created our activity and our java class.
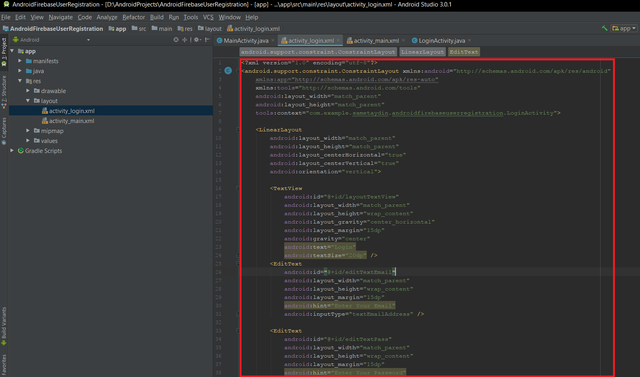
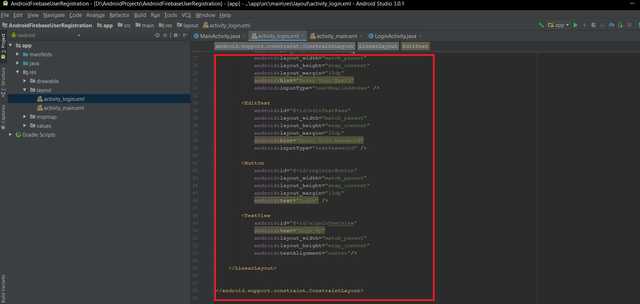
Now we can go into the design of our login layout, open the "app/res/layout/ " folder in our activity_login.xml file. Let's go to the "text" (coding) section below. And write the code of our application's design.
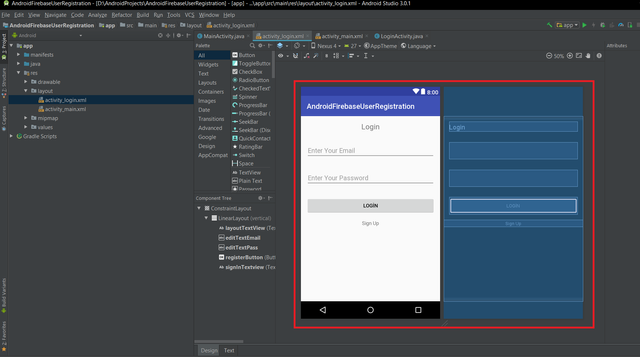
I've added a linear layout first. I inserted one button, two edittext and two textview into this linear layout.
Code:
<LinearLayout
android:layout_width="match_parent"
android:layout_height="match_parent"
android:layout_centerHorizontal="true"
android:layout_centerVertical="true"
android:orientation="vertical">
<TextView
android:id="@+id/layoutTextView"
android:layout_width="match_parent"
android:layout_height="wrap_content"
android:layout_gravity="center_horizontal"
android:layout_margin="15dp"
android:gravity="center"
android:text="Login"
android:textSize="20dp" />
<EditText
android:id="@+id/editTextEmail"
android:layout_width="match_parent"
android:layout_height="wrap_content"
android:layout_margin="15dp"
android:hint="Enter Your Email"
android:inputType="textEmailAddress" />
<EditText
android:id="@+id/editTextPass"
android:layout_width="match_parent"
android:layout_height="wrap_content"
android:layout_margin="15dp"
android:hint="Enter Your Password"
android:inputType="textPassword" />
<Button
android:id="@+id/registerButton"
android:layout_width="match_parent"
android:layout_height="wrap_content"
android:layout_margin="15dp"
android:text="Login" />
<TextView
android:id="@+id/signInTextview"
android:text="Sign Up"
android:layout_width="match_parent"
android:layout_height="wrap_content"
android:textAlignment="center"/>
</LinearLayout>
In general, I created the same simple design as our register page. But I made a new text view (Login) to make it clear what page we are on. I will add this to our register page.
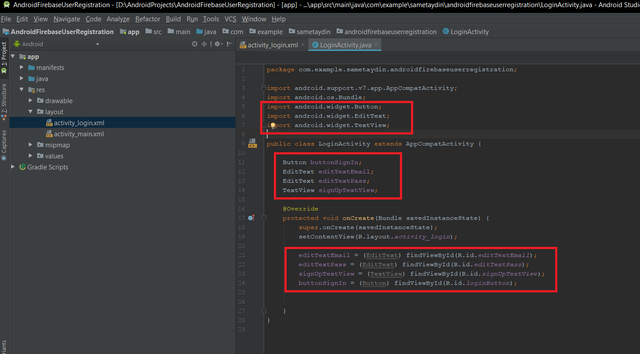
Okey now, I deefine layout objects in our java class.
Code:
import android.widget.Button;
import android.widget.EditText;
import android.widget.TextView;
Button buttonSignIn;
EditText editTextEmail;
EditText editTextPass;
TextView signUpTextView;
editTextEmail = (EditText) findViewById(R.id.editTextEmail);
editTextPass = (EditText) findViewById(R.id.editTextPass);
signUpTextView = (TextView) findViewById(R.id.signUpTextView);
buttonSignIn = (Button) findViewById(R.id.loginButton);
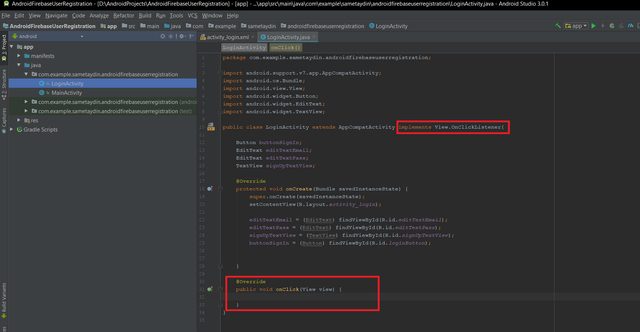
Now we will add an click listener implements to the main class.
Code:
implements View.OnClickListener
@Override
public void onClick(View view) {
}
}
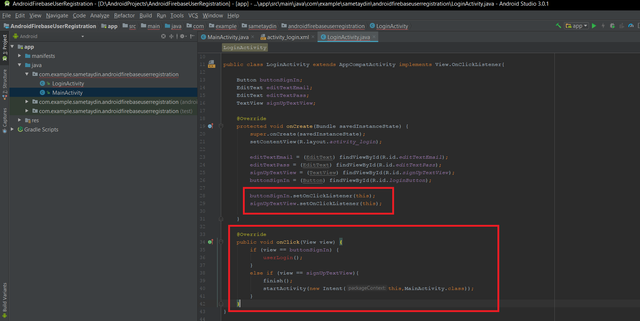
Now we will add our click listeners and write click methods.
Code:
buttonSignIn.setOnClickListener(this);
signUpTextView.setOnClickListener(this);
Methods code:
@Override
public void onClick(View view) {
if (view == buttonSignIn) {
userLogin();
}
else if (view == signUpTextView){
finish();
startActivity(new Intent(this,MainActivity.class));
}
}
We simply wrote our click listener methods as if it were on our previous register page. Simply put, if the clicked is login button open the "userLogin" method else if the clicked Sign up text view, open our register page.
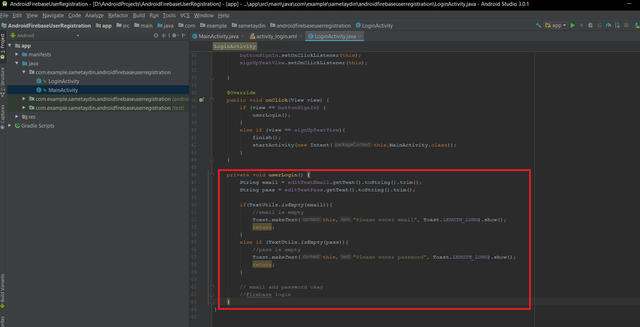
Okay now, we write the "userLogin" function for our app login feature.
Code:
private void userLogin() {
String email = editTextEmail.getText().toString().trim();
String pass = editTextPass.getText().toString().trim();
if(TextUtils.isEmpty(email)){
//email is empty
Toast.makeText(this,"Please enter email", Toast.LENGTH_LONG).show();
return;
}
else if (TextUtils.isEmpty(pass)){
//pass is empty
Toast.makeText(this,"Please enter password", Toast.LENGTH_LONG).show();
return;
}
// email and password okay
//Firebase login
}
We get our email and password data and checked. We will do firebase login with that datas in the next tutorial.
We came to the end of our Part 4 tutorial. Thank you for your attention.
Posted on Utopian.io - Rewarding Open Source Contributors

very good post
thanks
Your contribution cannot be approved because it does not follow the Utopian Rules.
Hi, this is the reason your contribution was rejected
I also recommend you format everything better for future contributions. You can use ``` above and below code snippets to make it look much nicer.
You can contact us on Discord.
[utopian-moderator]
Okay thanks I will try to improve.