OLED display Gauge Meter using Potentiometer - arduino
What Will I Learn?
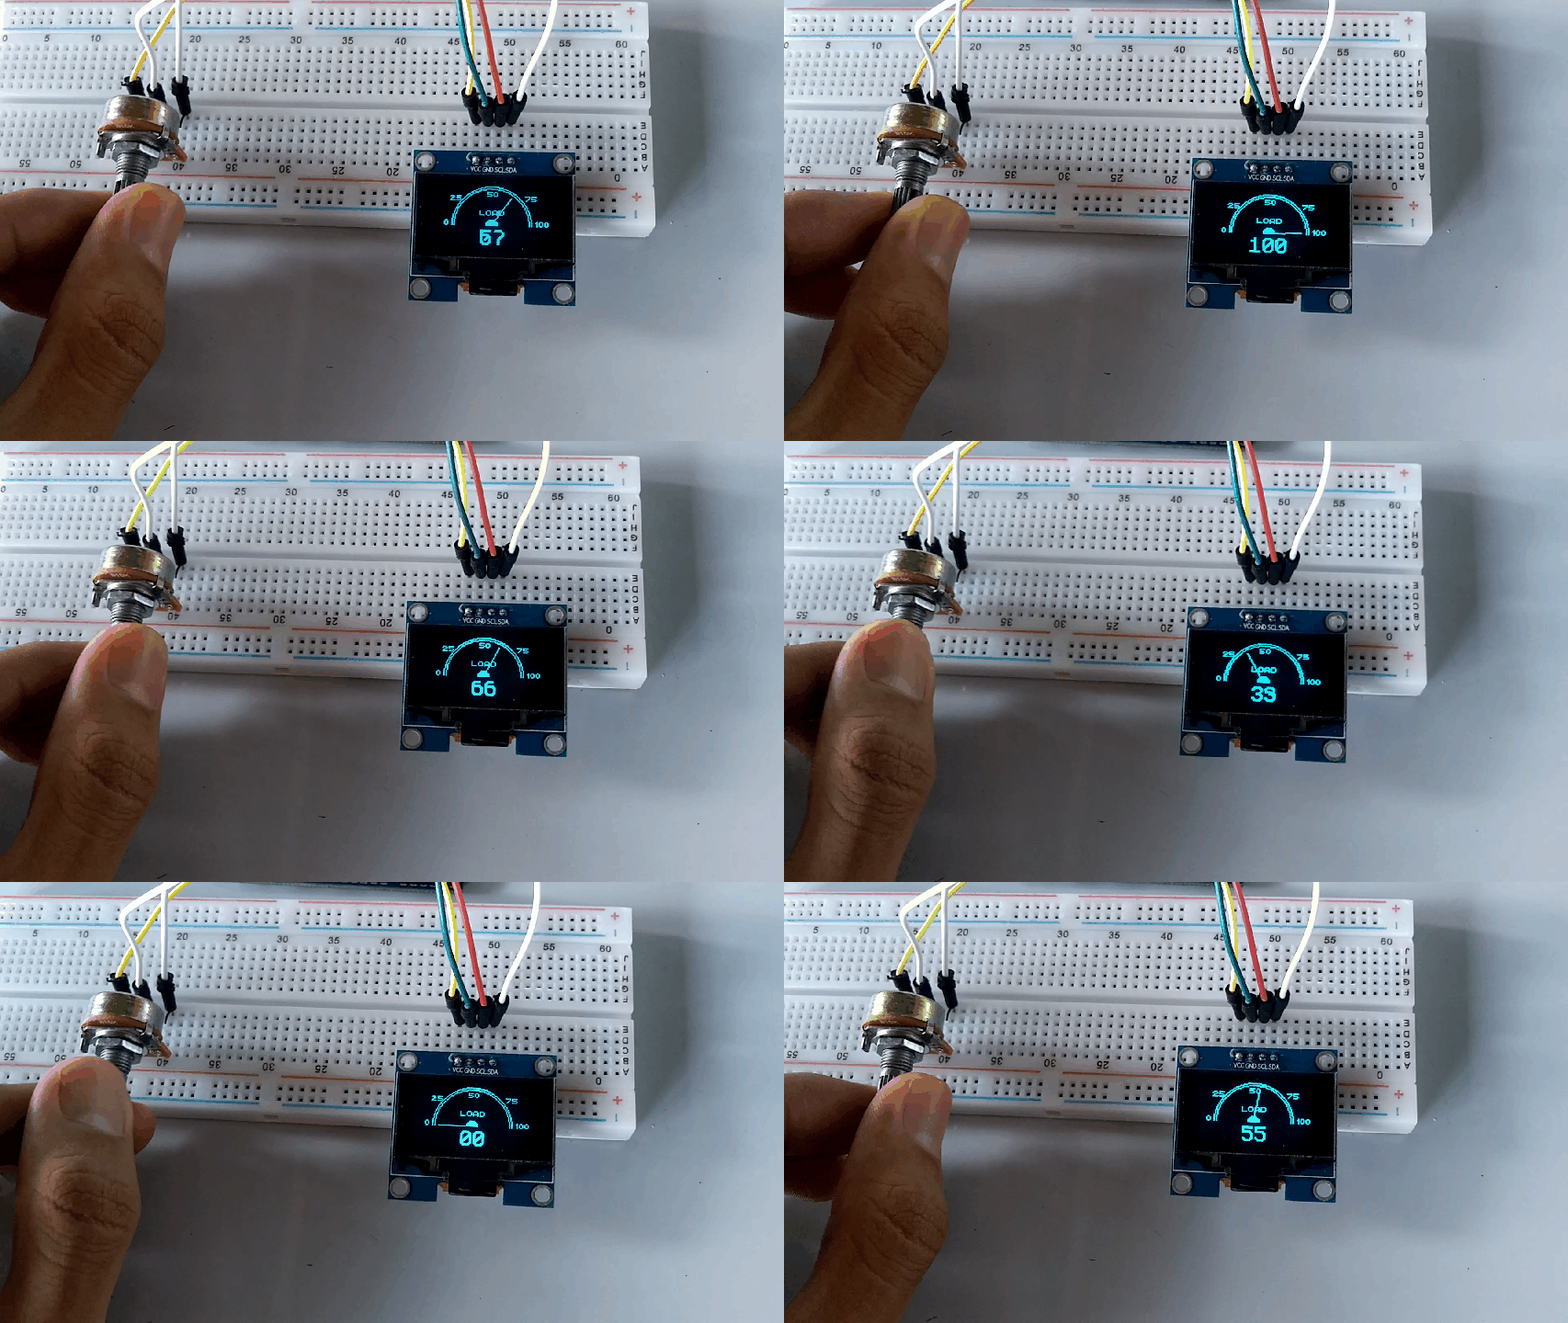
Today in this instructable we will learn how to make a Guage meter using a potentiomater, its very useful for school project activies a basic tutrial for oled display. how to program arduino on desktop IDE and how to connect the components with a circuit diagram.
Requirements
We need these couples of requirements needed in this tutorial
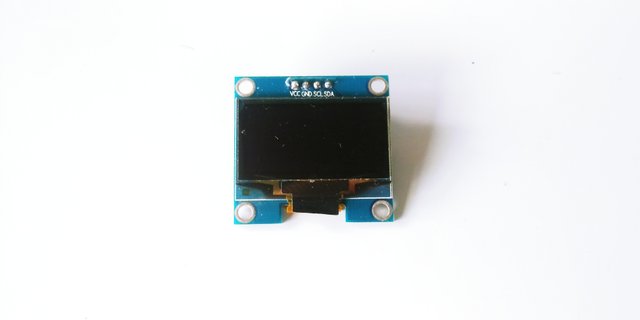
- IIC OLED display
I bought this oled display for $5 it has only 4 pins this version of oled doesent support colored oled as its only supports blue text graph, it is more better then using a LCD bcoz its displays more vivid color and the best image quality for arduino microcontroller. This display is made of 128x64 pixels which as a specific oled address on 8glib library.
- Potentiometer
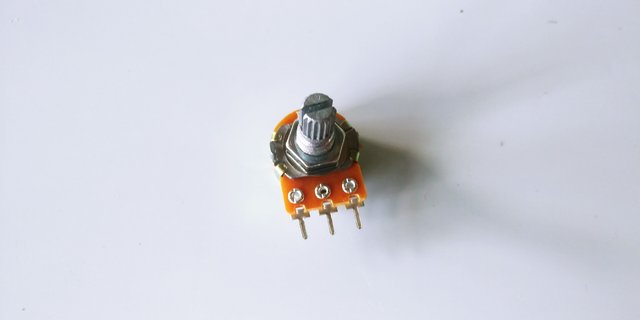
the potentiometer is device use to adjust variable resistor with 3 terminals. it is usually used functions as a variable voltage divider it has 3 pin the both 2 legs is the power and the middle pin is the analog output which sends signal to the arduino.
- Jumper wires
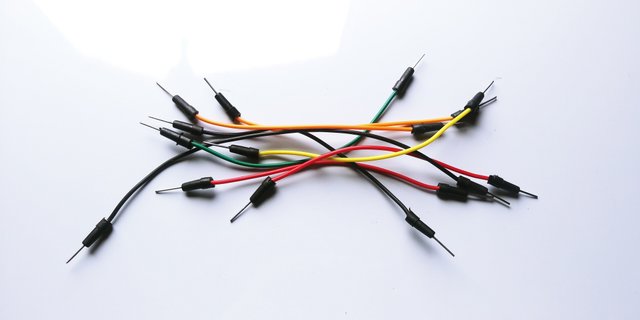
we will use jumpers to connect on a breadboard or female header connector, size and color to distinguish the different working signals. we will use the male to male jumper for 7 segment and the buttons to connect to arduino
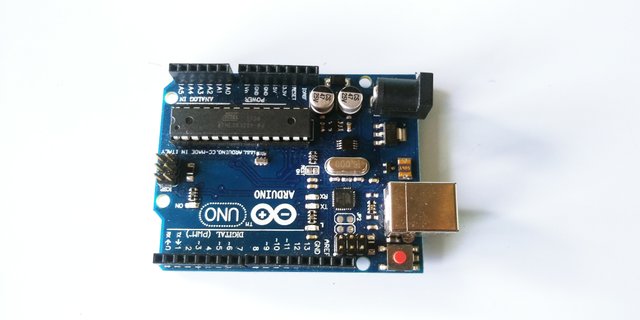
- Arduino Uno R3
In this tutorial i am using the clone arduino r3 board,
It has 14 digital input/output pins (of which 6 can be used as PWM outputs), 6 analog inputs, a 16 MHz quartz crystal, a USB connection, a power jack, an ICSP header and a reset button.It contains everything needed to support the microcontroller components.
Difficulty
- Basic
Tutorial Contents
- SOFTWARE
we are going to use the arduino ide, to set the sketch for this, if you dont have make sure to download the Arduino IDE for your specific operating system. I’ll leave a link to where you can download this software: https://www.arduino.cc/en/Main/Software
- Libraries
As long as the IDE had been installed next is you need to download the u8glib library For the control, the u8g library. This makes it easy to display graphic modes on OLED to make our project easy to create. beacause if we dont use library it takes days for us to program the oled on arduino.
download the library here; https://bintray.com/olikraus/u8glib/Arduino
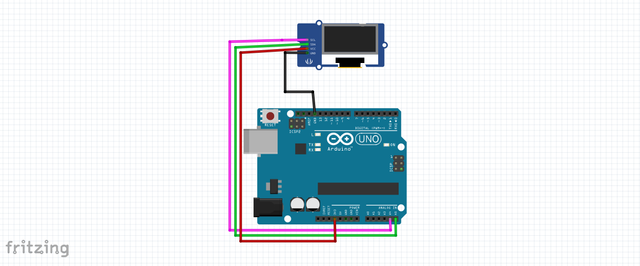
- OLED CIRCUIT DIAGRAM
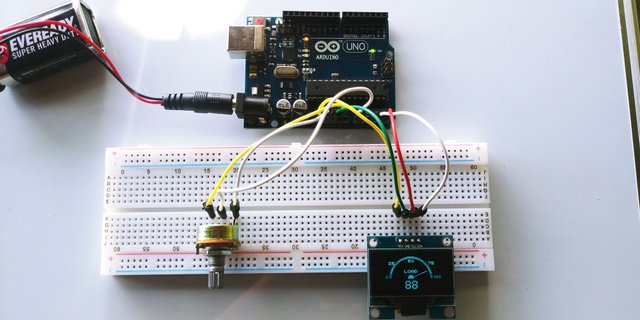
The i2c oled display has 4 pins the 2 pins VCC is connected to 3.3V on the arduino some users uses 5V but for better resolution we will use 3,3v bcoz it doesnt eat a lot of power compare to the lcd the GND pin to GND on the arduino in any GND pin bcoz the arduino r3 supports 3 GND pin outputs. the SCL is conneted to analog pin A5 and the SDA to analog pin A4.
- GND- GND
- VCC- 3.3V
- SCL- A5
- SDA- A4
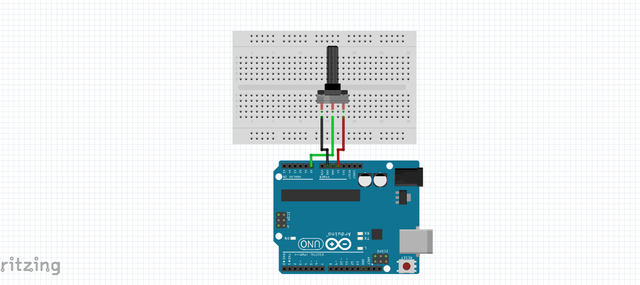
Potentiometer CIRCUIT DIAGRAM
the potentiometer has 3 pin the GND pin in any of the side leg of the pot to GND on the arduino and the VCC pin to 5V. the middle pin of the potetiometer is the signal pin the sends data to arduino it will be connected to analog pin A0 of the arduino
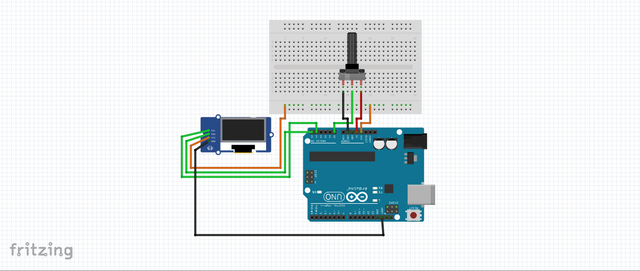
- OLED display Gauge Meter using Potentiometer Circuit diagram
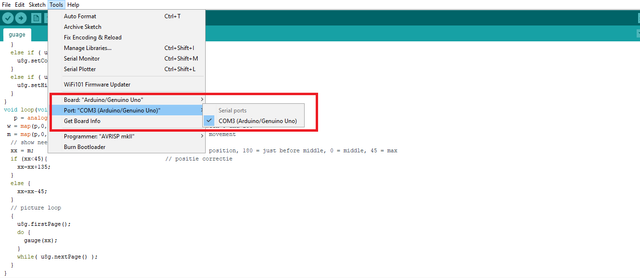
- Connect the arduino uno board to your computer using the Type B usb cable included in the package. open the arduino Desktop IDE locate the TOOLS verify the type of board you are using PORT should be on the COM# and the board should be on the arduino/genuino uno if youre using the same board as mine.
- Programming a code
To include the u8g library, we have different type of address you can check your by checking my post about how to connect the oled using 8glib
#include "U8glib.h"p = analog read (potmeterPin);
w = map (p, 0.1023.0.100);
m = map (p, 0.1023, 0.90);Calculates the positions of the digital hands
This angle of the pointer is calculated by the integers xx and passed to the function of gauge ()
{
U8g.firstPage ();
do {
gauge (xx);
}
While (u8g.nextPage ());
}
Draw the border of the gauge
u8g.drawCircle (xcenter, ycenter, arc + 6, U8G_DRAW_UPPER_RIGHT);
u8g.drawCircle (xcenter, ycenter, arc + 4, U8G_DRAW_UPPER_RIGHT);
u8g.drawCircle (xcenter, ycenter, arc + 6, U8G_DRAW_UPPER_LEFT);
u8g.drawCircle (xcenter, ycenter, arc + 4, U8G_DRAW_UPPER_LEFT);
Draw the needle pointer, a simple line on the bottom center.
float x1 = sin (2 * angle * 2 * 3.14 / 360); // needle positioning
float y1 = cos (2 * angle * 2 * 3.14 / 360);
u8g.drawLine (xcenter, ycenter, xcenter arc + x1 *, y1 * ycenter-arc);
Draw the shaft of the middle pointer
u8g.drawDisc (xcenter, ycenter, 5, U8G_DRAW_UPPER_LEFT);
u8g.drawDisc (xcenter, ycenter, 5, U8G_DRAW_UPPER_RIGHT);
lets says we just want to show the voltage on the wiper of the potentiometer, a scale of 0 to 5. We would w = map (p, 0.1023.0.5); There is in use but little precision Involved. The needle shouldering follow along nicely but the digital display has only 6 values (0-1-2-3-4 and 5).
SOURCE CODE
#include "U8glib.h"
U8GLIB_SSD1306_128X64 u8g(U8G_I2C_OPT_NONE|U8G_I2C_OPT_DEV_0);
int xmax=128;
int ymax=62;
int xcenter=xmax/2;
int ycenter=ymax/2+10;
int arc=ymax/2;
int angle=0;
char* label[] = {"LOAD","COOLANT","INTAKE", "VOLT"};
int labelXpos[] = {53, 45, 49, 53};
#define potmeterPin A1
int p, w, m,a=10;
u8g_uint_t xx=0;
void gauge(uint8_t angle) {
  // draw border of the gauge
  u8g.drawCircle(xcenter,ycenter,arc+6, U8G_DRAW_UPPER_RIGHT);
  u8g.drawCircle(xcenter,ycenter,arc+4, U8G_DRAW_UPPER_RIGHT);
  u8g.drawCircle(xcenter,ycenter,arc+6, U8G_DRAW_UPPER_LEFT);
  u8g.drawCircle(xcenter,ycenter,arc+4, U8G_DRAW_UPPER_LEFT);
  // draw the needle
  float x1=sin(2*angle*2*3.14/360);
  float y1=cos(2*angle*2*3.14/360);
  u8g.drawLine(xcenter, ycenter, xcenter+arc*x1, ycenter-arc*y1);
  u8g.drawDisc(xcenter, ycenter, 5, U8G_DRAW_UPPER_LEFT);
  u8g.drawDisc(xcenter, ycenter, 5, U8G_DRAW_UPPER_RIGHT);
  u8g.setFont(u8g_font_chikita);
  // show scale labels
  u8g.drawStr( 20, 42, "0");
  u8g.drawStr( 25, 18, "25");
  u8g.drawStr( 60, 14, "50");
  u8g.drawStr( 95, 18, "75");
  u8g.drawStr( 105, 42, "100");
  // show gauge label
  u8g.setPrintPos(labelXpos[0],32);
  u8g.print(label[0]);
  // show digital value and align its position
  u8g.setFont(u8g_font_profont22);
  u8g.setPrintPos(54,60);
  if (w<10){
    u8g.print("0");
  }
  if (w>99) {
    u8g.setPrintPos(47,60);
  }
  u8g.print(w);
}
void setup(void) {
  u8g.setFont(u8g_font_chikita);
  u8g.setColorIndex(1);
  // assign default color value
  if ( u8g.getMode() == U8G_MODE_R3G3B2 ) {
    u8g.setColorIndex(255);
  }
  else if ( u8g.getMode() == U8G_MODE_GRAY2BIT ) {
    u8g.setColorIndex(3);
  }
  else if ( u8g.getMode() == U8G_MODE_BW ) {
    u8g.setColorIndex(1);
  }
  else if ( u8g.getMode() == U8G_MODE_HICOLOR ) {
    u8g.setHiColorByRGB(255,255,255);
  }
}
void loop(void) {
   p = analogRead(A0);
 w = map(p,0,1023,0,100);
 m = map(p,0,1023,0,90);
  // show needle and dial
  xx = m;
  if (xx<45){
    xx=xx+135;
  }
  else {
    xx=xx-45;
  }
  // picture loop
  {
    u8g.firstPage();
    do {
      gauge(xx);
    }
    while( u8g.nextPage() );
  }
}
note; the U8GLIB_SSD1306_128X64 u8g(U8G_I2C_OPT_NONE|U8G_I2C_OPT_DEV_0); is the address of my oled display you can check your by locating the 8glib examples of the file of the IDE.
I hope you enjoy this actitvity if want to learn how arduino works, and how to make a sketch, then maybe this site http://educ8s.tv/ might help you, educ8 since im always following their project for this stuff, all images on this blog are supposedly mine. thank you for stopping by..
please check my previous tutorials
Ultrasonic Sensor HC-SR04 with IIC LCD Display (Distance Meter)
i2C Oled display and 8glib Library arduino
Control 2 servo with Potentiometer/ XOD
Controlling 2 Servo Motor with Joystick
Ultrasonic Sensor HC-SR04 alarm system
DS18B20 temperature sensor and IIC 16x2 LCD display Arduino tutorial
Ultrasonic Sensor HC SR04 distance meter with a Nokia 5110 LCD display
IIC LCD Scrolling Text with Arduino tutorial
Light sensor LDR Monitor with a LCD Nokia 5110 Tutorial
Rotary Encoder with Nokia 5110 display Tutorial
Real time clock DS1302 module and Nokia 5110 DIY lcd tutorial
How to connect nokia 5110 LCD to arduino
Posted on Utopian.io - Rewarding Open Source Contributors
Thanks for all the charts and opinion.Upvot and resteem.I appreciate your work..
Wow..... This is better than any class I ever attended on the subject..
Wow!
Thank you for the contribution. It has been approved.
You can contact us on Discord.
[utopian-moderator]
Hey @pakganern I am @utopian-io. I have just upvoted you!
Achievements
Suggestions
Get Noticed!
Community-Driven Witness!
I am the first and only Steem Community-Driven Witness. Participate on Discord. Lets GROW TOGETHER!
Up-vote this comment to grow my power and help Open Source contributions like this one. Want to chat? Join me on Discord https://discord.gg/Pc8HG9x