Light sensor LDR Monitor with a LCD Nokia 5110 Tutorial
Today in this Instructable I am going to show you how to build a Light meter with Nokia 5110 LCD display using Arduino.
What Will I Learn?
Building a Light Meter is a great learning experience for begginers. When you finish building this project you will have a better understanding of how light meters work and you are going to see in action how powerful the Arduino can be. you will be able to easily build more complex projects in the future. You can use this project to monitor the lighting conditions of your work enviroment, of your plants and so on. Without any further delay, so let's get started!
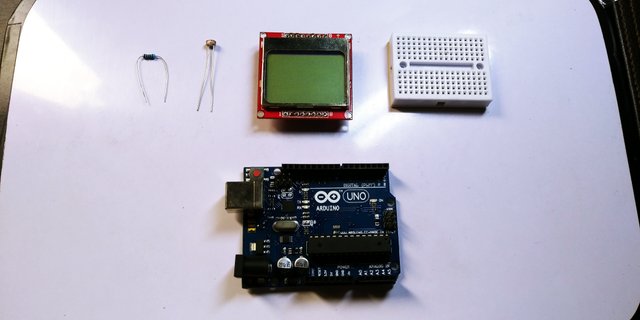
Requirements
Difficulty
- Basic
Tutorial Contents
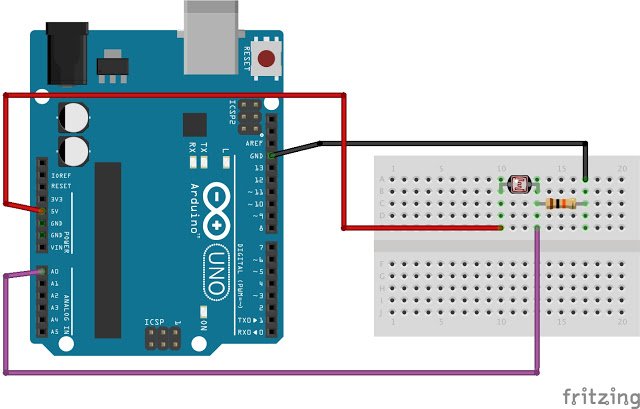
Lets start this tutorial by following the circuit diagram that i made on fritzing some parts of the Nokia 5110 pin may be different but you can check my wiring below the LIGHT pin on the display can also be connect to the digital pin 7 on arduino.
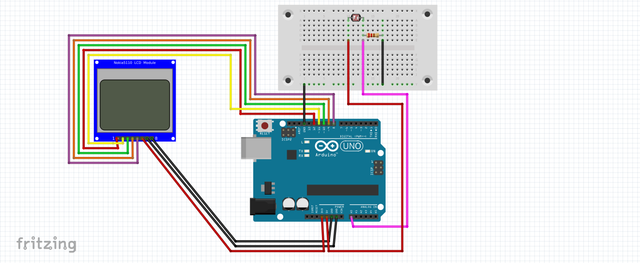
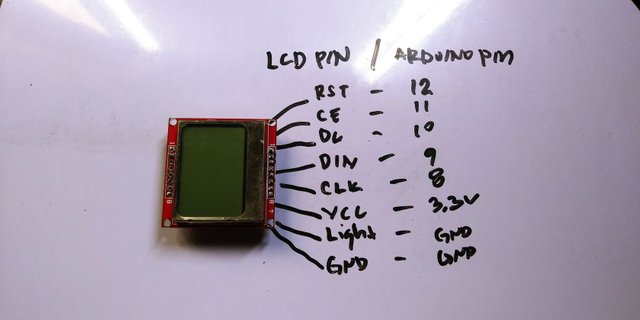
Connect the Nokia 5110 display. Remember that the LCD runs on 3.3V pin on the uno board and some people have connected it to 5V, yes it has workes but gave some weird grahics effects, the LCD has 8 pins which will be connected to a specified pin on the arduino board.
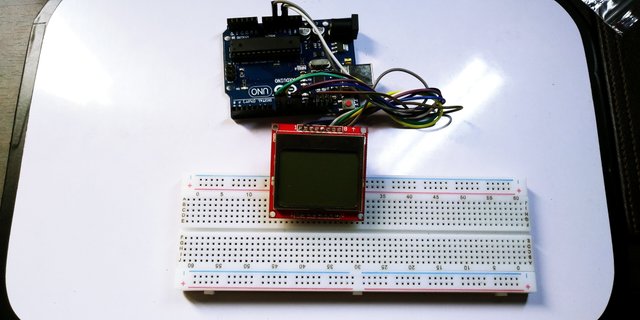
The photoresistor has two leg, we will be putting a 220k ohms resistor to the LDR as seen on the diagram below the LDR are light sensitive devices most often used to indicate the presence or absence of light, or to measure the light intensity. the resistance is very high, sometimes up to 1MΩ, but when the LDR sensor is exposed to light, the resistance drops dramatically, even down to a few ohms, depending on the light intensity.
SOFTWARE
We are done building the circuit so lets start to set up and make a code for this. we are going to use the arduino ide, to set the sketch for this, if you dont have make sure to download the Arduino IDE for your specific operating system. I’ll leave a link to where you can download this software: https://www.arduino.cc/en/Main/Software
I have the IDE downloaded to my computer so lets start to work for the libraries we have to download 3 libraries listed below.
-To get the nokia 5110 LCD library we need to download the zip file from rinkydinkelectronics you can download it directly here http://www.rinkydinkelectronics.com/library.php?id=47
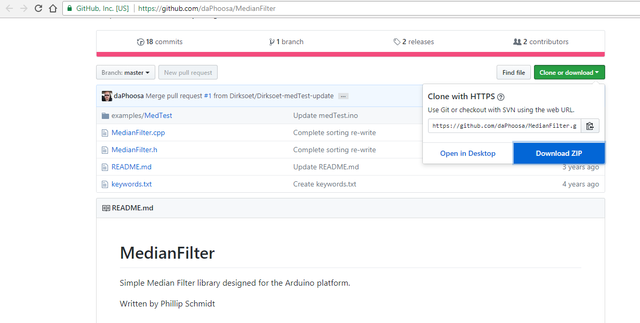
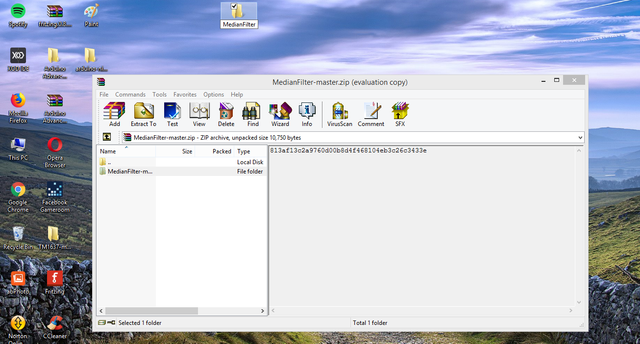
-To get the MedianFilter Libraries
https://github.com/daPhoosa/MedianFilter
When the download is finished open the zip file then copy the folder Nokia 5110-graph and MediaFilter unzip the folder to your desktop you can rename it as well.
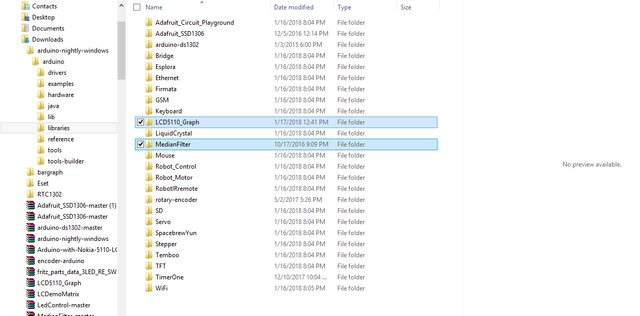
Cut the folder of the 2 libraries in your desktop then go to your folders then locate the arduino folder>> libraries then paste it there. and now the folder LCD5110_Grap, and the Medianfilter is already in the arduino ide libraries.
The first thing we need to do like with every other code, is include all the libraries we will be using we have to add the 2 library that we have recently downloaded. the #include <LCD5110_Graph.h> and #include <MedianFilter.h>
COPY SOURCE CODE HERE:
#include <LCD5110_Graph.h>
#include <MedianFilter.h>
MedianFilter test(10, 0);
LCD5110 myGLCD(8,9,10,12,11);
extern unsigned char SmallFont[];
extern unsigned char BigNumbers[];
void setup()
{
myGLCD.InitLCD();
myGLCD.setFont(SmallFont);
// randomSeed(analogRead(0));
pinMode(7, OUTPUT);
digitalWrite(7,LOW);
}
void loop()
{
String str;
int val = analogRead(A0);
val = map(val,300,950,0,100);
test.in(val);
val = test.out();
str = String(val);
myGLCD.setFont(SmallFont);
myGLCD.print("LDR METER", 0, 0);
myGLCD.drawLine(0,10,84,10);
myGLCD.setFont(BigNumbers);
myGLCD.print(str,7,18);
myGLCD.setFont(SmallFont);
myGLCD.print("%", 40, 30);
myGLCD.update();
delay(50);
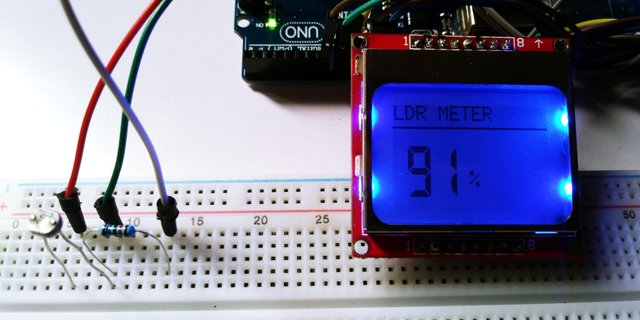
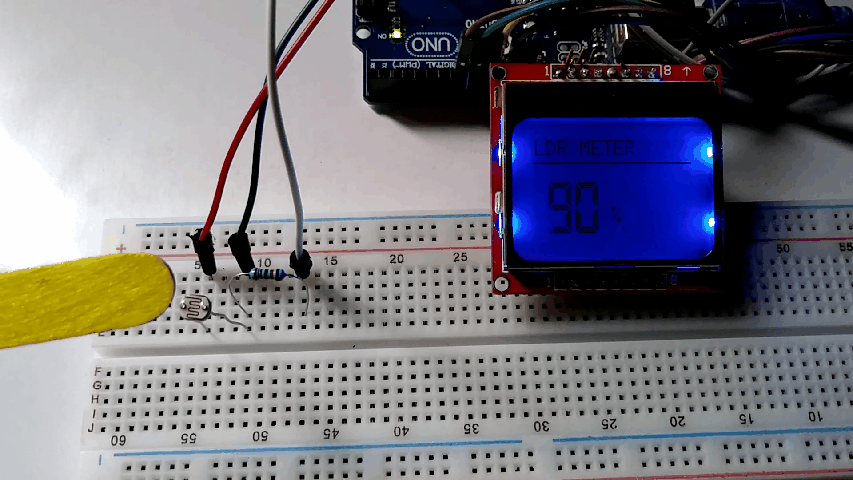
}Now that the code is loaded we can test the LDR Meter indoors and outdoors. I test it in my desk with a light when i cover the LDR with apopsicle the value decreases. The result if fantastic. We can accurately measure the light intensity with easy to build project.
I hope you enjoy this actitvity if want to learn how arduino works, and how to make a sketch, then maybe this site http://educ8s.tv/ might help you, i was inspired by educ8 and jume-maker for this wonderful stuff. thank you.
You can also check my previous posts:
TM1637 4 digit 7-segment display with Arduino
How to adjust LED brightness using potentiometer/ visual programming XOD
How to make 12 LED chaser without shift
Posted on Utopian.io - Rewarding Open Source Contributors
making science great again , i have never used adruino but this looks like fun, i have worked with raspberry pi and its fun too
Thank you for the contribution. It has been approved.
You can contact us on Discord.
[utopian-moderator]
Ok noted thank you!
Hey @pakganern I am @utopian-io. I have just upvoted you!
Achievements
Suggestions
Get Noticed!
Community-Driven Witness!
I am the first and only Steem Community-Driven Witness. Participate on Discord. Lets GROW TOGETHER!
Up-vote this comment to grow my power and help Open Source contributions like this one. Want to chat? Join me on Discord https://discord.gg/Pc8HG9x