IIC LCD Scrolling Text with Arduino tutorial
In this this Instructable of the i2c LCD i will provides two additional functions of scroll text From Right line and scroll in from Left (line to display text on, string to be scrolled). These two functions which scroll lines into the LCD screen combined with the two functions, from my earlier Instructable which you will see it below i posted on how to use the i2c lcd on arduino, in this post i will presented functions to scroll lines off the screen.
What Will I Learn?
What you may learn in this tutotrial is how the IIc LCD works and connect it from arduino, how to put a scrolling text on it like what you see on any advertisement and how to add zip library to arduino IDE so lets start this.
Requirements
Difficulty
- Intermediate
Tutorial Contents
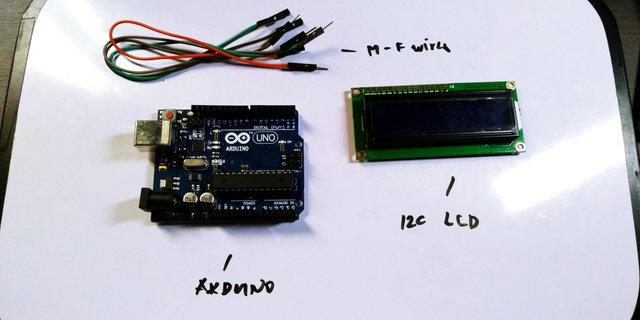
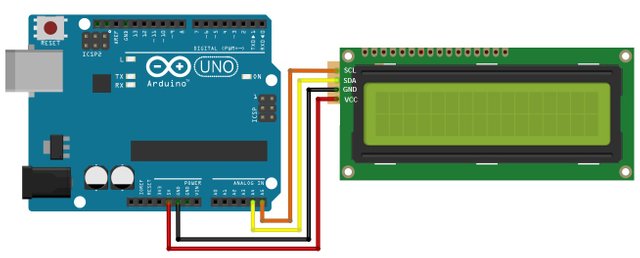
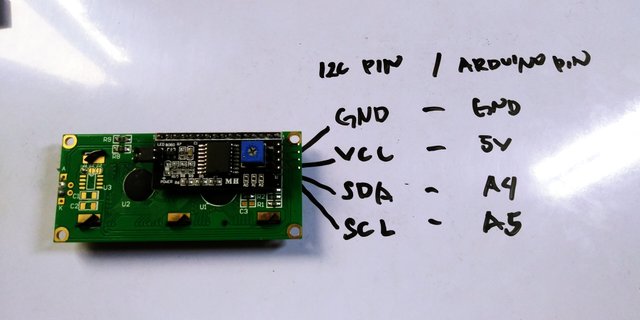
Lets start this tutorial by following the fritzing circuit diagram some parts of the lcd may be different, i am using the i2c LCD display that has only 4 pins on it. you can check my wiring below.
SOFTWARE
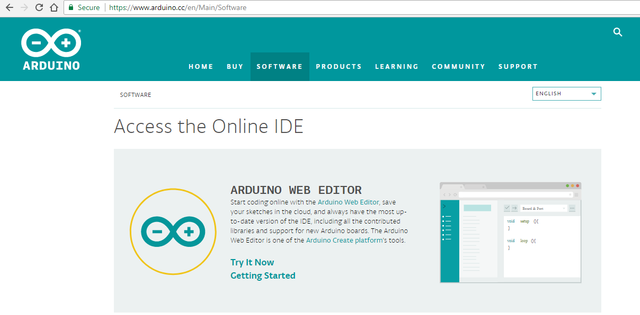
We are done building the circuit so lets start to set up and make a code for this. we are going to use the arduino ide, to set the sketch for this, if you dont have make sure to download the Arduino IDE for your specific operating system. I’ll leave a link to where you can download this software: https://www.arduino.cc/en/Main/Software
I have the IDE downloaded to my computer so lets start to work for the libraries we have to download 3 libraries listed below.
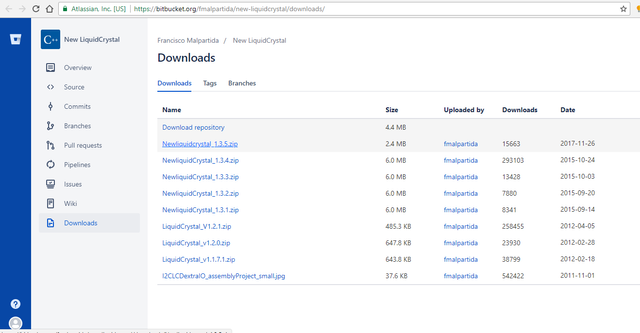
-To get the i2c liquidcrystal library we need to download the zip file from bitbucket you can download it directly here : https://bitbucket.org/fmalpartida/new-liquidcrystal/downloads/ just choose the latest one
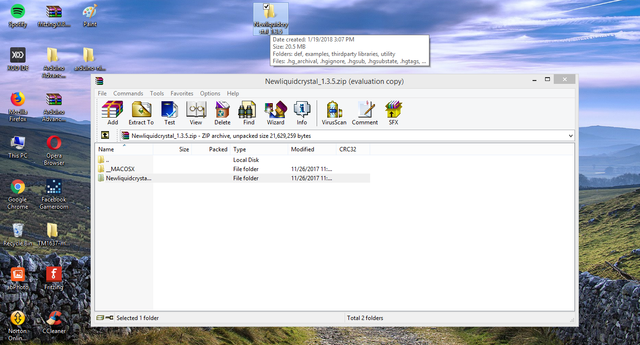
When the download is finished open the zip file then copy the folder name Newliquidcrystal unzip the folder to your desktop you can rename it as well.
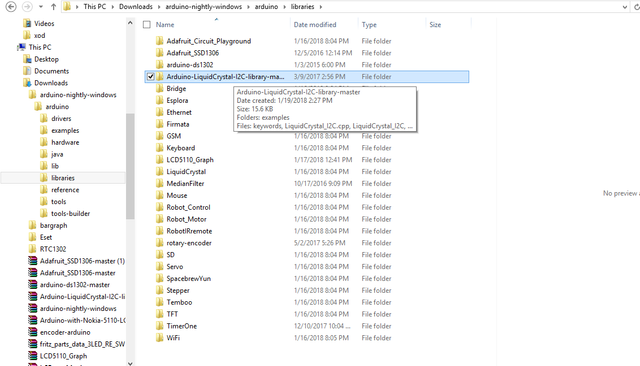
Cut the folder of the library in your desktop then go to your folders then locate the arduino folder>> libraries then paste it there. and now the folder liquidcrytal is already in the arduino ide libraries.
Lets find out the address of the LCD you can find it by downloading rhis .ino file: download the i2c scanner on this link http://www.mediafire.com/file/f7oaa4et779yaaz/i2c_scanner.ino
Open the i2c scanner that we have downloaded, if your system cannot open the file >> just left click on the file>> open with>> then locate the arduino uno ide. the file ino is for arduino. after that the i2c scanner code will appear on the sketch. upload it to the board.
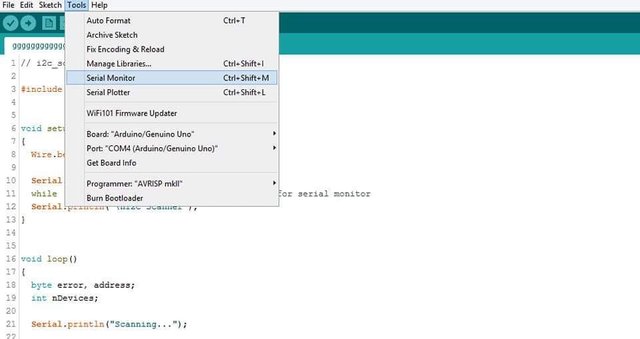
After that click COMPILE>>> THEN UPLOAD it to the uno board. once done click on the TOOLS>> SERIAL MONITOR.
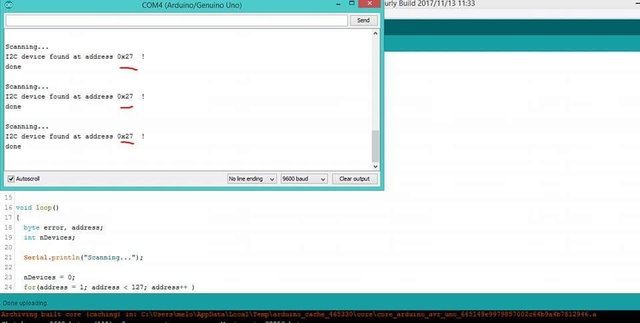
the serial display will appear and the scannned address of your module will state there, so my address will be 0x27 before the ! sign.. we have different address of the module thats why we need to scan the module sometimes its depends on the unit of the lcd.
Edit this adress with your LCD address; LiquidCrystal_I2C lcd(--ENTER MODULE ADDRESS HERE--, 2, 1, 0, 4, 5, 6, 7, 3, POSITIVE);
The address will now become : LiquidCrystal_I2C lcd(0x27, 2, 1, 0, 4, 5, 6, 7, 3, POSITIVE);
And now you know how to get the i2c LCD address lets start to upload the sketch code from arduino. remember to put this library before starting the sketch #include <Wire.h> and
#include <LiquidCrystal_I2C.h>
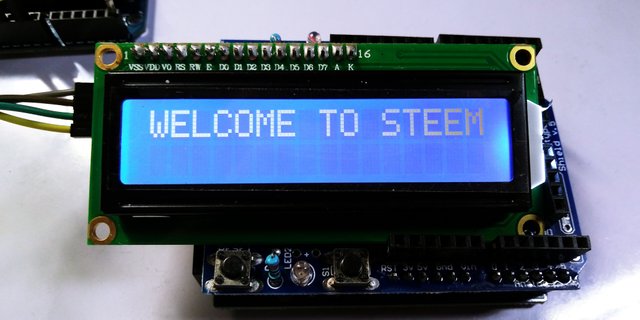
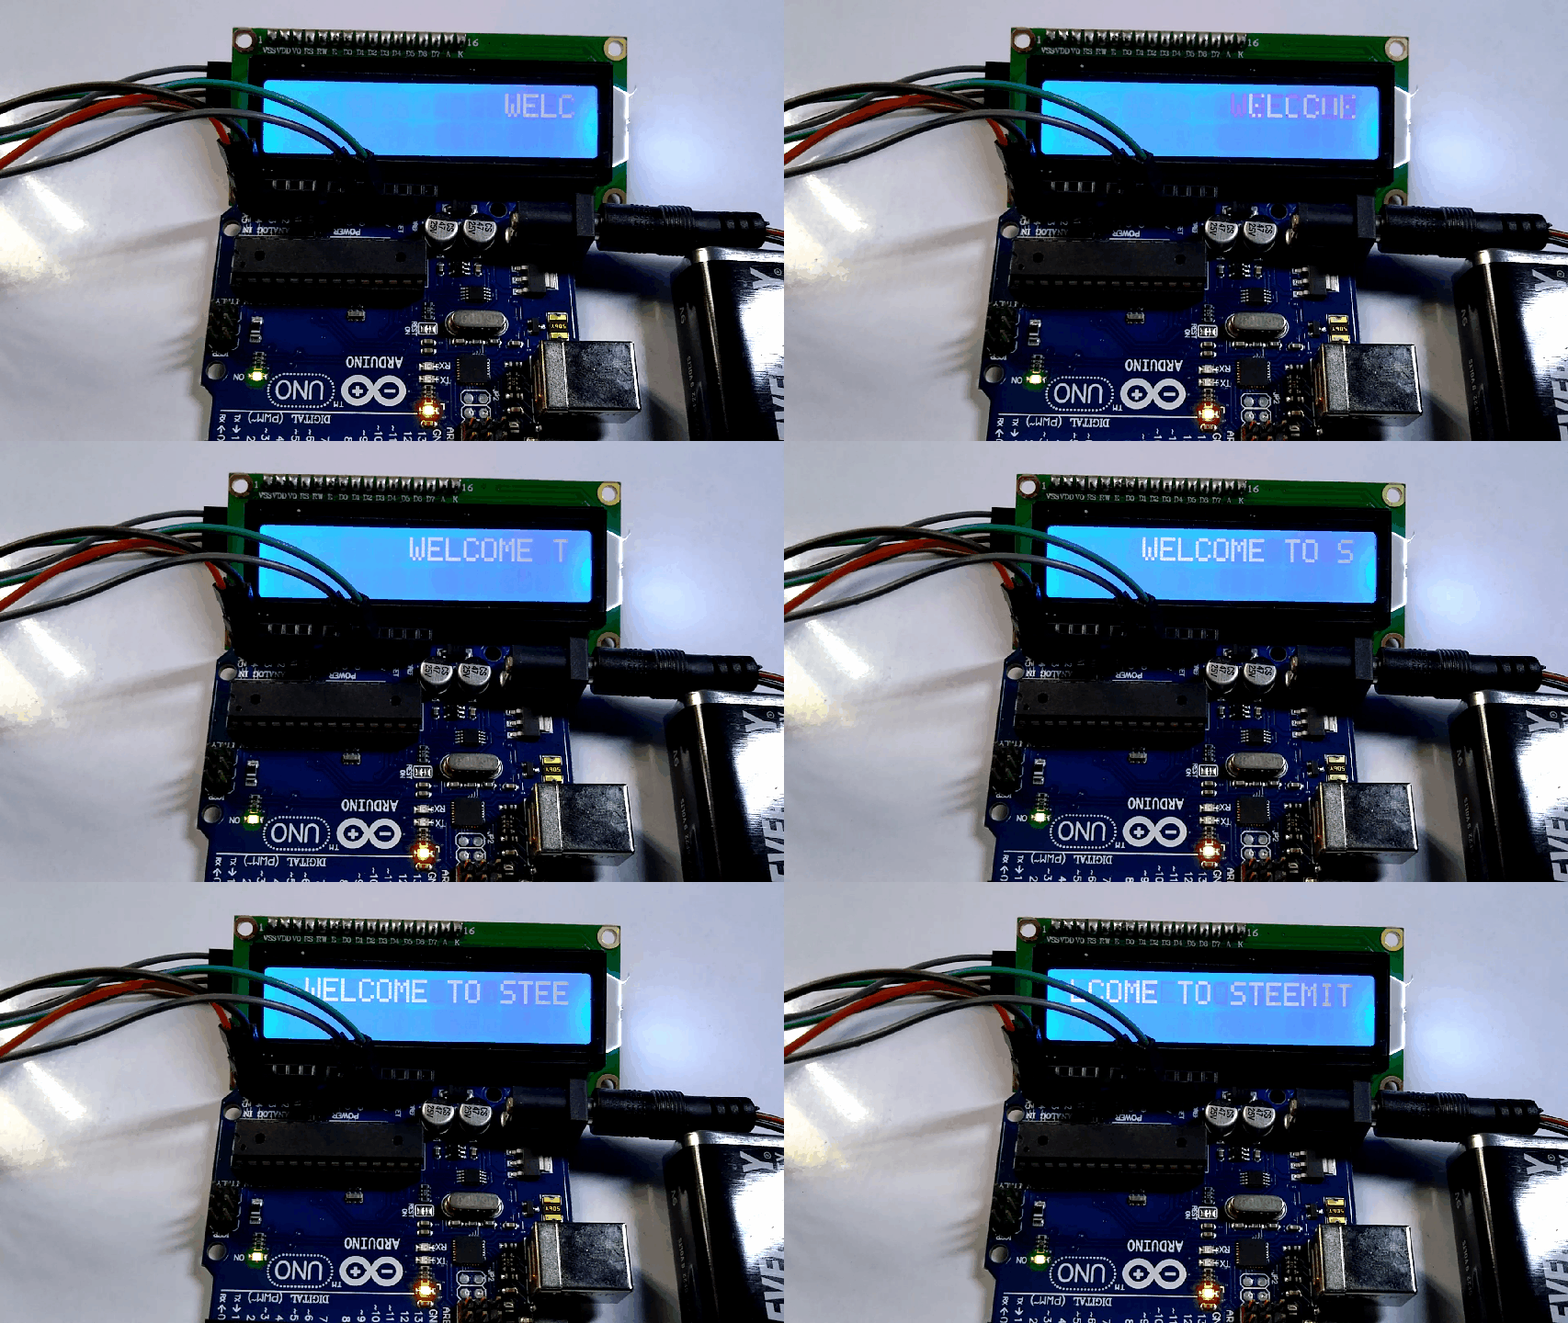
WELCOME TO STEEMIT source code;
#include <Wire.h>
#include <LiquidCrystal_I2C.h>
LiquidCrystal_I2C lcd(0x27, 2, 1, 0, 4, 5, 6, 7, 3, POSITIVE);
void setup()
{
lcd.begin(16, 2);
  // Print a message to the LCD.
  lcd.backlight();
  lcd.setCursor(0,0);
  lcd.print(" WELCOME TO STEEMIT ");
}
void loop()
{
   lcd.setCursor(16,1);
   lcd.autoscroll();    // Set diplay to scroll automatically
   lcd.print(" ");      // set characters
   delay(700);
}
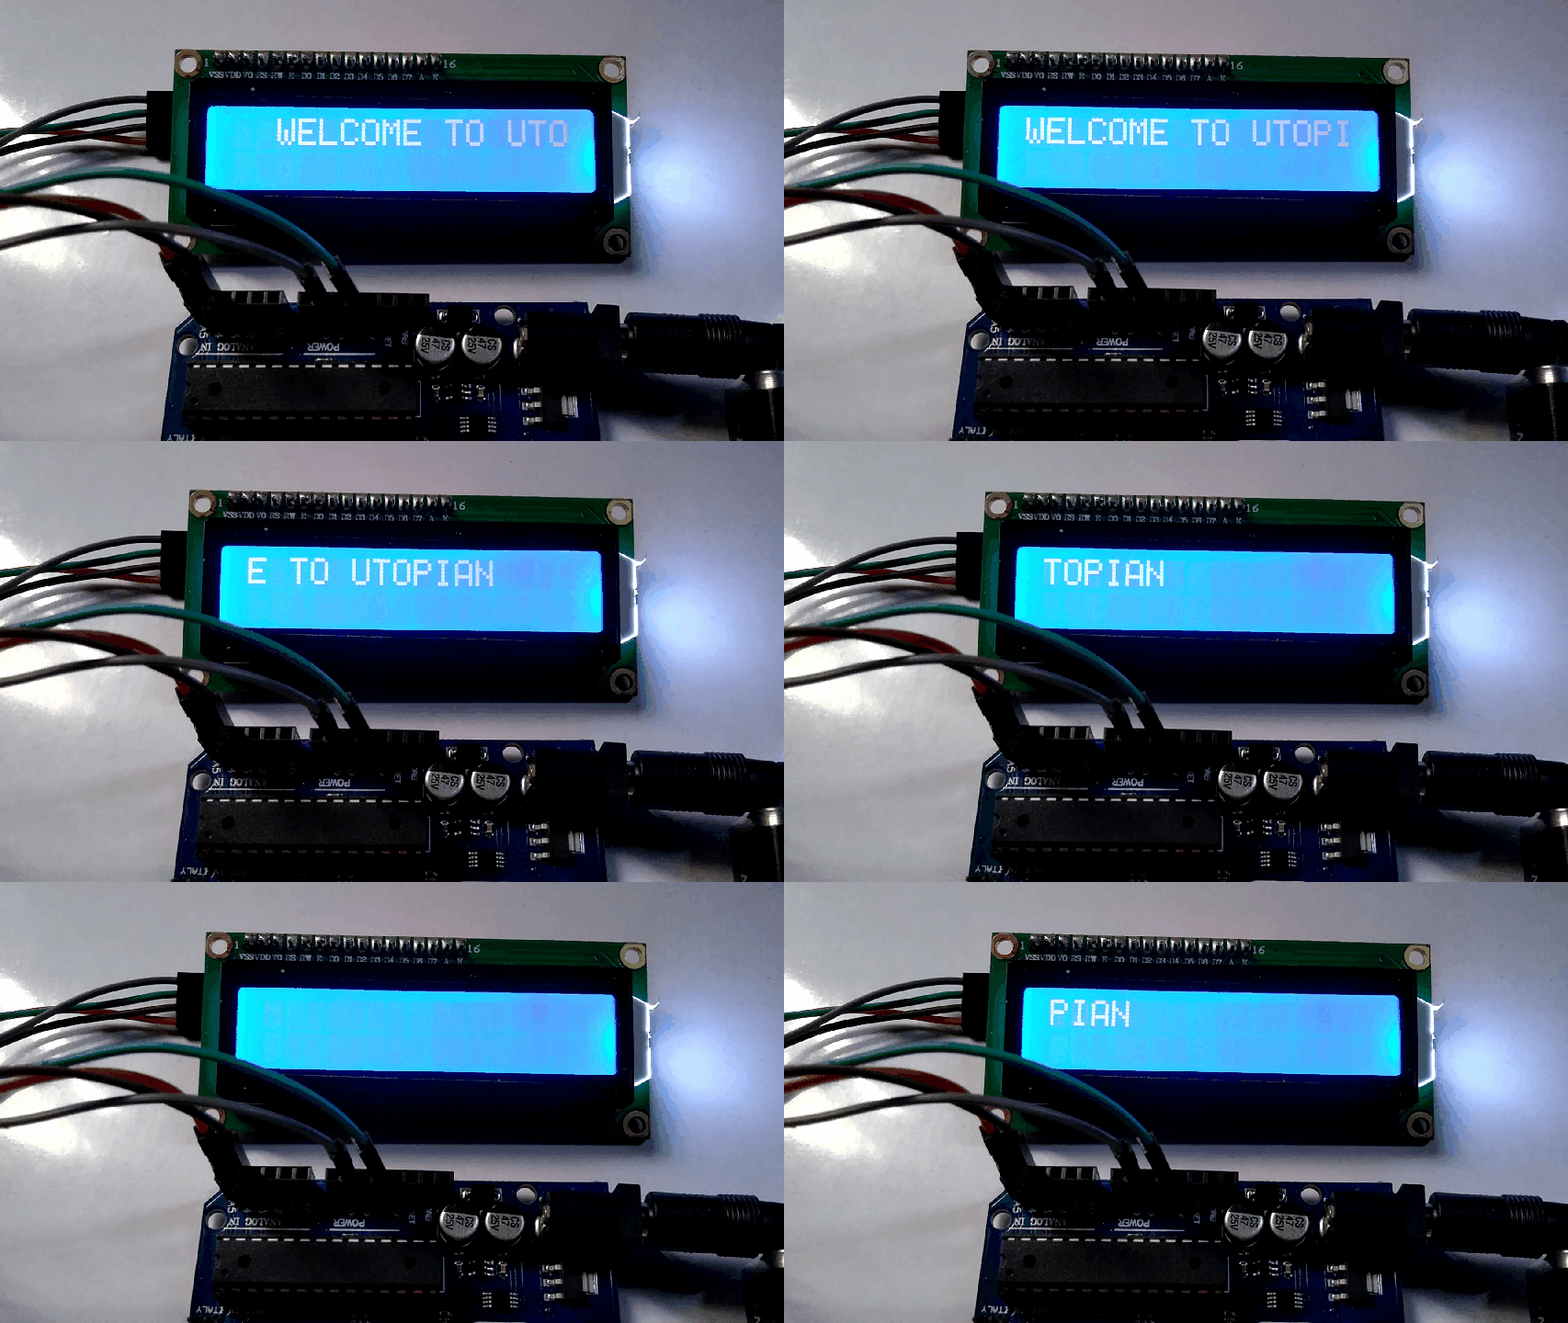
WELCOME TO UTOPIAN source code
#include <Wire.h>
#include <LiquidCrystal_I2C.h>
const byte lcdAddr = 0x27;  // Address of I2C backpack
const byte lcdCols = 16;    // Number of character in a row
const byte lcdRows = 2;     // Number of lines
LiquidCrystal_I2C lcd(0x27, 2, 1, 0, 4, 5, 6, 7, 3, POSITIVE);
// Demo parameters
const char demoText[]= " WELCOME TO UTOPIAN ";
const unsigned int scrollDelay = 500;   // Miliseconds before scrolling next char
const unsigned int demoDelay = 2000;    // Miliseconds between demo loops
byte textLen;                           // Number of visible characters in the text
void setup() {
  textLen = sizeof(demoText) - 1;
 lcd.begin(16, 2);
  lcd.backlight();
  lcd.print(demoText);
  delay(demoDelay);
}
void loop() {
  // Scroll entire text in a row to the left outside the screen
  for (byte positionCounter = 0; positionCounter < textLen; positionCounter++) {
    lcd.scrollDisplayLeft();
    delay(scrollDelay);
  }
  // Scroll hidden text through entire row to the right outside the screen
  for (byte positionCounter = 0; positionCounter < textLen + lcdCols; positionCounter++) {
    lcd.scrollDisplayRight();
    delay(scrollDelay);
  }
  // Scroll text to the right back to original position
  for (byte positionCounter = 0; positionCounter < lcdCols; positionCounter++) {
    lcd.scrollDisplayLeft();
    delay(scrollDelay);
  }
  delay(demoDelay);
}
If theres no text appears on the lcd, and already check the wirings and theres no problem with it. GET A SCREW driver then adjust the calibration of the i2c breaker backpack.
I hope you enjoy this actitvity if want to learn how arduino works, and how to make a sketch, then maybe this site http://educ8s.tv/ might help you, i was inspired by jume-maker for this wonderful stuff. and i thanks to https://github.com/mrkaleArduinoLib/LiquidCrystal_I2C/blob/master/examples/Scroll/Scroll.ino for giving the sample code that i use in welcome to utopian so thats it, if you want to know and see my future activity follow me! and dont forget to follow me @pakganern! thank you.
You can also check my previous posts:
TM1637 4 digit 7-segment display with Arduino
How to adjust LED brightness using potentiometer/ visual programming XOD
How to make 12 LED chaser without shift
Control LED using Push Buttons/ Visual programming using XOD
Control Servo motor using Joystick
Stepper motor + Driver Uln2003 in arduino
Control Servo motor using potentiometer - arduino
Posted on Utopian.io - Rewarding Open Source Contributors
Thank you for the contribution. It has been approved.
You can contact us on Discord.
[utopian-moderator]
Hey @pakganern I am @utopian-io. I have just upvoted you!
Achievements
Suggestions
Get Noticed!
Community-Driven Witness!
I am the first and only Steem Community-Driven Witness. Participate on Discord. Lets GROW TOGETHER!
Up-vote this comment to grow my power and help Open Source contributions like this one. Want to chat? Join me on Discord https://discord.gg/Pc8HG9x