How to adjust LED brightness using potentiometer/ visual programming XOD
In this instructable i am going to share how to control the led adjustable brightness. The brightness will be set based on the position of the potentiometer.
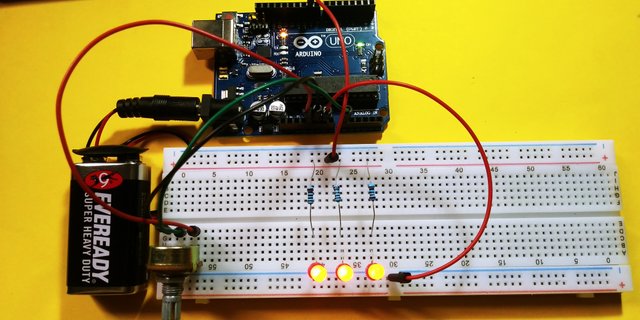
In order to do this, we need to set the potentiometer up as a voltage divider, and we need to drive the LED from one of the pins. For this example, I am using pin 9. The circuit schematic I am using is shown below. but we will write first the requirements for thid tutorial.
REQUIREMENTS,
CIRCUIT DIAGRAM

In placing the LED into the breadboard, remember that you must always put the longer leg towards the positive voltage(anode). In the case above, the longer leg should be connected to the resistor, and the shorter leg connected to ground(cathode). Also remember that we are using a 220 ohm resistor in the circuit to limit the current flow through the LED, it allow current to pass when you push it down and block electricity when you let it go.
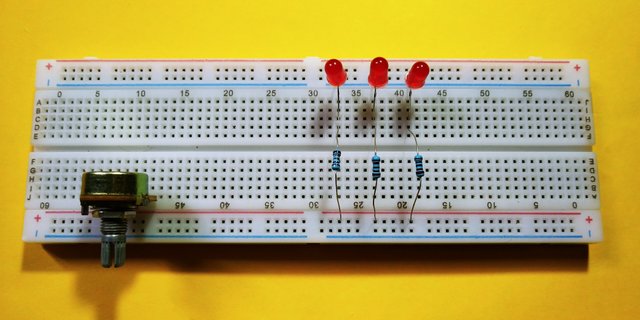
I started to put the 220 ohm resistor, and 3 red leds, coonect the short leg or the common cathode leg of the led on the horizontal rail on the breadboard, put resistor on the long leg of the led then connectb it to the same rail on the breadboard,
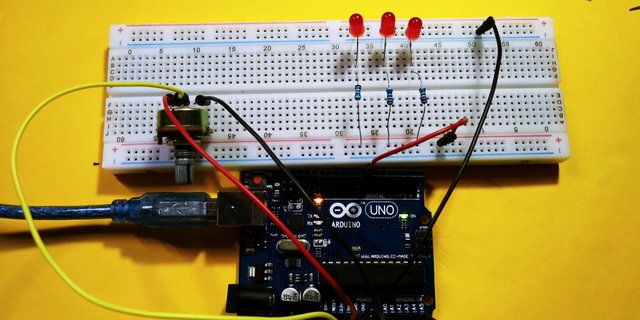
SOFTWARE
we will going to use visual programming using XOD application, here is a brief info about the software, on installing XOD you use the XOD integrated development environment (IDE for short), which comes in two flavors: browser-based and desktop version but to upload the the sketch dorectly to the uno its better to download the software. It works on Windows, macOS, and Linux. Find a distribution package for your system on https://xod.io/downloads/
I have downloaded it already on my pc, so lets start working on the code, onc eyou have open the software there a lot of guide there on how its work, so i m going start a new project on how to adjust the lumination of the led using the potentiometer, lets start to set up the led node form the ide. just double click on the nodes table the search bar will appear and search for the word LED.
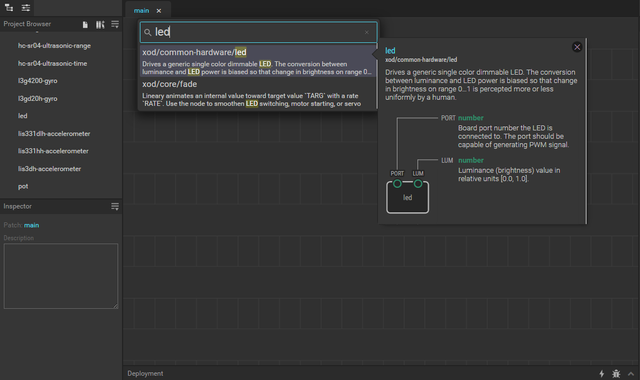
Or you can simply go to the project browser then look for led and POT as potentiometer.
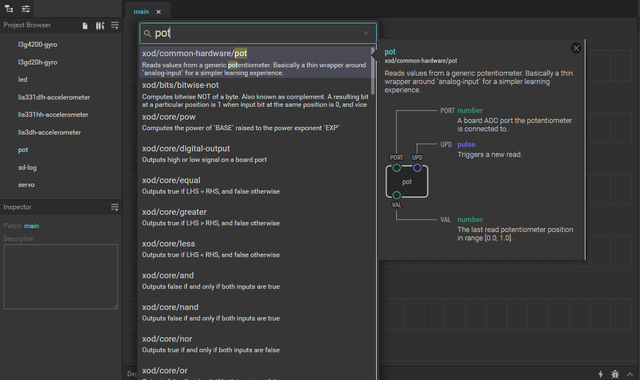
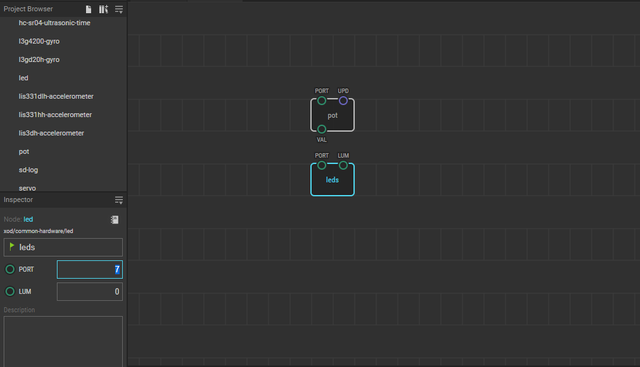
once done, click on the potentiometer node POT then edit the port where the pin is connected. as my example i put the potentiometer to the analog pin A5 so i put 5 on the port.

click on the LED node, then again edit the port where the led pin is connected, as myexample i put the led pin to digital pin 7 on the arduino so i put 7 on the port.
Now lets connect the potentiometer VAL to LUM of the led, the lum or luminance is the brightness of the led, you can put 0-1 on the lum 0 means off, but we are going to use potentiomenter to control the luminance so we dont need to put a lum on led. once done, click on the DEPLOY tan then upload to arduino.
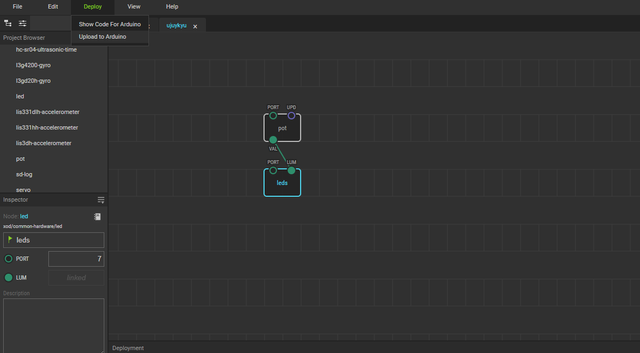
As you can see on the circuit diagram i use 3 leds but on the visual sketch on xod i use only 1 led node thats bcoz i only using 1 1ok potentiometer and i tried to put 3 leds but the potentionmeter woks only in 1 led and the 2 led is just turning on and off. the 3 leds is connected to 1 parallel circuit which means its all connected into one led. s lets take a look and try to control the leds using the potentiometer.
If yu are going to use the arduino ide you can copy the skecth code below;
int potPin= A5;  //Declare potPin to be analog pin A0
int LEDPin= 7;  // Declare LEDPin to be arduino pin 7 or 9
int readValue;  // Use this variable to read Potentiometer
int writeValue; // Use this variable for writing to LED
void setup() {
  pinMode(potPin, INPUT);  //set potPin to be an input
  pinMode(LEDPin, OUTPUT); //set LEDPin to be an OUTPUT
  Serial.begin(9600);      // turn on Serial Port
}
void loop() {
 readValue = analogRead(potPin);  //Read the voltage on the Potentiometer
 writeValue = (255./1023.) * readValue; //Calculate Write Value for LED
 analogWrite(LEDPin, writeValue);      //Write to the LED
 Serial.print("You are writing a value of ");  //for debugging print your values Serial.println(writeValue);
}![20180114_142157[1].gif](https://steemitimages.com/0x0/https://res.cloudinary.com/hpiynhbhq/image/upload/v1515945794/v1jdjibufgtt9iw38e3g.gif)
So thats it, i hope this small project got you an idea:) if you have qustion about the XOD you can check this out: XOD Official -- https://xod.io/
XOD Community -- https://forum.xod.io/, and thank you for to toptechboy for this wonderful stuff. then thank you guys!
You can also check my previous posts:
How to make 12 LED chaser without shift
Control LED using Push Buttons/ Visual programming using XOD
Control Servo motor using Joystick
Stepper motor + Driver Uln2003 in arduino
Control Servo motor using potentiometer - arduino
Posted on Utopian.io - Rewarding Open Source Contributors
Thanks for sharing this post.I already has been
this post about LED potebtiomitre.
Thank you
Thank you for the contribution. It has been approved.
You can contact us on Discord.
[utopian-moderator]
noted thank you
Hello, you received a boost courtesy of @steemdunk! Steem Dunk is an automated curation platform that is easy and free for use by everyone. Need a boost? Click me
Upvote this comment to support the bot and increase your future rewards!
Hey @pakganern I am @utopian-io. I have just upvoted you!
Achievements
Suggestions
Get Noticed!
Community-Driven Witness!
I am the first and only Steem Community-Driven Witness. Participate on Discord. Lets GROW TOGETHER!
Up-vote this comment to grow my power and help Open Source contributions like this one. Want to chat? Join me on Discord https://discord.gg/Pc8HG9x