Java Programming tutorial with officialhord - Connecting Java program to Sqlite Database

Hi steemians thanks for following, from the last tutorial we created example1, today we will be working on creating a database and connecting it to our program.
Straight to work
Stage 1 – Creating the Database
Before we create the database, let me tell you what a database is.
Database:
A database is an organized collection of data in tables, rows and columns, this allows search for data faster and more organized.
To create our database we follow the steps below;
STEP 1
Open Sqlite Studio

Click on the database menu.
Click add a database
Click on the plus sign icon in the popup menu and select where you want the file to be stored, I suggest you go to documents, netbeans projects, tutorial.
Set the name you want for the database.
Click save, click ok.
We have successfully created a database.
Basically, after doing this our database is always empty without any data until we start adding data to the database, like I said in earlier tutorial, a database is a storage location for data in an organized manner (tables) in the computer system.
A database uses tables to store data, when a database is created we would have to add tables to it before it starts storing data, without this the database is useless.
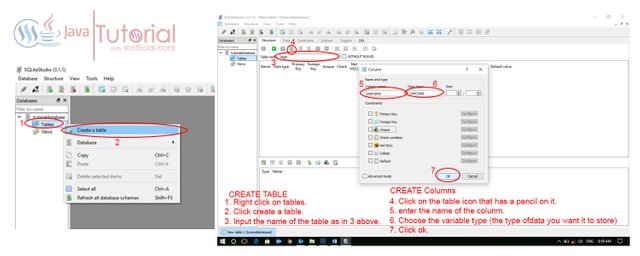
Step 2 – Creating tables in the database.
- Right click on tables.
- Click create a table.
- Input the name of the table as in 3 above.
Step 3 – Adding Columns to the database.
- Click on the table icon that has a pencil on it.
- Enter the name of the column.
- Choose the variable type (the type of data you want it to store)
- Click ok.
If you followed the two stages above you should see this as you go along.

Go ahead and add one more column to your table, it should be called password and the Data type should be VARCHAR. If you’ve done this click the commit sign close to the add column sign in your SQlite studio and click ok so the columns in the database can be saved.

Step 4 – Add Data to database.

Adding data to database.
- Click on the data tab.
- Click the plus sign.
- Double click the area where I typed admin and do same.
- Do same for the password column also.
- the commit sign and we are done.
We have successfully added data to our database.
STAGE 2 – CONNECTING OUR DATABASE TO THE PROGRAM
Step 1 – Create a java class for the connection

Open your Pre-installed Netbeans ide, the program we worked on previously should be open, if not open the application folder and double click on source packages. Once this is done and you can see the default packages, follow these steps:
- Right click on default packages.
- Go to new.
- Click Java class
- Enter the class name, which should be “javaconnect” for reference reasons.
- Click ok.
Congratulations, you have successfully created a java class.
Step 2 – Download the Java-Sqlite Connection library.
We will be needing a java library to enable our connecting the program to the database work out as planned, without the library any code we type in the javaconnect class will not work so click here to download the library required,

download version 3.21.0 once download is complete, copy the downloaded file to the location (documents/netbeans projects/tutorialclass) where we saved the files for our program.
Step 3 - Import the Library to our Program.
Once the file has been copied to our source file, we now need to import it into our libraries in the program so it is available for the program to access whenever it is required.

Importing Sqlite-jdbc library.
- Right click on libraries
- Click add Jar/Folder.
- In the location chooser click documents, netbeansprojects, tutorial class and click the sqlite-jdbc .3.21.0
- Click Open.
If you did it correctly sqlite-jdbc-3.21.0.jar should be in the libraries. YIPEE !! we are done.
Step 5 – Adding our Connection Code
If you have followed steps 1 – 4 above, then you’re ready to input some coding therefore lets import some java libraries more by inputting these codes.
import java.sql.Connection;
import java.sql.DriverManager;
import java.sql.SQLException;
import javax.swing.JOptionPane;
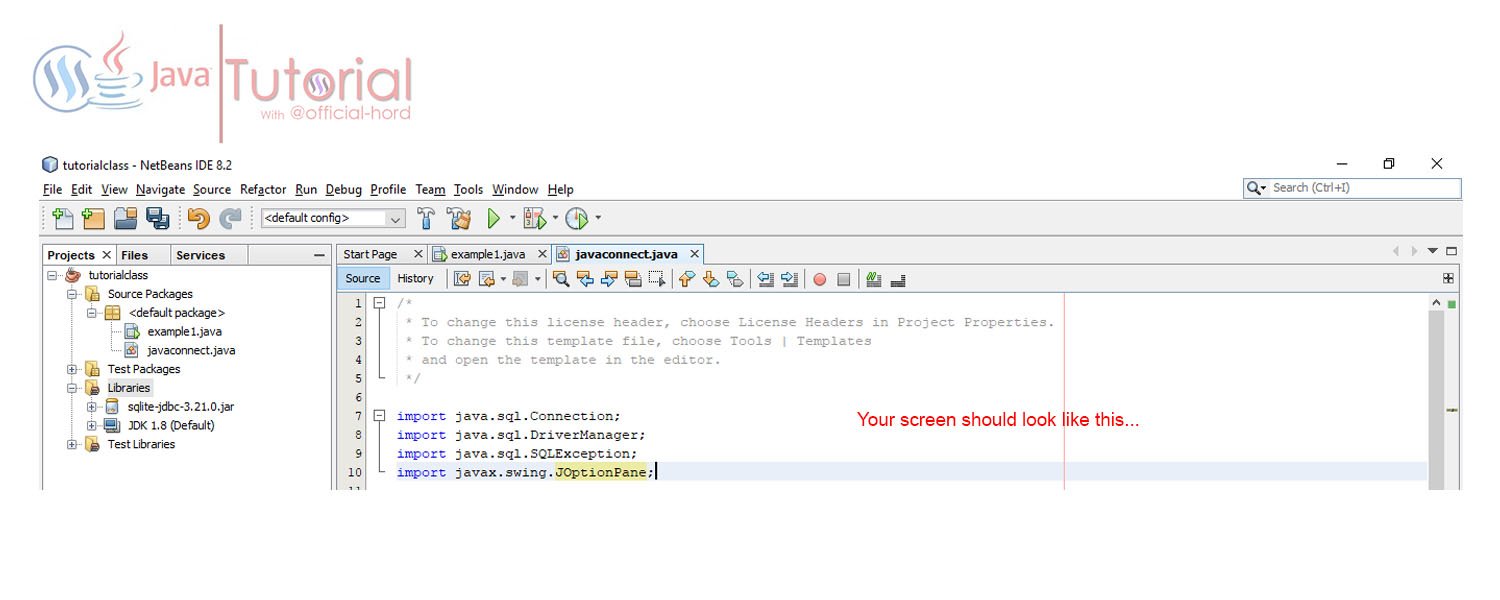
When you have input these codes, you will be able to work with functions from the libraries and the jar file we downloaded also adding our own code to make things work.
Will explain everything we imported in the next post tomorrow.
That is done so no we add the other section of code.
public static void connect() {
Connection conn = null;
try {
// db parameters
String url = "jdbc:sqlite:C:\\Users\\mojisola.akinola\\Documents\\NetBeansProjects\\tutorialclass\\tutorialdatabase.db";
// create a connection to the database
conn = DriverManager.getConnection(url);
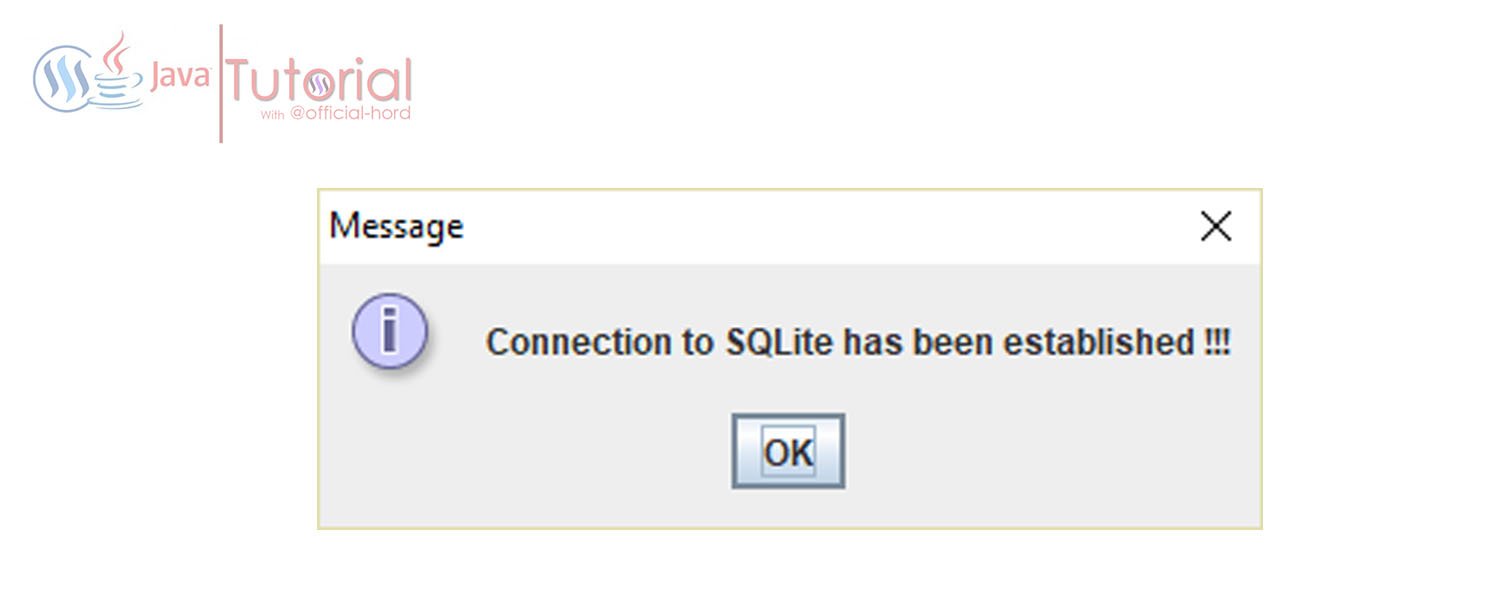
JOptionPane.showMessageDialog(null, "Connection to SQLite has been established !!!");
} catch (SQLException e) {
JOptionPane.showMessageDialog(null, e);
} finally {
try {
if (conn != null) {
conn.close();
}
} catch (SQLException ex) {
System.out.println(ex.getMessage());
}
}
Your code should look like this.

Once this is done, right click inside the code section and click run, you should see this confirmation is you followed correctly.
Note:
All screenshots in this post were taken by me, the video was shot by me using bandicam free version, this has not been posted anywhere else.
Also check out my Youtube Channel for more tutorial videos.
Posted on Utopian.io - Rewarding Open Source Contributors
Post Updated...
Your contribution cannot be approved because it does not follow the Utopian Rules.
You can contact us on Discord.
[utopian-moderator]
Alright thanks will work on that...
This is really a good Java tutorial.
@abuja-steem just upvoted and resteemed this post. Help us to do more by upvoting this comment