Google Assistant on Raspberry | Part 3: Custom wake word
Repository
https://github.com/google/aiyprojects-raspbian
What Will I Learn?
- You will learn how to create custom wake word
- You will learn how to use Snowboy on Raspberry
- You will learn how to inegrate Snowboy with Assistant
Requirements
Difficulty
Intermediate
Required software
- Open new terminal window on the Raspberry and execute commands one by one to install required software
sudo apt-get install python-pyaudio python3-pyaudio sox
sudo pip install pyaudio
sudo apt-get install libatlas-base-dev
- Go to Snowboy and register your account to be able to train your own wake word model. You can record and download already existing model as well
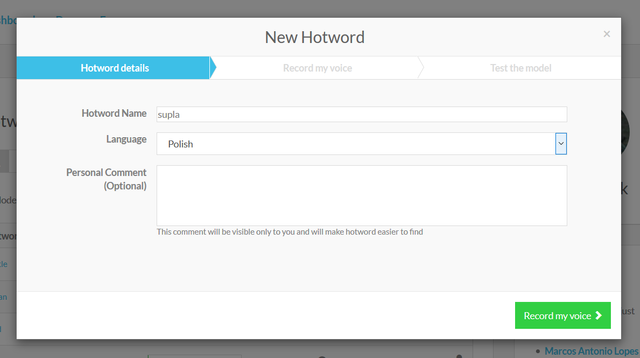
- Name your hotword and select a properly language. As an example I will make "Supla" wake word in Polish
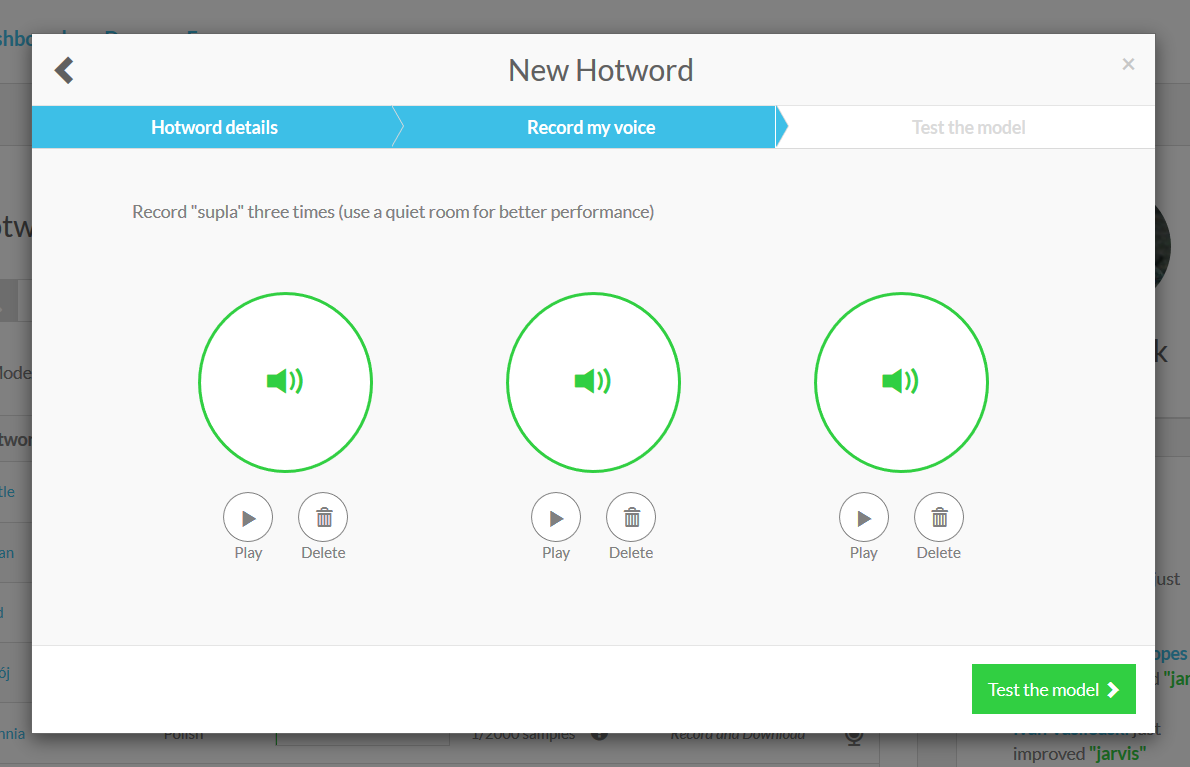
- Record your hotword three times to train the model
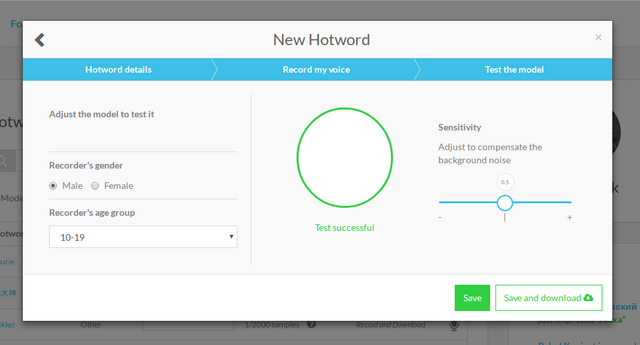
- Select your gender, age group and adjust sensitivity. Then test if your model works properly and download it
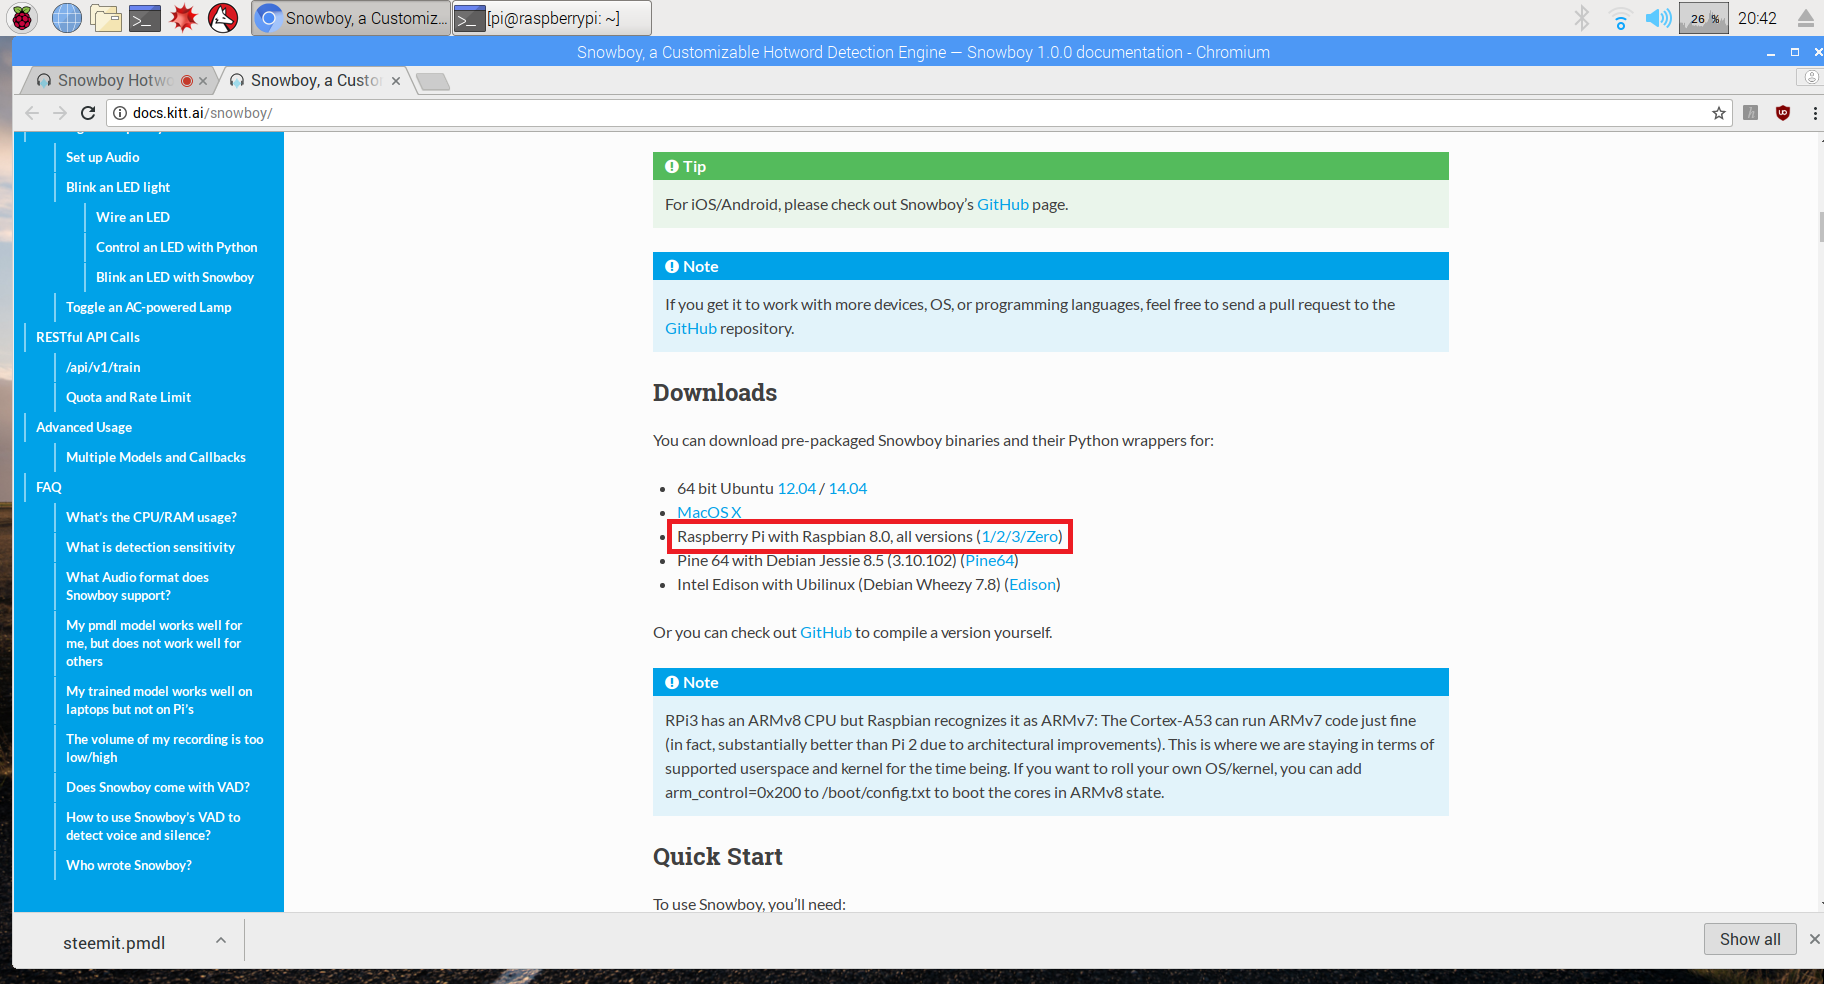
- Download Snowboy package for Raspberry
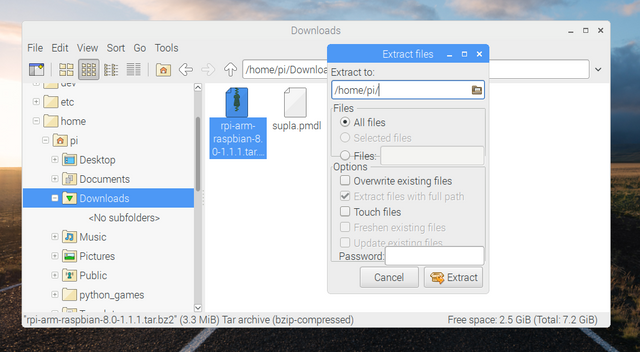
- Go to Downloads folder on your Raspberry and localize your downloaded package. Right-click on it and extract files to the /home/pi directory
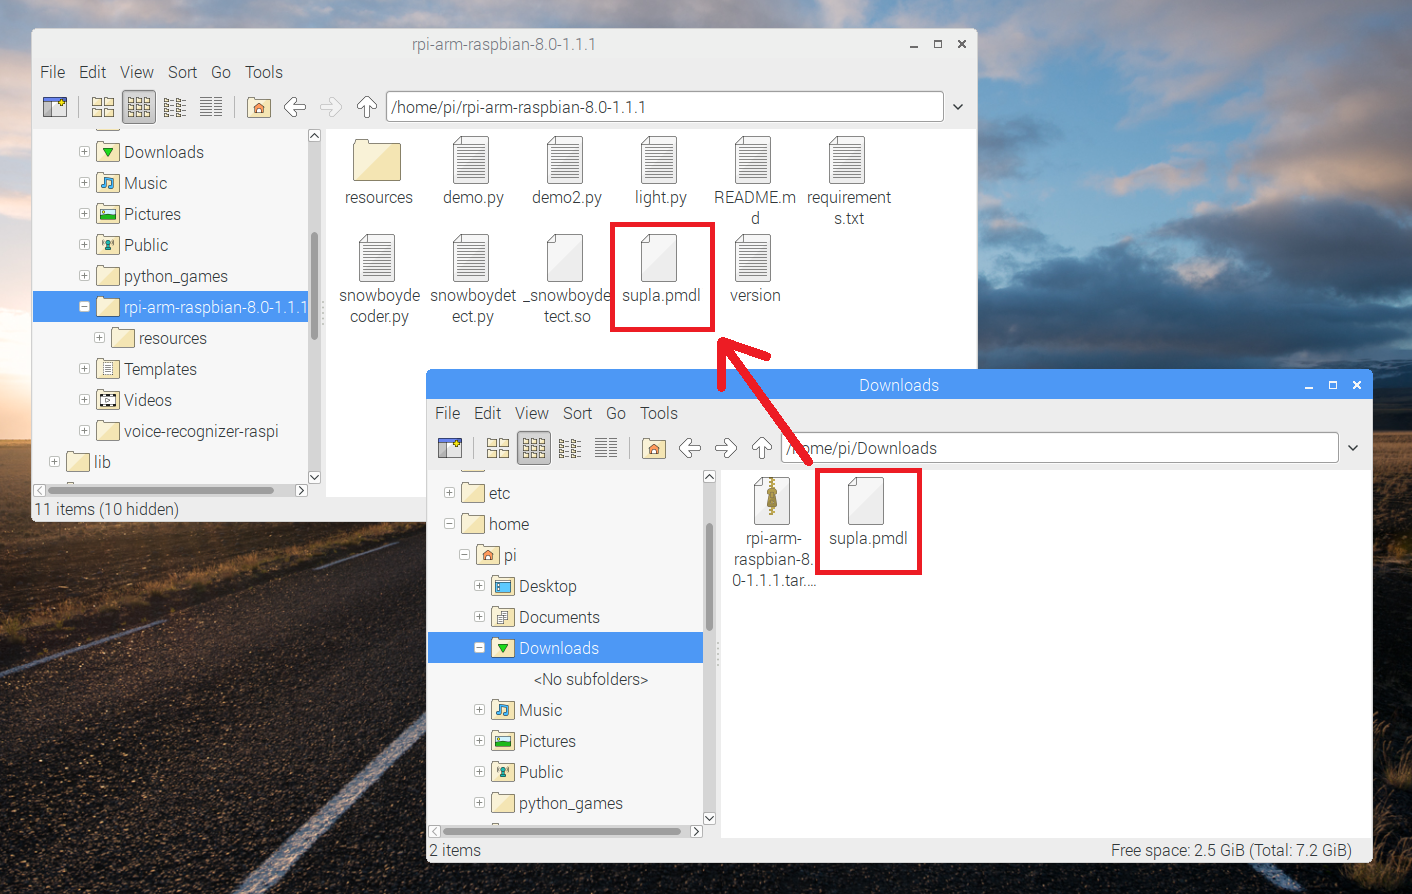
- Go to /home/pi directory and open the newly created folder. Copy your trained hotword model to it
Editing files
If you followed my previous tutorials about Google Assistant you probably use an assistant_library_with_local_commands_demo.py file which is now renamed to main.py. Instead of that you will have to use assistant_library_with_button_demo.py because it allows Assistant to be activated by button connected to GPIO23. When Snowboy recognizes your trained hotword it will provide LOW state on GPIO23 which activates assistant.
- Go to the Assistant folder
cd /home/pi/voice-recognizer-raspi/src/
- Delete current Assistant main file. If you have your custom actions in it, make sure you made a backup copy of this file
rm -f main.py
- Copy assistant_library_with_button_demo.py into new main file
cp assistant_library_with_button_demo.py main.py
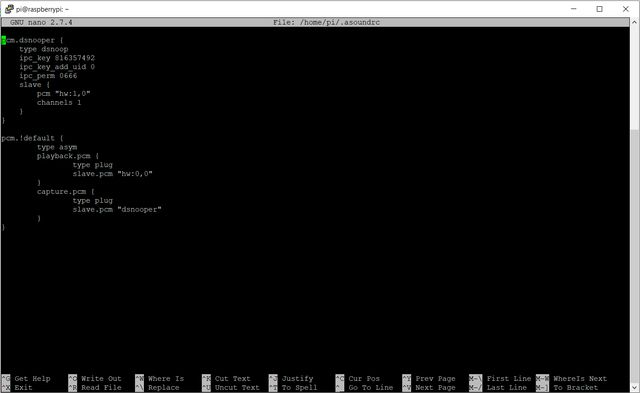
- To allow two applications (Snowboy and Google Assistant) to read from the same USB microphone we have to edit .asoundrc file to implement Dsnoop plugin. Here you can learn more about it
sudo nano /home/pi/.asoundrc
Replace the entire contents of the file with:
pcm.dsnooper {
    type dsnoop
    ipc_key 816357492
    ipc_key_add_uid 0
    ipc_perm 0666
    slave {
        pcm "hw:1,0"
        channels 1
    }
}

pcm.!default {
        type asym
        playback.pcm {
                type plug
                slave.pcm "hw:0,0"
        }
        capture.pcm {
                type plug
                slave.pcm "dsnooper"
        }
}
Source: https://github.com/shivasiddharth/GassistPi/blob/master/audio-drivers/USB-DAC/scripts/.asoundrc
- Open Snowboy file which allows to control GPIO
sudo nano /home/pi/rpi-arm-raspbian-8.0-1.1.1/light.py
We have to modify this file a bit to make assistant work properly:
GPIO.HIGH->GPIO.LOW- Output is lowt = 0.3->t = 0.05- Single signal is shorter(17)->(23)- Output is on GPIO 23(0.7)->(0.5)- Intervals between signals are shorter
- Create new file named trigger.py in Snowboy directory. It runs Snowboy hotword recognition, but instead of normal callback function it uses light.py file to activate the Assistant
sudo nano /home/pi/rpi-arm-raspbian-8.0-1.1.1/trigger.py
and fill it with below configuration:
import snowboydecoder
import sys
import signal
from light import Light

interrupted = False

def signal_handler(signal, frame):
    global interrupted
    interrupted = True

def interrupt_callback():
    global interrupted
    return interrupted

if len(sys.argv) == 1:
    print("Error: need to specify model name")
    print("Usage: python demo.py your.model")
    sys.exit(-1)

model = sys.argv[1]

signal.signal(signal.SIGINT, signal_handler)

detector = snowboydecoder.HotwordDetector(model, sensitivity=0.5)
print('Listening... Press Ctrl+C to exit')

led = Light(23)
detector.start(detected_callback=led.blink,
               interrupt_check=interrupt_callback,
               sleep_time=0.03)

detector.terminate()
Source: https://github.com/Kitt-AI/snowboy/blob/master/examples/Python/demo.py
Note that we use GPIO23 because it activates the Assistant.
Running Snowboy
- Go into the Snowboy folder
cd /home/pi/rpi-arm-raspbian-8.0-1.1.1
- Run trigger.py (replace supla.pdml with your trained model)
sudo python trigger.py supla.pmdl
Here is how it works:
Curriculum
- Google Assistant on Raspberry | Part 2: Custom actions
- Google Assistant on Raspberry | Part 1: Installation process



Thank you for the tutorial.
Yet you used two complete pieces of code/configuration which are actually taken as are from other sources, without citing any reference, properly explaining them, nor making any adjustments to them.
See here: https://github.com/Kitt-AI/snowboy/blob/master/examples/Python/demo.py
https://github.com/shivasiddharth/GassistPi/blob/master/audio-drivers/USB-DAC/scripts/asound.conf
In the future make sure to avoid such approach.
Need help? Write a ticket on https://support.utopian.io/.
Chat with us on Discord.
[utopian-moderator]
Thanks for the review. I added a reference to the sources of used configurations and provided a bit more explanation. I hope it helped. I will do my best to avoid such approach in my next posts.