|Tutorial| How To Make a Chess Board In Blender
Hello guys. This time I want a little sharing about tutorial how to make a chess board. In this tutorial there are some cheats that may be useful for friends, as these are some basic transformation ways in Blender.
1.As always, open the Blender app.
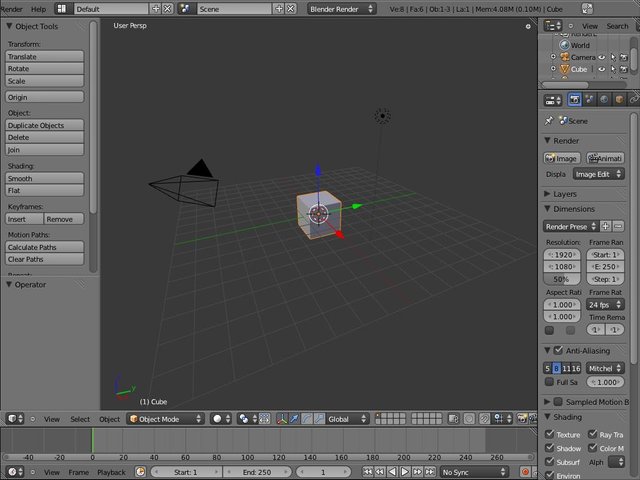
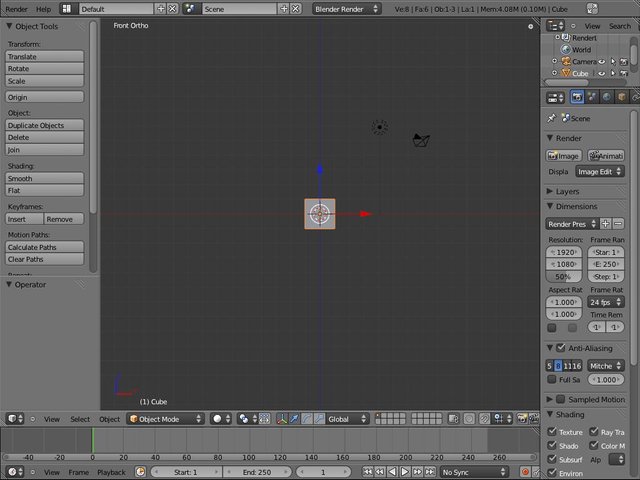
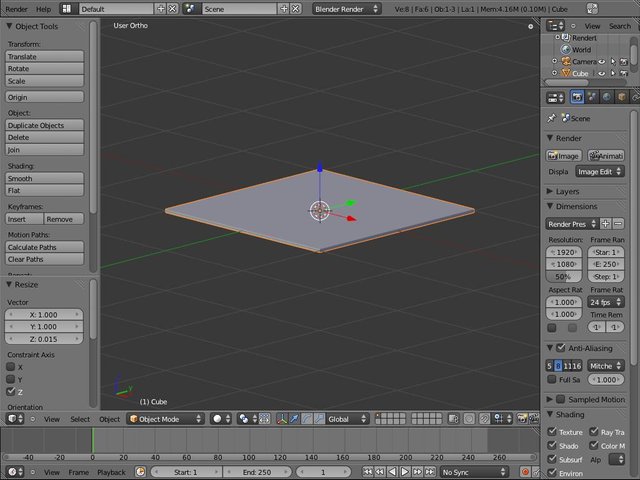
2.Press NUMPAD 5 to change the view to orthogonal to make it easier for us. Then press NUMPAD 1 to see from the front side. This cube will be our main chessboard.
3.Zoom in (SCROLL UP) so we can see the object more clearly. Then do resize on the z axis so that the height of the cube becomes smaller. The trick is press R> Z. I resize by 0.015.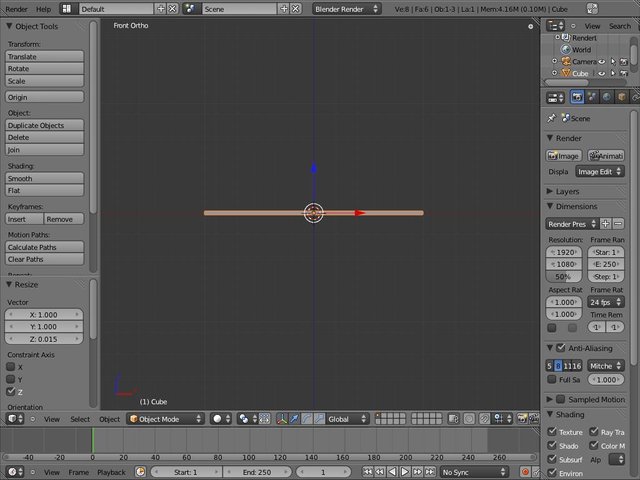
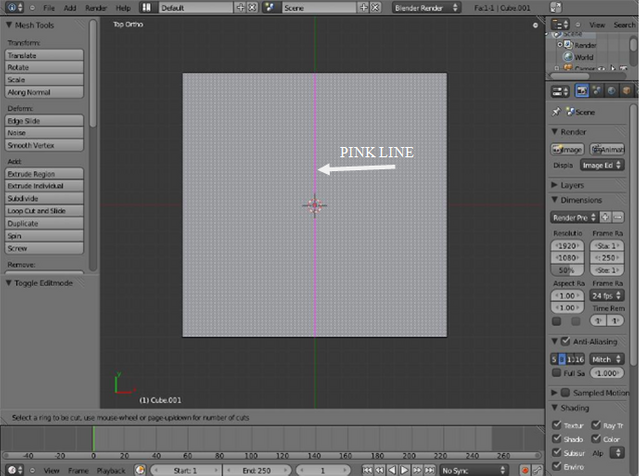
4.Change the point of view to be as follows. The simplest way is to hit NUMPAD 2,4,6,8 until the view corresponds to the image below.
5.Click on TAB and we will go to edit mode. Then click face select mode and select the upper face of the cube.
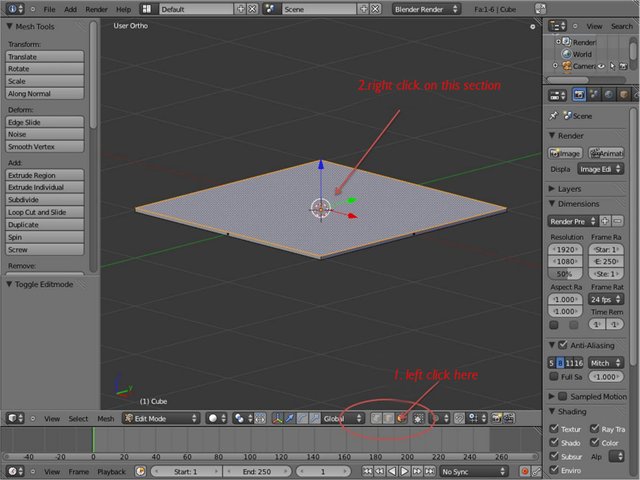
6.Press P then a separate sub menu will appear. Select the selection.
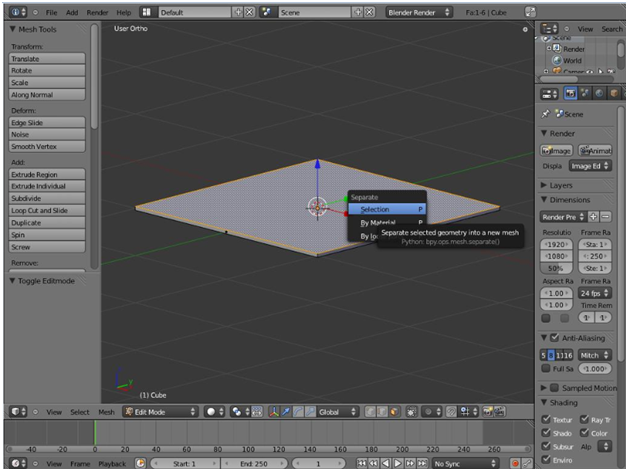
7.Well, now the cube has been divided into 2 pieces of objects. This is done so that we can edit the top of the cube and it will not affect the bottom of the cube.
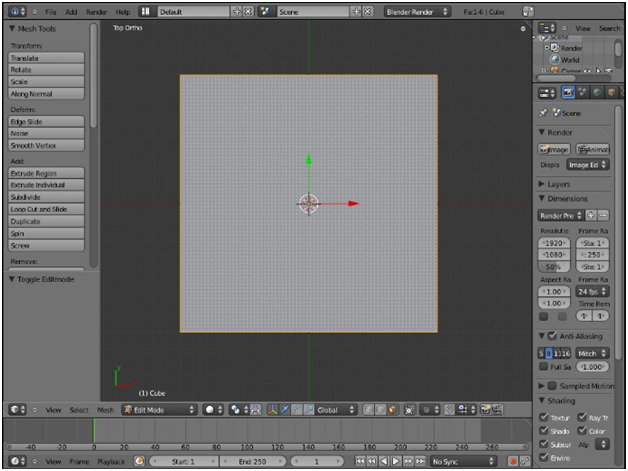
8.Return to the object mode by pressing TAB, then select the top of the cube (the part we just separated). Then click TAB again. Press NUMPAD 7 so we can do editing from the top corner.
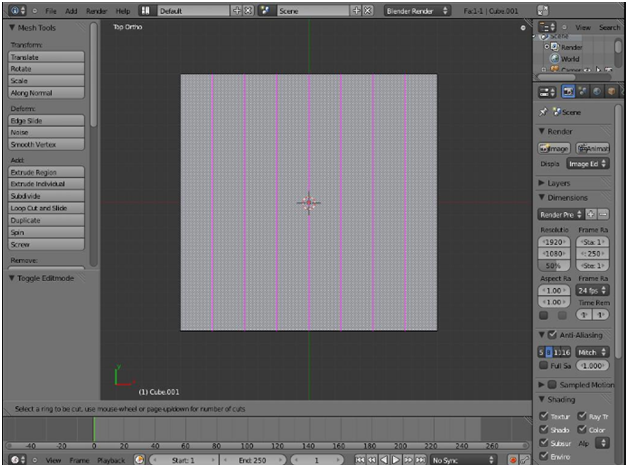
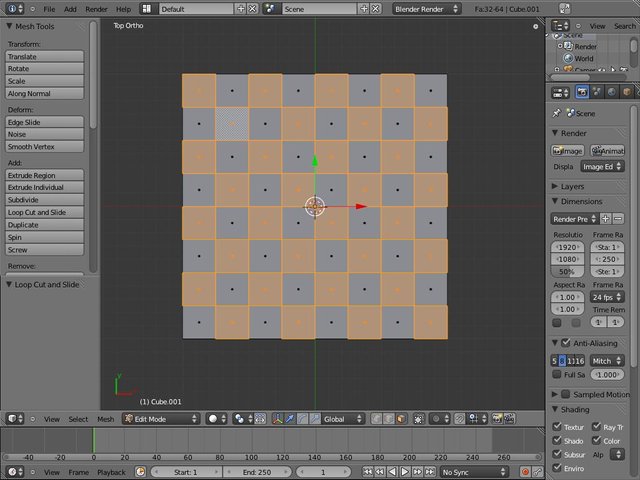
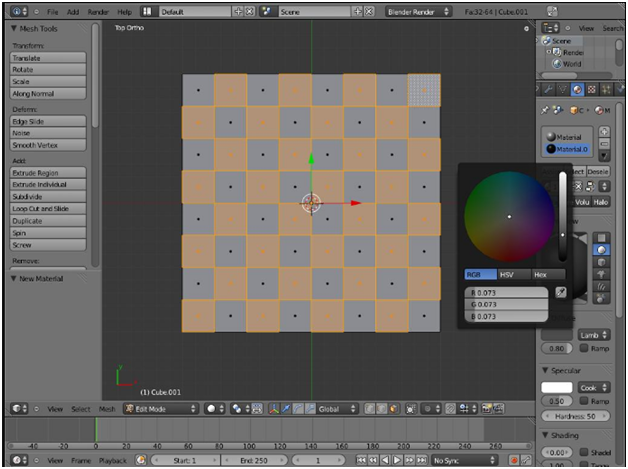
9.Click the Ctrl + R button and position the mouse on the top of the object so that a purple vertical line will appear. Scroll Up so there are 7 pieces of purple vertical lines, then left click. Then the purple lines will turn yellow.
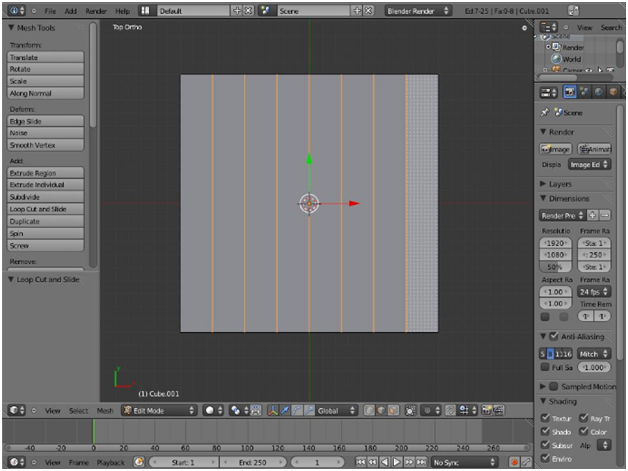
10.Do the same on the horizontal section.
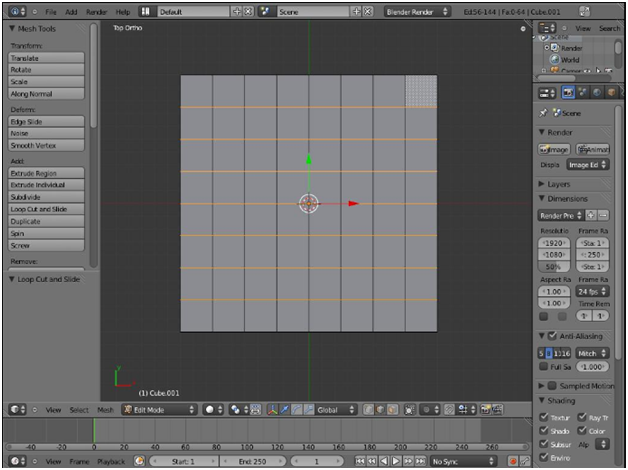
11.Click again face select mode, then do multiple click on the face like the following picture. How to do multiple clicks is press and hold SHIFT while pressing right click on the mouse, and select the faces that exist in the picture.
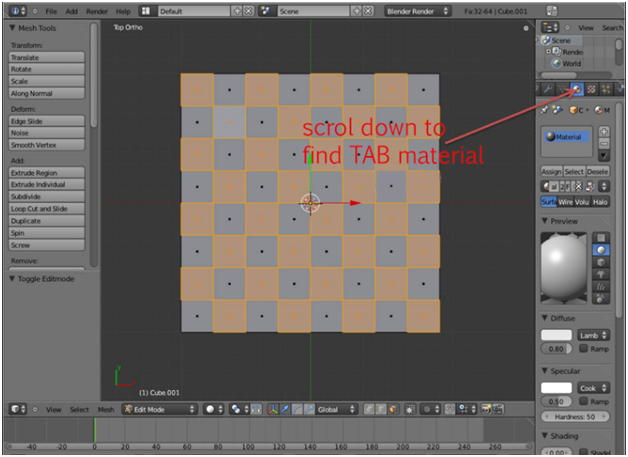
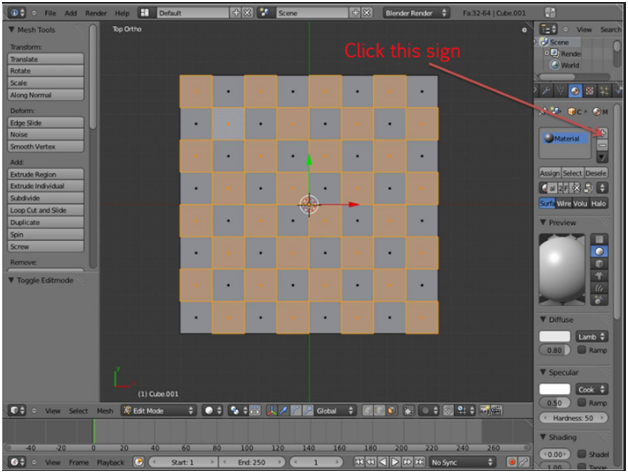
12.This part we will give white color. Click on the MATERIAL tab.
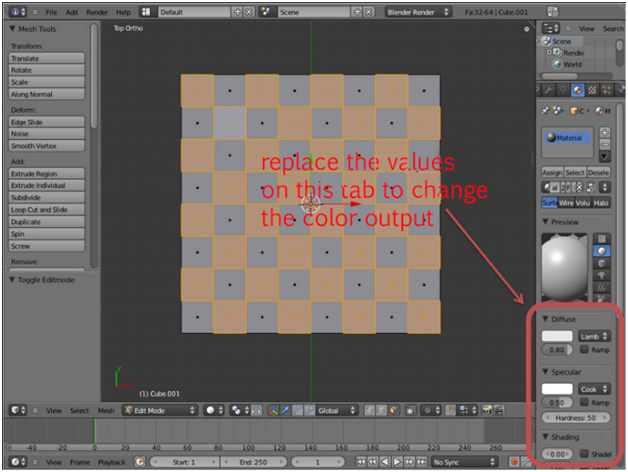
13.You can change the values that are on the right so that the white color obtained in accordance with the tastes of friends. For now, I leave it to its original value only, without changing it.
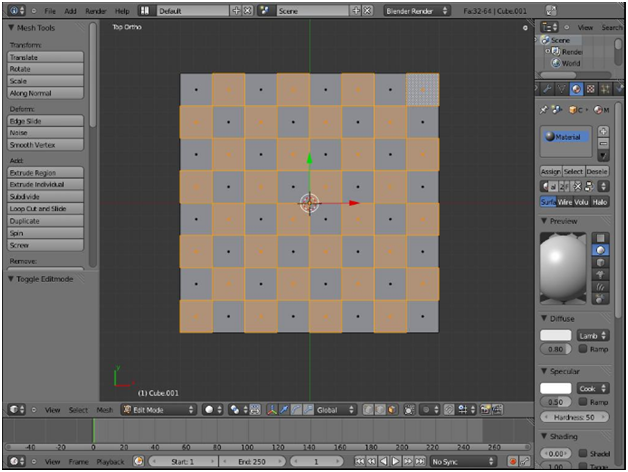
14.Well, white is over. Now change the black color we will give. Choose a different faces from the white faces. Here is the picture.
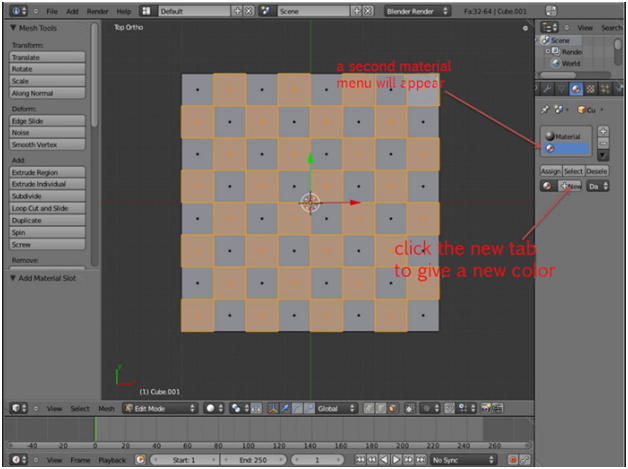
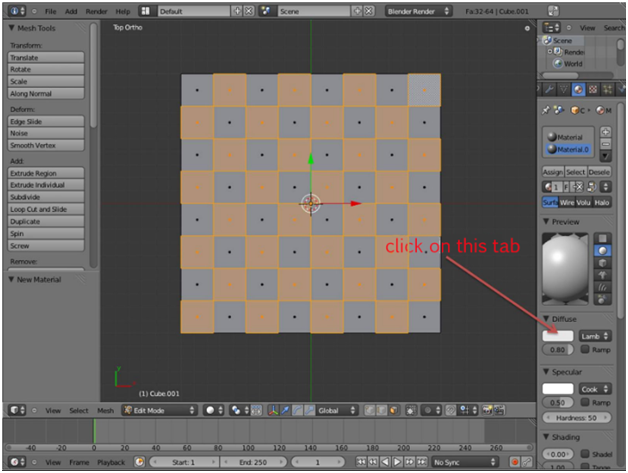
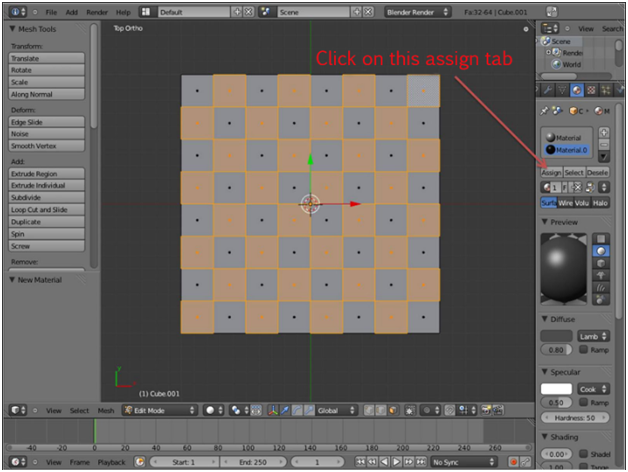
15.Well, we will give 2 MATERIAL in 1 object. This seems trivial, but very useful. First, click the + sign as shown. Then it will appear the second material menu.
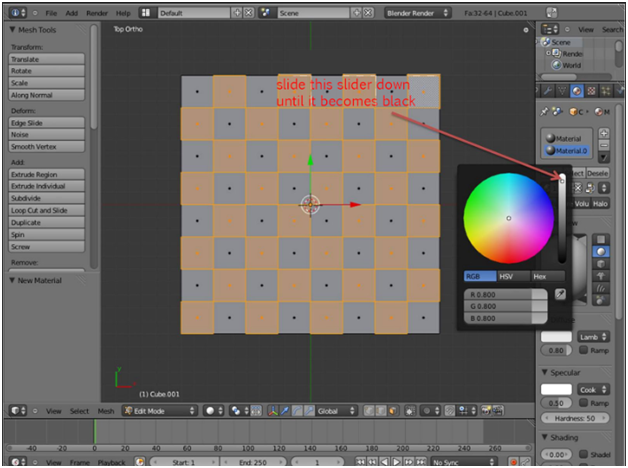
16.After we click the NEW tab, then the view will be the same as before. Select the slider on DIFFUSE and slide the slider towards black (down direction).
17.After that, do not forget to click the ASSIGN tab so that colors can be implemented on the object, so the object has 2 colors.

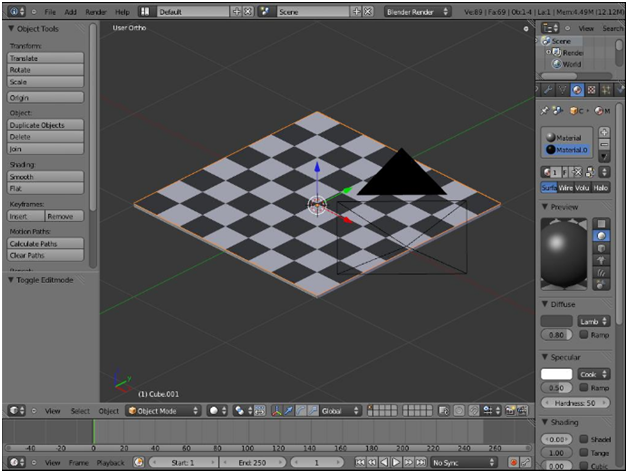
18.Okay, we've succeeded in making the first stage chessboard. ClickTAB to return to Object Mode. Then position the camera as shown.
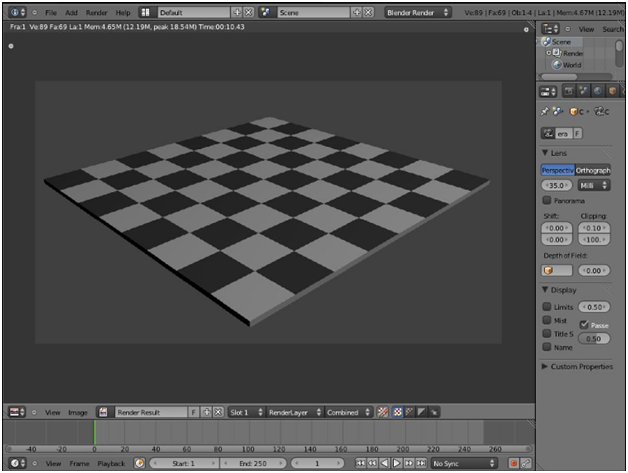
19.Press the NUMPAD 0 key and we will see this object from the camera view point.Right-click on the camera's border, then zoom in and slide the camera position (press G) to position the camera closer to the object.

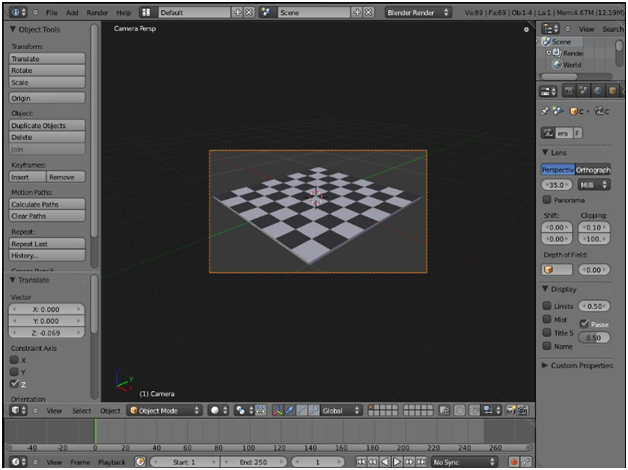
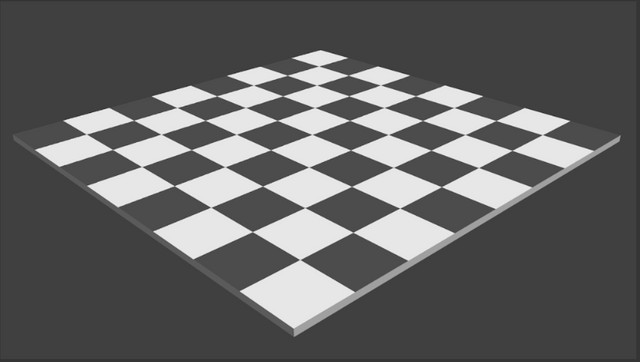
20.Press F12 so we can see the results of this chessboard rendering.
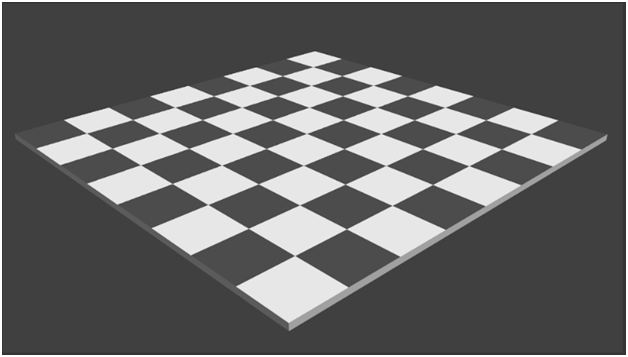
21.Final result.
-----------------------------------------May Be Useful----------------------------------------
Posted on Utopian.io - Rewarding Open Source Contributors
Your contribution cannot be approved because it does not follow the Utopian Rules.
You can contact us on Discord.
[utopian-moderator]
Thank you for the contribution. It has been approved.
Since the tutorial is detailed, It has been accepted. But please don’t make similar tutorials next time.
You can contact us on Discord.
[utopian-moderator]
thanks @shreyasgune
Hey @mulia041 I am @utopian-io. I have just upvoted you!
Achievements
Suggestions
Get Noticed!
Community-Driven Witness!
I am the first and only Steem Community-Driven Witness. Participate on Discord. Lets GROW TOGETHER!
Up-vote this comment to grow my power and help Open Source contributions like this one. Want to chat? Join me on Discord https://discord.gg/Pc8HG9x