How To Create A Simple Registration Form Using Java AWT
What Will I Learn?
- You will learn about AWT
- You will learn about GUI
- You will learn about Java programming
- You will learn about how to create GUI application using AWT
Requirements
Difficulty
- Intermediate
Tutorial Contents
This time, I will show you how to create a simple registration form using Java AWT feature. Of course, I will make it in GUI form.
First you must know the meaning of AWT. AWT (Abstract Windowing Toolkit) is a feature in java that provides multiple classes for creating GUI views. AWT is almost similar to SWING, it's just AWT display is simpler than SWING.
For a bit of reference too, GUI is an interface view. Its function is to facilitate the user in accessing the computer.
Now you can see the steps.
- The first step is to create a file named Tes.java. Then, you can simply fill the command (syntax) into the file.
Enter the command to call the AWT java feature.
import java.awt.*;
Next is to give the name of the public class. The public class name must be the same as the java file name you created. And since you will use AWT, then in public class we have to put command to call applet feature, so you can display GUI form.
public class Tes extends java.applet.Applet
Next, enter a command to call the method. This time we use init method, because it is more suitable with the GUI application using AWT.
public void init()
{
The next is to make layout settings, so the application will be created will appear from the left layout.
setLayout(new FlowLayout(FlowLayout.LEFT));
Then, enter the command
add (new Label ("Name:"));to create a new label. And commandadd(new TextField (10));to create a field that can be filled using text.
add(new Label("Name          :"));
add(new TextField(10));

add(new Label("Address       :"));
add(new TextField(10));

add(new Label("Birthday      :"));
add(new TextField(10));
Syntax below is a syntax to create an other label and a choice menu. The choise menu can be created using the command
Choice gender = new Choice();. The choice menu may contain some contents. The example is in the choice of gender.
add(new Label("Gender        :"));
Choice gender = new Choice();
gender.addItem("Man");
gender.addItem("Woman");
Component add = add(gender);
While the command below is a command to create a new label and a checkbox option. Checkbox options are formed using command
CheckboxGroup job = new CheckboxGroup();.
add(new Label("Job            :"));
CheckboxGroup job = new CheckboxGroup();
add(new Checkbox("Student", job, false));
add(new Checkbox("Teacher", job, false));
And the syntax below serves to create buttons. In the form of Register and Exit button.
add(new Button("Register"));
add(new Button("Exit"));
}
}
- Then, do not forget to create the Tes.html file. This is very useful, so that you can display the result of your application. The syntax is as follow.
<html>
<head><title>Register</title></head>
<body>
<applet code="Tes.class" width=230 height=300></applet>
</body>
</html>
- And now, you can try to run its application.
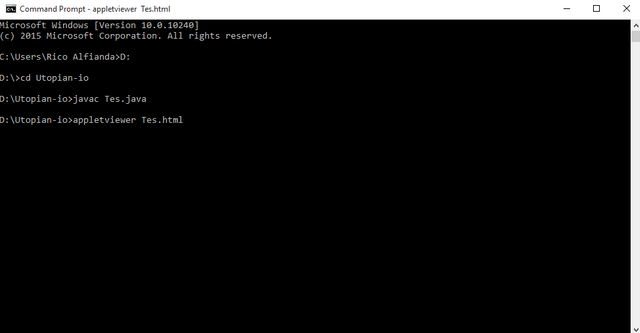
Compiling process:
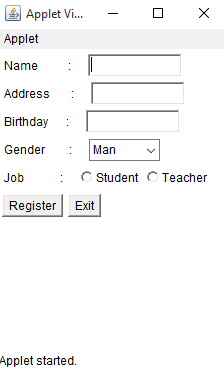
Registration Form result:
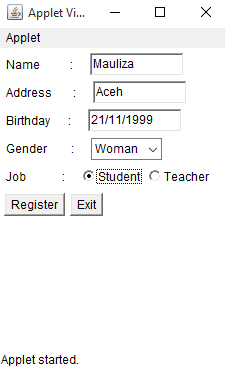
Final result:
Here are the full syntax.
- Tes.java
import java.awt.*;
public class Tes extends java.applet.Applet
{
    public void init()
    {

        setLayout(new FlowLayout(FlowLayout.LEFT));

        add(new Label("Name          :"));
        add(new TextField(10));

        add(new Label("Address       :"));
        add(new TextField(10));

        add(new Label("Birthday      :"));
        add(new TextField(10));


        add(new Label("Gender        :"));
        Choice gender = new Choice();
        gender.addItem("Man");
        gender.addItem("Woman");
        Component add = add(gender);

        add(new Label("Job            :"));
        CheckboxGroup job = new CheckboxGroup();
        add(new Checkbox("Student", job, false));
        add(new Checkbox("Teacher", job, false));

        add(new Button("Register"));
        add(new Button("Exit"));
        }
}
- Tes.html
<html>
<head><title>Register</title></head>
<body>
<applet code="Tes.class" width=230 height=300></applet>
</body>
</html>
Curriculum
Posted on Utopian.io - Rewarding Open Source Contributors
I am sure,
It will be approved
I hope like that so :v
Don't worry, the words in your post can be understood
Thanks
Thank you for the contribution. It has been approved.
You can contact us on Discord.
[utopian-moderator]
Thanks sir
Hey @mauliza11 I am @utopian-io. I have just upvoted you!
Achievements
Suggestions
Get Noticed!
Community-Driven Witness!
I am the first and only Steem Community-Driven Witness. Participate on Discord. Lets GROW TOGETHER!
Up-vote this comment to grow my power and help Open Source contributions like this one. Want to chat? Join me on Discord https://discord.gg/Pc8HG9x
Simple and to the point, nice work pal, keep it up