TUTORIAL PHOTOSHOP) # page1 - Create a Flame Effect In Text

Hello everyone on this occasion I will share a tutorial on how to edit photos in Photoshop app. On the day I will discuss how to create a fire effect on photo / text using phoshop.
Photoshop is one of the open source applications that is often used by everyone. Especially for people who are lovers of photographers, of course he wants a good quality picture and quality. Photoshop is very easy and complete if used to edit various images.

Here is a tutorial on How to Make a Flame Effect On Text
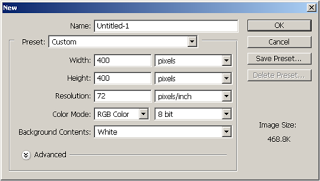
[1]Select File-New
then fill, height = 400 pixels, width = 400 pixels
and resoulation of 72 dpi in the RGB mode. As follows :
[2] Now Color it with Black BackGround, by pressing Alt + delete on the keyboard.
To color background make sure in the selected toolbox as follows.

[3] Now type the Text as you wish, the example of text I typed "On Fire" with white text color can be selected in the font toolbar above, the type of free letter as follows:

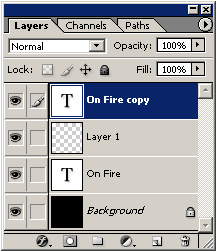
[4] copy the text layer, and select new layer
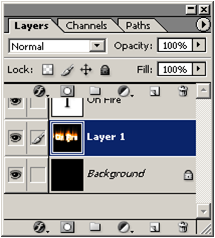
[5] now arrange the layers so they are arranged as follows
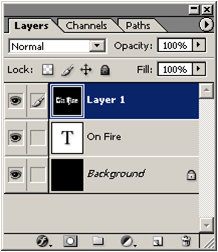
[6] Color the new layer (layer 1) with black color, like stage no two earlier
[7] now highlight Copy text layer, then select layer - Merge Down so layer 1 and text copy layer unite to Layer 1, as shown below:
[8] Select / Select layer1 Click Image> Rotate Canvas> 90'CCW.
[9] so it looks like the following.

[10] then select Filter> Stylize> Wind. Dierection From the right, repeat once (twice)
[11] now the text looks like the following:
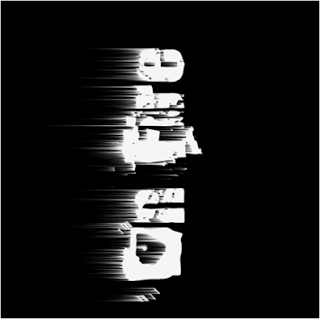
[12] Select layer1 Click Image> Rotate Canvas> 90'CW.
[13] and the image back to the original.
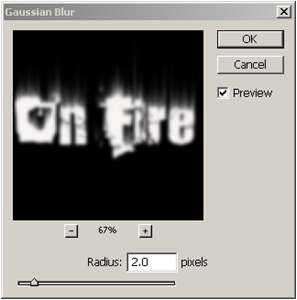
14] Then Click Filter> Blur> Gaussion Blur Apply the following settings.
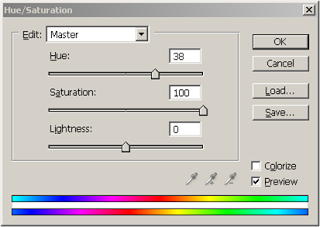
[15] now we color, by mengklick Image> Adjustments> Hue / Saturation or press Ctrl + U Apply the following settings.
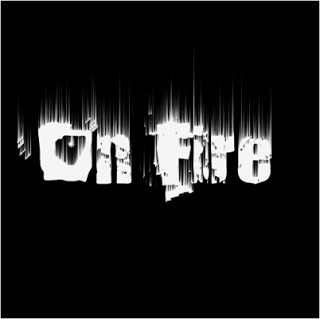
[16] now the image looks like this.

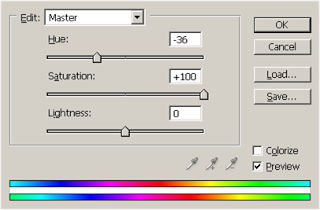
[17] now duplicate layer 1, so it becomes layer 1 copy and change the Hue / Saturation as before and Apply Settings Here
18] Now change the blending mode in Layer1 copy.
Select Layer 1 copy, change the blending mode to Color Dodge
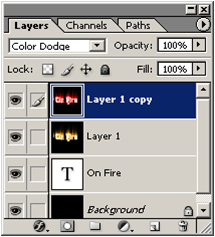
[19] then Select on Layer 1 Copy then Select Layer Merge Down
[20] set the layer as below
[21] Select the text layer and Block text and change the text color to Black

[22] and the resulting image looks like the following, then select Layer> Flaten Image to merge all layers.

Proof of Work
So many of my tutorials today, if any want to be asked please in the comment field below. do not forget to follow my account @masterym
Posted on Utopian.io - Rewarding Open Source Contributors
Your contribution cannot be approved because it does not follow the Utopian Rules.
You can contact us on Discord.
[utopian-moderator]