Implement Basic Access Authentication and User Agent display on an HTTP server using NodeMCU devkit v1.0 board
What Will I Learn?
- You will learn how to implement a simple authentication using username and password on an HTTP server.
- You will learn how to program your NodeMCU devkit v1.0 board to contain an HTTP server with basic access authentication.
- You will learn what is a user agent software and how to display the user agent software used for accessing the HTTP server by a specified user after authentication.
Requirements
Materials Needed
- NodeMCU devkit v1.0
- USB Cable (Type A to Mini B)
- Computer
Software Applications
- Open-Source Arduino Software (IDE) / Arduino IDE
- Any web browser (Examples: Chrome, Mozilla, Safari, etc.)
Difficulty
- Basic
Description:
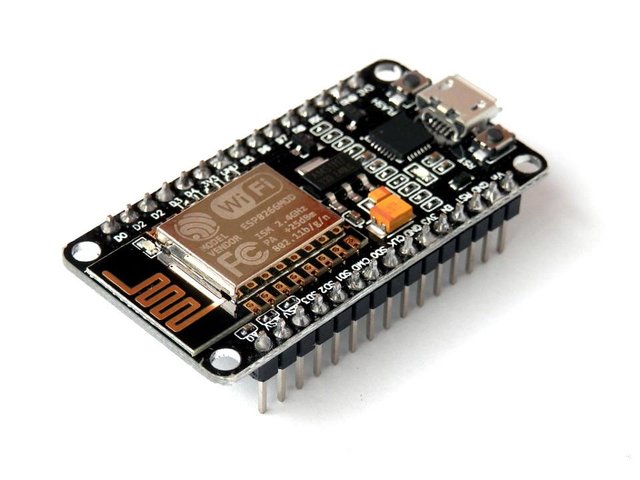
Image Source: 1
HTTP is the condensing of "HyperText Transfer Protocol". A convention resembles a dialect with a basic syntax. The HTTP Server is the execution of that convention in a bit of Software. The convention determines how the data must be asked for and how the reactions are shaped. The HTTP Server "serves" content situated in the server, this incorporates HTML, pictures, flash and any record related. The server isn't limited to server static substance, it additionally serves dynamic substance produced on fly from a database or comparable. Specifically, the Hypertext Transfer Protocol (HTTP) recognizes the customer programming beginning the demand, utilizing a user-agent header,
notwithstanding when the customer isn't worked by a client.
A user agent is a software that is following up in the interest of a client. One regular utilization of the term alludes to a web program educating a site data concerning the program and operating system. This enables the site to modify content for the abilities of a specific gadget.
With regards to a HTTP transaction, basic access authentication is a technique for a HTTP client operator to give a client name and secret key when making a demand..
In this tutorial, I will implement a basic authentication on an HTTP web server using NodeMCU devkit v1.0 board. And for additional information of every user that passes the authentication, the HTTP web server will also
display the user agent software information of that user.
References: 1, 2
For further research about NodeMCU devkit v1.0. Here is its official website
Tutorial Contents
using NodeMCU devkit v1.0 board"
with its Necessary Files "
Open Arduino IDE then, check if you have the ESP8266 library from your installed libraries . This is necessary to configure the NodeMCU to run on Arduino IDE.
Note: Make sure that you have already downloaded and installed the necessary files to run the NodeMCU devkit v1.0. If you are still starting to use ESP8266 boards in Arduino IDE and you haven't install or download them, kindly click here. And follow the first step of my tutorial there.
The NodeMCU devkit v1.0 board belongs to the ESP8266 boards and can run only in Arduino IDE using Arduino ESP8266 core libraries.
Step 2:
When you have finished downloading and installing the necessary files to run ESP8266 boards like the NodeMCU devkit v1.0 board, it would be required to close the Arduino IDE then, open it after a minute. It is good practice to do, so as to allow the new libraries to be loaded for setup when you open the Arduino IDE again, in some instances to avoid errors.
After, go to Tools tab and change the board to NodeMCU 1.0 (ESP-12E Module).
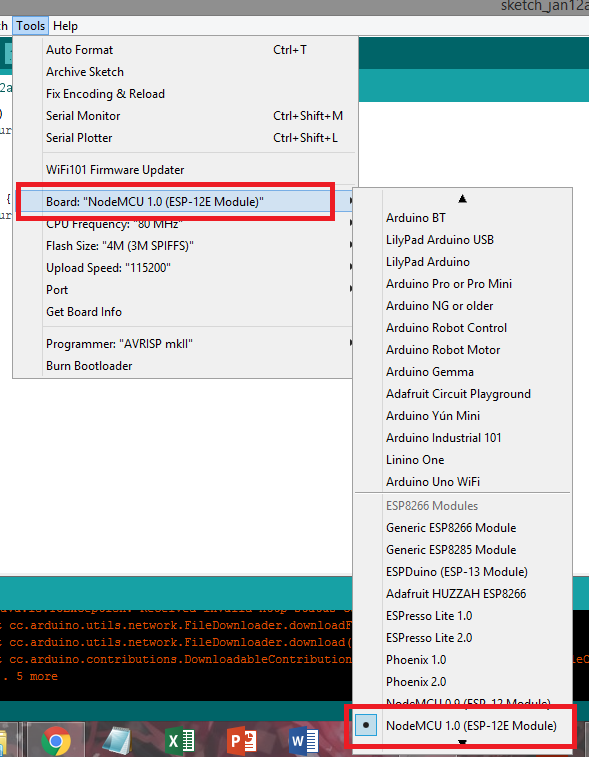
Then, click on File> New, to create a new sketch in Arduino IDE.

Actual Photo
On your new sketch in Arduino IDE, input this program:
#include <ESP8266WiFi.h>
#include <WiFiClient.h>
#include <ESP8266WebServer.h>
const char* ssid = "HUAWEI Y5 2017";
const char* password = "12345678";
IPAddress ip(192, 168, 43, 155);
IPAddress gateway(192, 168, 43, 1);
IPAddress subnet(255, 255, 255, 0);
IPAddress dns(192, 168, 43, 1);
ESP8266WebServer server(8080);
//Check if header is present and correct
bool is_authentified(){
Serial.println("Enter is_authentified");
 if (server.hasHeader("Cookie")){
Serial.print("Found cookie: ");
String cookie = server.header("Cookie");
Serial.println(cookie);
 if (cookie.indexOf("ESPSESSIONID=1") != -1) {
Serial.println("Authentification Successful");
return true;
}
}
Serial.println("Authentification Failed");
return false;
}
//login page, also called for disconnect
void handleLogin(){
String msg;
if (server.hasHeader("Cookie")){
Serial.print("Found cookie: ");
String cookie = server.header("Cookie");
Serial.println(cookie);
}
if (server.hasArg("DISCONNECT")){
Serial.println("Disconnection");
String header = "HTTP/1.1 301 OK\r\nSet-Cookie: ESPSESSIONID=0\r\nLocation: /login\r\nCache-Control: no-cache\r\n\r\n";
server.sendContent(header);
return;
}
if (server.hasArg("USERNAME") && server.hasArg("PASSWORD")){s
if (server.arg("USERNAME") == "admin" &&  server.arg("PASSWORD") == "admin" ){
String header = "HTTP/1.1 301 OK\r\nSet-Cookie: ESPSESSIONID=1\r\nLocation: /\r\nCache-Control: no-cache\r\n\r\n";
server.sendContent(header);
Serial.println("Log in Successful");
return;
}
msg = "Wrong username/password! try again.";
Serial.println("Log in Failed");
}
String content = "<html><br>";
content += "<h1>Username:<br>";
content += "Password:<br>";
content += "" + msg + "<br>";
content += "You also can go here</h1></html>";
server.send(200, "text/html", content);
}
//root page can be accessed only if authentification is ok
void handleRoot(){
Serial.println("Enter handleRoot");
String header;
if (!is_authentified()){
String header = "HTTP/1.1 301 OK\r\nLocation: /login\r\nCache-Control: no-cache\r\n\r\n";
server.sendContent(header);
return;
}
if (server.hasArg("USERNAME") && server.hasArg("PASSWORD")){s
if (server.arg("USERNAME") == "admin" &&  server.arg("PASSWORD") == "admin" ){
String header = "HTTP/1.1 301 OK\r\nSet-Cookie: ESPSESSIONID=1\r\nLocation: /\r\nCache-Control: no-cache\r\n\r\n";
server.sendContent(header);
Serial.println("Log in Successful");
return;
}
msg = "Wrong username/password! try again.";
Serial.println("Log in Failed");
}
String content = "<html><br>";
content += "<h1>Username:<br>";
content += "Password:<br>";
content += "" + msg + "<br>";
content += "You also can go here</h1></body></html>";
server.send(200, "text/html", content);
}
//root page can be accessed only if authentification is ok
void handleRoot(){
Serial.println("Enter handleRoot");
String header;
if (!is_authentified()){
String header = "HTTP/1.1 301 OK\r\nLocation: /login\r\nCache-Control: no-cache\r\n\r\n";
server.sendContent(header);
return;
}
String content = "<html><h2>WELCOME TO NODEMCU WEB SERVER!</font></h2><br>";
content += "<br><a href=\"/login?DISCONNECT=YES\"><b>LOGOUT</b></font></button></font></body></html>";
if (server.hasHeader("User-Agent")){
content += "<p>The user agent used is : " + server.header("User-Agent") + "<br><br>";
}
server.send(200, "text/html", content);
}
//no need authentification
void handleNotFound(){
String message = "File Not Found\n\n";
message += "URI: ";
message += server.uri();
message += "\nMethod: ";
message += (server.method() == HTTP_GET)?"GET":"POST";
message += "\nArguments: ";
message += server.args();
message += "\n";
for (uint8_t i=0; i<server.args(); i++){
message += " " + server.argName(i) + ": " + server.arg(i) + "\n";
}
server.send(404, "text/plain", message);
}
void setup(void){
Serial.begin(115200);
WiFi.config(ip,gateway,subnet,dns);
WiFi.begin(ssid, password);
Serial.println("");
// Wait for connection
while (WiFi.status() != WL_CONNECTED) {
delay(500);
Serial.print(".");
}
Serial.println("");
Serial.print("Connected to ");
Serial.println(ssid);
Serial.print("IP address: ");
Serial.println(WiFi.localIP());
server.on("/", handleRoot);
server.on("/login", handleLogin);
server.on("/inline", [](){
server.send(200, "text/plain", "this works without need of authentification");
});
server.onNotFound(handleNotFound);
//here the list of headers to be recorded
const char * headerkeys[] = {"User-Agent","Cookie"} ;
size_t headerkeyssize = sizeof(headerkeys)/sizeof(char*);
//ask server to track these headers
server.collectHeaders(headerkeys, headerkeyssize );
server.begin();
Serial.println("HTTP server started");
}
void loop(void){
server.handleClient();
}
The program creates an HTTP web server that has a main page that comprises the basic access authentication. The functionvoid handleLogin()simply facilitates the login form that comprises the username and password. Theif (server.arg("USERNAME") == "admin" && server.arg("PASSWORD") == "admin" )defines the necessary password and username to be used. In this case, the username and password are bothadmin.These information is stored as a cookie for the web site and the web server will include this in its header by the next time, a specific user access the web server again. The cookie is identified by the codeString cookie = server.header("Cookie");and is stored directly after the user logs out based on the condition in the codeif (server.hasArg("DISCONNECT")). When you enter a website utilizing cookies, you might be requested to round out a shape giving individual data; like your name, email address, and interests. This data is bundled into a cookie and sent to your Web program, which at that point stores the data for later utilize. Whenever you go to a similar website, your program will send the cookie to the Web server. The message is sent back to the server each time the program asks for a page from the server.
The functionvoid handleRoot()defines the contents of the web page after the user successfully authenticate with the correct username and password.
But if the user failed to authenticate nd will just click the link on the string "You can also click here", the functionvoid handleNotFound()handles the web page that would give a pop up message that the server has failed to find the necessary files to display the requested web page.
In order for the chat server to have wireless connection to the clients, the board must connect to a wireless access point or to a hotspot. The SSID and the password of the access point it would connect is defined by the codeconst char* ssid = "HUAWEI Y5 2017";andconst char* password = "12345678";. This should be changed based on the configuration of the wireless access point, you are using.
Now, connect your NodeMCU devkit v1.0 to your computer using the USB cable (Type A to Mini B).
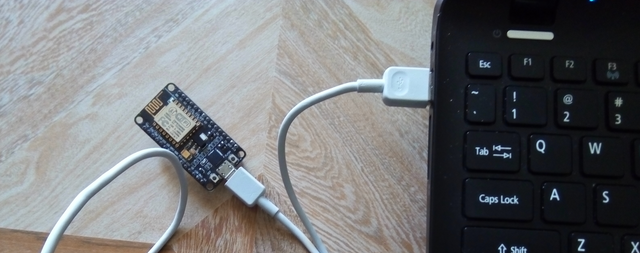
Actual Photo
Go to the device manager then, identify its port number if it is your first time to use this board. Now, go the Arduino IDE and click Tools > Port and look for the port of your NodeMCU devkit v1.0.

Actual Photo
Input the program above properly. And click Verify/Compile when you are done with the program to check for errors.I have already compiled this program and it has no errors based on my screenshot. If compiling your code is unsuccessful, try comparing your program to my program in this tutorial. You may have missed something.
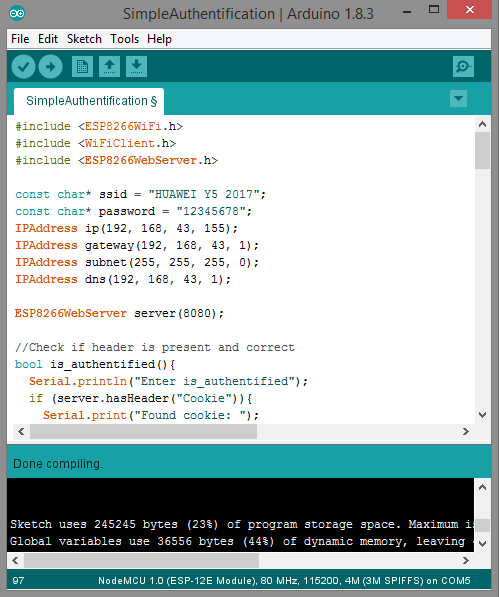
Actual Photo
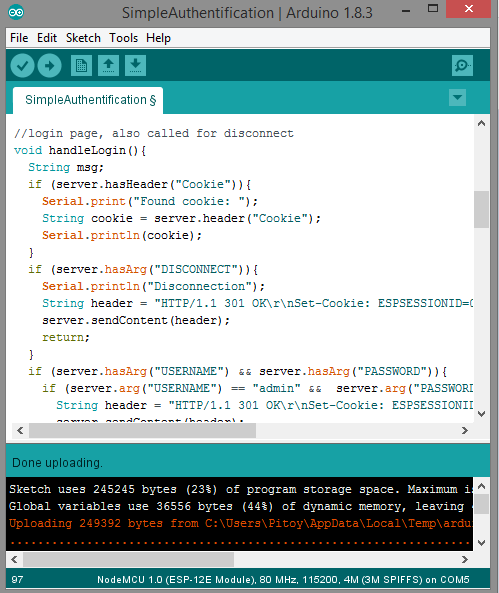
If your program has no errors after you compiled, click on Upload. If uploading your code is unsuccessful, check if you are using the right port.
Actual Photo
Step 4:
Before testing, make sure that you have already turned on the Wi-Fi hotspot which the NodeMCU board connects as specified on the program above.
1. Open your web browser, input the IP address of the HTTP web server as assigned on your program on the search tab. In my case, the IP address is 192.168.43.155:8080.

Actual Photo
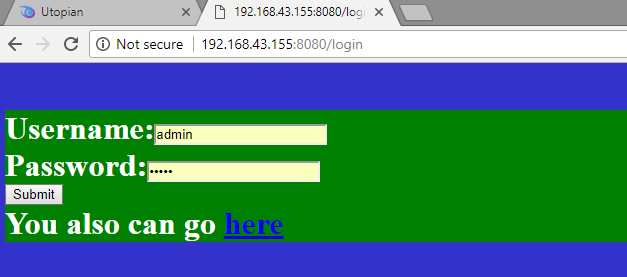
2.On the main page of the HTTP server, you should see an login form. This is the basic access authentication that needs your username and password. Based on the program, the username and the password is both admin.
Actual Photo
3. After filling up the login form with the correct username and password, click on submit button. Then, you will be directed to your actual page.

Actual Photo
This is the user agent display as described on the description of this tutorial.

Actual Photo
But if you input the wrong username or password, you will be asked to try again.

Actual Photo
Now, we have successfully implemented basic access authentication and user agent display on an HTTP web server using NodeMCU devkit v1.0 board
Curriculum
• Auxiliary Wireless TV Power Remote Control using NodeMCU devkit v1.0
• Make Your Own Web Server using NodeMCU devkit v1.0
• External GPIO Pin State Monitoring using HTTP Client Request for NodeMCU Devkit v1.0 Boards
• Web-controlled Servomotor using NodeMCU devkit v1.0 board
• Intruder Alarm System with Automatic Online Updates using NodeMCU devkit v1.0
• Online Temperature Monitor using NodeMCU devkit v1.0
• Water Overflow Alarm with Online Updates using NodeMCU devkit v1.0
• Set up Your Own Wireless Access Point using NodeMCU devkit v1.0
• Create a Local Chat Server using NodeMCU devkit v1.0 board via Telnet
• Create a Web Bot Server using NodeMCU devkit v1.0 board via Telegram
Posted on Utopian.io - Rewarding Open Source Contributors
Your contribution cannot be approved because it does not follow the Utopian Rules.
Your tutorial is far too trivial for Utopian to be accepted. We want tutorials to be detailed how-tos not "Copy paste this code and save it"
You can contact us on Discord.
[utopian-moderator]
Will try better next time. Anyways, thank you sir @deathwing.