COMMUNITY-BASED Angular course from scratch /Setting up our project/
Have you ever wondered how web apps are built? Did you plan to build one, but you didn't know where to start? Maybe you are a frontend developer who wants to learn a new JavaScript framework? If you answer yes to any of these questions, you are probably at the right place.
NOTE: the whole course is gonna be available on utopian.io, so why don't we try to do a community-based course? I mean, I have already prepared code for 6 parts of the course, but there is still a lot that can be done (at the moment: testing, making this app Progressive Web App and so on) and I think utopian.io can help with that. How?
If you are more experienced dev than me, you can always do pull request with amendments to my code or even with a new feature, just follow these steps:
- Fork my repo.
- Make your changes in a new branch.
- Push your branch to GitHub.
- In GitHub, send a pull request either to branch tutorial-part-x (if you found a bug or you don't like my approach) or to master (if you are adding a new feature).
Also, take advantage of the Utopian.io, which will allow you to get a reward for your contribution to the jakipatryk/ angular-todo-list-tutorial project. You do not have to write theoretical issues to what you have created. That's what I'll take care of. If your pull request is accepted, I will resteem your post and 30% of the reward from the part of the course which you have contributed to will go to you (if more than one pull request is accepted, the reward will be divided equally for all).
Of course, not only developers are welcome. In addition to the resteem, another 10% reward of each post will go to people who will publish other contributions to jakipatryk/angular-todo-list-tutorial project (e.g. a proven increase in course visability).
Introduction
In this course, you will learn how to build web apps using a framework powered by Google - Angular. We will build one simple app, but we will use a lot of cool tools and technologies, besides Angular also:
- Angular CLI
- Google Firebase:
- Cloud Firestore
- Authentication
- Hosting
- Angular Material
How to get as much as possible from my tutorials?
The app we will be building throughout this course is available here:
https://angular-todo-list-tutorial.firebaseapp.com
and its code on Github:
https://github.com/jakipatryk/angular-todo-list-tutorial
However, before you start building applications using Angular, some JavaScript knowledge is required. Angular is just a tool and to understand what is really going on, you need to know JS. I won't cover it in this course, but don't worry, there are plenty of sources you can learn from. I personally recomend:
Each part of the course will cover some theoretical knowledge before we start coding our ToDo List app, but it will be great if you also read the articles I'm gonna be adding in the references section, which will extend topics that I have written about in a given part of the course.
Let's get started!
Editor
Before we start, you need an editor. There are plenty of them, but I recommend the ones I am using or I used in the past:
- Visual Studio Code, this is the source code editor that I'm currently using (also in this course)
- Atom, I used to use it in the past, also really cool
- Brackets, I use this one from time to time, but mostly for Vanilla JS (plain JavaScript)
Terminal
If you are Linux or Mac user, you can just use their default terminals. They are good enough. However, as a Windows enjoyer, default Command Line isn't the best choice when working with Angular (it is gonna be our second home!). Sure, you can use it and still do everything we are gonna be doing in this course, but why won't you use a prettier and easier to use the software? I use Cmder and I'm really satisfied.
NPM
We also need Node.js and NPM (Node Package Manager) to be able to install some dependencies. You will soon find out why we need to use them ;) At the moment just follow this guide and you are almost ready to start coding! I know it is much time spent on setting up our environment, but trust me, all of these tools will save us A LOT of time in the future!
Angular CLI
It basically is a command line interface for Angular that makes it super easy to create and develop our apps. To install it, just open your command line (Cmder or anything) and type:
npm install -g @angular/cli
when installation is done, you will see information similar to this:

Initializing our ToDo List Angular app!
It is super easy to initialize an application using Angular CLI. In a command line you just have to go to a directory, where you want to have your app locally at, and type:
ng new angular-todo-list-tutorial --routing true --style scss
Let me explain what each of this words mean:
- ng - a keyword at the beginning of every Angular CLI command
- new - it informs Angular CLI that we want to creat a new app
- angular-todo-list-tutorial - this is the name of our app
- --routing true - this is an optional argument, you don't have to type this, but we will need a module it creates in the future
- --style scss - this is also an optional argument, all it does is setting default style file extension to .scss instead of .css
Now, to see what CLI has generated, just move to your app name directory:
cd angular-todo-list-tutorial
and type:
ng serve
ng serve builds the application and starts a web server, so we can see the result of our work in the browser. You will also see these informations in your terminal:
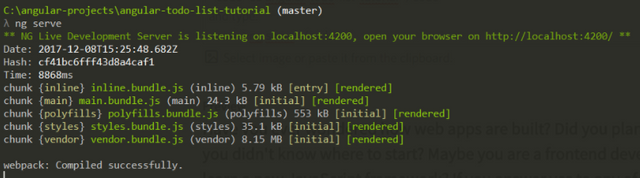
especially useful is this part:
** NG Live Development Server is listening on localhost:4200, open your browser on http://localhost:4200/ **
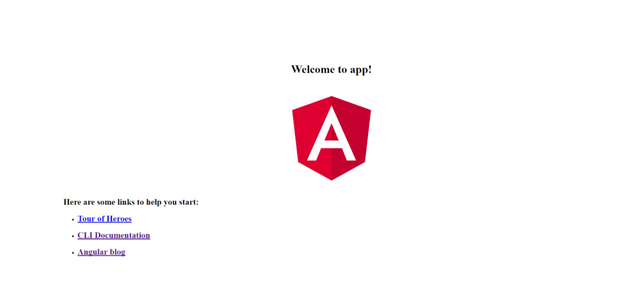
so, let's go! When you open your browser on http://localhost:4200/ you will see views that CLI generated:
Google Firebase
Our ToDo List app will need some backend features such as user authentication and database. But we don't want to write them on our own, that would be so much more work to do! Fortunately, these services can be served by Google Firebase! We just have to code our frontend and connect to these services (that's what we will be doing in the next part of the course).
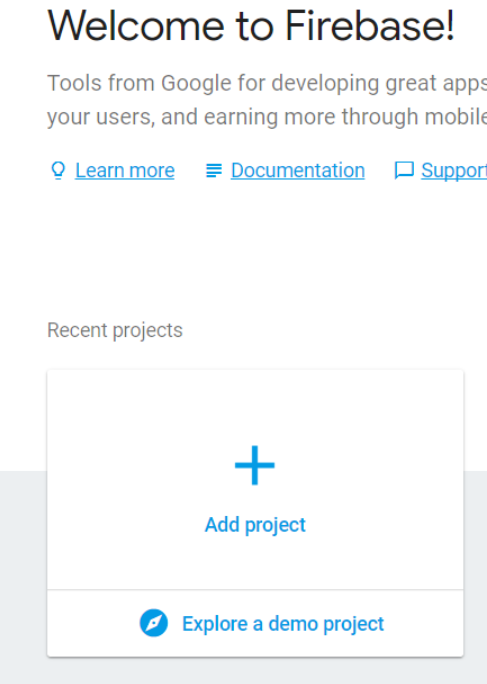
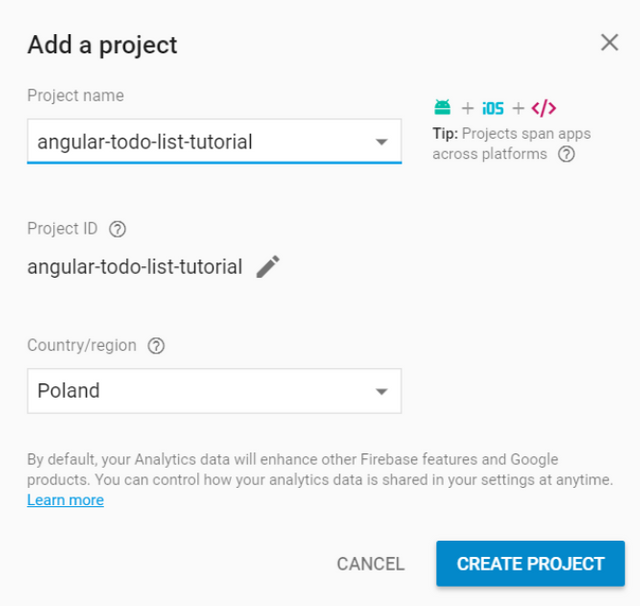
To initialize a new Firebase project, open the Firebase Console, and click "Add project":
then enter your app name:
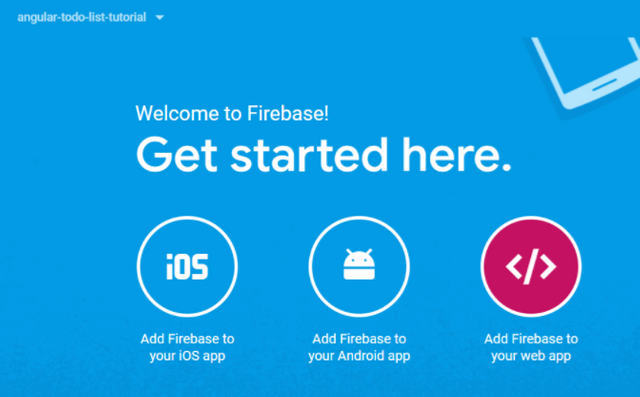
Next step is to add Firebase project to our Angular project. To do so, click on the "Add Firebase to your web app" button:
and copy everything from apiKey to messagingSenderId.
Now open your Angular app folder in the editor, find a file "src/environments/environment.ts" and update its code:
export const environment = {

production: false,

firebaseConfig: {

apiKey: '<your-apikey>',

authDomain: '<your-project-authdomain>',

databaseURL: '<your-database-URL>',

projectId: '<your-project-id>',

storageBucket: '<your-storage-bucket>',

messagingSenderId: '<your-messaging-sender-id>'

}

};
Summary
Ouh, it's been a lot of work just to set up an app that doesn't do anything yet. We initialized Angular and Firebase projects and connected them. But you have to trust me, it will become a more useful and prettier app! You just have to be patient, we will start coding in the next part.
Did you like this article? Have you found anything not explained good enough? Please, add a comment and tell me so! This is actually the first time I wrote a tutorial, so every advice is important to me.
References
Posted on Utopian.io - Rewarding Open Source Contributors
Great effort! I think you need to be committed - this guide will serve well those who want to learn. Wishing you best of luck with this initiative!
Thank you for the contribution. It has been approved.
You can contact us on Discord.
[utopian-moderator]
Hey @jakipatryk I am @utopian-io. I have just upvoted you!
Achievements
Suggestions
Get Noticed!
Community-Driven Witness!
I am the first and only Steem Community-Driven Witness. Participate on Discord. Lets GROW TOGETHER!
Up-vote this comment to grow my power and help Open Source contributions like this one. Want to chat? Join me on Discord https://discord.gg/Pc8HG9x