
For every owner of a personal WordPress website, there may come a time when you want to add a user to help with development. Though adding a new user itself is not too difficult a task, it does require the assignment of the user's role.
As the site owner, it is important to understand the user roles because they authorize each user to perform different tasks. For example, users with the role of admin can access all of the Wordpress website's files. For users with the role of a contributor, authorization is limited to writing blog posts.
Goals Of The WordPress Tutorial: Adding New Users & Understanding User Roles
By the end of this tutorial, the reader will be able to:
1. Login to their WordPress website and add a new user.
2. Understand the role options and what authorizations they allow the new user.
3. Complete the entire process and send out an invite email to the new user.
Login To WordPress & Find The Users Tab On The Dropdown Menu
To get started, login to the desired WordPress website. You can do this through your host provider or by adding /wp-admin to the end of the website url.
ex: Entering YourWebsite.com in the browser will bring you to your set home page on the front end.
Entering YourWebsite.com/wp-admin will bring you to the administration sign in page like you see below.
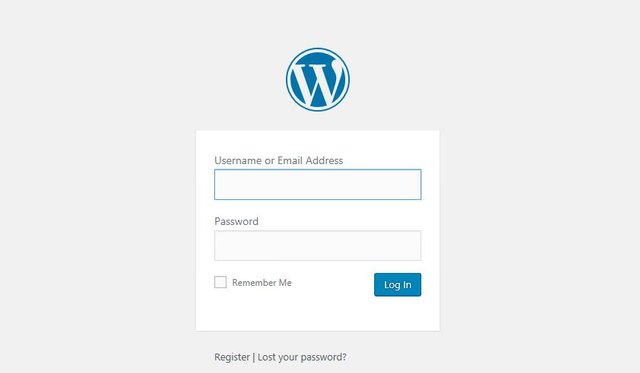
Note: If you forget your password, use the link at the bottom to reset it.
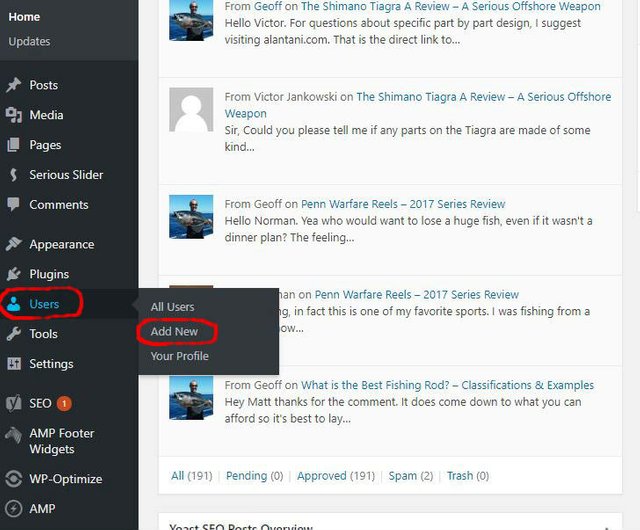
Locate & Click The Users Tab On The Dropdown Menu
Once logged in to the WordPress website as admin, open the dropdown menu in the top left corner of the screen. Follow the tabs down until you see the Users tab. Hover your cursor over the Users tab and sub-categories will appear on the right. Select and click Add New, as shown in the image below.
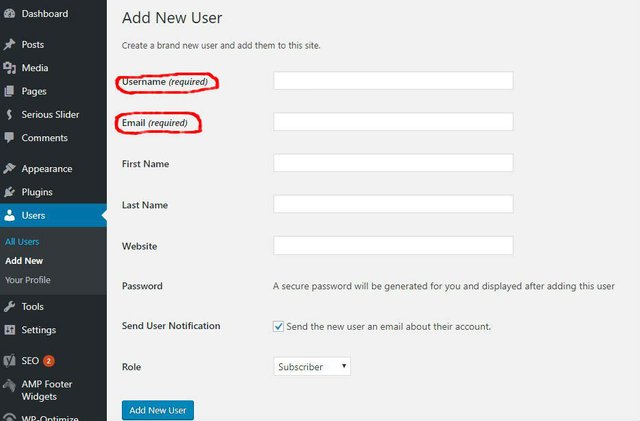
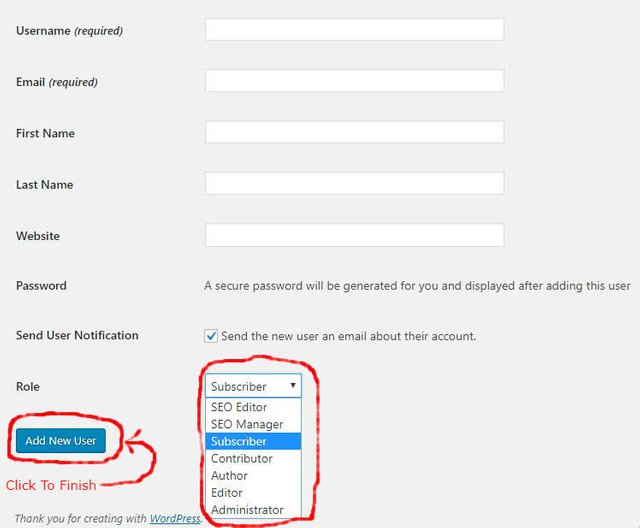
Fill The Required Fields And Preferred Optional Fields On The Add New Users Page
Clicking the Add New tab opens up the Add New Users page as shown in the image below. Note that the first two fields, Username & Email, require entries.
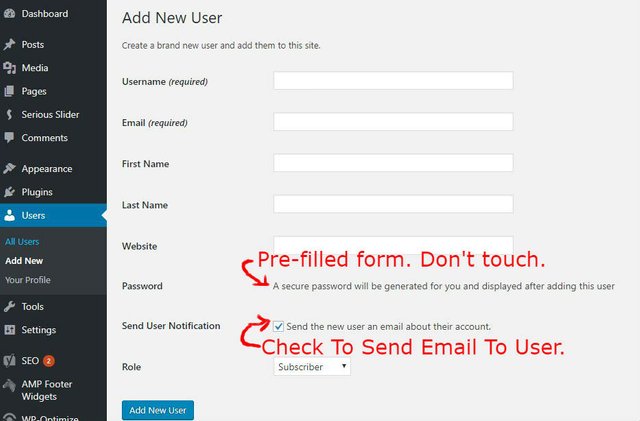
Fill in the new user's first name, last name, and website if desired. Do not worry about the Password field, as this will generate once the process is complete. Be certain to check the Send User Notification box. This ensures the invitation email is sent to the new user. See illustrations in the image below.
Final Steps - Choose The New User Role & Complete The Process
In order to better understand the permissions that come with each role assignment, continue along with the tutorial. Once the correct role for the new user is determined, select it from the option box. To finish the task and generate the new user email, click the blue Add New User box at the bottom of the screen.
Explanation Of New User Permissions By Role Assignment
When assigning a role to a new user, that role allows certain permissions to the new user when they login to the WordPress website. After the last WordPress update 4.9.1, seven different user roles appear in the selection box. They show up as follows:
- SEO Editor
- SEO Manager
- Subscriber
- Contributor
- Author
- Editor
- Administrator
By assigning a test user to each of the different seven roles, one is able to see the permissions they allow. Take a closer look at each role below, starting from the top and going down the list in order.
SEO Editor
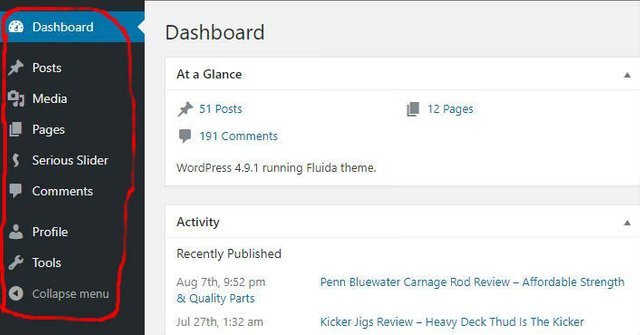
The role of SEO Editor has access to areas of the WordPress menu that might affect SEO. They will need to access these sections of the menu to add SEO elements or fix SEO issues. Besides the main dashboard these sections include posts, media, pages, sliders, comments, profile, and tools.
Note that the installment of different plugins may increase or decrease the permissions on this list.
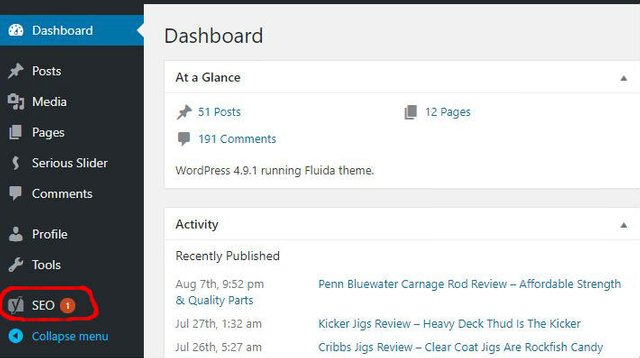
SEO Manager
The role of SEO Manager comes with all the permissions afforded to the SEO Editor, plus one more major authorization. They also have full access to the SEO Plugin. See the addition marked in red on the image below.
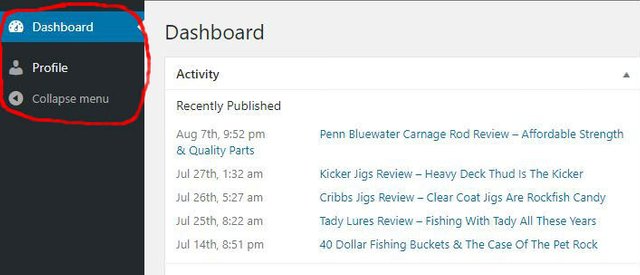
Subscriber
The Subscriber role offers the least amount of permissions. The user will have access to the dashboard and their own profile page only.
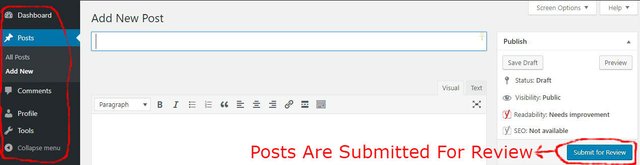
Contributor
Contributors are users with the permission to access the post editor. They are able to view all posts, but do not have editing authority. Contributors access the post editor to create new posts. Completed posts can not be published by the Contributor, but instead are submitted to the site Admin.
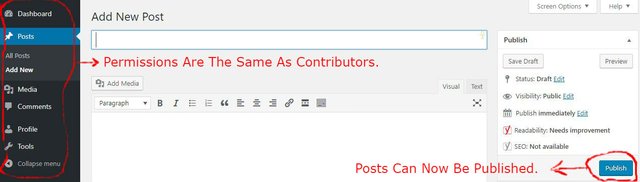
Author
Users who are assigned the role of Author on a WordPress website don't have any noticeable permissions above the role of Contributor. The difference is that Authors have the authority to publish the posts they write. As seen in the image below, Authors no longer need to submit their work to Admin.
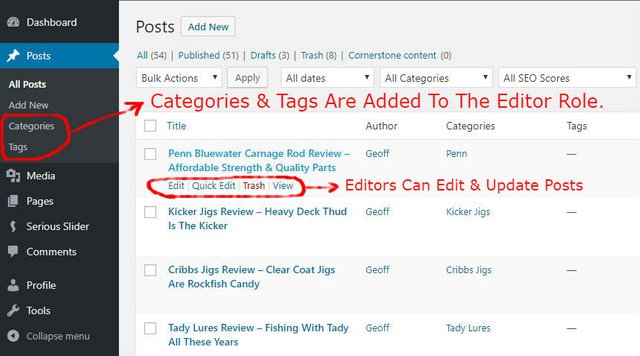
Editor
The Editor role has full permission over post controls on a WordPress website. They have access to media and comments, just like Contributors and Authors do. Editors gain access to Pages and Slider menu items, plus post categories and tags. In addition, the Editor role can edit and update all pages, posts, images, sliders, and comments.
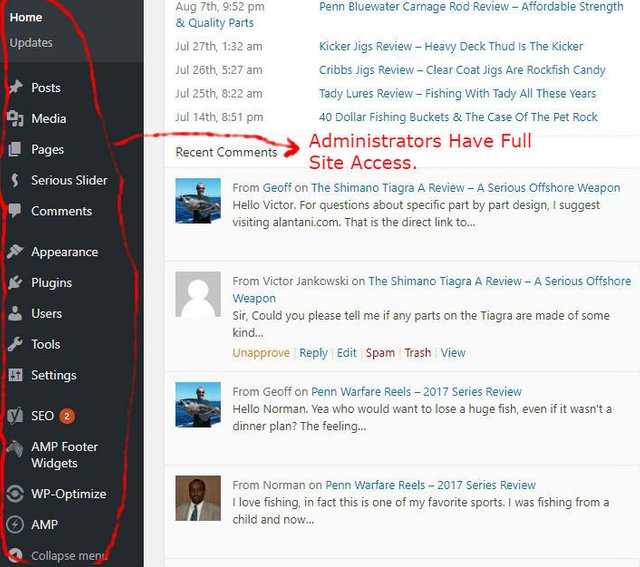
Administrator
The role of Administrator is reserved for the owner of the WordPress website, or anyone trusted enough with the responsibility. It gives full permission and access to all areas of the WordPress website. Check the dropdown menu in the image below.
Final Thoughts On Adding New Users & Assigning Roles To A WordPress Website
When a new user receives the invite email from WordPress, it comes with a confirmation link. The link brings the new user to a WordPress page where it provides a temporary password. The user can copy this password and click over to the login page, or change it to one they prefer. They then need simply enter their username and paste in the password to gain access.
Remember that the examples used in this tutorial are from 1 WordPress website. Changes in the plugins may alter the results slightly from website to website. To check your own website, simply follow the process I used here. You can add a test user with an unregistered email address and assign any role you like. Then just login from the notification you get to that email. To do this more than once you'll need more email addresses, or just return to your admin page and delete the test user.
Hopefully this tutorial clears up any questions or concerns you may have about adding new users to WordPress websites. Feel free to add any info, point out any discrepancies, or ask any questions in the comments. I'll do my best to answer.
Cover Image Courtesy Of Pixabay.com - All Other Images Personal Screenshots

 CLICK HERE TO JOIN THE STEEMIT BLOGGERS ON DISCORD
Animated Banner Created By @zord189
CLICK HERE TO JOIN THE STEEMIT BLOGGERS ON DISCORD
Animated Banner Created By @zord189
Posted on Utopian.io - Rewarding Open Source Contributors
Hey @inalittlewhile I am @utopian-io. I have just upvoted you!
Achievements
Suggestions
Get Noticed!
Community-Driven Witness!
I am the first and only Steem Community-Driven Witness. Participate on Discord. Lets GROW TOGETHER!
Up-vote this comment to grow my power and help Open Source contributions like this one. Want to chat? Join me on Discord https://discord.gg/Pc8HG9x
Thank you for the contribution. It has been approved.
You can contact us on Discord.
[utopian-moderator]
Thank you. :)