(PT 1) Ethereum Front End - Introduction to web3.js (Part 1)
Repository
https://github.com/igormuba/EthereumFrontEnd/tree/master/class1
What will I learn?
- What is web3.js
- How to setup node.js for web3.js development
- How to connect web3.js(node) to Ganache
- How to use web3 to interact with the blockchain
Requirements
- Chrome or Brave Browser
- Metamask browser extension
- Node/NPM
- Ganache
Difficulty
- Intermediary.
Introduction
On other tutorials, I have gone in depth on Ethereum development for smart contracts (back-end), and more recently for testing (quality assurance). With this tutorial, we will start to dive on the front end development for Ethereum applications.
With all this knowledge, you can be a full stack Ethereum developer. You will be able to develop and deploy contracts, execute the testing, and understand how to control the Ethereum code from the front end. The Ethereum blockchain is not the most friendly for front end development. But thanks to some nodes (main net or testate like Ganache with Metamask), and to the Ethereum team, that have developed a library called web3.js, we can use nodes or clients to access and post data on the blockchain!
You can read more about web3js on their GitHub.
And more about Metamask on their GitHub too.
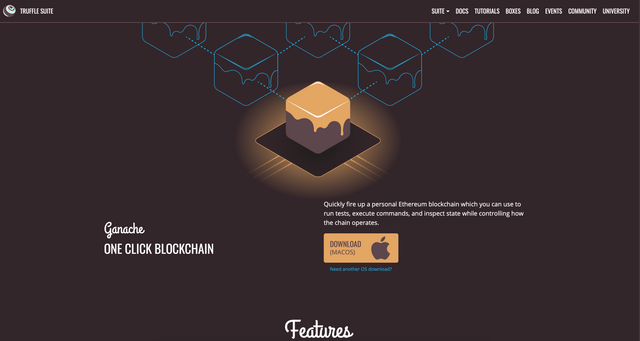
Ganache
The first thing we need is Ganache. Ganache is a local Ethereum blockchain emulator. It starts a local environment and it emulates everything the real Ethereum blockchain would do. From the transaction fees to the mining delay.
If you have followed my previous tutorials on Ethereum development (either the backend tutorials or the testing) you probably already have Ganache installed. If you don't yet have this tool, head to their website and find the installation instructions for your operating system:
Node.js
The first step is getting node.js. This tool will allow us to set a local server and install web3.js easily to serve it for the browser!
To get node.js, go to their website and follow the instructions according to your operating system. I recommend you to get the "LTS" (Long Time Support) version because this one is supposed to last longer without bugs and with support from the core team.
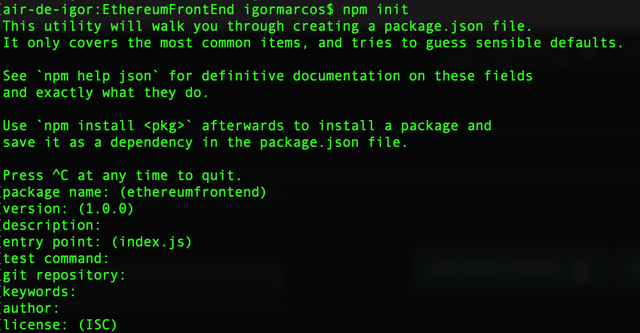
Once you have node installed on your machine, create a folder where you want to start the new project. Open the terminal window for your operating system, and start a new node project with:
npm init
The terminal will ask for some information, but that is not important, so, just press enter through all of that like shown on the screenshots:
Web3.js
For this project, we will use the version 1.0 of web3.js. This version is currently under beta testing and is not the final product, so BUGS ARE EXPECTED to appear somewhere down the road. I am not using an older version and better tested because I expect that soon the "final" version of the web3.js 1.0 will be released, and we will be used to this version! So, better to be over prepared to deal with the new version than underprepared!
There are a couple of ways you can get web3.js on a project. You do not have, necessarily, to use node.js to use web3 from Ethereum according to the official documentation:
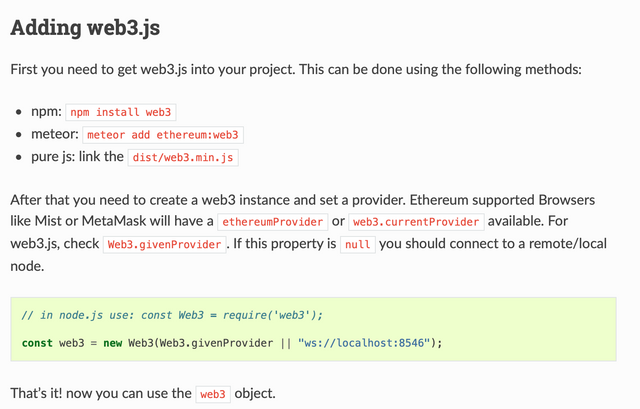
As we are using node.js, we just:
sudo npm install --save web3 --unsafe-perm=true
You will see a "loading bar" while the download and installation are made. This may take a couple of minutes depending on your internet connection/computer, so be patient.

You may have noticed that the documentation asks you to run just npm init, but I am running with more flags, such as sudo, --save and --unsafe-perm=true. That is because, as I have said before, the web3js 1.0 library is in beta version, and asking for "web3" we will get the most recent version of web3, and that may have bugs. If you don't feel comfortable running the --unsafe-perm and sudo flags, you can use the "vanilla" command and see if you can install without troubles. I am using them because I have had issues in the past and I don't know how the version the reader will have when he reads this tutorial.
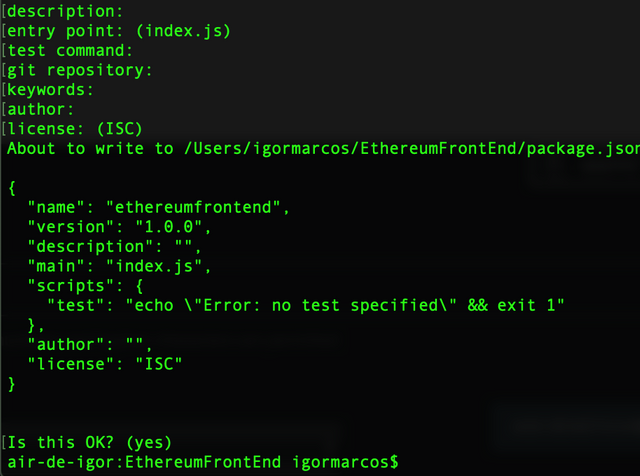
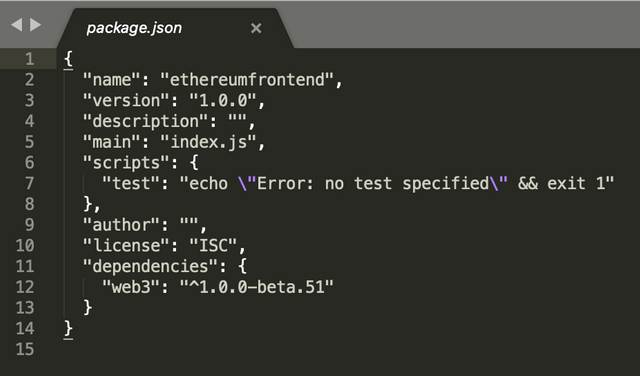
Once the installation is finished you can open the file "package.json" to see if web3 is installed, and what version you are using:
Creating a Web3 instance
Now let's proceed to test if everything works so far. We will test, with node, something that would be similar to a "hello world". We need something simple to see if our nom and web3 works. Everything will be done from the console, we won't touch on the front end on this tutorial yet. On the next one, I will introduce you to React, a library that will allow you to server web3 to a browser.
Inside the project folder, do:
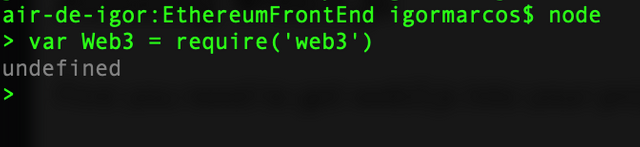
node
And create a variable "importing" web3 with:
var Web3 = require('web3')
Next, we instantiate a local web3 provider. On the documentation we can find the following command:
let web3 = new Web3(Web3.givenProvider || "ws://localhost:8546");
But that is for later when we run web3 on the browser. For now, I want you to understand web3 on the command terminal before we move on to the browser.
So, it suffice to do simply:
let web3 = new Web3("ws://localhost:8545");
Notice that the port should match your Ganache port! On my Ganache I have set the port to 8545, on the documentation, you can read that theirs is 8546. To see in which port is Ganache running on your computer, just open the program and see on the top of the screen, where mine reads "8545":

Interacting with the blockchain
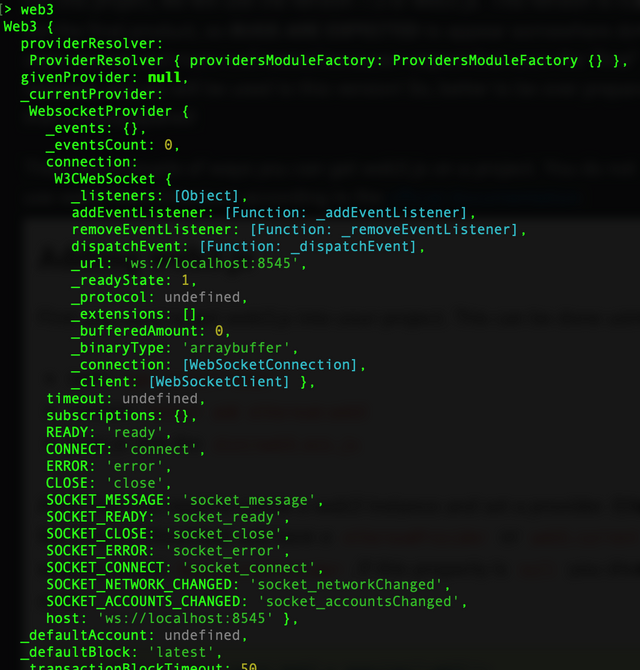
Still inside the node terminal, before we interact with the blockchain, try tapping web3on your console to see what appears. You will find all the methods and variables inside the web3 object:
You can read more about the Web3 documentation here, that is easier than reading the huge code you were prompted by on the screen :)
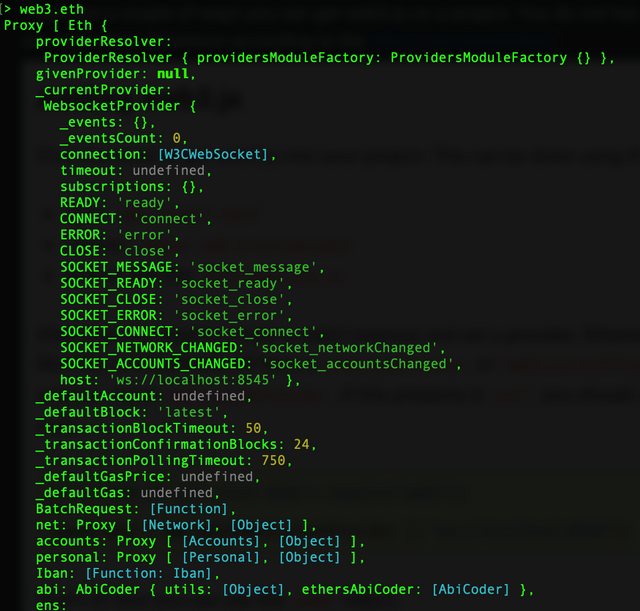
For our little test, I want to use a function inside web3.eth, again, you can type on the console and see everything that you have at hands:
Or read the web3.eth documentation
To check if our web3 can successfully communicate with Ganache, we will call the function to retrieve the balance from a wallet. Check on your Ganache and copy the address of one of your wallets:
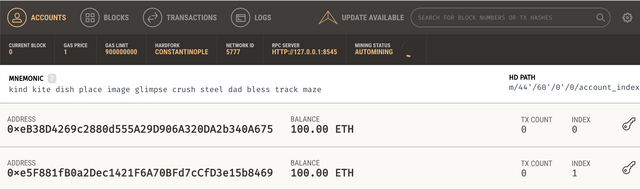
In my case, I am gonna use the wallet 0xeB38D4269c2880d555A29D906A320DA2b340A675to do the testing.
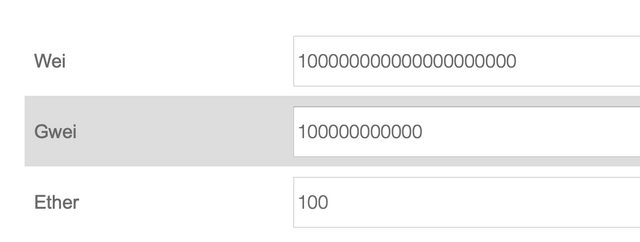
Before we proceed, remember, the Ethereum blockchain works with wei values. Wei is the smallest Ethereum fraction possible. One Ethereum is 1*10^18 wei (1 with 18 zeroes after it!).
On the Ethereum documentation you can read more about the fractions. Here is a quick cheat sheet:
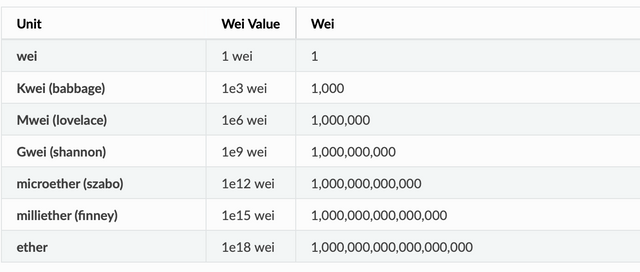
I know we are used to seeing Ethereum using fractions like "0.0004ETH" instead of "400000000000000", but the blockchain only knows wei! The conversion is done on the front end! We will learn how to programmatically do that later. For now, you can use any free online converter of ETH units, such as eth-converter.com for example.
Now, let us retrieve the balance of the wallet and store in a variable with:
let balance = web3.eth.getBalance('0xeB38D4269c2880d555A29D906A320DA2b340A675');
Notice, a call does not "consume" blocks on Ganache (it is free, so you could test this on the main net for free too!):
And we can see what is the value of that variable:
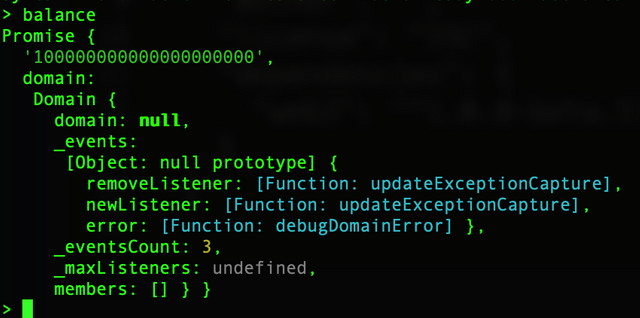
It has 100000000000000000000 wei. Using the converter, it tells us that is equivalent to 100 Ether:
Which matches the value on Ganache:

That means we have successfully connected the web3 to Ganache! On the next episodes, we will see how to serve the web3 to the browser and make a front end for the blockchain and for contracts!
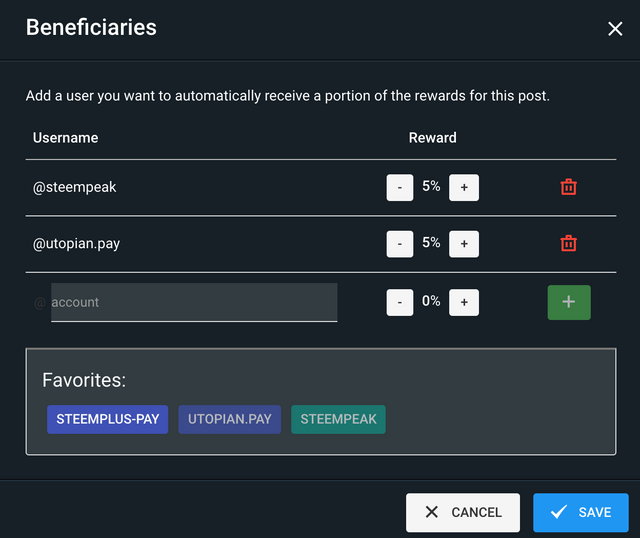
Beneficiaries
This post has as beneficiaries
- @utopian.pay with 5%
- @steempeak with 5%
using the SteemPeak beneficiary tool:
Thank you for your contribution @igormuba.
After reviewing your tutorial we suggest the following points listed below:
Again an excellent tutorial, very well explained and with enough images of examples of the results.
The subject of your tutorial tutorial is very interesting. We wait for the next one.
Thank you for your work in developing this tutorial.
Your contribution has been evaluated according to Utopian policies and guidelines, as well as a predefined set of questions pertaining to the category.
To view those questions and the relevant answers related to your post, click here.
Need help? Chat with us on Discord.
[utopian-moderator]
Thank you for your review, @portugalcoin! Keep up the good work!
Hi @igormuba!
Your post was upvoted by @steem-ua, new Steem dApp, using UserAuthority for algorithmic post curation!
Your post is eligible for our upvote, thanks to our collaboration with @utopian-io!
Feel free to join our @steem-ua Discord server
Hi, @igormuba!
You just got a 0.3% upvote from SteemPlus!
To get higher upvotes, earn more SteemPlus Points (SPP). On your Steemit wallet, check your SPP balance and click on "How to earn SPP?" to find out all the ways to earn.
If you're not using SteemPlus yet, please check our last posts in here to see the many ways in which SteemPlus can improve your Steem experience on Steemit and Busy.
Congratulations @igormuba! You have completed the following achievement on the Steem blockchain and have been rewarded with new badge(s) :
You can view your badges on your Steem Board and compare to others on the Steem Ranking
If you no longer want to receive notifications, reply to this comment with the word
STOPVote for @Steemitboard as a witness to get one more award and increased upvotes!
Hey, @igormuba!
Thanks for contributing on Utopian.
We’re already looking forward to your next contribution!
Get higher incentives and support Utopian.io!
Simply set @utopian.pay as a 5% (or higher) payout beneficiary on your contribution post (via SteemPlus or Steeditor).
Want to chat? Join us on Discord https://discord.gg/h52nFrV.
Vote for Utopian Witness!