PHP Steem Apps with Steem Connect and Laravel - Part I: Initial Setup
What Will I Learn?
This tutorial is the first installment of a series of tutorials providing step-by-step instructions to bootstrap a Steem based application using the Laravel Framework and SteemConnect (though the SteemConnect SDK for PHP).
- 1 - Registering a SteemConnect application.
- 2 - Creating the Project.
- 3 - Laravel Configuration.
- 4 - Installing Dependencies.
Requirements
To follow this tutorial series, you should be familiar with the following:
- A PHP 7.1+ environment with Composer installed.
- Basic PHP experience.
- Basic Laravel Framework experience.
- Basic understanding of SteemConnect.
- Basic understanding of the Steem blockchain RPC.
- Basic command line experience.
Difficulty
- Basic to Intermediate, depending on the previous knowledge of each of the requirements.
Tutorial Contents
In this tutorial we are going to start a Laravel application, configure the very basic bits and install the package dependencies need in order to setup SteemConnect and the RPC client.1
For the fun of it, we will call this application LaraSteem, which is just joining the words Laravel and Steem.
Registering a SteemConnect application.
SteemConnect applications, are in it's core, special Steem accounts handled by SteemConnect. They are used to sign the transactions in behalf of the users.
In other to create applications that interacts with the Steem blockchain through SteemConnect, we need to register those applications.
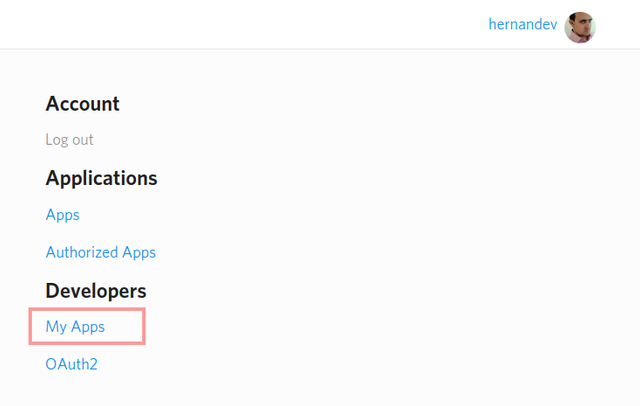
So, head to the SteemConnect dashboard, at https://steemconnect.com/dashboard and click on the My Apps menu.
If you never did this process before, this will will not show any application, and we are going to create the first one.
If you already have an application registered there, you may chose to use the existing ones or create a new one.
The menu link can be seen highlighted on the image below:
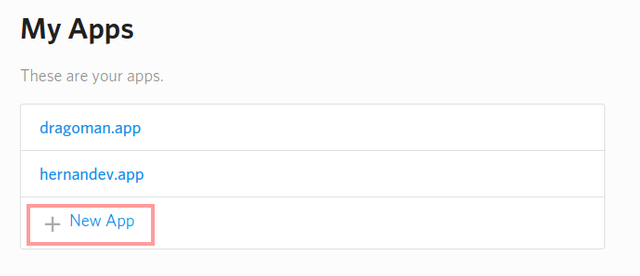
To then register a new application, you may click the New App link, also, highlighted on the screenshot below:
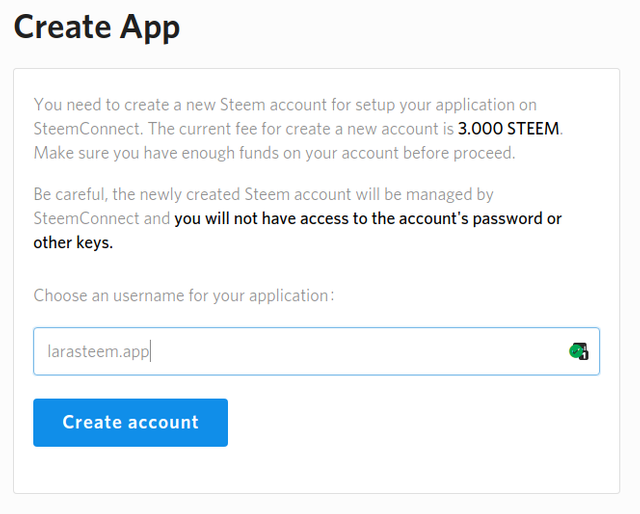
Now, it's time to chose your application name. You may notice on the application creation form, that a 3 STEEM balance is required. That's because each SteemConnect application, is itself a Steem account.
One common practice here is to name the SteemConnect applications the same username your main account uses, in our case, we are calling the example application LaraSteem, so the convention recommends creating the application as larasteem.app
After setting the name of our SteemConnect application, just click the "Create Application" button.
This will redirect us for the application settings page, that will be empty, since it's a newly created application.
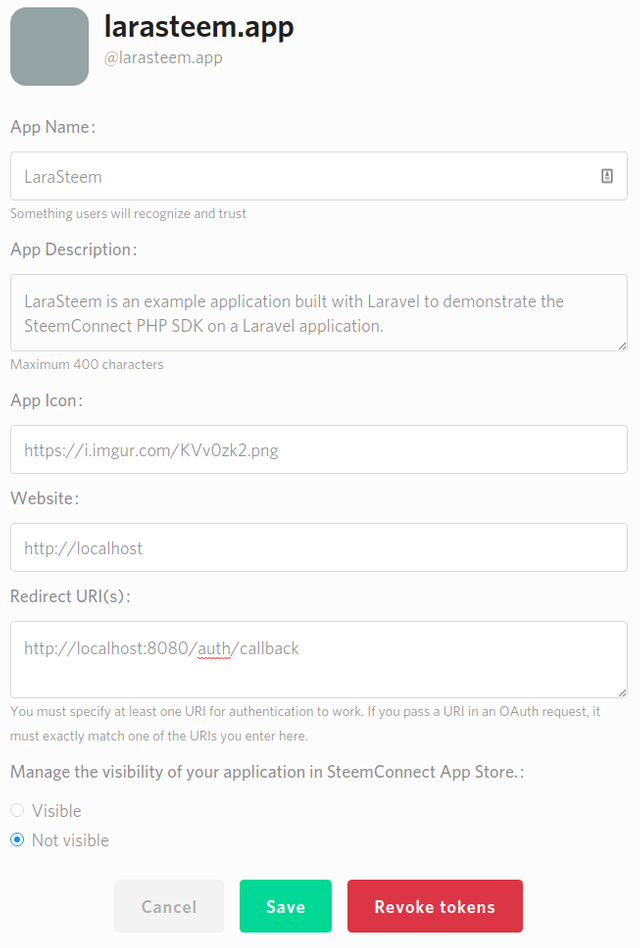
On the screenshot below, you can notice I've filled most of the details, and you may set those as you wish.
There is, one little point we need to be careful here. The Redirect URI(s) must match the URL on the application, that will be responsible for handling the authorization flow.
We will build this later on this tutorial series, but for now, assuming we will use the Laravel embedded HTTP server, se the value to http://localhost:8080/auth/callback, and later this will make more sense, once we build the authentication code.
The application visible / not visible setting, is just a setting that will not list your application on the SteemConnect dashboard for others to discover. There's no security problems at making it visible, it's your choice.
Also, the application icon, is optional, but highly recommended. You need to use an external image host to upload the icon, feel free to chose one.
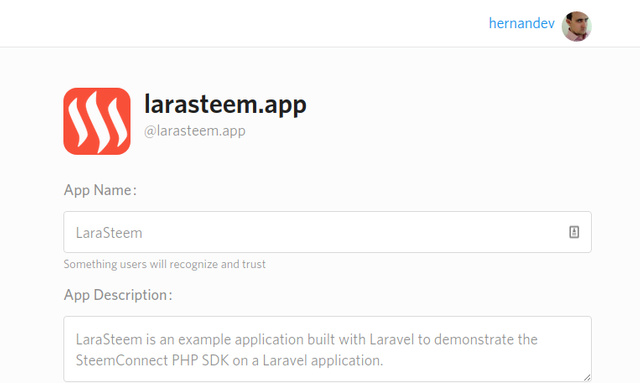
After clicking save, the page will stay there on screen, we will need to refresh that page, to ensure the icon appears:
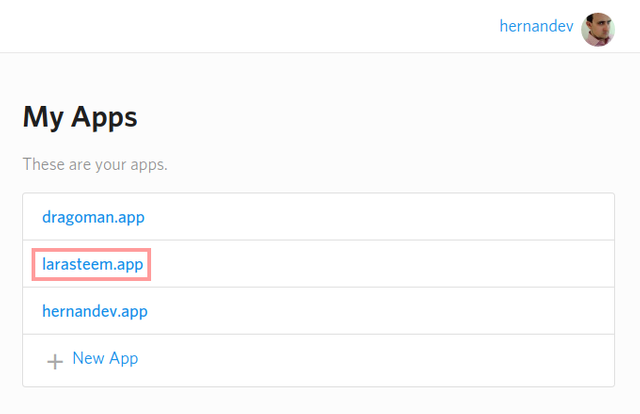
After configuring the application, we will return to the My Apps page, were we can now see the newly created application listed, among any other applications you may have.
Click the application name, to show it's details:
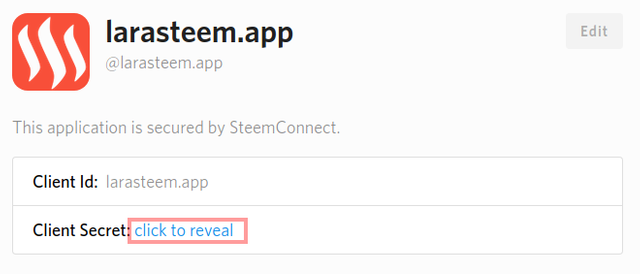
On the application details, will you find the corresponding OAuth client id (which is the application name itself) and a yet hidden client secret. Hit "click to reveal" so you can obtain the secret key that will later be used to authenticate users on the application.
Write down the value revealed on the client secret field, and be aware of this:
Never Reveal the client secret to anyone, it's an information only your application and SteemConnect know. As the name suggests it's a secret and you should take care of it just like you would with your Steem account password.
Creating the Project.
Finally, we will start on the code side of things. To create the LaraSteem application, we will start on a default Laravel skeleton, which could be obtained by the composer create command.
So, let's create the application:
composer create laravel/laravel lara-steem
This will be enough for generating the Laravel skeleton on a directory called lara-steem.
After doing this, feel free to open this directory on your preferred PHP code editor or IDE. On a personal choice, I personally use the PHPStorm IDE by Jetbrains, but, any editor will work just fine.
Also, any command line instruction from now one, will assume your working directory is the lara-steem folder.
Now, an optional step, but highly recommended it's to set a base namespace for the application, we will set the base namespace as LaraSteem so it matches our project name.
To rename all source code at once, we can run the Laravel Artisan command:
php artisan app:name LaraSteem
To ensure no composer caching was left behind after this, run the auto-loader dump command on composer:
composer dump
Laravel Configuration.
If you are not familiar with Laravel, you should take a few minutes to read through its configuration documentation.
For this tutorial we will use SQLite for the database and file for caching, to make it really simple to follow by novices.
If you have any experience with Laravel, it's recommended you use Redis as the caching driver, and MySQL or PostgreSQL as the database.
Application name.
Most of the configuration, will be done in the .env file that can be found at the root of the lara-steem directory.
Edit this file, changing the variable APP_NAME to LaraSteem (or any other name you may wanna use).
Also, change the DB_CONNECTION variable value to sqlite
You may remove the other DB_* variables, if you are using SQLite. Feel free to configure this as you wish.
At the end, the .env file would look something like this:
APP_NAME=LaraSteem
APP_ENV=local
APP_KEY=base64:XBM2S/h9Bt5E/RLBoBHsj2nF0hGC/ZZQif71Xq8Q1nc=
APP_DEBUG=true
APP_URL=http://localhost

LOG_CHANNEL=stack

DB_CONNECTION=sqlite

BROADCAST_DRIVER=log
The APP_KEY is set dynamically, please do not use the same shown on this tutorial, keep the one generated locally when you created the application or generate a new one with the php artisan key:generate command.
Starting the SQLite Database file.
When using the SQLite driver for database, we will init the SQLite database file by running the following command.
touch database/database.sqlite
Installing the Dependencies.
As for the package dependencies, we will use on the LaraSteem application:
The SDK client will handle all authentication, authorization and broadcasting of operations to the Steem blockchain.
To install the SteemConnect SDK for PHP, run the following command:
composer require hernandev/sc2-sdk-php
The LightRPC client will be used to call Steem API and retrieve content.
To install the LightRPC client library, run the following command:
composer require hernandev/light-rpc
On the next installment of this tutorial series, we will configure both SDK and LightRPC clients for usage within a Laravel project.
Curriculum
You just read the Part I of a tutorial series, all installments are listed bellow:
- Part I: Initial Setup
- Part II: Steem Configuration
- @todo: update with the other parts once published.
Posted on Utopian.io - Rewarding Open Source Contributors
This is very informative and I learnt a lot from it, thanks Master @Hernandev you're awesome
thanks for the contribution , it has been approved
Need help? Write a ticket on https://support.utopian.io.
Chat with us on Discord.
[utopian-moderator]
Hey @hernandev I am @utopian-io. I have just upvoted you!
Achievements
Utopian Witness!
Participate on Discord. Lets GROW TOGETHER!
Up-vote this comment to grow my power and help Open Source contributions like this one. Want to chat? Join me on Discord https://discord.gg/Pc8HG9x