Tutorial || how to make a poster with photoshop
JOB 1
how to make a poster with photoshop
- Open a new document
How to: file - new - change name (job 1) - create A4 size (present change to international paper and select size A4)
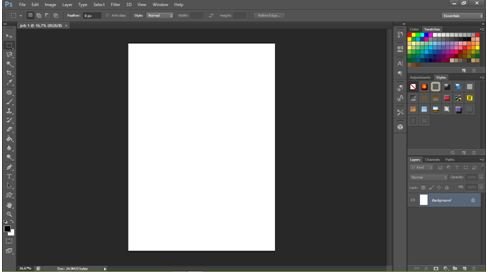
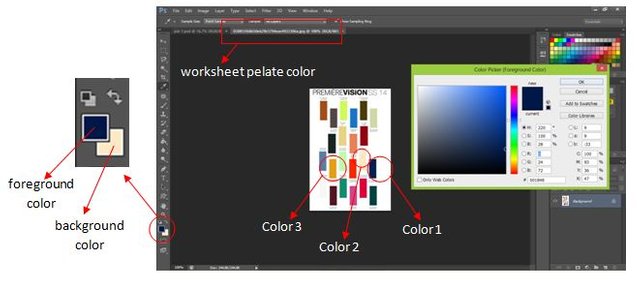
2.Change background color (choose color with plate color)
How to:
- open the palette calor file - click the work sheet of the pelate color - point the pointer to the foreground color and grab the sample color 1 then ok - move the pointer to the background color and grab the 2nd color sample then ok.
- Return to job sheet 1 - change the background by pressing Alt + backspace
3.Create text
How to:
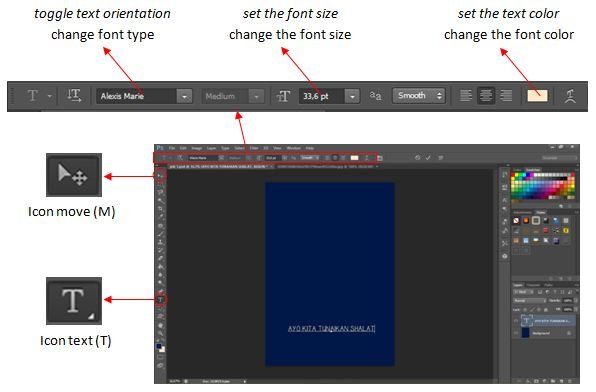
- click the text icon - select the font type on toggle text orientation (use Alexis Marie font) - select font color on set the text color (click set the text color and click on background icon) - create text with (click image area and type AYO KITA TUNAIKAN SHALAT) - move text (hold click on image area) - adjust text size on icon set the font size (change text value or by shifting icon set the font size) - end with command Ctrl + Enter
NOTE: If the position of the text is not as you wish, we can move it by clicking on the move tool icon.
4.Creating text "TAHAJUD" + shadow
How to:
- before making the text take the color sample on the palette color worksheet (take 3 colors, 3 colors in use font color) - follow step 3 only text text color change to 3 color and use font Ceria Ramadan.
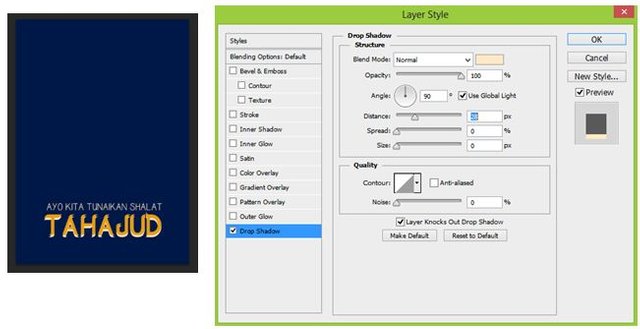
- To create a shadow effect you can use the Blending Option function (right click on the text icon on the layer and select Blending Options or click 2x on the far right of the text layer) - select (√) drop shadow and set the blend mode to normal, calor shadow with color sample 2, angle 900, distance = 28, spread = 0, and size = 0. And ok
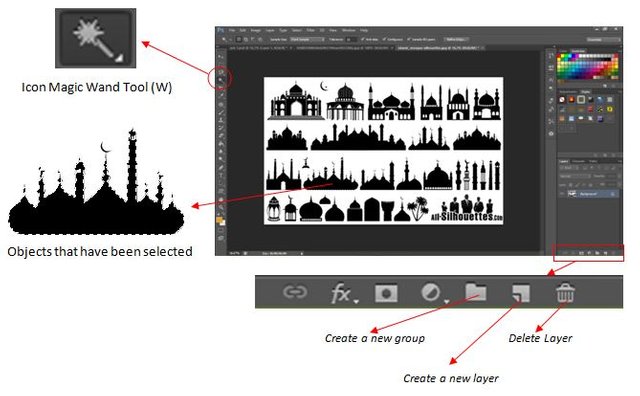
5.Selection of images with Magic Wand Tool + change the color of the object
How to:
- create a new layer (click on the new layer icon) Open the image file you want to select - click Magic Wand Tool and click on the object you want to select - move the object to the worksheet 1 (hold the click from the worksheet to the job sheet 1) - change the color of the object (press Alt + Backspace) - end by pressing Ctrl + D - adjust the size of the object (Press Ctrl + T and hold click on the corners of the object) - create a shadow on the Blending Options function.
Note: To keep the image symmetrical press Shift while holding down the click.
6.Add a Brush
How to:
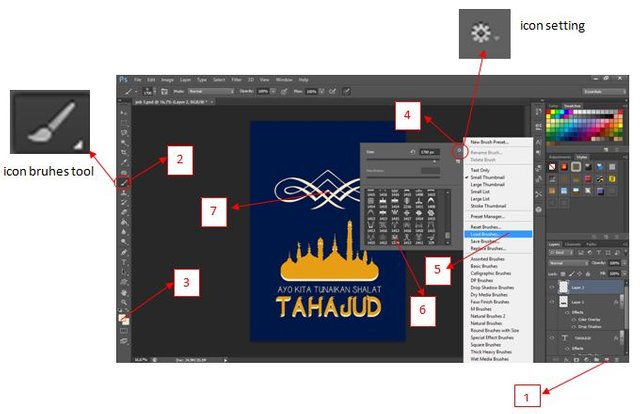
- create a new layer for the brush - click the brush tool - select the color sample (take sample from the job sheet 1 ie color 2) - right click on the worksheet and click on the settings icon - select load brushes and grab the .abr file (format icon bruhes) - select the shape of the bruses and adjust the size (to press the button] and to shrink press [) and click on the desired image area
7.add a pictorial background
How to:
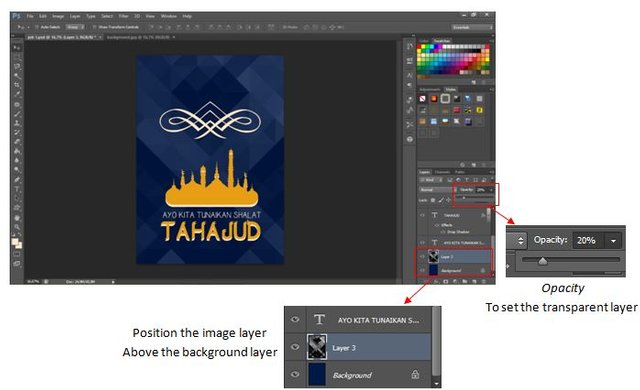
- open the image file - move the image to the job1 worksheet - move the image layer down (press Ctrl + [to move the layer down and press Ctrl +] to move the layer upward otherwise it can also hold the layer down or up) - create layer image becomes transparent (choose opacity and set the percentage 20%).
8.add name tag and watermark
How to :
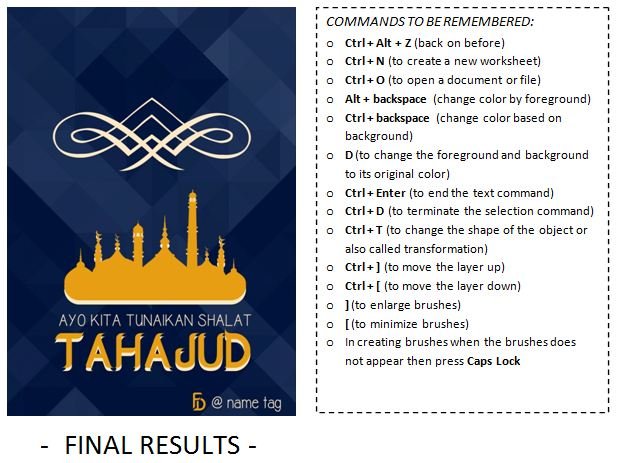
- open the watermark image file and move it to the job1 worksheet - add your name tag
NOTE: For the task material can be downloaded at the following link https://drive.google.com/open?id=1QacZDfrIJeC8OCt1srgxuogMyYjnzCaX
Posted on Utopian.io - Rewarding Open Source Contributors
Your contribution cannot be approved because it does not refer to or relate to an open-source repository. See here for a definition of "open-source."
You can contact us on Discord.
[utopian-moderator]