DIY Arduino Weather Station
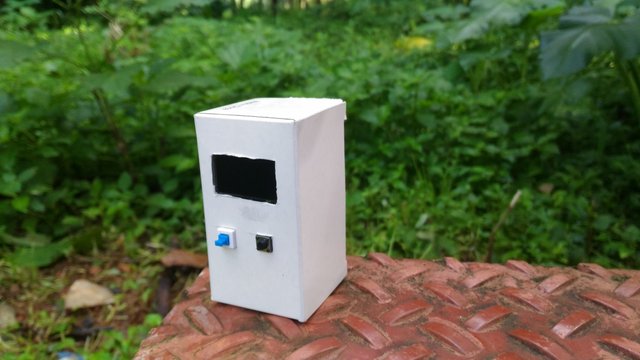
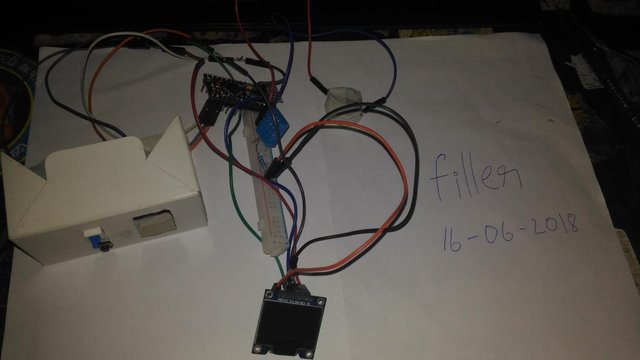
( Thanks to @jefpatat for the suggestion of adding this pic!!)
Repository
https://github.com/fillerInk/Arduino-Weather-Station
Overview
At times when the weather is constantly changing every moment, it would be really useful to have your favourite microcontroller board telling you the weather and the weather to come.
In this article, we will go through how to make your own weather station, which updates you with temperature and humidity, which shows you the humidity, temperature and heat index, in both Celsius and Fahrenheit.
How it works?
We will use a DHT11 humidity sensor along with our Arduino and oled screen. There will be a push button which is programmed to switch the information in the display between Celsius and Fahrenheit. The humidity and the temperature values can be read from the humidity sensor.
For the module to work, you’ll need to install a library (the link to the GitHub repository is given below). After the library is installed, you can create an object of the DHT class and use the pre-defined functions of those class such as readTemperature() and readHumidity().
Components needed
1.Arduino Uno / Pro-Mini
I used a Pro-Mini to pack up the entire circuit into a smaller package, but more on that later.
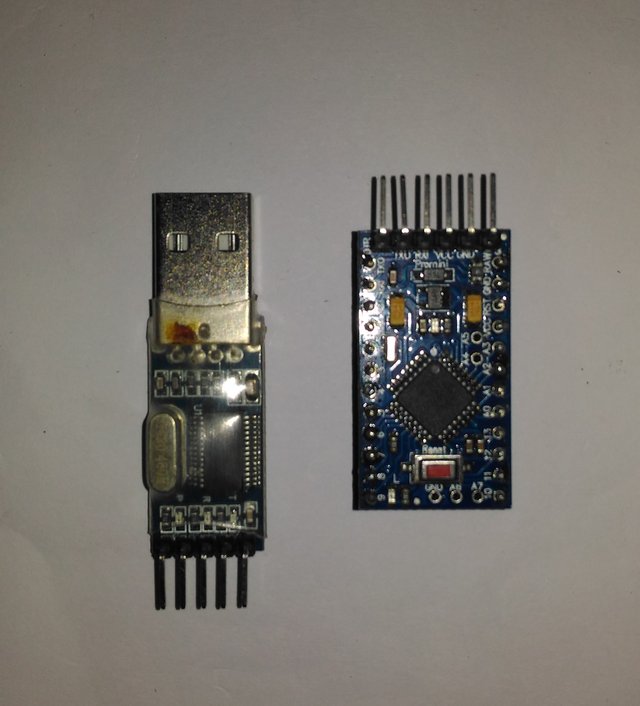
(The Arduino Pro-Mini and a USB-Serial converter which I used to program it)
2.OLED Display
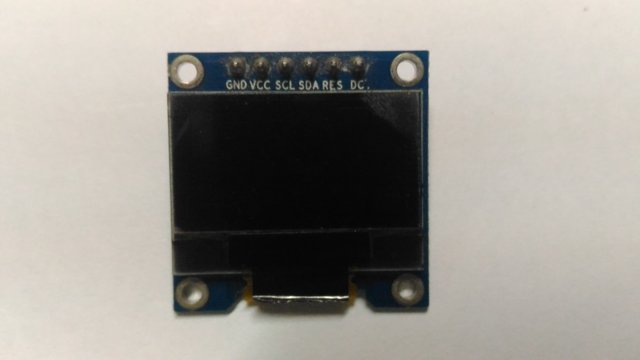
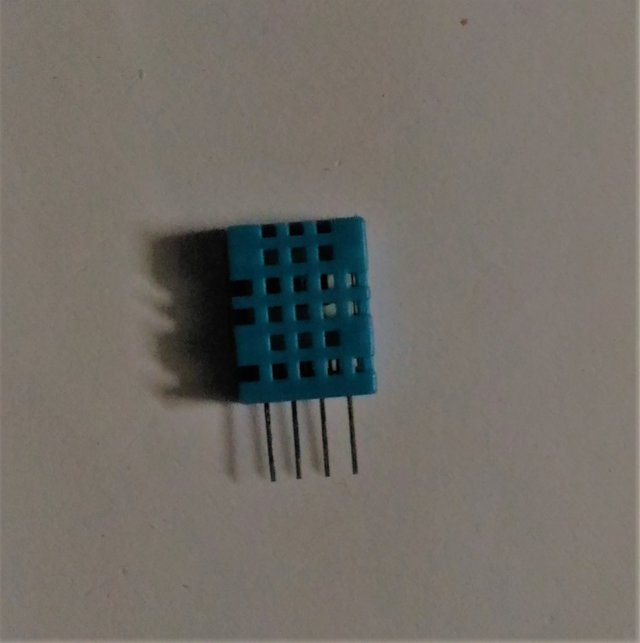
3.DHT11 Humidity Sensor
4.10k resistor
5.Momentary pushbutton switch
Additional components
You will also need these components if you want to compactify the project and make it as a standalone model.
7.SPDT toggle switch ( for turning the module on and off)
8.A Li-Po battery or even some 3v coin cells
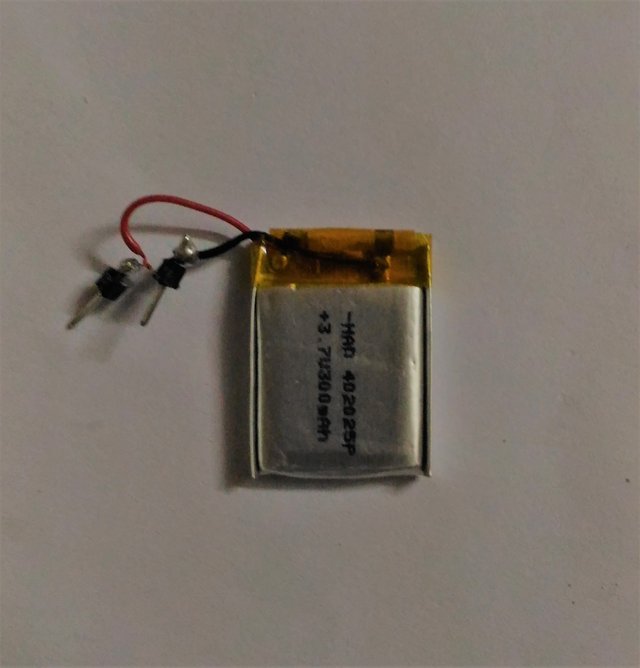
(If a LiPo cannot provide the required voltage, you may have to use a larger one, or even another power source. Choose a power source suitable for the board you are using.)
9.An enclosure for the circuit
You can either 3D print this, or as I did, make a cardboard enclosure.
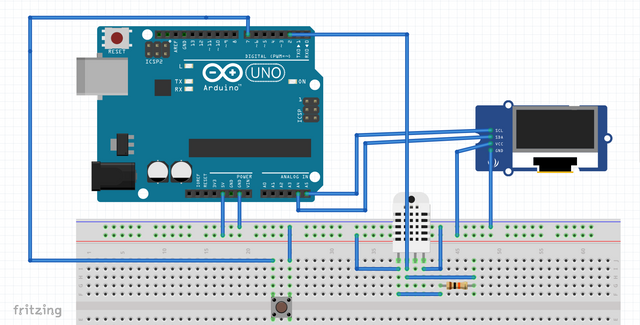
Wiring Diagram
Connect a 10k ohm resistor between the power and signal pins.
Explanation for the code
#include "DHT.h"
#define DHTPIN 2
#define DHTTYPE DHT11
DHT dht(DHTPIN,DHTTYPE);
Here we declare the DHT class.
We define the pin to which we connect the signal pin of the humidity module as DHTPIN.
I am using a DHT11 module. So I declare that as DHTTYPE and declare the DHT object.
dht.begin();
Inside the setup() function, we need to start the DHT module.
We do this with the objectName.begin() command.
boolean state;
In order to have the push button switch between Fahrenheit and Celsius, we first declare a variable of boolean type, outside the setup and loop methods.
In the next part, we'll see how to use this variable along with some ifs and else-ifs to switch between the formats.
int buttonPin = 7;
pinMode(buttonPin,INPUT_PULLUP);
When we declare the button as INPUT_PULLUP, we activate the internal pullup resistor. Now, when the button is pressed, it will return a value of LOW.
int mode = digitalRead(buttonPin);
First read the button and store the state in a variable.
if(mode == LOW)
  {
    state = !state;
  }
Now if the button is pressed, the state variable gets changed from true to false.
When you push it again, the state variable reverts again.
Now we can easily implement an if-else chain to check the value of the state variable and run two different pieces of code for each state.
 if(state == HIGH)
 {
      t = dht.readTemperature();
      hi = dht.computeHeatIndex(t, h, false);
 }

  else if(state == LOW)
  {
     t = dht.readTemperature(true);
     hi = dht.computeHeatIndex(t, h);
  }
In this snippet of code, we check the value of the state variable and execute the code for displaying celsisus and fahrenheit values of the temperatures and heat indices.
The entire code :-
#include<SPI.h>
#include<Adafruit_GFX.h>
#include<Adafruit_SSD1306.h>

#include "DHT.h"
#define DHTPIN 2
#define DHTTYPE DHT11
DHT dht(DHTPIN,DHTTYPE);

int buttonPin = 7;


//If you are using an SPI oled module, uncomment this block of code and connect accordingly
/*
#define oled_mosi 11
#define oled_clk 10
#define oled_dc 13
#define oled_reset 12
#define oled_cs 2
Adafruit_SSD1306 oled(oled_mosi,oled_clk,oled_dc,oled_reset,oled_cs);
*/

//If you are using an I2C oled module, uncomment this block of code and connect accordingly
/*
 * Connect the SCl and SDA pins to the respective SCL and SDA pins of your board
 *
 * #define OLED_RESET 4
   Adafruit_SSD1306 oled(OLED_RESET);
 */


boolean state;


void setup() {


 oled.begin(SSD1306_SWITCHCAPVCC);
 oled.clearDisplay();
 oled.setTextColor(WHITE);
 oled.setTextSize(1);

 pinMode(buttonPin,INPUT_PULLUP);

 dht.begin();                        // this command initializes the dht module


}

void loop() {


  oled.clearDisplay();

  float h = dht.readHumidity();
  float t;
  float hi;

  int mode = digitalRead(buttonPin);    //read the pushbutton

 if(mode == LOW)                        //change the state variable if there is a change in pushbutton
  {
    state = !state;
  }

  if(state == HIGH)                          //if state is high, display in celcius
 {
    t = dht.readTemperature();               //this function displays temperature in celsius
    hi = dht.computeHeatIndex(t, h, false);  //this function displays heat index in celsius

  }
  else if(state == LOW)                 //if state is low, display in fahrenheit
  {
   t = dht.readTemperature(true);       //if true is passed as an argument, returns temperature in fahrenheit
    hi = dht.computeHeatIndex(t, h);    // if false is not passed as an additionalargument, returns heat index in fahrenheit
  }

  oled.setCursor(1,1);
  oled.print("Humidity    : ");
  oled.print(h);
  oled.print(" %");
  oled.setCursor(1,11);
  oled.print("Temperature : ");
  oled.print(t);

  if(state == HIGH)                    // the same conditionals as above, to display the units of temperature
    oled.print(" C");
  else if(state == LOW)
    oled.print(" F");

  oled.setCursor(1,21);
  oled.print("Heat Index  : ");
  oled.print(hi);

  if(state == HIGH)                   // the same conditionals as above, to display units of heat index
   oled.print(" C");
  else if(state == LOW)
    oled.print(" F");

  oled.display();

  delay(1000);

}
Result
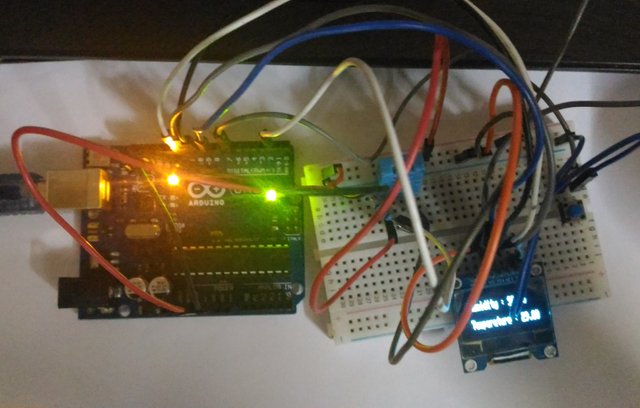
The circuit wired up in the breadboard.
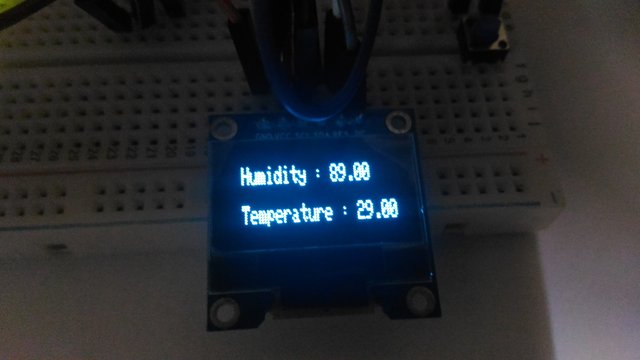
This is an early implementation of the project where I had not included the switching function and the heat index variable.
Unfortunately my oled screen was burnt while I was doing some soldering work after completing the project.
Conclusion
Overall, it was really a fun project. I made a few mistakes in the beginning, but cleared them up later. I was able to learn a lot. I finally uploaded the code into my Arduino Pro-Mini, a toggle switch to power it on and off, and shrinkified my project. It also looks cute now.
Resources
1.GitHub repository for the DHT Library
https://github.com/adafruit/DHT-sensor-library
2.GitHub repository for the Adafruit_Sensor Library, to be installed with the DHT library
https://github.com/adafruit/Adafruit_Sensor
3.The DHT Guide from Adafruit
https://learn.adafruit.com/dht/overview
Sources -
All the images provided and the code is my own creation.
The wiring diagram was made with fritzing.
Join our Discord Channel to connect with us and nominate your own or somebody else's posts in our review channel.
Help us to reward you for making it ! Join our voting trail or delegate steem power to the community account.
Your post is also presented on the community website www.steemmakers.com where you can find other selected content.
If you like our work, please consider upvoting this comment to support the growth of our community. Thank you.
Congratulations! This post has been upvoted from the communal account, @minnowsupport, by filler from the Minnow Support Project. It's a witness project run by aggroed, ausbitbank, teamsteem, theprophet0, someguy123, neoxian, followbtcnews, and netuoso. The goal is to help Steemit grow by supporting Minnows. Please find us at the Peace, Abundance, and Liberty Network (PALnet) Discord Channel. It's a completely public and open space to all members of the Steemit community who voluntarily choose to be there.
If you would like to delegate to the Minnow Support Project you can do so by clicking on the following links: 50SP, 100SP, 250SP, 500SP, 1000SP, 5000SP.
Be sure to leave at least 50SP undelegated on your account.
Very cool and interesting project!
Thanks to @sayee, this post was resteemed and highlighted in today's edition of The Daily Sneak.
Thank you for your efforts to create quality content!
Hey filler, if you are submitting the tutorials in Utopian you need to add the tag after utopian-io tag. utopian-io should be the first tag and then tutorials should be the 2nd tag.
Thanks! I'll update the post.
Thank you for your contribution.
Cool work, yet few notes for you though:
Your contribution has been evaluated according to Utopian policies and guidelines, as well as a predefined set of questions pertaining to the category.
To view those questions and the relevant answers related to your post, click here.
Need help? Write a ticket on https://support.utopian.io/.
Chat with us on Discord.
[utopian-moderator]
Thanks for the evaluation. I will update the post and also keep it mind for future contributions!
Hey @filler
Thanks for contributing on Utopian.
We’re already looking forward to your next contribution!
Contributing on Utopian
Learn how to contribute on our website or by watching this tutorial on Youtube.
Want to chat? Join us on Discord https://discord.gg/h52nFrV.
Vote for Utopian Witness!