Manage permission on android with Dexter library

A while ago I have developed an application that has a feature change user profile. in the feature the user can change the profile picture by taking pictures using the camera or choose the image from gallery. but the problem when used by the user with phone system android nougat, this feature causes crashes. After I do the analysis of the application there was a problem with the permission. I've previously created permissions related to features like cameras and storage in the manifest file. so far I use that way to target device up to kitkat, the application does not crash.
After my research, I found out from the android marshmallow Google gives a new permission system. now request permissions in runtime. this makes security for the user increased. but create headache developers. finally I have to write the code for permission request in my activity class, I have to make sure to have request for every permissions my application needs. this becomes a tough job if we have to use multiple permissions in our application.
Recently I found this permission problem can be easily solved by using dexter library, Dexter is android library that simplifies the process of requesting permission at runtime. Therefore in this opportunity I share tutorial how to use dexter library in android project to help developers who have problems when dealing with permissions in android.
For example in this tutorial I will create application using camera and manage the permission with dexter, let’s start the tutorial.
(1) Create new project from android studio, set the Application name, company domain and package, also don’t forget to targeted project location path. For this tutorial, i have been set my package name com.fahrulhidayat.tutorialdexter. Click next button for next step.

(2) Second step, set the project for phone and tablet, just check the box on it, then set Minimum SDK for minimum requirement to run the apps, for this example i choose API 18 because from the statistik it will coverage about 91.4% of the devices that are active on the google play store. Also if you want to run in other platform just check the box according to the platform you want. Click next for next step.

(3) Android studio have provided developers with many template for starting the android project. if want to use map on your apps choose google map activity, or want to use drawer menu on the app, we can choose navigation drawer menu, and more options that can help us to start the project. if want to use map on your apps choose google map activity, or want to use drawer menu on the app, we can choose navigation drawer menu, and more options that can help us to start the project. For this tutorial we only need empty activity, make sure you have been selected it, click next to proceed.

(4) Next step we will set the activity name and the layout name. For now we use default name that given by android studio, that is “Main activity” for activity name and “activity_name” for the layout name. If you want another name you can type as you wish. Click finish to end the process setup new project and wait until the project structure open.

(5) After the project open you can see the structure of android project, in the left side there are manifest file to control permission and file in the project, directory java contain all class we we use in the apps, and drawable contain all image we needs, layout directory for all layout we use in the activity, and res directory for strings, colors, dimens and styles. For now the layout xml file and the main activity class is still contain default generate script by the android studio.
(6) Add Dexter dependency to your app/build.gradle. just add compile ‘com.karumi:dexter:4.2.0’. another depedencies script here is default by the android project structure, the function for display style of the application. Click sync, and wait until the process synchronize done. after the process done we can use the dexter function from the library.
dependencies {
    compile fileTree(dir: 'libs', include: ['*.jar'])
    androidTestCompile('com.android.support.test.espresso:espresso-core:2.2.2', {
        exclude group: 'com.android.support', module: 'support-annotations'
    })
    compile 'com.android.support:appcompat-v7:26.0.0-alpha1'
    compile 'com.jakewharton:butterknife:8.8.1'
    annotationProcessor 'com.jakewharton:butterknife-compiler:8.8.1'
    testCompile 'junit:junit:4.12'
}
(7) Let’s add button on xml file activity_main on the layout directory. Type the following code, here we use button view and set the property of width with match_parent, property height with wrap_content, text button with “OPEN CAMERA” and set the id with “buttoncamera”.
<?xml version="1.0" encoding="utf-8"?>
<RelativeLayout xmlns:android="http://schemas.android.com/apk/res/android"
    xmlns:tools="http://schemas.android.com/tools"
    android:id="@+id/activity_main"
    android:layout_width="match_parent"
    android:layout_height="match_parent"
    android:paddingBottom="@dimen/activity_vertical_margin"
    android:paddingLeft="@dimen/activity_horizontal_margin"
    android:paddingRight="@dimen/activity_horizontal_margin"
    android:paddingTop="@dimen/activity_vertical_margin"
    tools:context="com.fahrulhidayat.tutorialdexter.MainActivity">
    <Button
        android:id="@+id/buttoncamera"
        android:layout_width="match_parent"
        android:layout_height="wrap_content"
        android:text="OPEN CAMERA" />
</RelativeLayout>
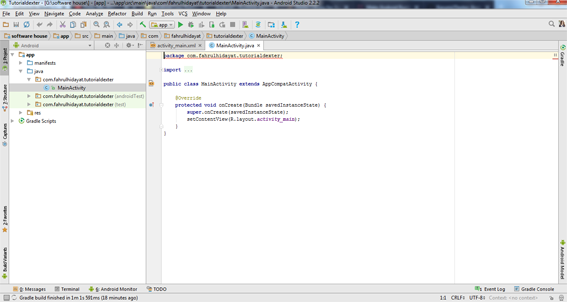
(8) Next we modification the main activity class, we must declaration variable for button view and set onClickListener() on the button. Don’t forget ot import the library for each component. Press alt+enter to automatically import classes needed by the component.
public class MainActivity extends AppCompatActivity {
    private Button cameraButton;
    @Override
    protected void onCreate(Bundle savedInstanceState) {
        super.onCreate(savedInstanceState);
        setContentView(R.layout.activity_main);
        cameraButton = (Button) findViewById(R.id.buttoncamera);
        cameraButton.setOnClickListener(new View.OnClickListener() {
            @Override
            public void onClick(View view) {
                //empty
            }
        });
    }
}
(9) Next we use requestCameraPermission() to request for camera permission, and checks if the permission is denied permanently with onPermissionDenied() and onPermissionGranted(). Type the following code, add requestCameraPermission() on the button listener, and create requestCameraPermission() method outside main class. Add Dexter.withActivity() to manage the permission. And add the method to check the permission on the dexter permission listener.
private void requestCameraPermission() {
        Dexter.withActivity(this)
                .withPermission(Manifest.permission.CAMERA)
                .withListener(new PermissionListener() {
                    @Override
                    public void onPermissionGranted(PermissionGrantedResponse response) {
                        // permission is granted
                    }
                    @Override
                    public void onPermissionDenied(PermissionDeniedResponse response) {
                        // check for permanent denial of permission
                        if (response.isPermanentlyDenied()) {
                        }
                    }
                    @Override
                    public void onPermissionRationaleShouldBeShown(PermissionRequest permission, PermissionToken token) {
                        token.continuePermissionRequest();
                    }
                }).check();
    }
(10) If the permission granted then open the camera, for this concept let’s call openCamera() method on the onPermissionGranted().
@Override
public void onPermissionGranted(PermissionGrantedResponse response) {
 // permission is granted
 openCamera();
 }
(11) Create openCamera() method outside main class. Type the following code. Here we create intent using internal activity mediaStore.ACTION_IMAGE_CAPTURE to open internal camera application. And directly start the activity of internal camera application.
 private void openCamera() {
        Intent intent = new Intent(MediaStore.ACTION_IMAGE_CAPTURE);
        startActivityForResult(intent, 100);
    }
(12)If the permission permanent denial then open settings dialog to let user change manual the permissions. On the method onPermissionDenied(), we need check first isPermanentlyDenied() method true and call showSettingsDialog() method on it. Type like the following code
 @Override
 public void onPermissionDenied(PermissionDeniedResponse response) {
// check for permanent denial of permission
if (response.isPermanentlyDenied()) {
 showSettingsDialog();
  }
 }
(13) Create the showSettingsDialog() method outside main class. Type the following code, here we use AlertDialog.Builder to run the alert activity, then set property text on the alert. Also we have two button thera are action for postitif button to run the setting activity and negative button to close the alert window. Type the following code.
private void showSettingsDialog() {
        AlertDialog.Builder builder = new AlertDialog.Builder(MainActivity.this);
        builder.setTitle("Need Permissions");
        builder.setMessage("This app needs permission to use this feature. You can grant them in app settings.");
        builder.setPositiveButton("GOTO SETTINGS", new DialogInterface.OnClickListener() {
            @Override
            public void onClick(DialogInterface dialog, int which) {
                dialog.cancel();
            }
        });
        builder.setNegativeButton("Cancel", new DialogInterface.OnClickListener() {
            @Override
            public void onClick(DialogInterface dialog, int which) {
                dialog.cancel();
            }
        });
        builder.show();
    }
(14) Create openSettings() method outside main class, here we call intent to run internal settings activity with script Settings.ACTION_APPLICATION_DETAILS_SETTINGS. And after the intent has created then start the activity. Type the following code
   private void openSettings() {
        Intent intent = new Intent(Settings.ACTION_APPLICATION_DETAILS_SETTINGS);
        Uri uri = Uri.fromParts("package", getPackageName(), null);
        intent.setData(uri);
        startActivityForResult(intent, 101);
    }
(15) Don’t forget to call the openSetting() method on the positive button action from the alert window.
@Override
            public void onClick(DialogInterface dialog, int which) {
                dialog.cancel();
                openSettings();
            }
(16) For the last we add script continuePermissionRequest() ont the method onPermissionRationaleShouldBeShown() method. This for make the application request the permisssion until it request is run. Type following code.
@Override
public void onPermissionRationaleShouldBeShown(PermissionRequest permission, PermissionToken token) {
token.continuePermissionRequest();
}
(17) We must add permission on the manifest for camera permissions. Manifest is file that contain important information about android system. The android system need to know what will use by application before can run. The info in manifest are : package name, application component, and permission needed. Type following code register the request permissions we need.
<uses-permission android:name="android.permission.CAMERA" />
 <uses-feature android:name="android.hardware.camera" />
 <uses-feature android:name="android.hardware.camera.autofocus" />
(18) Now lets run the application on the phone, you can click run button 
, from the list you can see list of available phone connect to android studio or emulator that you have. Choose your phone and wait until the apk have finish installed on your phone.

(19) After you run the sample application that have been installed on your phone, the display will like following picture. In the interface only one button with text open camera. If you click this button it will try to open the camera because in the main activity we have add the opencamera() function on button listener

(20) Because my phone system is android nougat, like I have describe above, google made new permission system from the marshmallow version, so the camera can’t open. in the main activity class we have add script to check if we have permissions to use camera, if not the application will run the alert window, you can see from image below. The alert have two option allow or cancel. Click allow to activate camera permission.

(21) After the camera permission activated, then the application will open the camera application. You can use camera to photo or take video.

Conclusion
Because google new rule to setting permission in runtime, this can make developers nighmare, so with dexter library that problem become easy to handle. To use dexter first add depedencies in app/build.gradle, then add dexter method on main activity, and don’t forget to add permissions you needs in the manifest file.
Reference: https://github.com/Karumi/Dexter
Posted on Utopian.io - Rewarding Open Source Contributors
Thank you for the contribution. It has been approved.
You can contact us on Discord.
[utopian-moderator]
thanks for your review :)
Bang, pakai permainan font size biar manusia sejenis aku enak bacanya wkwkwkk... mantap!
oke @elvizakiyah, notes :)
Hey @fahrulhidayat I am @utopian-io. I have just upvoted you!
Achievements
Suggestions
Get Noticed!
Community-Driven Witness!
I am the first and only Steem Community-Driven Witness. Participate on Discord. Lets GROW TOGETHER!
Up-vote this comment to grow my power and help Open Source contributions like this one. Want to chat? Join me on Discord https://discord.gg/Pc8HG9x