Creating Forms with OpenOffice BASE: Using the Forms Wizard to Create Data Entry Forms for OpenOffice
This article provides a brief tutorial on how to Use the Forms Wizard to Create Data Entry Forms for OpenOffice.org BASE
Once a database has been created in OpenOffice.org BASE, and at least one table to store data is created, there needs to be a way to insert data – otherwise a database is rather useless. OpenOffice.org BASE makes this as easy as it does to create a database or a table – through the use of forms.
There are three options for creating a form in BASE:
1- Creating Forms with OpenOffice.org BASE
Open a database in BASE and find the icon “Forms” in the left column. Click it and the Tasks portion of the main window changes from Table Tasks to Form Tasks; Create Form in Design View... and Use Wizard to Create Forms..
2- Create Form in Design View with OpenOffice.org BASE
Creating forms this way means using the Form Controls and Form Design tools. These tools give absolute control but are beyond the intent of this article.
3- Use the Wizard to Create Forms with OpenOffice.org BASE
An easy way of creating a data entry form is the wizard. While this may not be ideal in complex cases, it is often a good starting place even when heavy customization is required.
Clicking the Forms icon in the main BASE window allows access to any form created for the currently open database.
Using the Wizard with OpenOffice.org BASE
After a database is created, and tables to store data exist, data can be entered manually, but an easier way is to create forms for data entry. With a database open click Use Wizard to Create Form... in the Tasks portion of the window and the Form Wizard launches.
Step 1: Field Selection: In most cases databases have multiple tables. The drop-down selection specifies which table or query the form should be created from.To use specific fields they must be selected from the Available Fields and added to the Fields in the form by clicking the “>” button. For this tutorial add all Available Fields by clicking “>>” then click Next.
Step 2: Set up a Subform: Subforms are forms following another form. Since this example is simple there is no need for this. In more complex databases using table relationships this would be a place to take advantage of that. For this tutorial leave Add Subform unchecked and click Next.
Step 3: Arrange Controls: Clicking Next in Step 2 sends the Form Wizard to step 5 (no Subform was created). In the Arrange Controls dialogue the user determines the layout of the form. Click on each of the options and the preview behind the dialogue updates. This choice is aesthetic preference, once a choice is made, click Next.
Step 4: Set Data Entry: Specify how data should be handled by the new form. There are two options:
- The form is to be used for entering new data only. Existing data will not be displayed. This means users will only enter new data – not review or edit existing records in the database.
- The form is to display all data. This is the option for this tutorial. It allows existing data to be reviewed, new data entered, or the deletion of records. There are three refinements to this access level of the form.
-Do not allow modification of existing data. Select to disallow editing data.
-Do not allow deletion of existing data. Select to disallow deleting data.
-Do not allow addition of new data. Select to disallow adding new data.
For this tutorial leave the settings as they are in and click Next.
Step 5:Apply Styles: This setting is also aesthetics. Choose a background from the Apply styles, then set the field border preferences; none, 3D, or a flat look. The preview behind the dialogue updates when the styles or looks are changed.
Step 6: Set Name: Give the form a name which is easily identifiable for future use. By default the form will take the name of the table or query it interacts with. Next, tell the wizard whether to modify the form in design view, or go straight to data entry mode.
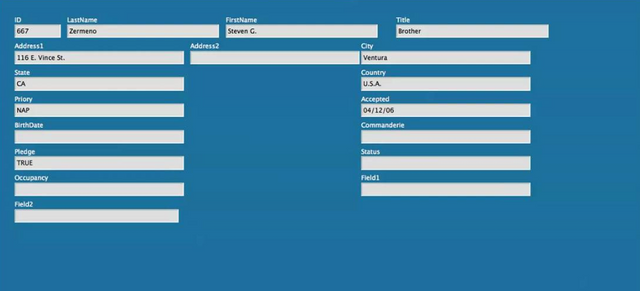
Modifying the form is useful in more complex forms or where customization is needed, but in this case, all that needs doing now is to select Work with the form and start entering addresses.
Posted on Utopian.io - Rewarding Open Source Contributors

Thank you for the contribution. It has been approved.
You can contact us on Discord.
[utopian-moderator]
Hey @dorodor I am @utopian-io. I have just upvoted you!
Achievements
Suggestions
Get Noticed!
Community-Driven Witness!
I am the first and only Steem Community-Driven Witness. Participate on Discord. Lets GROW TOGETHER!
Up-vote this comment to grow my power and help Open Source contributions like this one. Want to chat? Join me on Discord https://discord.gg/Pc8HG9x