How To Create a Lightsaber Effect Using GIMP
What Will I Learn?
Imagine being able to add light sabers into random pictures. With GIMP, that's an easy task to to. In this tutorial, you will learn how to create a lightsaber effect for fun or profit in just a few minutes. In this tutorial, you will learn:
- How to use the path tool to select specific parts of an image
- How to use layers to attain realistic laser-life effects
- How to use Color Balance to achieve a greenish glow
Requirements
1) GIMP
If you haven't downloaded and installed GIMP yet, please do so. You can download GIMP here:
https://www.gimp.org/downloads/
It's compatible with Mac, Windows, and Linux. Best of all, it's free.
For this tutorial, the screenshots will be from GIMP 2.8.22.
2) Image with person holding something long.
It can be a stick, a sword, an umbrella. It must be long to appear like a lightsaber. For this tutorial, I chose an image from Pixabay.
Original Image
https://pixabay.com/en/woman-sword-amazone-heroine-2996541/
Difficulty
- Basic
Tutorial Contents
This tutorial will teach you how to create a simple yet realistic lightsaber effect using GIMP.
OVERVIEW
The glowing effect of the lightsaber can be achieved by using the Gausian blur effect. For better results, we will use several layers of varying sizes of blur. Finally, we will adjust the color balance to create a greenish glow on the 'sword.'
STEP 1
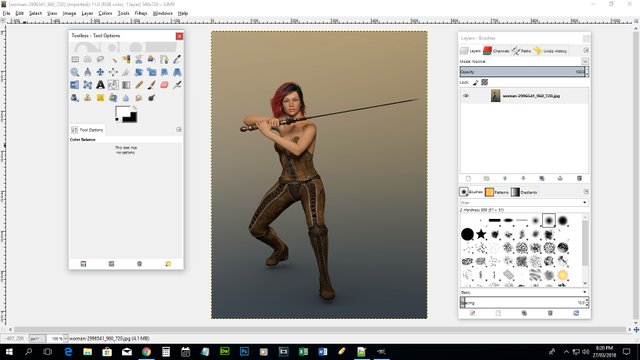
Open image on GIMP.
STEP 2
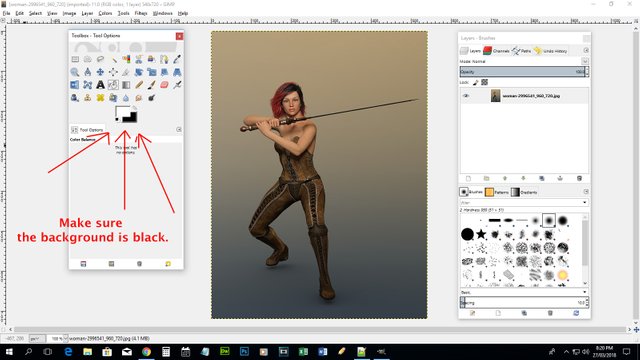
Make sure the background color is black.
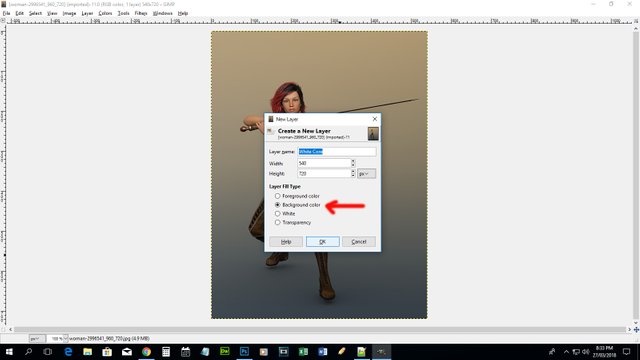
Create new layer by pressing CONTROL + SHIFT + N (COMMAND + SHIFT + N on Macs). Make sure "Background" is selected like in the image. I named the layer "White Core".
The middle of the lightsaber must be white to make it look like it's glowing.
Click OK. The image will be covered in black. Don't panic.
STEP 3
Change the mode from "Normal" to "Screen" just like in the image above. The black layer should dissappear and you will now be able to see the image of the woman with the sword.
STEP 4
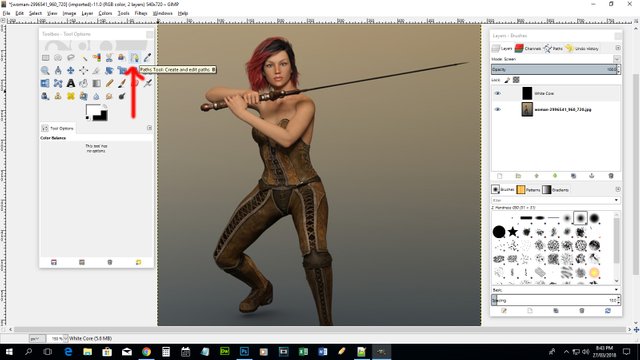
We will now select the sword. The goal is to cover it in pure white. This will serve as the 'core' of the lightsaber. To do this, we will use the "Paths" tool.
Using the "Paths" tool, create a pattern around the sword. Try to select the sword as closely as possible.
You will notice that I zoomed the image a little to be able to select the sword easier. Use the CONTROL + MOUSE SCROLL to zoom in or out of the image.
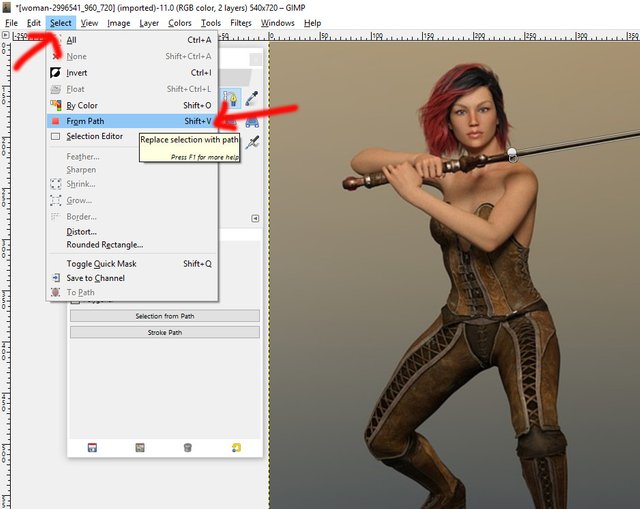
Now go to Select. Then click "From Path". This should select the area around the sword.
STEP 5
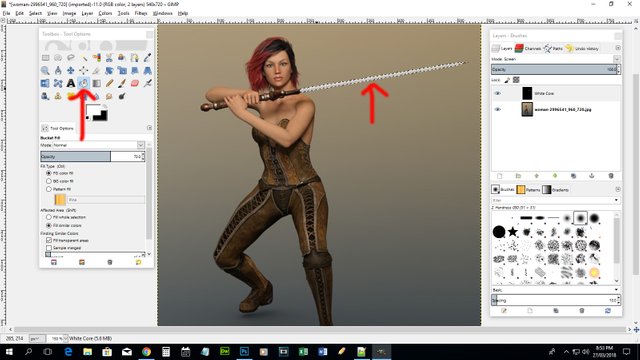
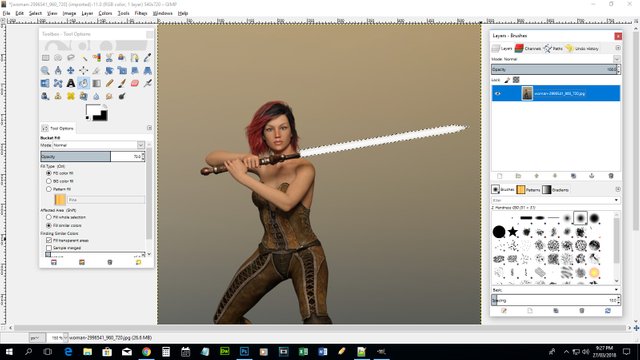
Use the "Bucket" tool to fill the selected area with white. Then, press CONTROL + SHIFT + A to deselect the sword.
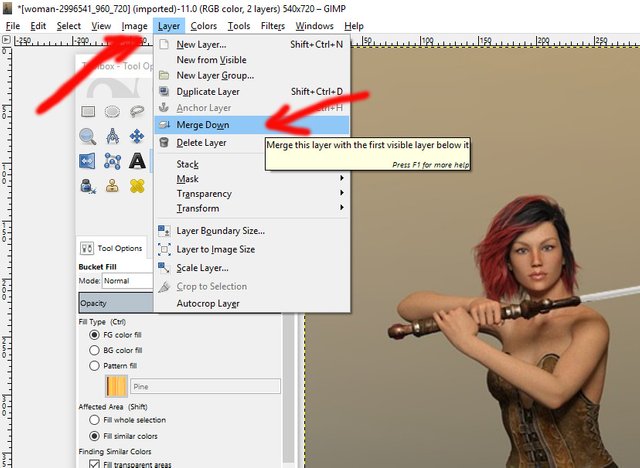
Then click on "Layer" at the top then "Merge Down".
STEP 6
Create a new layer. Follow the same steps on STEP 3 making sure you change the Mode from "Normal" to "Screen". I named the layer "Glow".
Then select an area around the sword using the "Paths" tool just like in STEP 4. This time, however, select an area a little wider than the sword. Then using the "Bucket" tool, fill it with white.
STEP 7
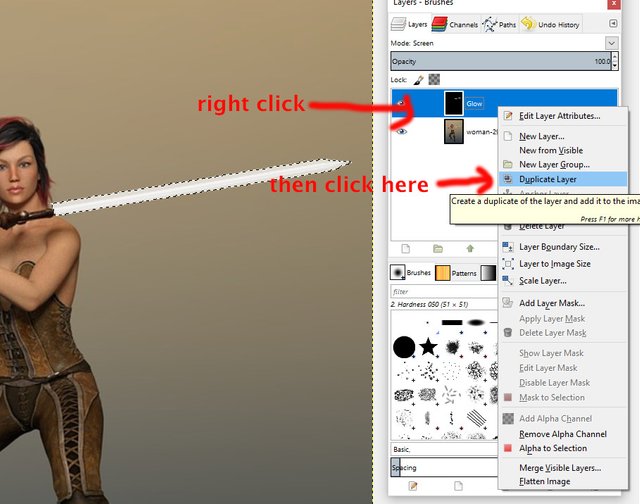
Right click on the new layer then click "Duplicate". Then do it again.
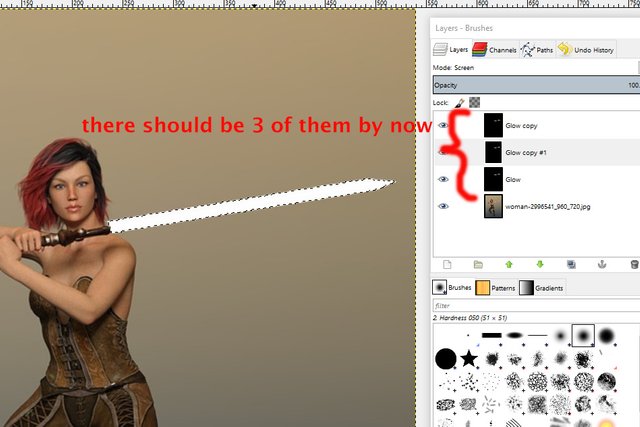
By now you should have 3 additional layers on top of the layer with the woman.
STEP 8
Now we'll add the blur on each of the additional layers.
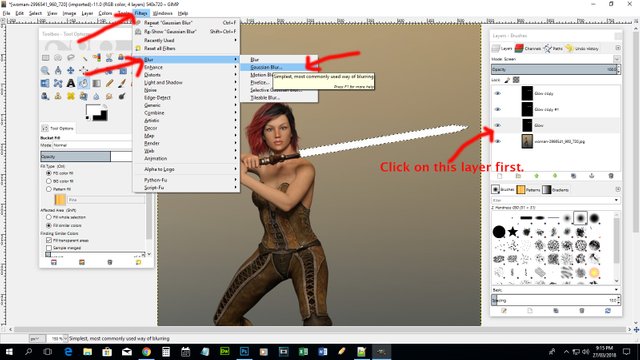
Click on "Filters", then "Blur", and then "Gausian Blur". A pop-up window will appear.
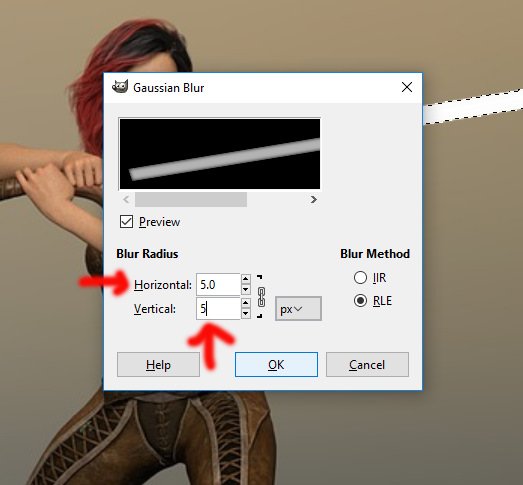
Set the blur radius on both Horizontal and Vertical to 5.0 and click OK.
Now click the "Glow Copy #1" layer. We'll also apply a Gausian blur on this one. This time, however, set the blur radius to 20 on both horizontal and vertical.
Next, click on the "Glow copy" layer and apply Gausian blur setting the horizontal and vertical values to 40 this time.
STEP 9
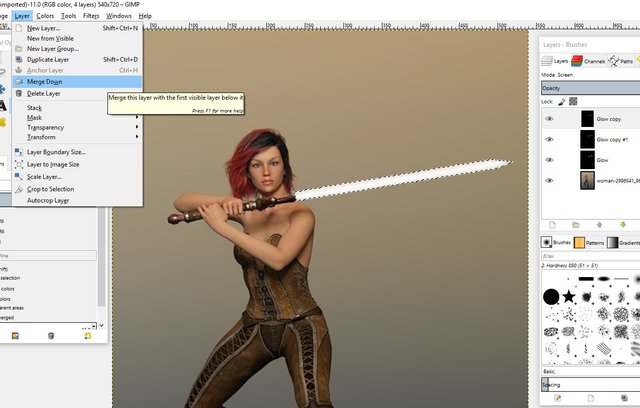
Click on the "Glow copy" layer and click on "Layers" then "Merge Down". You will see the black layer again. Just do the same as we did in STEP 3 and change the mode from "Normal" to "Screen".
Do the same for the layers "Glow copy #1" and "Glow". The result should look like this:
STEP 10
We'll now add the glow effects.
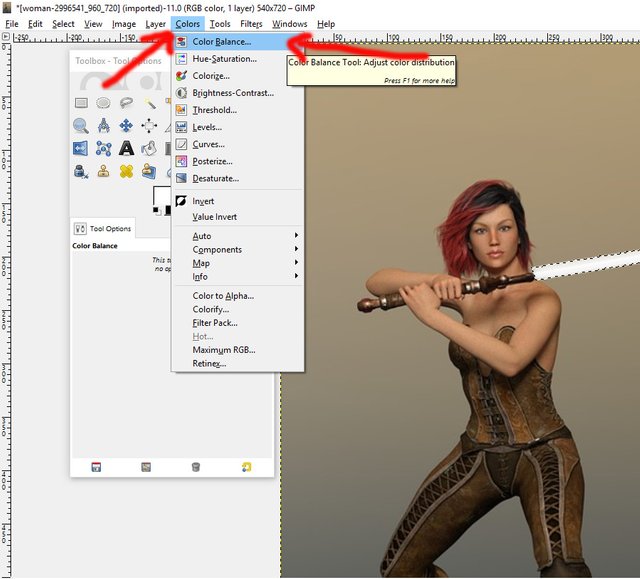
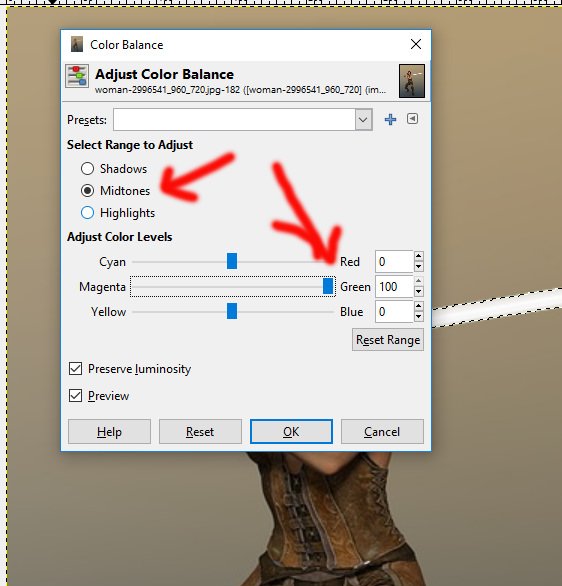
Making sure the the sword is still selected, go to "Colors" then click "Color Balance". A pop-up window will appear.
Set the Midtones to 100 to Green. Then, set the Highlights to 100 to Green.
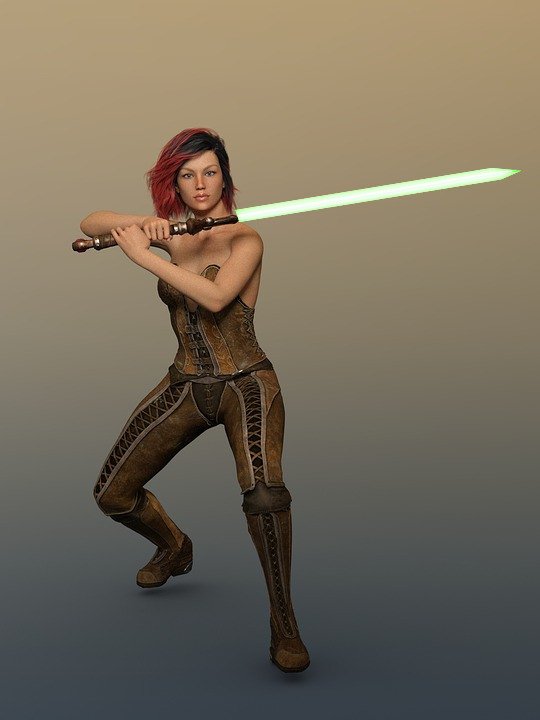
FINISHED PRODUCT
The finished image should look like this:
HAVE FUN
Once you know the steps, it will only take a few minutes to edit an image and add lighsabers.
Posted on Utopian.io - Rewarding Open Source Contributors



Your contribution cannot be approved because it does not follow the Utopian Rules.
Related Rule:
You can contact us on Discord.
[utopian-moderator]
Hey @roj, I just gave you a tip for your hard work on moderation. Upvote this comment to support the utopian moderators and increase your future rewards!