manipulation photoshop fire element
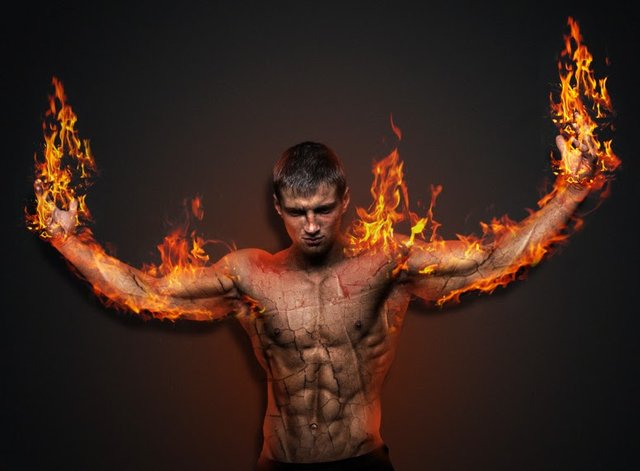
Okay here's the final result of the photoshop fire element tutorial.

The following steps should be followed to create photoshop element manipulation of fire.
| step 1 |
|---|
Create a new file in photoshop with size W: 1500px H: 1200px Res: 72
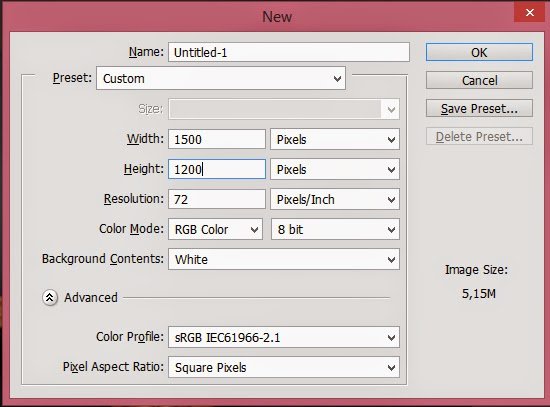
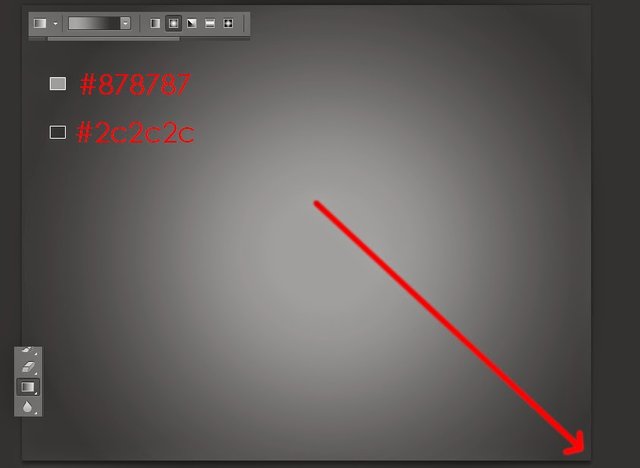
Then for the background we give the color gradient.
Enable Gradient Tool (G) with Radial mode.
Pull from the middle of the worksheet to the bottom right corner.
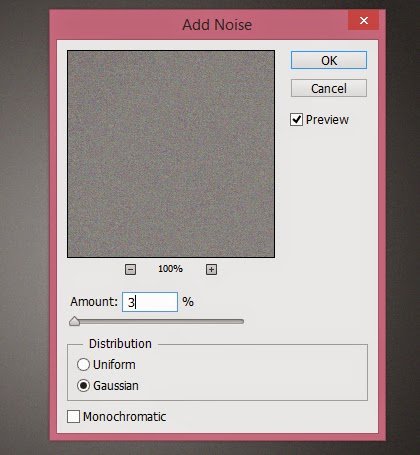
Click filter menu-Noise-Add Noise with Amount 3%.
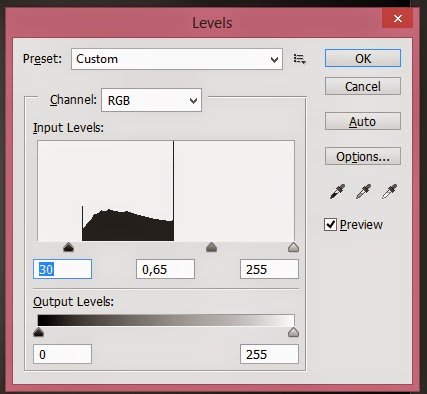
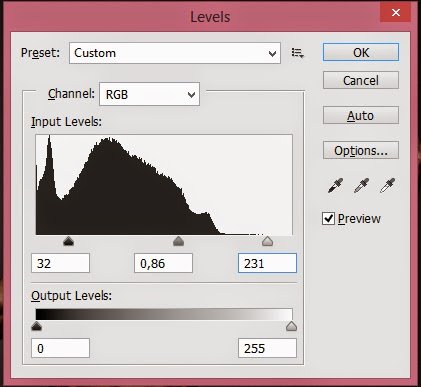
Click the image-adjusment-levels menu (Ctrl + L), then set the level composition as shown below.
| step 2 |
|---|
Selection Our model photo, can use pen tool or other selection tool that we usually use.
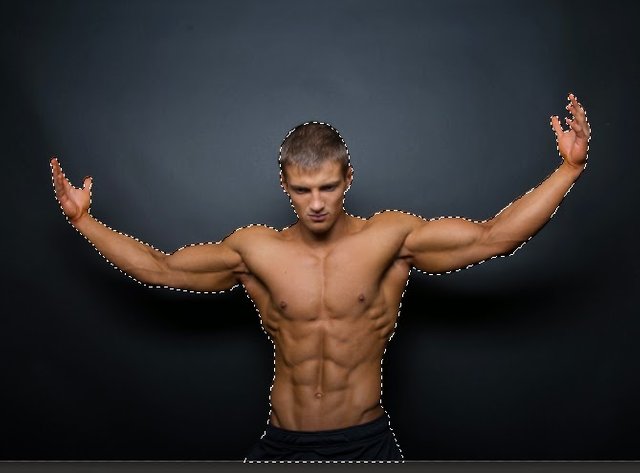
Then drag it to our main sheet.

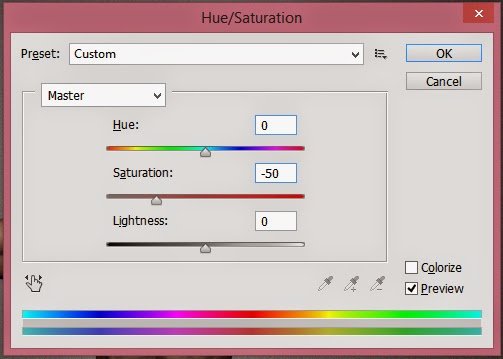
Set the hue / saturation and levels layer of our model.
Press Ctrl + U or click the image-adjusment-Hue / Saturation menu
To adjust the levels click the Image-Adjusment-Levels menu or press Ctrl + L.
| step 3 |
|---|
Duplicate the model layer by pressing Ctrl + J on the keyboard.
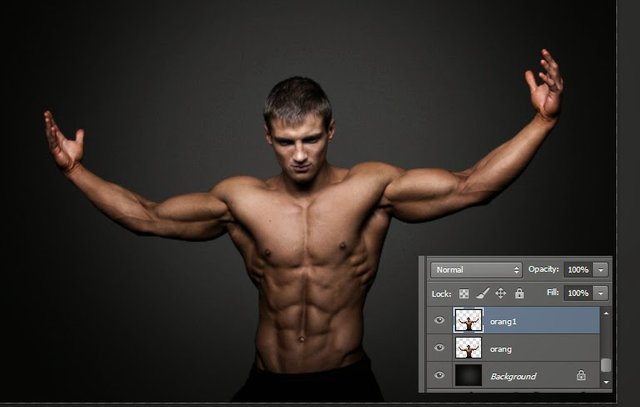
For the model layer below, we give color overlay with black color.
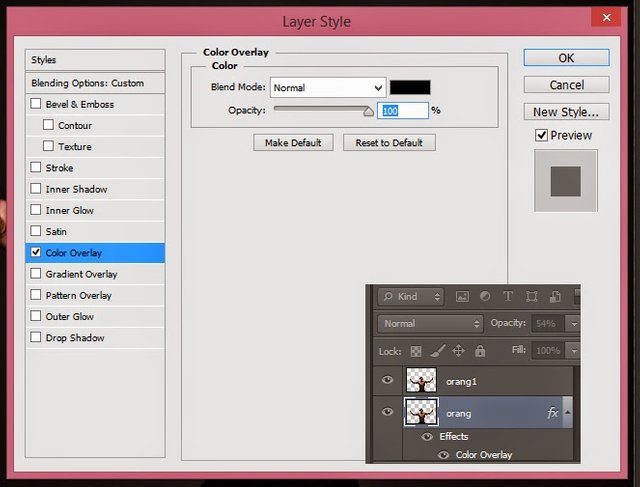
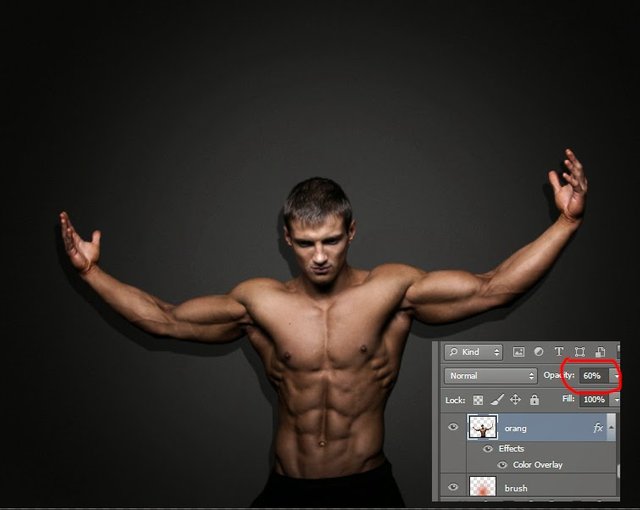
Slide a bit of right and lower its opacity 60%.
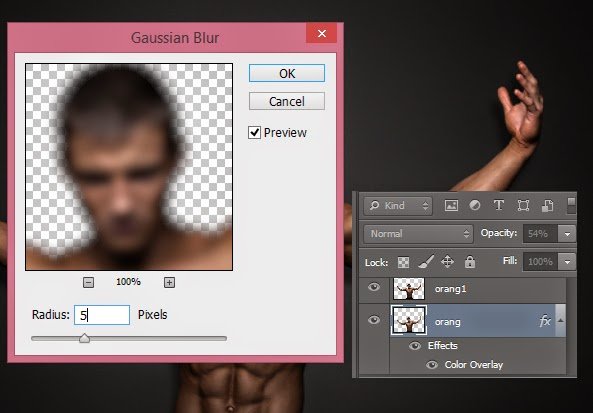
Then give Gaussian blur 5 Pixels.
| step 4 |
|---|
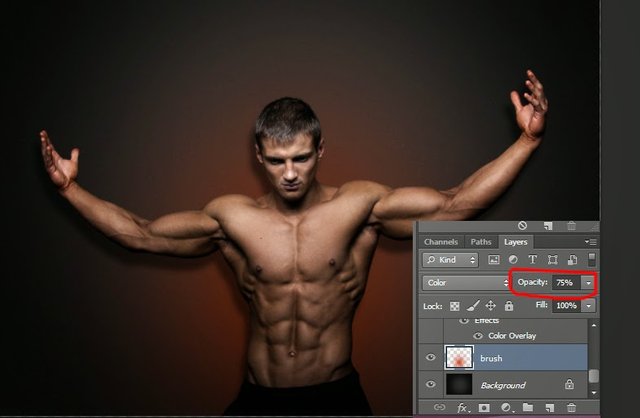
Activate the Brush tool (B) with a soft brush, with a slightly reddish orange color.
Create a new layer above the background and then brush with brush dot right behind the layer of our model.
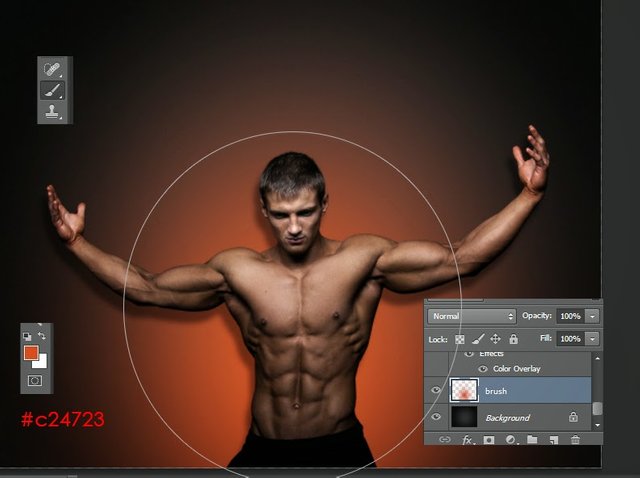
Decrease layer opacity to 75%.
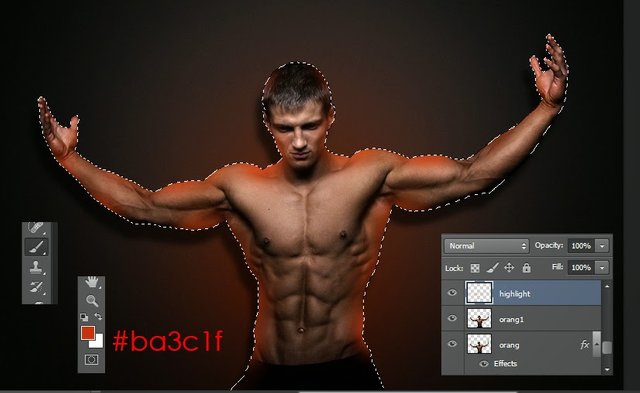
Create a new layer above the person or model layer.
Press ctrl while left-click on the people layer to get the selection according to the shape of the object on the layer. then still with a soft brush tool we make highlights on the edge of the layer of people,
| step 5 |
|---|
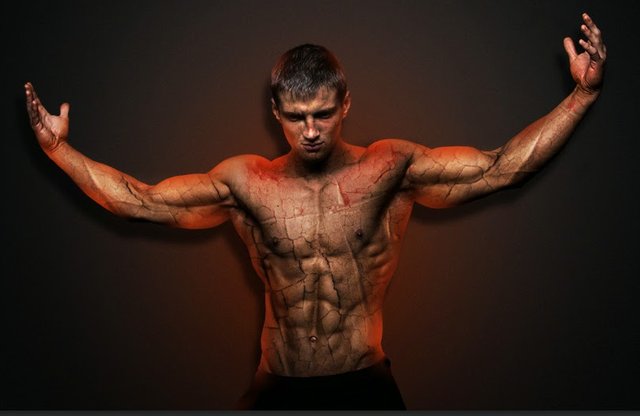
For texture on the model body, then we use cracked texture. open texture crack it into photoshop then fit it with body size.
Remove the edges of the texture adjust the body shape of the model.
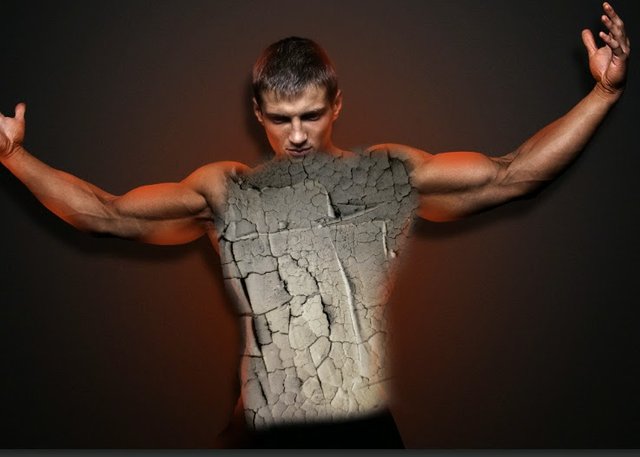
Change layer mode to overlay.
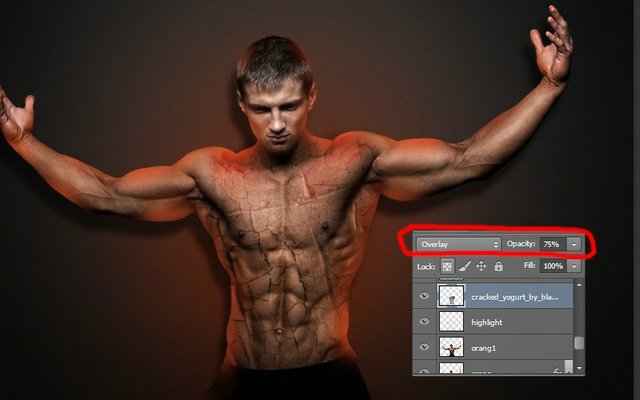
Do this on other parts of the body. if done this is the result we get.
| step 6 |
|---|
Open one of the rather high stock fire images, drag it to our main worksheet then position it on the model's hand.
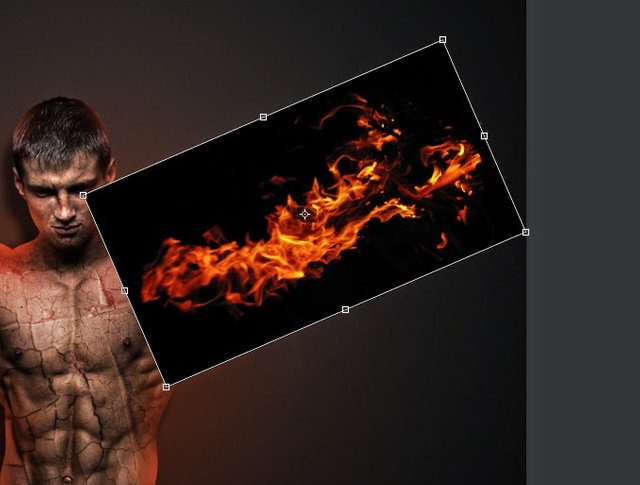
Change the layer mode to Screen.
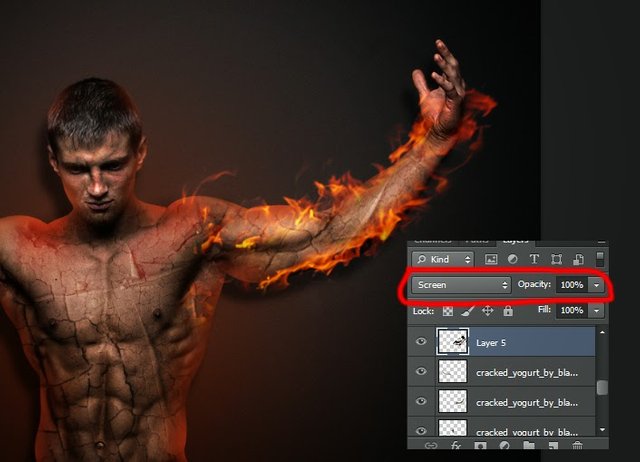
Do the same with the rest of the body.
Use existing fire stock.
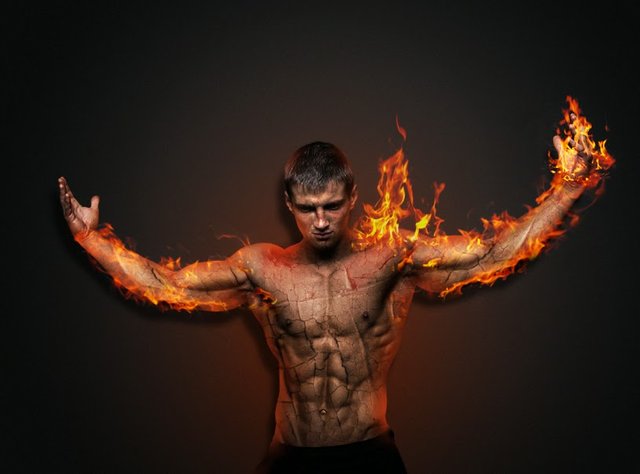
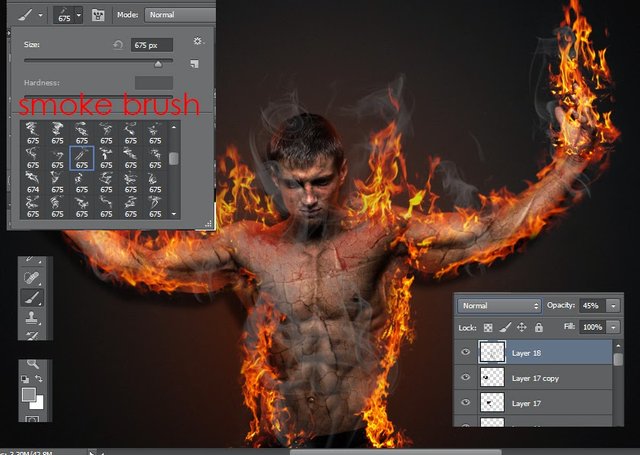
Next we make smoke using smoke brush.
Of course if there is fire there will be smoke.
Choose some type of smoke brush we have added to our brush tool.
delete above our model.
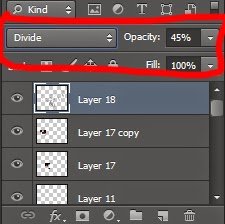
Then change the layer mode to Divide with 45% opacity.
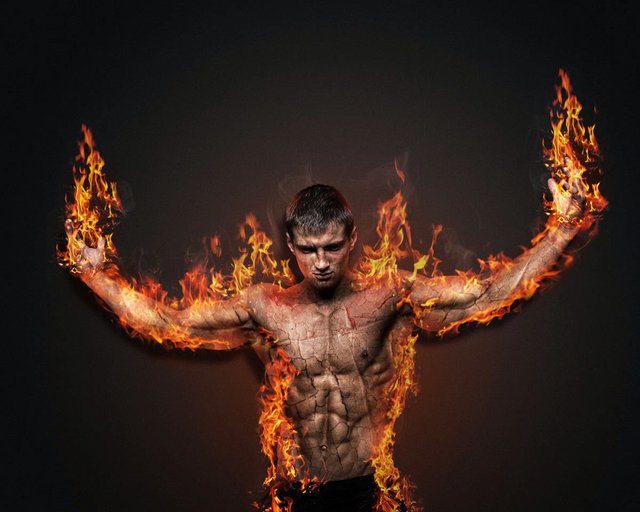
Final !!!
This is the end result we get.
Posted on Utopian.io - Rewarding Open Source Contributors
Your contribution cannot be approved because it does not follow the Utopian Rules, and is considered as plagiarism. Plagiarism is not allowed on Utopian, and posts that engage in plagiarism will be flagged and hidden forever.
It breaks multiple rules, but is also plagiarised from here.
You can contact us on Discord.
[utopian-moderator]