Use Javascript to Create a Looping Image Gallery on a Web Page
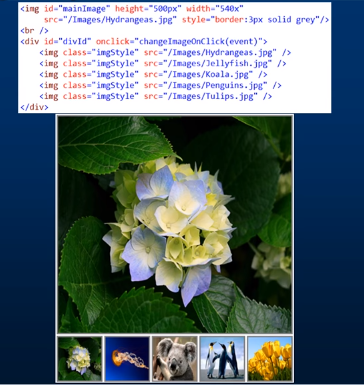
With just a few lines of JavaScript code it is possible to turn a static image into a looping gallery of pictures.
Most web pages are a mixture of text and images and, in many cases, the images are a single, static picture. However, with just a little Javascript code it is possible to turn the single image into a whole gallery of pictures which change automatically.
Adding a Static Image to a Web Page
It is, of course, very easy to add an image to a web page by using the img tag:
< img src="image1.png" id="img1" >
However, this is a static image. It will not change. The next stage is to add some Javascript in order to change the picture being displayed.

Changing an Image by Using Javascript
In order to change the displayed picture the Javascript code must:
- obtain the image element
- change the src of the image
And this can be done with just two lines of code:
var image = document.getElementById(image_id);
image.src = "image2.png";
This code would change the picture being displayed from the original to a new one. Next a timer is required so that all of the changes are done within a continous loop.
Adding a Javascript Loop
A Javascript loop is created by defining a function that calls itself using the setTimeout function, for example:
function callMe () {
setTimeout("callMe()", 2000);
}
In the example above the callMe function will repeat once every 2 seconds (or 2000 milliseconds).
Creating the Image Gallery with Javascript
The image gallery consists of a set of images (stored in an array) and a loop that automatically changes the src of an img tag. The array is defined by:
< html>
< head>
< script language="javascript">
var images = new Array ("image1.png","image2.png")
Here 2 images have been used, but more can be added if required. Next a loop counter is required. This will keep track of the image being displayed:
var image_count = 0;
The loop counter is updated by a looping function. The function receives the img tag to be updated and the time for which the image is to be displayed:
function rollover (image_id, millisecs) {
The Javascript tales control of the img object:
var image = document.getElementById(image_id);
And then updates the src with a new image:
image.src = images[image_count];
The loop counter is then updated:
image_count++;
However, the loop counter must not excede the number of available images (as defined by the array):
if (image_count >= images.length) {
image_count = 0;
}
And finally the function resubmits itself:
setTimeout("rollover('" + image_id + "'," + millisecs + ");",millisecs);
}
< /script>
< /head>
All that's required now is the HTML defining the img tag:
< body>
< img src="image1.png" id="img1" >
And for the loop to be started:
< script language="javascript">
rollover("img1",2000);
< /script>
< /body>
< /html>
If this is now stored as an HTML document and viewed in a browser then the user will see a looping gallery of images that updates itself once every 2 seconds.
Posted on Utopian.io - Rewarding Open Source Contributors
Congratulations @cues! You have completed some achievement on Steemit and have been rewarded with new badge(s) :
Click on any badge to view your own Board of Honor on SteemitBoard.
For more information about SteemitBoard, click here
If you no longer want to receive notifications, reply to this comment with the word
STOPYour contribution cannot be approved because it does not refer to or relate to an open-source repository. See here for a definition of "open-source."
You can contact us on Discord.
[utopian-moderator]
very helpful, thanks alot