Test Driven Development with AdonisJS
Building applications with reliable behavior is not usually an easy feat. When a user interacts with an application, unexpected behavior may be encountered. As software developers, we have the power to minimize these occurrence. We wield this special ability thanks to a method known as TDD (test driven development).
Difficulty
- Intermediate
What Will I Learn?
At the end of this tutorial, we hope to gain an appreciable understanding of Test Driven Development. We'll cover the following
- A Brief Introduction to TDD.
- Test Driven Development Methodologies
- How and When to Refactor Code.
- Using AdonisJS Vow to Run Test Cases.
Requirements
- Node.js 8.0 or greater.
- NPM 3.0 or greater.
- Yarn package manager
- An intermediate level of AdonisJS knowledge.
1. A Brief Introduction to TDD.
What is Test Driven Development?
Test Driven Development is simply building software with expected outcomes clearly defined before any other action is taken. In other words, when doing TDD, we write the expected outcome for any program we are designing before writing that program.
Why Should I Practice Test Driven Development?
Test Driven Development is key to writing quality code. Writing a test before writing code can help you cover more use cases and can also help you explore multiple probabilities. Also, the tests you'll generate will help you hand off your code to another collaborator someday with total assurance concerning its fidelity. Testing is invaluable for collaborative software development.
Where Can I Practice TDD?
You can practice TDD anywhere you write code. You can practice TDD when designing a note-taking application that runs on a smartphone, developing a photo sharing cloud-based application, hacking together a remote API that periodically returns data. TDD can be practiced anywhere code is written.
How Do I Get Started with TDD
It's really easy to get started with TDD. The TDD flow is something like this:
- 1. Outline a feature to be developed:
From the program specification, we outline a feature we'd like to develop. We could be interested in building a feature that helps us a user find houses within their vicinity that satisfy their requirement(s).
- 2. Describe a test for this feature:
We provide a little description for the test. Usually, it's a statement like this: "The test should find houses that cost within $2,000 - $4,000 per month".
- 3. Write the test code:
We then write test code that will return a "green" result if the conditions it stipulates are satisfied. This test code is usually a bunch of assertions. Assertions are basically us saying, "Hey! We'd like to know if the value we are expecting matches the value we are supplying". The simplest assertion you can write is an assertion that expects "2 + 2" to equal "4". Other assertions can include:
- An assertion that expects the response code for a HTTP request to equal 200.
- An assertion that expects the Boolean variable
is_authenticatedto equaltrue.
Continuing with our real life use case, we can query a hypothetical API for results match the criteria our user supplied. Next, we can supply assertions that expect the response to:
- Have a status code of 200.
- Contain a JSON response.
- Have a range of prices (not less than $2000 and not greater than 4000)
At this point, we are yet to write code for the feature we'd like to build, so if we run this test, we are satisfied with a "red" result.
- 4. Write Feature Code That Passes the Test:
The next step in the flow is really important. We write code that makes our test turn green. This is the fun part as we get to write code that passes the test regardless of its level of elegance. This is a breathe of air for me because I get to write anything that helps my test turn green. This aspect of TDD almost feels like gaming.
- 5. Refactor, Refactor, Refactor:
Refactoring is really important. Here, we get to apply proper structure to our code. Here, we get to add comments, separate our concerns, decouple dependencies and practice other industry standard software development practices. This step is also pretty important as it helps us minimize technical debt moving forward.
With all these concerns addressed, let's proceed to build the hypothetical application we just described. We'll be calling the app homely and it will be an API server written in Node.js with the AdonisJS framework.
Setting Up the AdonisJS Installation
We're assuming your development machine runs the Linux operating system. Windows users will be right at home here also. We're also assuming you have the Node runtime and NPM installed.
To install AdonisJS on your machine, we first have to get the global command line interface (CLI). We can install that by running:
npm i -g @adonisjs/cli
Once the installation completes, make sure that you can run adonis from your command line.
adonis --help
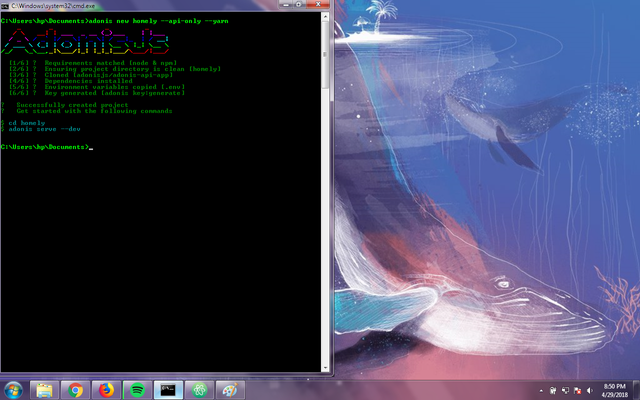
Next, we need to create an app called homely from the CLI. Since we're only interested in the API functionality and we'd like our dependencies downloaded using the Yarn package manager, we pass additional flags
adonis new homely --yarn --api-only
You should see an output similar to the one below.
Also, let's add the sqlite3 dependency for our database.
yarn add sqlite3 --save-dev
Let's change directories to the homely directory and start the development server.
cd homely && adonis serve --dev
We receive a tidy little JSON response if we head over to http://127.0.0.1:3333
{"greeting":"Hello world in JSON"}
Setting Up Application Config
Let's update the contents of our .env file to the content below
HOST=127.0.0.1
PORT=3333
APP_URL=http://${HOST}:${PORT}
NODE_ENV=development
CACHE_VIEWS=false
APP_KEY=0lMihXm6HtQyoJglrhg8bCI2JtEJQavO
DB_CONNECTION=sqlite
DB_HOST=127.0.0.1
DB_PORT=3306
DB_USER=root
DB_PASSWORD=
DB_DATABASE=homely
Setting Up Testing Environment
AdonisJS relies on the @adonisjs/vow package as its core testing framework. We may install it by running
adonis install @adonisjs/vow --yarn
We now need to register its service provider in the aceProviders array available at start/app.js .
    const aceProviders = [
      '@adonisjs/vow/providers/VowProvider'
    ]
We must also define a couple of behaviors for our tests. We can define these behaviours in a vowfile.js script available at the project root. We'd like Adonis to spin up a server and run migrations before any tests are run. Then, we'd like Adonis to destroy the server and reset the migrations after we are done testing.
'use strict'

/*
|--------------------------------------------------------------------------
| Vow file
|--------------------------------------------------------------------------
|
| The vow file is loaded before running your tests. This is the best place
| to hook operations `before` and `after` running the tests.
|
*/

const ace = require('@adonisjs/ace')

module.exports = (cli, runner) => {
  runner.before(async () => {
    /*
    |--------------------------------------------------------------------------
    | Start the server
    |--------------------------------------------------------------------------
    |
    | Starts the http server before running the tests. You can comment this
    | line, if http server is not required
    |
    */
    use('Adonis/Src/Server').listen(process.env.HOST, process.env.PORT)

    /*
    |--------------------------------------------------------------------------
    | Run migrations
    |--------------------------------------------------------------------------
    |
    | Migrate the database before starting the tests.
    |
    */
    await ace.call('migration:run')
  })

  runner.after(async () => {
    /*
    |--------------------------------------------------------------------------
    | Shutdown server
    |--------------------------------------------------------------------------
    |
    | Shutdown the HTTP server when all tests have been executed.
    |
    */
    use('Adonis/Src/Server').getInstance().close()

    /*
    |--------------------------------------------------------------------------
    | Rollback migrations
    |--------------------------------------------------------------------------
    |
    | Once all tests have been completed, we should reset the database to it's
    | original state
    |
    */
    await ace.call('migration:reset')
  })
}
Building the Application
We've successfully setup our installation and we must proceed with building our application now. We'll be following a series of steps to help us achieve our purpose.
Outlining Requirements
Our app serves the core purpose of helping users locate homes that are available and match their tastes. Our requirements are below:
A user should be able to specify the type of lodging they are interested in acquiring. This could be anything from penthouses to bungalows.
Provisions for filtering according to the number of rooms, bathrooms, kitchens, floors, square footage and cost.
Setting Up Our Database Tables
Based on the requirements we have above, we would need a homes table to contain all the data we'll be storing. We'll be using a sqlite database for our use. AdonisJS can help us create the required table(s) via migrations.
We'll be generating the home migrations through the CLI.
adonis make:migration home
A little dialog should come up on the CLI asking if we'd like to create or select a table. We'll go with the create table option. Open up the newly generated migration available at database/migrations and let's add some code. We'll be checking to see if this table is yet to be created before proceeding.
'use strict'

const Schema = use('Schema')

class HomesSchema extends Schema {
  up () {
    if (await this.hasTable('homes')) return;

    this.create('homes', (table) => {
      table.increments()
      table.string('title').notNullable().unique();
      table.text('description').nullable();
      table.string('photo').nullable().defaultTo('default.jpg');
      table.float('price').notNullable().defaultTo(0.00);
      table.text('locale').nullable();
      table.enu('type', ['duplex', 'bungalow', 'penthouse', 'detached']).defaultTo('duplex').nullable();
      table.integer('rooms').defaultTo(0);
      table.integer('bathrooms').defaultTo(0);
      table.integer('kitchens').defaultTo(0);
      table.integer('floors').defaultTo(0);
      table.float('sq_footage').defaultTo(0);
      table.timestamps()
    })
  }

  down () {
    this.drop('homes')
  }
}

module.exports = HomesSchema
We'll run our migration now. This will generate the homes table.
adonis migration:run
We've successfully set up our database. Let's create a quick AdonisJS Lucid ORM model for our homes table. Create Home.js in app/Models and add some code
'use strict'

const Model = use('Model')

class Home extends Model {}

module.exports = Home
Our First Feature Test
We have some features we'd like to add to our app. These are the features below:
- We'd like the administrator to be able to add a new home through the HTTP client.
- We'd also like the administrator to be able to edit info about a home.
- We also would like to be able to list and filter homes according to criteria.
Creating Our First Feature Test
AdonisJS comes fully equipped with test capabilities. We can generate a test through the CLI for our Home suite of tests. Make sure you choose to generate a functional test as we'll be attempting to test HTTP routes.
adonis make:test Home
home.spec.js should be available at the test/functional directory now.
Writing Our First Feature Test
Open up test/functional/home.spec.js and we are greeted with a default test that looks like this:
    'use strict'

    const { test } = use('Test/Suite')('Home')

    test('make sure 2 + 2 is 4', async ({ assert }) => {
      assert.equal(2 + 2, 4)
    })
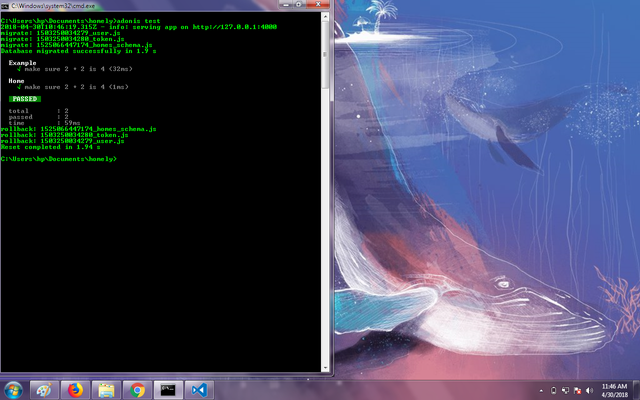
We can execute the default test by running
adonis test
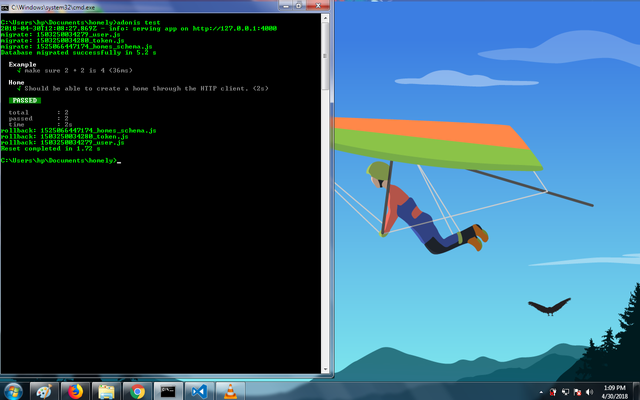
We get a result like the one below:
It's a great starting point for us, so we proceed further. For our first feature, we'd like the administrator to be able to add a new home through the HTTP client. Let's add that as the test description. Also, we'd like to use the Test/ApiClient to gain access to the client dependency.
'use strict'

const { test, trait } = use('Test/Suite')('Home')

trait('Test/ApiClient')

test('Should be able to create a home through the HTTP client.', async ({ assert, client }) => {

}).timeout(0)
We should add some data we'd like to pass to the API to help us create a new home in the database. We'll define this data inside the test closure.
 let data = {
    title: 'The Beech',
    description: `The Beech offers superb styling with clean lines and practicality throughout.
                  The ground floor boasts a kitchen / diner, and large living room the width of the house, with doors opening out into the enclosed garden. There is also a WC which completes the ground floor accommodation. On the first floor you will discover an impressive master bedroom with en-suite and two further well-proportioned bedrooms with a family bathroom and storage cupboards.
                  Outside, there is an enclosed rear garden and designated parking.`,
    photo: 'the-beech-002342482.jpg',
    price: 255000.00,
    type: 'penthouse',
    locale: 'Elburton',
    rooms: 3,
    bathrooms: 2,
    kitchens: 1,
    floors: 3,
    sq_footage: 188.65
  }
We have now clearly defined data for the home we'd like to add. We must now attempt to push this data as a payload to an API endpoint. We will assign any server responses to the response variable.
  const response = await client
                      .post('/api/v1/homes')
                      .send(data)
                      .end()
Lastly, we run our assertions. We now our home was created successfully if
- The server returns a 200 HTTP status code.
- The server response contains the data we sent to it.
Here are the assertions below.
  response.assertStatus(200)
  response.assertJSONSubset(data);
Our test code should look something like this now.
'use strict'

const { test, trait } = use('Test/Suite')('Home')

trait('Test/ApiClient')

test('Should be able to create a home through the HTTP client.', async ({ assert, client }) => {
  let data = {
    title: 'The Beech',
    description: `The Beech offers superb styling with clean lines and practicality throughout.
                  The ground floor boasts a kitchen / diner, and large living room the width of the house, with doors opening out into the enclosed garden. There is also a WC which completes the ground floor accommodation. On the first floor you will discover an impressive master bedroom with en-suite and two further well-proportioned bedrooms with a family bathroom and storage cupboards.
                  Outside, there is an enclosed rear garden and designated parking.`,
    photo: 'the-beech-002342482.jpg',
    price: 255000.00,
    type: 'penthouse',
    locale: 'Elburton',
    rooms: 3,
    bathrooms: 2,
    kitchens: 1,
    floors: 3,
    sq_footage: 188.65
  }

  const response = await client
                        .post('/api/v1/homes')
                        .send(data)
                        .end()

  response.assertStatus(200)

  response.assertJSONSubset(data);


}).timeout(0)
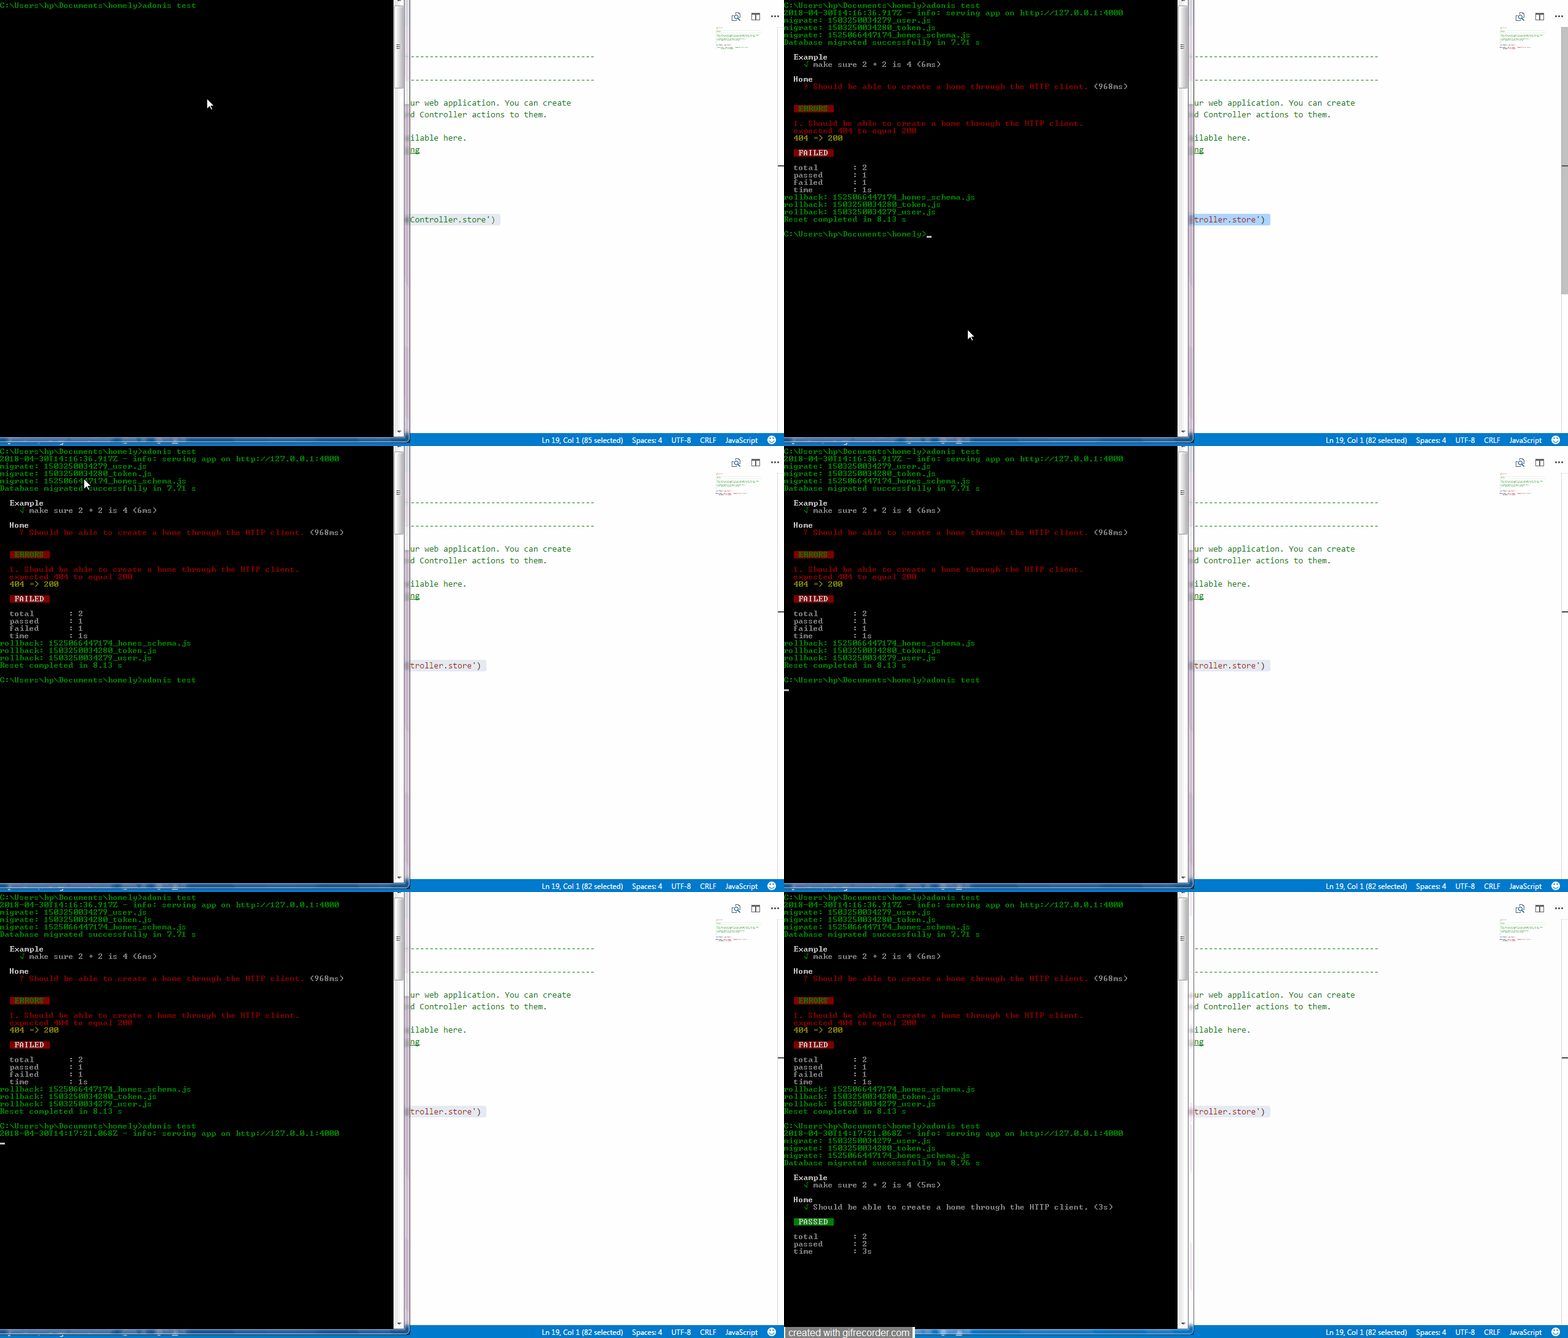
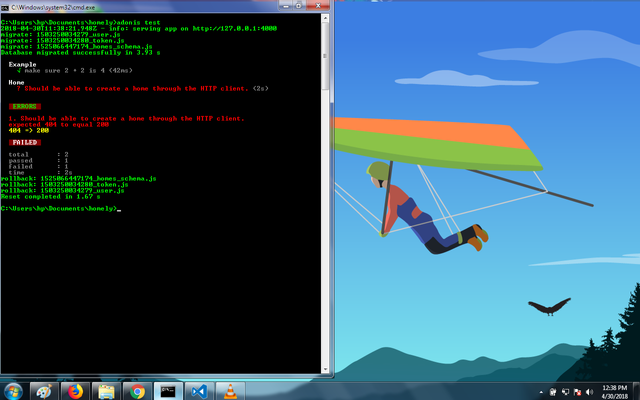
Running adonis test in the terminal, we should get a "red" failing test like the one below. This is expected, since we're yet to write code that helps us create homes.
Passing Our First Feature Test
Let's write code that passes our test. We'll edit the first route in the start/routes.js and write some code. We'll listen for POST requests to /api/v1/homes.
Route.post('/api/v1/homes', async ({ request }) => {})
Let's add some code in the route closure method. We'll be using the ES6 Object Spread proposal to set some block scoped variables. We're retrieving values from request.all()
  let {title,
        description,
        photo,
        price,
        type,
        locale,
        rooms,
        bathrooms,
        kitchens,
        floors,
        sq_footage
      } = request.all()
We now need to create a new Home (if none matching the provided data exists) using the data received. We then return the created home instance in JSON format.
  let home = await Home.findOrCreate({
    title,
    description,
    photo,
    price,
    type,
    locale,
    rooms,
    bathrooms,
    kitchens,
    floors,
    sq_footage
  })

  return home.toJSON()
Our feature code looks like this now
'use strict'
/*
|--------------------------------------------------------------------------
| Routes
|--------------------------------------------------------------------------
|
| Http routes are entry points to your web application. You can create
| routes for different URL's and bind Controller actions to them.
|
| A complete guide on routing is available here.
| http://adonisjs.com/docs/4.0/routing
|
*/

const Route = use('Route')
const Home = use('App/Models/Home')

Route.post('/api/v1/homes', async ({ request }) => {

  let {
        title,
        description,
        photo,
        price,
        type,
        locale,
        rooms,
        bathrooms,
        kitchens,
        floors,
        sq_footage
      } = request.all()

  let home = await Home.findOrCreate({
    title,
    description,
    photo,
    price,
    type,
    locale,
    rooms,
    bathrooms,
    kitchens,
    floors,
    sq_footage
  })

  return home.toJSON()
})
Let's save, jump back into the terminal and run our test
adonis test
Congratulations, our red test turns green! We have completed the first phase of TDD.
Refactoring Our First Feature
While our test passes successfully, we are not done. We failed to run validation on the data we're passing to the database. We also should have this code in a controller ideally not in a route file.
Let's install the @adonisjs/validator package
adonis install @adonisjs/validator
We'll add its provider to start/app.js .
    const providers = [
      '@adonisjs/validator/providers/ValidatorProvider'
    ]
We'll update our route to look like this. We're also performing route based validation here.
    Route.post('/api/v1/homes', 'HomeController.store')
                .validator('StoreHome')
Let's generate a HomeController.js file. Choose the http controller type when prompted.
adonis make:controller Home
We'll move our code from the closure to the store method of the HomeController.js file.
'use strict'

class HomeController {

    async store () {
        let {
            title,
            description,
            photo,
            price,
            type,
            locale,
            rooms,
            bathrooms,
            kitchens,
            floors,
            sq_footage
        } = request.all()

        let home = await Home.findOrCreate({
            title,
            description,
            photo,
            price,
            type,
            locale,
            rooms,
            bathrooms,
            kitchens,
            floors,
            sq_footage
        })

      return home.toJSON()
    }

}

module.exports = HomeController
We'll also setup validation by setting up some validation rules. Let's create the StoreHome validator class.
adonis make:validator StoreHome
We'll open up the class and add some rules.
'use strict'

class StoreHome {
  get rules () {
    return {
      title: 'required|string|min:5',
      description: 'string',
      photo: 'string',
      price: 'number',
      rooms: 'number',
      kitchens: 'number',
      sq_footage: 'number',
    }
  }
}

module.exports = StoreHome
We're done with our refactor. We must run our test again to make sure everything is OK. Our test returns a green so we are successful.
Conclusion
Test Driven Development is both fun and easy. We've tackled a feature together using TDD and we've successfully scaled the task. From here on, the possibilities are endless.
You can attain mastery of TDD by practice. For fun, try to build both remaining features with a TDD approach. Got any questions or comments? Feel free to hit reply!
You can clone the repository containing code to this tutorial from here.
Resources
Posted on Utopian.io - Rewarding Open Source Contributors
Hey @creatrixity
We're already looking forward to your next contribution!
Decentralised Rewards
Share your expertise and knowledge by rating contributions made by others on Utopian.io to help us reward the best contributions together.
Utopian Witness!
Vote for Utopian Witness! We are made of developers, system administrators, entrepreneurs, artists, content creators, thinkers. We embrace every nationality, mindset and belief.
Want to chat? Join us on Discord https://discord.me/utopian-io
Thank you for your contribution, it has been accepted
Need help? Write a ticket on https://support.utopian.io.
Chat with us on Discord.
[utopian-moderator]