Bootstrap Clear Fix, Show & Hidden, Text Hidden Commands
What Will I Learn?
- CLEAR FIX COMMAND
- SHOW & HIDDEN COMMAND
- TEXT HIDDEN COMAND
- RESPONSIVE SENSITIVE VIDEO BOX
- WELL ELEMENT
Requirements
- Notepad++
Difficulty
- Intermediate
CLEAR FIX COMMAND
An other code command is "Clearfix" with this command you can do "Fix" by easily after to Float.
You can see nessecary code to do this stage below:
<div class="clearfix">Hello World</div>
SHOW & HIDDEN COMMAND
These two code you can hide element and show element when you want.
You can see a example to use code below:
<div class="show">
    <p class="lead">Show</p>
</div>

<div class="hidden">
    <p class="lead">Hidden</p>
</div>
This stage we just make a "div" tag and used term on the header. But important detail is when you use this code the "div" element will not keep location so if there has a hidden element the element will be move on hidden element.
with this code we will see result as bellow:

As in the picture you can see div tag is in the show element than div tag reflected on screen p tag area, with this we used "lead" class when we learn in "p" tag. And now let we learn this how to do with code.
Necessary code are seems to be below:
<div class="show">
    <p class="lead">1. Showing Elements</p>
</div>

<div class="hidden">
    <p class="lead">Hidden Elements</p>
</div>

<div class="show">
    <p class="lead">2. Showing Elements</p>
</div>
As you can see with "div" tag we apply hidden process in this way we did hidden because lost te element location. This step working like if under element is not hiddent this element, move to which element are not hidden. But if element after changed by hidden , positioning gonna be normal.
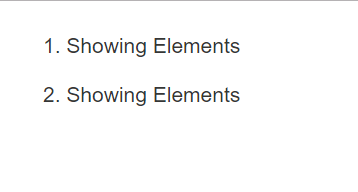
With this code we will see result as bellow:

As we can see first and last "div" tag is came succes. If we do all "div" tag "show" class
With this code we will see result as bellow:
<div class="show">
    <p class="lead">1. Showing Elements</p>
</div>

<div class="show">
    <p class="lead">2. Showing Elements</p>
</div>

<div class="show">
    <p class="lead">3. Showing Elements</p>
</div>
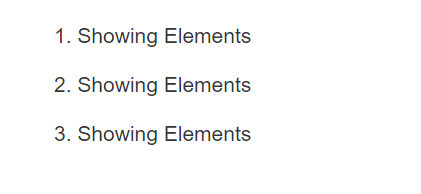
As we can see we gave all class "show" feature.
With this code we will see result as bellow:

As we can see we print on screen 3 feature with lead stlye.
To make this code we used code on below:
.show
{
    display: block !important;
}
.hidden
{
    display: none !important;
    visibility: hidden !important;
}
.invisible
{
    visibility: hidden;
}
.element
{
    .show();
}
.another-element
{
    .hidden();
}
TEXT HIDDEN COMAND
This code to be understand on header so we use this code to hidden text element.
When we use this code element it take up space even if we hidden. this code does not has not feature like "Show & Hidden" element to not take up space. Just we gonna hide element for visible.
For example to use code on bellow:
<h1 class="text-hide">H Tag</h1>
<p class="text-hide">P Tag</p>
<p class="lead">2. P Tag</p>
As we can see we use code on text element "p" and "h" tag.
To use this feature we just used "test-hide" class.
RESPONSIVE SENSITIVE VIDEO BOX
Under this header we going to learn, how to add in system sensitive to desing responsive video box .
When we add video box, we have two primary add video box stlye
one of them 4:3 resolution , one of other is 16:9 resolution.
My advice is use 16:9 resolution because on this moument people are using mostly 16:9 resolution. And it makes this option more popular
Example to use this necassary code on bellow:
<div class="embed-responsive embed-responsive-16by9">
    <iframe width="560" height="315" src="//www.youtube.com/embed/5NV6Rdv1a3I" frameborder="0" allowfullscreen></iframe>
</div>
(html comment removed:  4:3 Resolution )
<div class="embed-responsive embed-responsive-4by3">
    <iframe width="560" height="315" src="//www.youtube.com/embed/5NV6Rdv1a3I" frameborder="0" allowfullscreen></iframe>
</div>
As we can see highlight part we setting resolution, with use 9:3 and 16:9 resolutions. To take example video by directly YouTube.
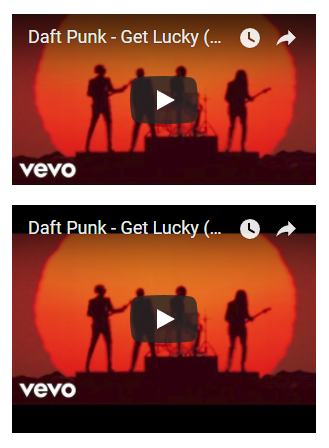
Video box will be like on bellow:

As we can see of picture up side we use 16:9 resolution and down side we use 4:3 resolution.If you look picture carifully you can se wich different between them. Down part video box is longer than up side.
WELL ELEMENT
Under this header we going to see "Well" element well element is actualy a panel
Previously lessons we saw panels, well element is working by same logic and pretty basic to use. To use well we will use div tag.
When we use well we should use sizing code in this way we can make ideal box for our desing.
Example to use this necassary code on bellow:
<div class="well well-sm">well-sm</div>
<div class="well well-lg">well-lg</div>
<div class="well well-xs">well-xs</div>
As you can see highlighted part we use sizing code, which we learn previous lesson. with this sizing code we can do directly sizing operations by html code, without do extra sizing process
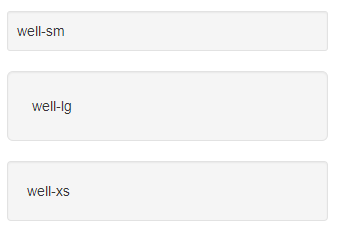
with this code we will see result as bellow:

As you can see, we created different size of result by these code.
Also bootstrap is working in stable with mobile device, we can see picture on bellow
view look good even if when resolution is reduced.
As you can see, it is working on mobile devices stabil. Already Bootstrap element are working maximum stability and fast on all platform and all devices.
Posted on Utopian.io - Rewarding Open Source Contributors
Thank you for the contribution. It has been approved.
You can contact us on Discord.
[utopian-moderator]
Hey @codings I am @utopian-io. I have just upvoted you!
Achievements
Suggestions
Get Noticed!
Community-Driven Witness!
I am the first and only Steem Community-Driven Witness. Participate on Discord. Lets GROW TOGETHER!
Up-vote this comment to grow my power and help Open Source contributions like this one. Want to chat? Join me on Discord https://discord.gg/Pc8HG9x