Learning 3D Graphics With Three.js | Procedural Geometry
What Will I Learn?
- You will learn how to make your own custom procedural geometry in three.js
- You will learn how to leverage procedural geometry to make appealing low-poly terrain
Requirements
- Basic familiarity with structure of three.js applications
- Basic programming knowledge
- Basic knowledge of 3d geometry (vertices, uvs, normals, etc.)
- Any machine with a webgl compatible web browser
- Knowledge on how to run javascript code (either locally or using something like a jsfiddle)
Difficulty
- Basic
Make Your Own Geometry
If you read my previous tutorial you would have seen that three.js provides many different built in basic types of geometries, add that to the fact that you can import your own 3D models into three.js easily and why would you ever need to make your own geometry? Well, one answer is for fun of course! And if you ask me that's the only answer you need. But, for the more pragmatic reader, it is also beneficial to generate your own geometry if you want to build geometry that is unique every time your program is run. Or if the geometry needs to fit certain constraints that you do not know in advance and that make it ill-suited for storage.
To begin we start with a base Geometry instance. In the previous tutorial we looked at many different types of geometries such as SphereGeometry and CylinderGeometry, but for our purposes here we want a plain, empty Geometry object.
var geometry = new THREE.Geometry();
var material = new THREE.MeshBasicMaterial();
var mesh = new THREE.Mesh(geometry, material);
scene.add(mesh);
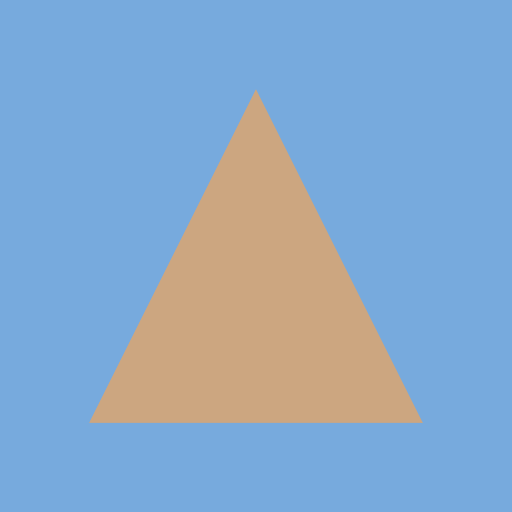
Now, we get started making the actual geometry. Three.js needs two things at a minimum to use Geometry. First it needs vertices, as you know 3D graphics are drawn by rasterizing triangles. So we need at least one triangle minimum to draw something (This isn't strictly true, but for our purposes it is a fair assumption). We need to give the Geometry at least 3 vertices which are stored by three.js as Vector3's. So we need 3 points in 3D space. And then second, we need to tell three.js how to connect those points together using a Face3. A Face3 takes 3 Vector3's and connects them together to draw a triangle. Let's take a look at that now. To start let's define a simple triangle.
geometry.vertices.push(new THREE.Vector3( 1, -1, 0));
geometry.vertices.push(new THREE.Vector3( 0,  1, 0));
geometry.vertices.push(new THREE.Vector3(-1, -1, 0));

geometry.faces.push(new THREE.Face3(0, 1, 2));
Notice how easy it is to directly access the vertex array and the face array? This is the benefit of the Geometry class in three.js. If we used a BufferGeometry this would be much more complicated. But the BufferGeometry is slightly faster, so you face a tradeoff.
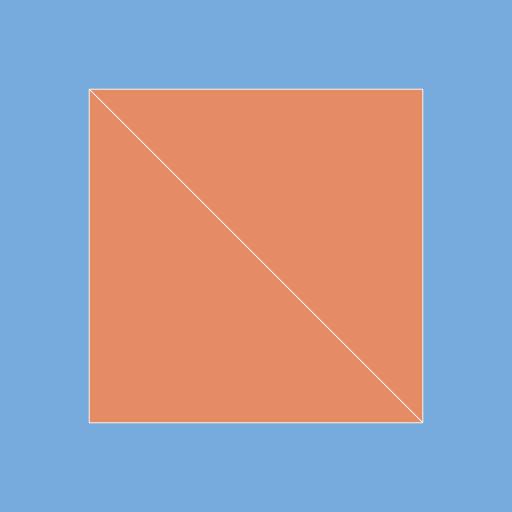
A few other points before we move on. Notice how our face takes three integers. Those are the array indices of each of our three vertices. The order that we define them in matters. There is nothing wrong with referencing the same vertex in multiple faces. In fact, this allows us to reuse some vertices and save some space. Let's look at how that works now.
geometry.vertices.push(new THREE.Vector3( 1, -1, 0));
geometry.vertices.push(new THREE.Vector3(-1,  1, 0));
geometry.vertices.push(new THREE.Vector3(-1, -1, 0));
geometry.vertices.push(new THREE.Vector3( 1,  1, 0));

geometry.faces.push(new THREE.Face3(0, 1, 2));
geometry.faces.push(new THREE.Face3(0, 3, 1));
As you can see here we have now defined two triangles but have only added a single vertex. This is a great way to define objects without taking up much extra space in the vertex array.
This is the basic way to create custom geometry in three.js we can extend this in any way we want. You can add vertices and faces using any method you can devise. But there are a few more considerations that are useful. To fully utilize the features of three.js we want our geometry to have normals, vertex colors, and uvs.
Normals
Normals are the easiest property for us to add. Once we have defined a vertex array we can get three.js to calculate our normals for us by calling computeVertexNormals or computeFlatNormals. Let's look at both:
geometry.computeVertexNormals();
geometry.normalsNeedUpdate = true;
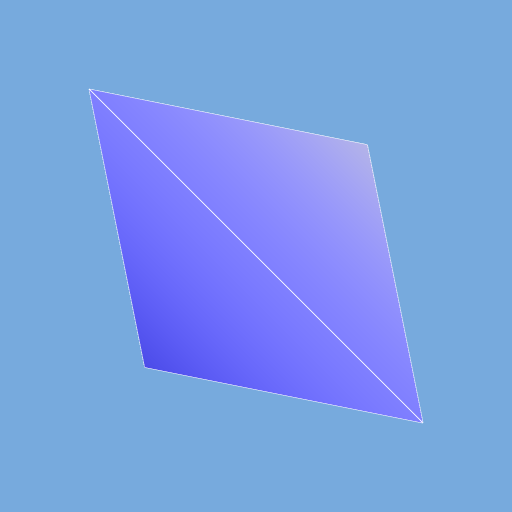
Vertex normals compute a per-vertex normal that is interpolated across the face of the triangle. Vertex normals are what you typically use for high fidelity looking models. This is because the interpolation makes the normal look like it changes across the face of the triangle, which allows you to calculate more accurate lighting across the face of the triangle.
geometry.computeFaceNormals();
geometry.normalsNeedUpdate = true;
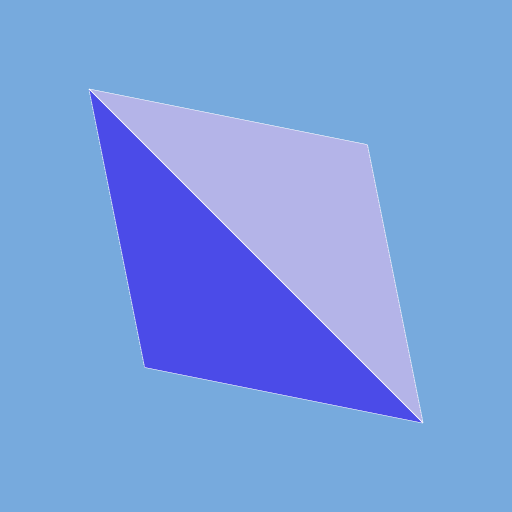
For Face normals the normal stays the same for the entire triangle. When you calculate lighting you will be able to see the triangles themselves very distinctly. Face normals are nice when you make a specific stylistic choice to show off the triangle itself.
Both are easy to call. To illustrate the difference let’s bend our quad a bit so the triangles are facing in different directions like so:
geometry.vertices.push(new THREE.Vector3( 1, -1, 0));
geometry.vertices.push(new THREE.Vector3(-1,  1, 0));
geometry.vertices.push(new THREE.Vector3(-1, -1, -1));
geometry.vertices.push(new THREE.Vector3( 1,  1, -1));

geometry.faces.push(new THREE.Face3(0, 1, 2));
geometry.faces.push(new THREE.Face3(0, 3, 1));
One more thing. Let’s change our material to a MeshNormalMaterial so that we can illustrate what our normals look like.
Now we can see that when we use vertex normals it looks like so:
Notice how the far corners are different colors while the two middle vertices have the same color?
Now let's look at the bent quad with face normals:
Each triangle stands out and has a different color.
Uvs
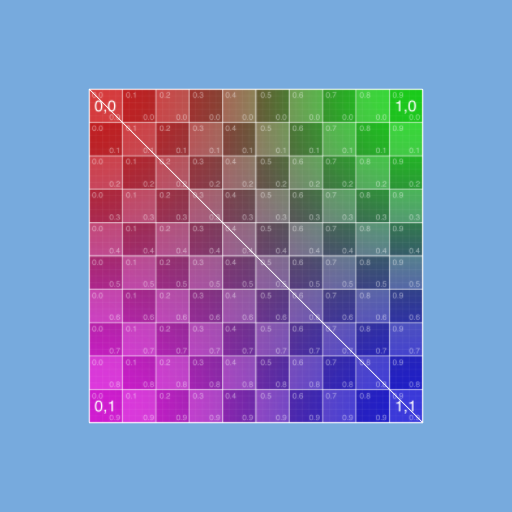
Closely tied to normals are uvs. Uvs are used when mapping a 2D texture to a 3D object. Unfortunately, three.js won't calculate uvs for us given a vertex array. So we need to build a uv array alongside our vertex array while we are building our geometry.
The uv array in three.js is accessed under the faceVertexUvs property in Geometry. faceVertexUvs is an array of array of uv arrays. Which are in turn arrays equal in length to the faces array, containing three uvs, one for each vertex in the corresponding face. Now that sounds very complicated but in practice it is very simple. We define our vertices as normal and then when we define our faces we do one extra step.
geometry.faces.push(new THREE.Face3(0, 1, 2));
var uvs1 = [new THREE.Vector2(1, 0), new THREE.Vector2(0, 1), new THREE.Vector2(0, 0)];
geometry.faceVertexUvs[0].push(uvs1); //remember faceVertexUvs is an array of arrays
geometry.faces.push(new THREE.Face3(0, 3, 1));
var uvs2 = [new THREE.Vector2(1, 0), new THREE.Vector2(1, 1), new THREE.Vector2(0, 1)];
geometry.faceVertexUvs[0].push(uvs2);
Doing this allows us to texture our Geometry we can apply a texture easily in three.js we just add a Texture to our map property in our material.
var material = new THREE.MeshBasicMaterial({map: texture});
And we get a texture by loading one up from the disk (Although we could also just create our own, but that is much too advanced for this tutorial).
var texture = new THREE.TextureLoader().load('uv_texture.jpg');
And what we get is:
Vertex Colors
One last common property of geometry is vertex colors. Sometimes we don't want to use a texture or a complicated shader. Sometimes we want to store the color of a vertex in advance and have our material simply read from that. Luckily three.js provides us with an easy way to provide vertex colors in advance.
We can set these in two ways. The first is to pass a single Color into our Face3 definition and thus provide a single color for the whole triangle. Or we can pass in an array of colors so that each vertex has its own color that is interpolated across the face.
//Face3 takes three vertex indices, a normal and then a color
//We aren't worried about normals right now so we pass null in instead
geometry.faces.push(new THREE.Face3(0, 1, 2, null, new THREE.Color(0.9, 0.7, 0.75)));
geometry.faces.push(new THREE.Face3(0, 3, 1, null, new THREE.Color(0.6, 0.85, 0.7)));
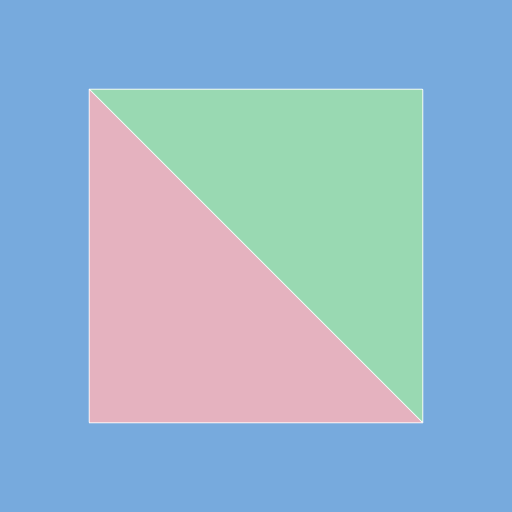
As you can see each triangle has its own color. Now if we want each vertex to have its own color we just create a array of three colors and pass that in instead of the single Color.
var colors = [new THREE.Color(1, 0, 0), new THREE.Color(0, 1, 0), new THREE.Color(0, 0, 1)];
geometry.faces.push(new THREE.Face3(0, 1, 2, null, colors));
geometry.faces.push(new THREE.Face3(0, 3, 1, null, colors));
Note, you can use a distinct array for each face, I just chose not to.
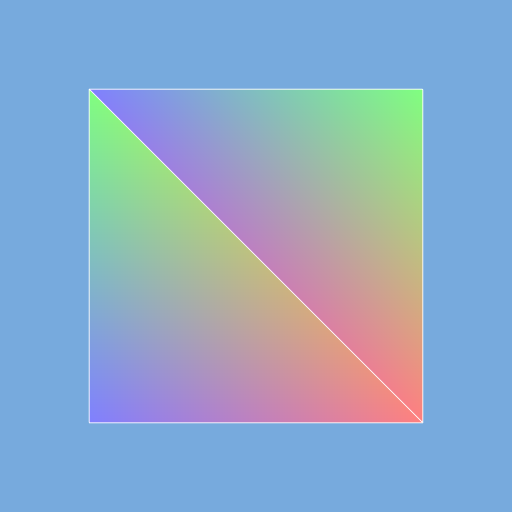
You can see that the colors are blended across the face of the vertex. This becomes especially useful if you want to transition colors smoothly on a simple object.
Low-Poly Terrain
To make use of everything we have learned above we will be writing a small script to generate an irregular plane that is offset by perlin noise resulting in some nice Low-Poly style terrain.
One of the added benefits of making your own Geometry not mentioned above is that you only need to deal with the amount of data that you absolutely need. If your Geometry doesn't need normals, don't waste time calculating them. If you don't want to add a texture, then don't waste space on uvs.
We are going to draw a small patch of Low-Poly style terrain so we won't need uvs, or vertex colors, we will just be using per face normals and a single color passed into the material.
Making Our Own Plane
It seems like a waste to make our own plane when three.js provides such an easy way to do it. But our plane is going to have one significant difference. We are not going to spread our points uniformly. Typically a plane is defined by a grid of points, as it is in three.js. But we are going to spread our points out a bit so that when we turn our plane into a terrain it doesn't look locked into a grid.
First things first, let's get a plane drawing. We will start with a regular grid-style plane and then move to something different as we progress. You've already seen how to define a single quad. Now we will extend that to something bigger. After all a plane is just a bunch of quads lined up together. let's start with a block of code and then we'll pick it apart.
makeTile = function(size, res) {
  geometry = new THREE.Geometry();
  for (var i = 0; i <= res; i++) {
    for (var j = 0; j <= res; j++) {
      var z = j * size;
      var x = i * size;
      var position = new THREE.Vector3(x, 0, z);
      var addFace = (i > 0) && (j > 0);
      this.makeQuad(geometry, position, addFace, res + 1);
    }
  }
  geometry.computeFaceNormals();
  geometry.normalsNeedUpdate = true;

  return geometry;
};
The function makeTile takes two parameters size and res. size defines the size of each quad building our plane and res defines how many quads wide our plane will be. Easy enough. We then have a nested loop where we count for 0 to res in two dimensions. Easy enough, you can see the start of a grid forming now.
Its inside the loop where the magic happens. We set the variables x and z to our vertex positions, which we calculate by multiplying the quads position i, j by the size of the quad. We save that into a Vector3.
But what about addFace. That is actually a clever little trick. You see, our first line of vertices isn't enough to form quads from. So on the edges of our plane we tell our script not to form triangles, but once we are in the second row we can start combining vertices to form quads and triangles.
Then we call makeQuad and pass it in all the information we have calculated in this loop. Easy! One more thing, once we complete the loop we tell three.js to calculate normals for us. And then we return our new geometry object to be used in the main part of our program. Great! Let's now look at the makeQuad function.
makeQuad = function(geometry, position, addFace, verts) {
  geometry.vertices.push(position);

  if (addFace) {
    var index1 = geometry.vertices.length - 1;
    var index2 = index1 - 1;
    var index3 = index1 - verts;
    var index4 = index1 - verts - 1;

    geometry.faces.push(new THREE.Face3(index2, index3, index1));
    geometry.faces.push(new THREE.Face3(index2, index4, index3));
  }
};
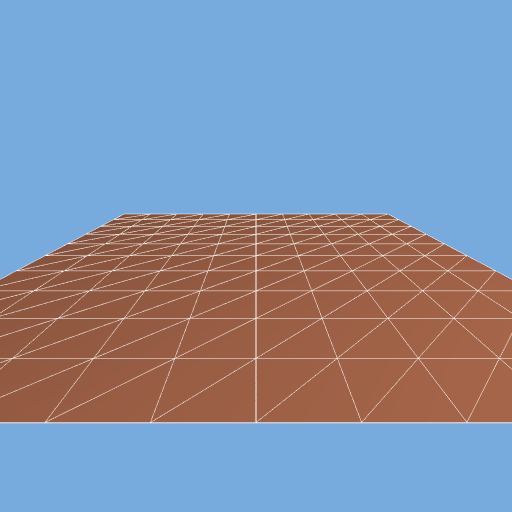
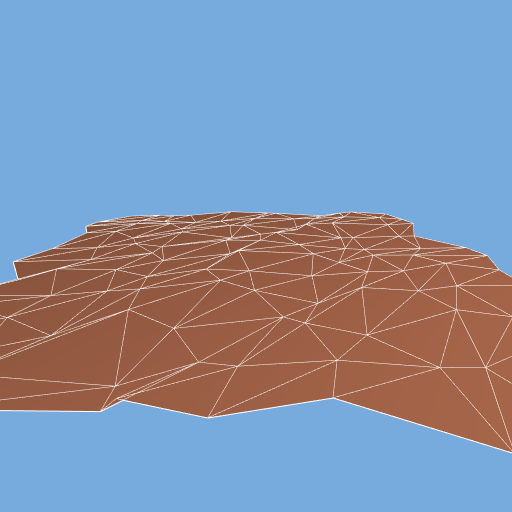
Okay, first off we add the vertex to our vertex array. That is easy enough to follow. If addFace is false then we stop. Otherwise we calculate the positions of the surrounding vertices and form up two faces just as we did above. Only now we have to calculate the index positions. And that's all there is to it! Using these two functions you should end up with something like this:
To make things interesting we are going to add some noise to the vertices to change up the height a bit. If you need a refresher on using noise in javascript check out this tutorial.
var position = new THREE.Vector3(x, noise.perlin2(x, z)*size, z);
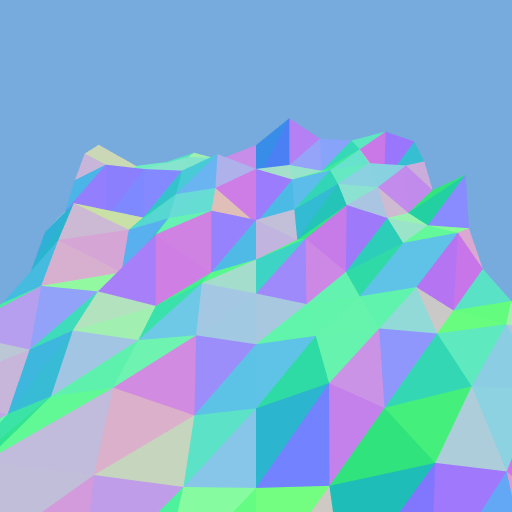
I am multiplying the noise by size so that it scales well with the size of your plane. If you use a MeshNormalMaterial your plane will now look like this:
It's a little boring actually. And you can see that it is just a grid that's had its vertices pushed up and down. Let's make it a little more interesting by breaking up the vertex positions more. We will do that by randomly offsetting the x and z positions using a call to Math.random.
var z = j * size + (Math.random() - 0.5) * size;
var x = i * size + (Math.random() - 0.5) * size;
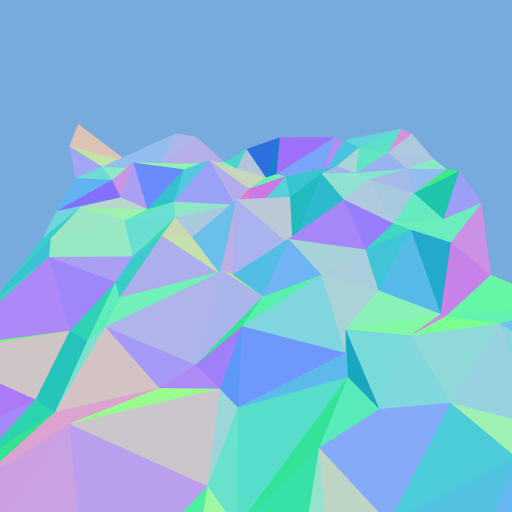
Now if you reset your height back to 0 you can see how varied your triangles become.
And if you add in the height again.
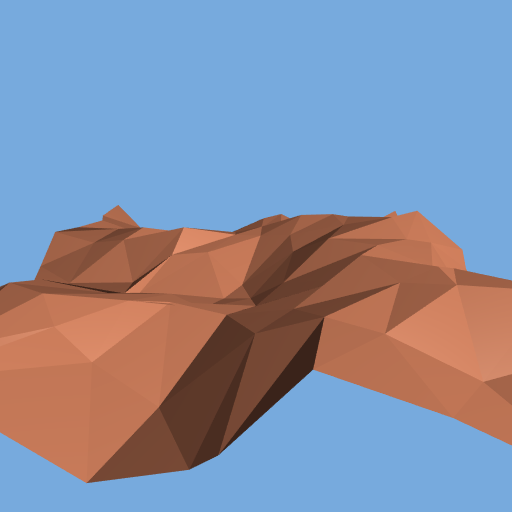
That's all you need to do to create your own little terrains! Try playing around with different settings, in particular try making the quads very small and the resolution large. Then try mixing up the noise a bit by multiplying x and z by different sized numbers to scale your noise. You should be able to create all different types of Low-Poly terrain. For a sample, here is the above code rendered using a MeshPhongMaterial.
Summary
There's a lot of stuff above, I know. Procedural geometry is a very deep topic. But now you have the tools to start exploring it more in three.js! Hopefully you have learned:
- How to use three.js's
Geometryclass to make your own custom geometry including: - How to define your own uvs,
- How to define your own vertex colors,
- And how to use three.js to calculate your normals for you
- How to automate the creation of a jittered plane
Curriculum
Posted on Utopian.io - Rewarding Open Source Contributors
Thank you for the contribution. It has been approved.
You can contact us on Discord.
[utopian-moderator]
Hey @yandot, I just gave you a tip for your hard work on moderation. Upvote this comment to support the utopian moderators and increase your future rewards!
Hey @clayjohn I am @utopian-io. I have just upvoted you!
Achievements
Community-Driven Witness!
I am the first and only Steem Community-Driven Witness. Participate on Discord. Lets GROW TOGETHER!
Up-vote this comment to grow my power and help Open Source contributions like this one. Want to chat? Join me on Discord https://discord.gg/Pc8HG9x