How to Change the Head part of Human Photo with another Photo using GIMP | GIMP TUTORIAL
Hello dear Steemians, today I will teach you about "How to Change the Head part of Human photo" using GIMP software. This is an easy tutorial and newbie friendly.
GIMP (GNU Image Manipulation Program) is a free and open-source raster graphics editor used for image retouching and editing, free-form drawing, converting between different image formats, and more specialized tasks
Before we start, you need to prepare your GIMP software. If you don't have it, you can download it in their official site
Download GIMP Official
After you Open your GIMP Software, Follow the instruction below.
How to Change the Head part of Human photo
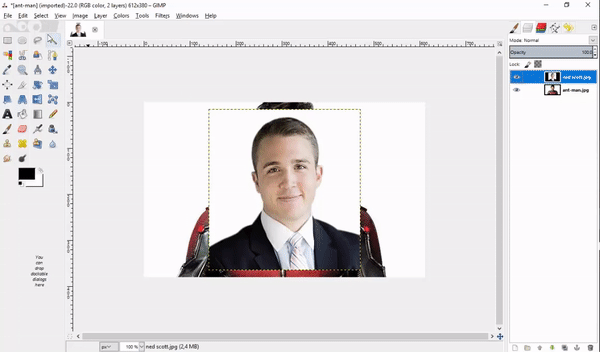
First of all, Put 2 photos that you want to edit into GIMP software by clicking File > Open as Layers , Next do the same for the 2nd photo by clicking File > Open as Layers (I use Ant Mant and Ned Scott photos that I take from Google Images with a fair to use license).
I will use Ant Man photo as the body part and Ned Scott photo as the head part (You can use any photos you want and choose the part as you like). After that in the Ned Scott layer, click the Free Select Tool on the left or by using Tools > Selection Tools > Free Select and do the selection on the head part clearly.
Next, in the selection part Right Click > Edit > Copy and then Right Click again then Edit > Paste as > New Layer.
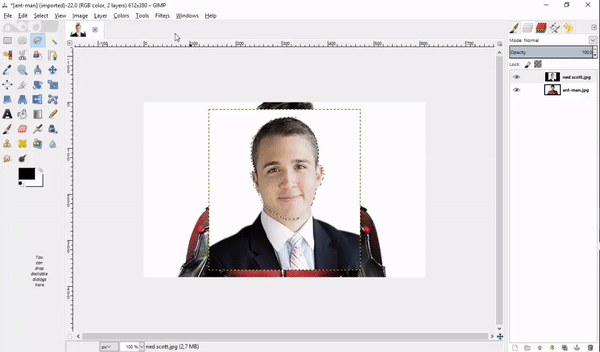
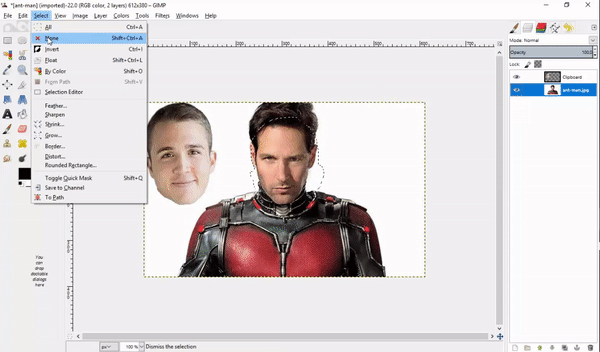
After you finish to separate the head part, click on Select > None to erase the selecting part. Then Delete the Ned Scott layer by Right Click on the layer then Delete Layer.

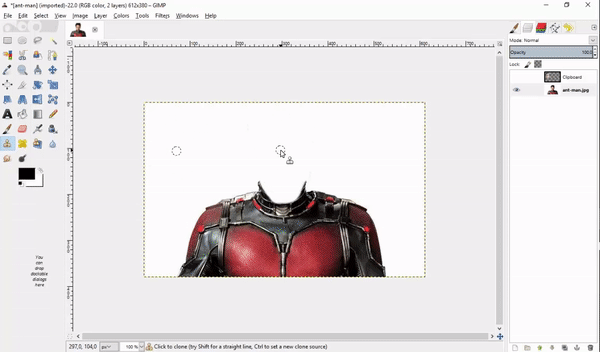
Next, Make the head part invisible by clicking the eye symbol on the left side of Ned Scott layer. Then we need to erase the Ant Man head from the layer, by clicking the Clone Tool one the left side or click Tools > Paint Tools > Clone. To use the Clone Tool you need to hold Ctrl and then Left Click on the white background layer. After that release the Ctrl and start erasing the Ant Man head by Left Click then hold it and just move your cursor to completely erase the head (you need to do it as clean as you can).
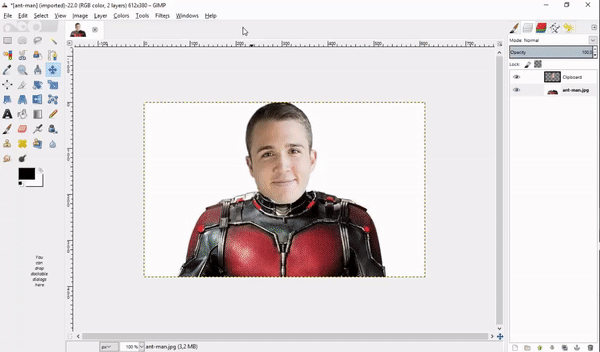
After you finish erasing the Ant Man head, click on the eye symbol on the left layer to make Ned Scott head visible. Then use Move Tool on the left side or click Tools > Transform Tool > Move and move the head exactly to the Ant Man body and fix the position.
The Final part, You need to change the brightness of the head to match the body by clicking Colors > Brightness/Contrast Tool and set the Brightness and Contrast number as you want (you can follow my number).
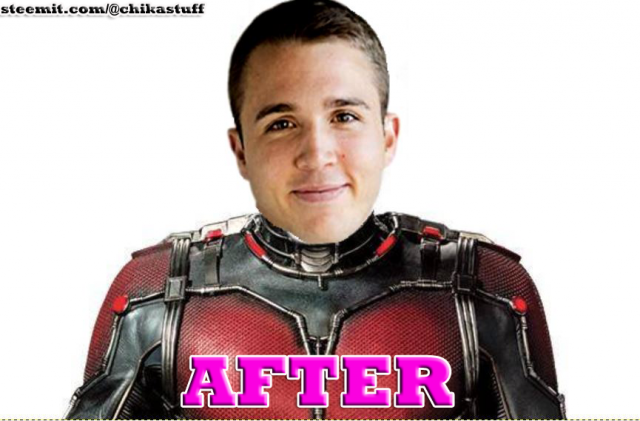
Final Result

Thank You and See you Next time!!!
Posted on Utopian.io - Rewarding Open Source Contributors
Thank you for the contribution. It has been approved.
You can contact us on Discord.
[utopian-moderator]
Hey @chikastuff I am @utopian-io. I have just upvoted you!
Achievements
Suggestions
Get Noticed!
Community-Driven Witness!
I am the first and only Steem Community-Driven Witness. Participate on Discord. Lets GROW TOGETHER!
Up-vote this comment to grow my power and help Open Source contributions like this one. Want to chat? Join me on Discord https://discord.gg/Pc8HG9x