Test esp8266 by AT command
Before reading:
I write it on my PC typora ,but the passage may go wrong when I copy the passage to Utopian post editor.So I upload to the Github. If the article layout make you dazzled please read on the below url.Thanks.
1.Necessary hardware
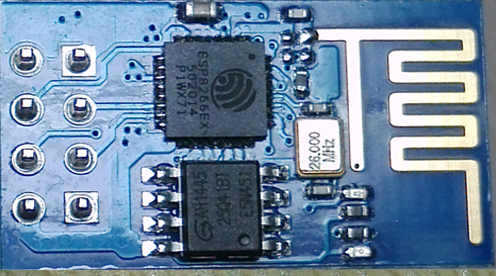
ESP8266 -01 module
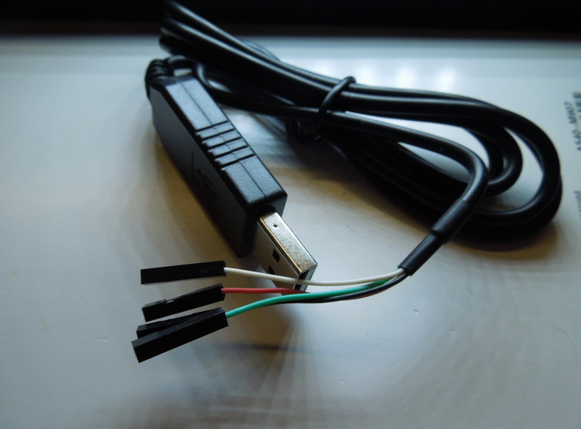
USB -TTL transfer tool
3.3V power


2.Necessary software
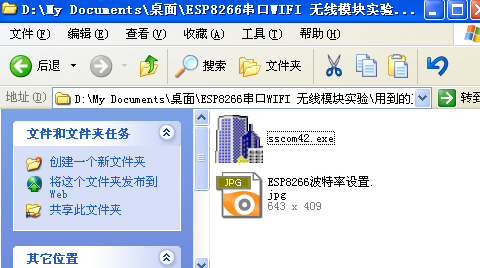
Network debug assistant "Netassist.com"
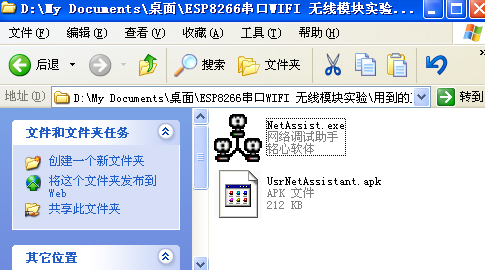
Serial port debug tool "sscom42.com"


3.Connection
ESP8266 PIN instrution

Connect ESP8266 to USB-TLL tool
ESP8266-01 USB-TTL tool UTXD RX URXD TX 3.3V 3.3V CH_PD 3.3V GND GND Computer properties setting
Right click "My computer" then click "properties" ,choose "hardware" tab ,and find " Device manager",select "COM and LPT" and you will see the number of USB-To-Serial Comm Port. Remember it!(Like the picture below,My port is COM6)


Debug
run the serial port debug tool "sscom42.com".Set the rate(波特率) as 115200 (New version of ESP8266 may be selected as 9600 )as well as the port as COM6.And remember click to select "send new line"(发送新行).Do as the picture marked below.
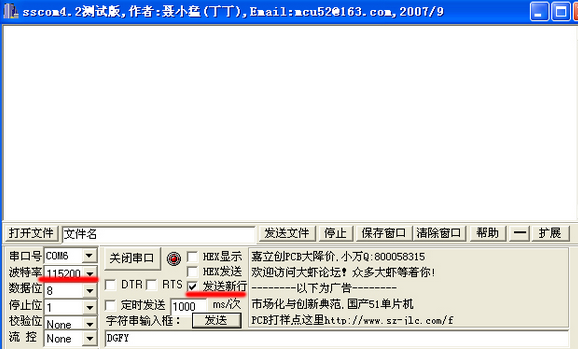
Then click "OPEN the buffer"(打开串口),and you will see some messy code,which is about the company information.You also can ignore it by click "Clearing"(清除).
Send AT commands to debug the ESP8266
Frequently-used AT commands are listed below
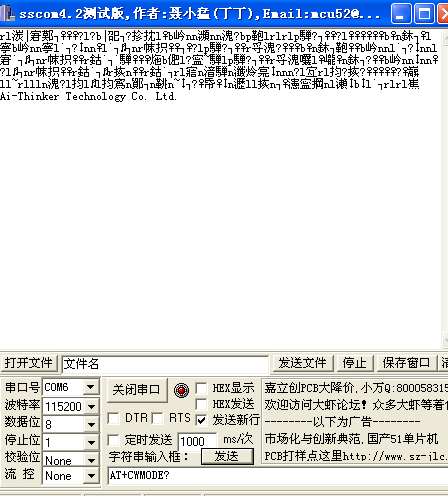
AT command Explain AT+RST restart module AT+CWMODE=3 set the mode AT+CWJAP="SSID Name","Password" connect to the WIFI SSID AT+CIFSR check up IP AT+CIPSTART="TCP","192.168.1.100",8080 connect to TCP server AT+CIPSEND=4 set the length of message AT command :
restart the module.
AT+RST
Receive :
OK

ets Jan  8 2013,rst cause:4, boot mode3,6)

wdt reset
load 0x40100000, len 816, room 16
tail 0
chksum 0x8d
load 0x3ffe8000, len 788, room 8
tail 12
chksum 0xcf
ho 0 tail 12 room 4
load 0x3ffe8314, len 288, room 12
tail 4
chksum 0xcf
csum 0xcf

2nd boot version : 1.2
  SPI Speed      : 40MHz
  SPI Mode       : QIO
  SPI Flash Size : 4Mbit
jump to run user1

Ai-ThinkerTechnology Co. Ltd.

Invalid
AT command:
set the mode of ESP8266 as "softAP + station",which can let ESP8266 generate the AP and at the same time connect to WIFI Station.
The picture below shows the AP which ESP8266 has generated.
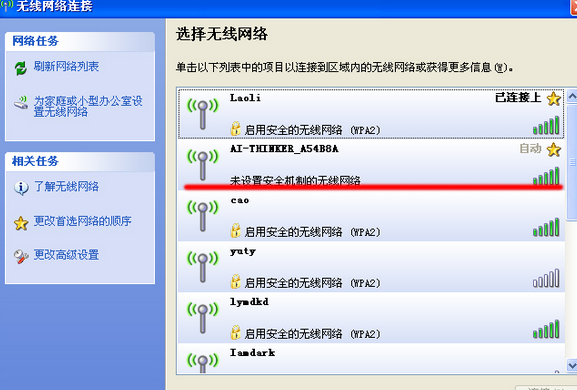
AT+CWMODE=3
Receive:
AT+CWMODE=3
OK
AT command:
While ESP8266 is on "Station" mode,you can send the AT command below to connect to the existing WIFI .(My wifi name is 'Laoli',and the password is 'lrh13888'. so I modify the AT command as below)
AT+CWJAP="Laoli","lrh13888"
Receive:
AT+CWJAP="Laoli","lrh13888"
OK
AT command:
After conected to the WIFI , sending this AT command can get the IP.
AT+CIFSR
Receive:
AT+CIFSR
+CIFSR:APIP,"192.168.4.1"
+CIFSR:APMAC,"1a:fe:34:fa:b8:25"
+CIFSR:STAIP,"192.168.1.107"
+CIFSR:STAMAC,"18:fe:34:fa:b8:25"

OK
AT command:
Firtstly set up the TCP server by using network debug assistant "Netassist.com"
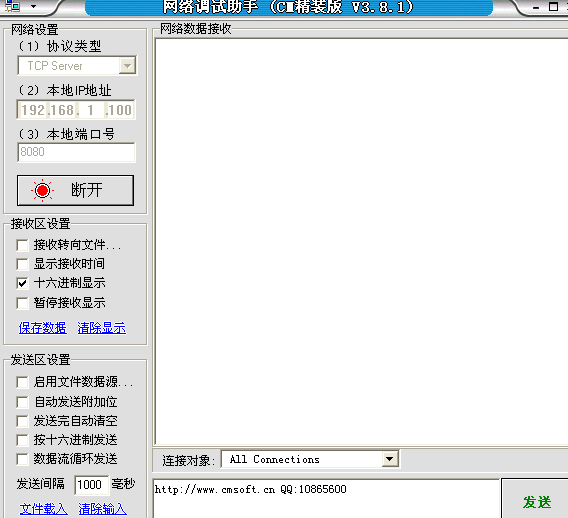
After the TCP server successfully setting , sending this AT command can connect to the server.Remember to input the correct IP and port.
AT+CIPSTART="TCP","192.168.1.100",8080
Receive:
AT+CIPSTART="TCP","192.168.1.100",8080
CONNECT
OK
AT command:
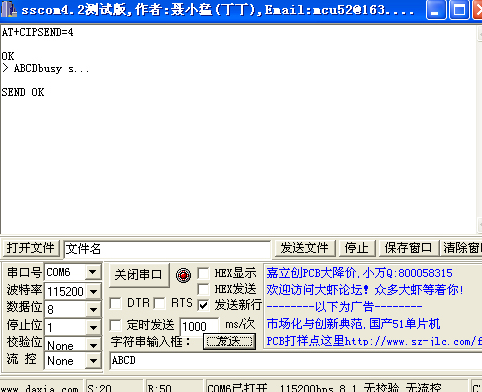
Sending message to TCP server which we have connected to.
Firstly ,set the length of the following message.
AT+CIPSEND=4
and we will receive:
AT+CIPSEND=4 OK > When we see the mark ">",it means we can send the message body .
Then I send "ABCD" four letters
Receive:
What we send will be seen in the monitor of "Netassist.com"
【Receive from 192.168.1.107 :20618】:03 08 41 42 41 42 43 44 41 42 43 44


4.Summary
Generally ,we use ESP8266 and Arduino for network communications with server or client.Just taking advantages of the AT commands I list above can easily meet the normal requirements.
But this is only the basics of network communications .More funny functions are waiting to be achieved.
**Next time I will share some of complex projects about the ESP8266 and Arduino **.
Please look forward to it
Thanks for reading patiently.
Posted on Utopian.io - Rewarding Open Source Contributors
Thank you for the contribution. It has been approved.
You can contact us on Discord.
[utopian-moderator]
thanks so much
Hey @cha0s0000 I am @utopian-io. I have just upvoted you!
Achievements
Suggestions
Get Noticed!
Community-Driven Witness!
I am the first and only Steem Community-Driven Witness. Participate on Discord. Lets GROW TOGETHER!
Up-vote this comment to grow my power and help Open Source contributions like this one. Want to chat? Join me on Discord https://discord.gg/Pc8HG9x