Blender - Setting Properties and User Preferences Defaults
Learn how to setup your Blender environment so when you start a new project all your settings are exactly what you need.
What Will I Learn?
- You will learn the function of a wide variety of Blender setting
- You will learn the optimal setting for these functions to create an intuitive work environment
Requirements
To complete this tutorial learners will need to have the following:
- The software application Blender installed - https://www.blender.org
Difficulty
This tutorial is at a beginner level.
Description
Learn the function of a wide variety of Blender setting
Learn the optimal setting for these functions to create an intuitive work environment
In the video tutorial I provide a step-by-step guide on how to set your defaults in Blender. I will briefly provide the same steps here. For more detail please refer to the video tutorial.
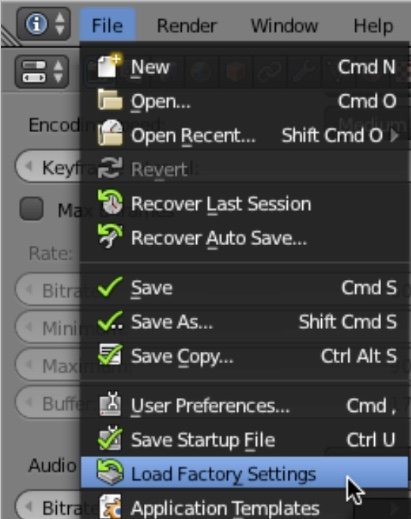
A. Reset to factory defaults - Info menu File->Load Factory Settings
B. Go to Video Editor Layout - Info window pull-down, select Video Editor
C. Make note of the layout of each window in the Video Editor layout.
D. The top left window is the Graph Editor. We will change this window to Properties. Do this by clicking the window selector on the Graph Editor window.
NOTE: You will find different layouts of menus in each window. Make note of the differences.
In the Properties window we will make several changes.
E. Display sub-window - Change Display to Keep UI

F. Dimensions sub-window - Select a preset that works for your project. I prefer HDTV 1080p for most of my projects.
You can customize your resolution by entering in X and Y values.
G. Frame Range refers to the first and last frames of your project. This is found in the Properties window as well as in the Time Line window. You do not need to change this now, but you will be working with these values quite often when editing video.

H. Frame Rate or Frames Per Second (FPS) - This number need to match the FPS of the footage you will be importing into your project. You can use applications like HandBrake and FFmpeg to reencode your footage to the proper FPS.

I. Output sub-window - Here you can choose the folder into which Blender will save all files it renders.

J. In the File Format pull-down menu you can choose the files type that best fits your project. I use FFmpeg.
K. Select either BW (Black and White) or RGB (colour) for your rendered videos.
L. Encoding sub-window - Choose a preset that best suits your needs. I normally use h.264 in Mp4.
You can manually choose the container, codec and quality with the pull-down menus.

M. Choose an audio codec and bitrate that works best for you. I usually use AAC 192.

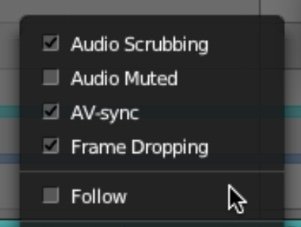
N. In the Timeline window at the bottom of your screen select the Playback menu and 'select' the following:
- Audio Scrubbing
- AV-Sync
- Frame Dropping
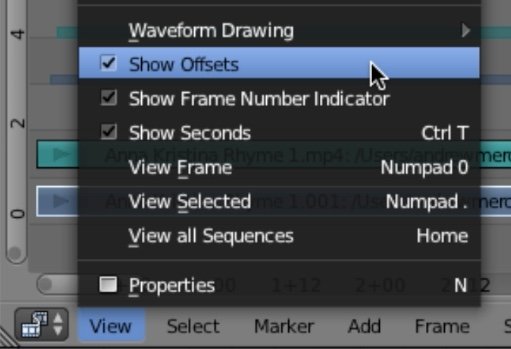
O. In the Video Sequence Editor window open the View menu and 'select' Show Offsets
P. In the Info menu at the top of your window open the file menu and choose User Preferences.
In the User Preferences window click the System tab and scroll down to "Memory Cache Limit." You can choose a number which is approximately 75% of the RAM that you have in your computer. You may need to adjust this number to get the best performance.
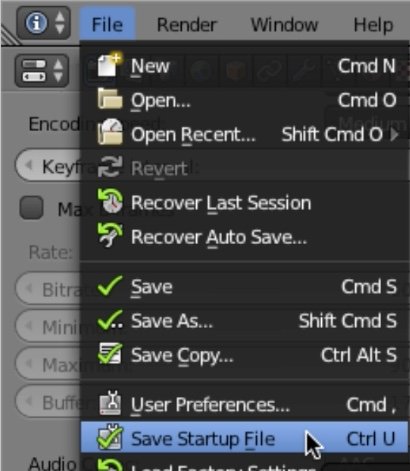
N. To save these settings so each time you start Blender will load your own personal settings you need to go to File in the Info menu and choose "Save Startup File."

Be patient :)
Blender is an open source application, which means that it is free for everyone to use. Please consider going to the developers' website and show your support for the project - https://www.blender.org
I hope you enjoy this tutorial. If you have any specific questions for me feel free to leave it in the comments of this post and I will do my best to get back to you with an answer.
Cheers,
Video Tutorial
Curriculum
Learn Blender Series
Learn MuseScore2 Series
Learn VCV Rack Modular Synthesis Series
If you would like to learn how to use the open source modular synthesis DAW VCV Rack then have a look at these tutorials:
Click here for @buckydurddle's guide to VCV Rack
Learn Hydrogen Drum Machine Series
If you would like to learn how to use the open source drum machine Hydrogen then have a look at these tutorials:
Click here for @buckydurddle's guide to Hydrogen
Learn Helm Series
If you would like to learn how to use the open source sound software synth Helm then have a look at these tutorials:
Click here for @buckydurddle's guide to Helm
Learn Audacity Series

If you would like to learn how to use the open source sound recording and editing software Audacity then have a look at these tutorials:
Click for @buckydurddle's Guide to Audacity
Logo - http://tytel.org/helm
Logo - https://www.audacityteam.org/
Logo - http://www.hydrogen-music.org/hcms/
Logo - https://www.vcvrack.com
Logo - https://www.blender.org
Posted on Utopian.io - Rewarding Open Source Contributors




This post has been resteemed from MSP3K courtesy of @buckydurddle from the Minnow Support Project ( @minnowsupport ).
Bots Information:
Join the P.A.L. Discord | Check out MSPSteem | Listen to MSP-Waves
Thank you for the contribution. It has been approved.
You can contact us on Discord.
[utopian-moderator]
Thanks @roj. I appreciate all the great work you're doing for Utopian.
Cheers,
Bucky
Finally I know a goto guy for my Blender issues. Only recently started using Blender and loving it.....but the learning curve is hectic.... yesterday I pulled open some split windows and now just cant get them closed. Lol
Please help
Hey @buckydurddle I am @utopian-io. I have just upvoted you!
Achievements
Community-Driven Witness!
I am the first and only Steem Community-Driven Witness. Participate on Discord. Lets GROW TOGETHER!
Up-vote this comment to grow my power and help Open Source contributions like this one. Want to chat? Join me on Discord https://discord.gg/Pc8HG9x