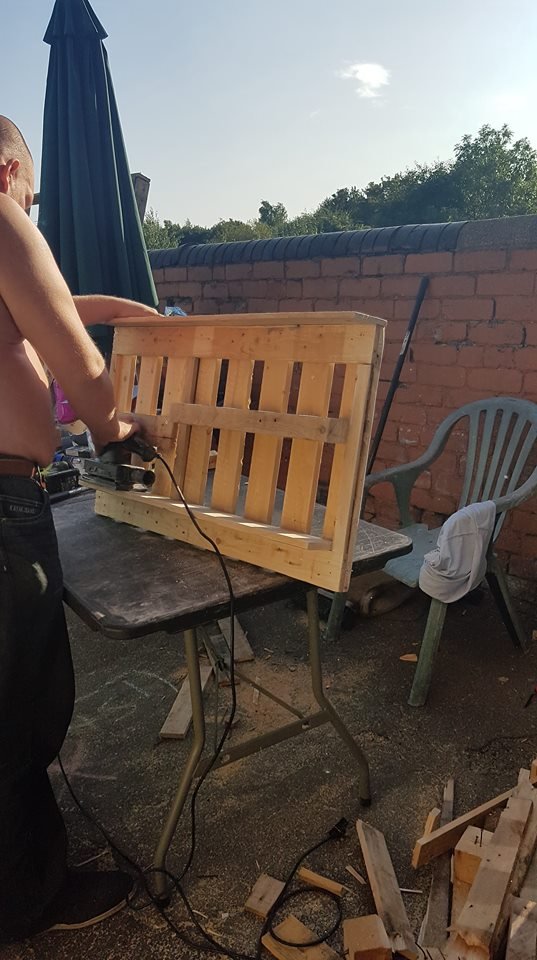
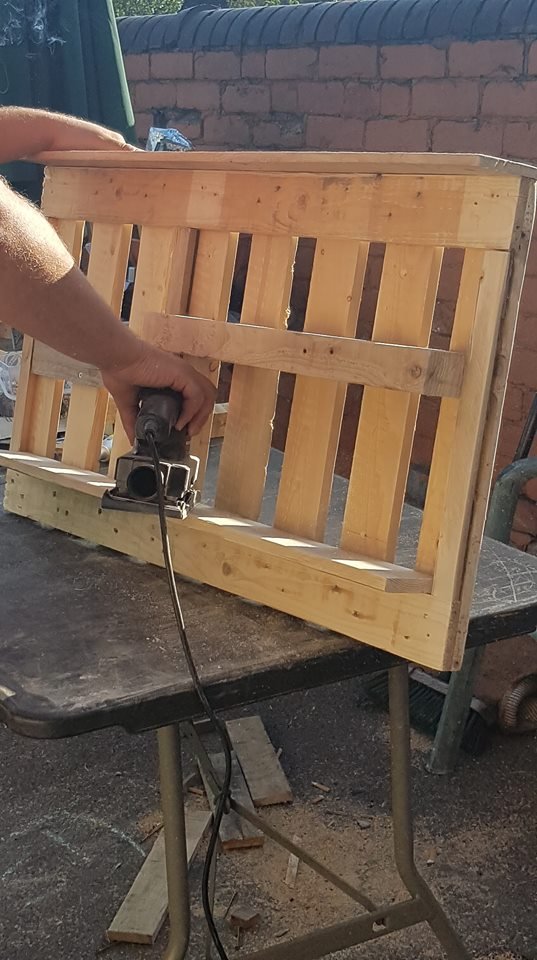
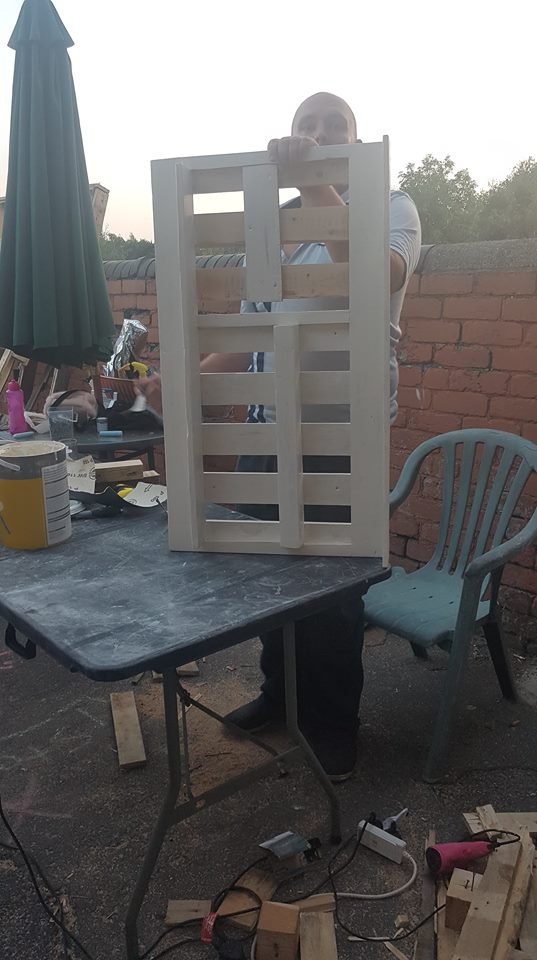
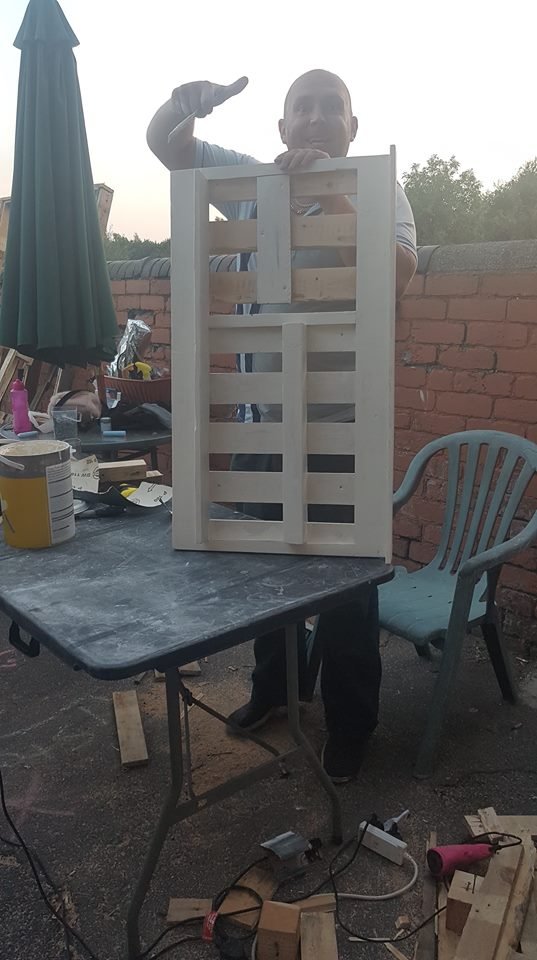
A shelf build from recycled pallets. Upcycling at its best.
Hiya friends.
The pallet upcycling is going great, I am spending hours in the sun cutting sawing and nailing to make the best of the best with what I have.
I had a projected that I wanted to get started but I came into a few hiccups when I first started and put on the back burner, well today I decided to bring it back to the work bench again and carry on with it.
It is a shelf for my daughters bedroom..
now a lot of people would say, "why would you put a pallet in your bedroom as a shelf?" well when you see the difference that a day makes you would want one of these in your house too.
In total it cost the price of some screws to make as all the wood has come from recycling pallets. there is nothing else that cost money just hard work and well.. the electricity to power some tools.
Now when I started this project I didn't really know what I was doing, I thought it would be as easy as screwing a few screws into a piece of wood but that didn't turn out to be the case.
In fact I feel sorry for joiners out there who do this everyday as I found this to be hard work.
Now to the hiccups,
Wrong size screws. yes this muppet had no idea what size screws to buy so I bought a selection, and screws are freaking expensive but even with the ones I bought I still had the wrong ones. they were either too short and the wood fell apart or too long and they stuck out of the other side.
wrong tools. I went out and bought a electric screwdriver, thinking that this would be a god send, it turned out to be a waste of money as they bits kept breaking and in the end my good old buddy next door lent me his impact driver.
so in future I will not be buying a cheap battery powered screw drive I will be going for something that will do the job.bent wood. now if you have never taken a pallet apart you won't know that pallet wood is the worst wood in the world, and that is why they use if for building pallets with, it is cut by Mr Stevie wonder himself, it has no straights to it and because at some point in its life it has carried weight it bends too, you have to remember these things sit on shelf in factories for years so they whorp like crazy.
So when it come to putting the shelf together it was more work than if I had gone to the local DIY shop and bought straight wood.
The pictures my wife took and they are not the best as it is missing a few stages of me making the shelf, but I had to brake down two pallets to make this shelf.
after putting all the pieces together I had to make sure everything was square as I don't want a dodgy looking shelf, I had to add extra screws into the shelf as well to pull it in the right places, once it was together I had to sand down all the pieces as they are prone to splinters and the last thing I want is any kid getting hurt on something that I have built.
I hit it hard with the electric sander making sure that it was smooth everywhere.
Now the brilliant thing is my kid wants it white so it goes in her room nicely so I could fill the gaps with wall filler, I used a hair dryer to dry it in record time.
Once it had dried I then hit it again with the sander to make sure that it was smooth, once I had done that I used emulsion as a base coat.
The basecoat is something that I have had to put on for my gloss to stick to other wise it runs looks bumpy and gives a shit look too.
I had to stop here for the night to let the paint dry, but again in the morning I will be giving it another rub down before glossing and making sure it looks the bomb.
I am looking forward to the finished look, I have also bought a mirror for this project as it is for my daughter which will fit perfect in the shelf, that means she can put make-up on and keep it out of the reach from her younger sister as they are always fighting.


This is a very nice upcycling project @artonmysleeve! Can't wait to see the shelf :) It is really cool that you share your carpentry works which to me, is quite a major undertaking with the full carpenter tools and stuffs that you have there. @phoenixwren is hosting an upcycling contest that you might want to check out and participate in (which you should since you have already wrote a post about your project :)
Oh totally, do enter! :)
thanks for the opportunity to enter into your contest :D
entered thank you for pointing this out to me :D
👍Yay!
whoop :D
Looking good!
Cheers buddy.
Are you well?
Trying my best =)
:D glad to hear that mate :D
Hi @artonmysleeve!
Your post was upvoted by @steem-ua, new Steem dApp, using UserAuthority for algorithmic post curation! Your UA account score is currently 3.206 which ranks you at #8231 across all Steem accounts.
Your rank has risen 110 places in the last three days (Your UA has improved by 0.000).
In our last Algorithmic Curation Round, consisting of 204 contributions, your post is ranked at #157.
Evaluation of your UA score:
Feel free to join our @steem-ua Discord server